 11-21-2012, 09:49 AM
|
#21
|
|
1999 base
Join Date: Dec 2011
Location: Coral Springs FL
Posts: 1,617
|
Quote:
Originally Posted by Ghostrider 310

The Aluminum scissor jack the car came with is free and should make an excellent support as long as the car isn't too high off the ground to use it.
|
yes.
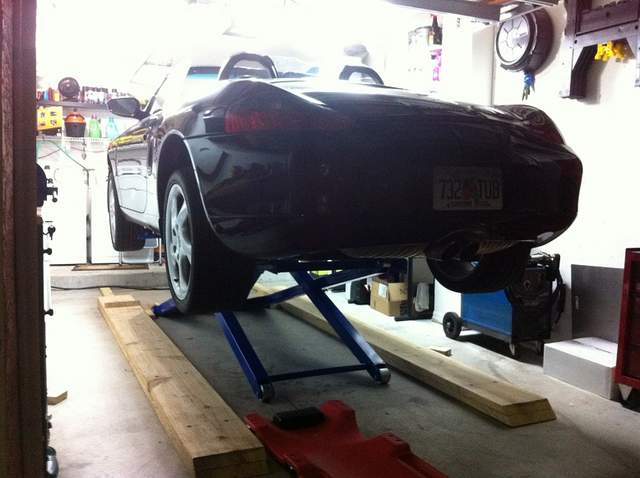
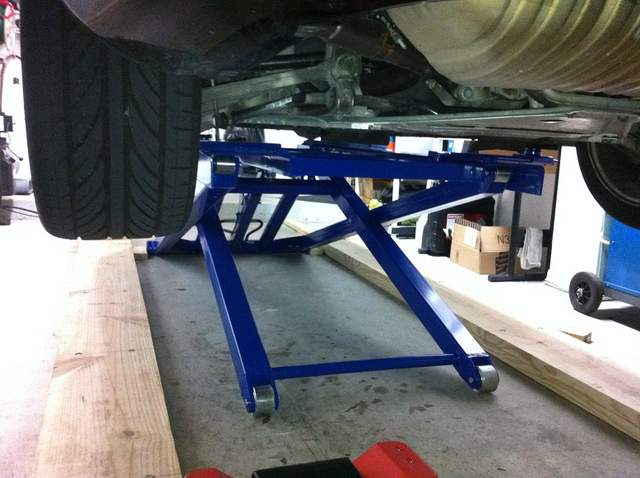
but this is what my wife bought me as Christmas gift (well, Hanuka in my case  ):

Last edited by Meir; 11-21-2012 at 09:56 AM.
|

|

|
|
11-21-2012, 11:37 AM
|
#22
|
|
Ex Esso kid
Join Date: Dec 2005
Location: NY
Posts: 1,605
|
Wow that's pretty sick, you might as well spring for the inside the engine bay support then.
|
|
|
|
|
11-21-2012, 11:54 AM
|
#23
|
|
1999 base
Join Date: Dec 2011
Location: Coral Springs FL
Posts: 1,617
|
Quote:
Originally Posted by Ghostrider 310
Wow that's pretty sick, you might as well spring for the inside the engine bay support then.
|
ya. got a 15% coupon from Harbor fright. gonna drive there now.
should be less then 50$ with the coupon.
|
|
|
|
|
11-21-2012, 09:20 PM
|
#24
|
|
Moderator
Join Date: Feb 2012
Location: DFW
Posts: 782
|
Not bad! Wish I had a scissor jack like you, Meir.
|
|
|
|
|
11-22-2012, 07:53 AM
|
#25
|
|
Registered User
Join Date: Jun 2012
Location: Bedford, TX
Posts: 2,757
|
Quote:
Originally Posted by Meir
yes.
but this is what my wife bought me as Christmas gift (well, Hanuka in my case ):
|
Must be nice! That's pretty sweet!
__________________
______________________________________________
2001 Boxster S Lapis Blue
TS Cat Bypass Pipes and exhaust
iPad Mini Dash Install
DEPO Tail Lights
|
|
|
|
|
11-22-2012, 04:10 PM
|
#26
|
|
1999 base
Join Date: Dec 2011
Location: Coral Springs FL
Posts: 1,617
|
There are two things I truly hate doing on my car.
Jacking it up, and washing it.
One problem is solved. Now need to think of a solution for the other one.
@ Kenny. I was dreaming of buying this thing for over a year now.
Did a very thorough research. Found the HF one to be most bang or the money.
They usually sale them for 1400$ + 90$ shipping. They drop the price at labor day by 200$. I found a 20% coupon online, and got it for 1100$ shipped.
It's not perfect, but with some medications it will be ( the story of my life )
|
|
|
|
|
11-23-2012, 01:55 PM
|
#27
|
|
Registered User
Join Date: Nov 2012
Location: Philadelphia
Posts: 45
|
Be careful with the Loctite on the oil pan. If you put too much on it and it squeezes off inside the sump it can get sucked up into the engine, you will blow the motor. Also, make sure you torque the nuts down according to specs.
|
|
|
|
|
11-24-2012, 04:51 AM
|
#28
|
|
1999 base
Join Date: Dec 2011
Location: Coral Springs FL
Posts: 1,617
|
Quote:
Originally Posted by navyc130fe
Be careful with the Loctite on the oil pan. If you put too much on it and it squeezes off inside the sump it can get sucked up into the engine, you will blow the motor. Also, make sure you torque the nuts down according to specs.
|
Advise taken.
Thanks.
|
|
|
|
|
12-03-2012, 10:08 AM
|
#29
|
|
1999 base
Join Date: Dec 2011
Location: Coral Springs FL
Posts: 1,617
|
so as the temperatures drooped and i can stay in my garage over an hour without the fear of dehydration, i decided to start my winter project this Sunday.
started by removing rear wheels, under body plastic covers,and the top clam shell (or whatever its called) also removed all trunk trim, and toke the opportunity to channel some wires from the driver compartment to the trunk (for a different project).
some pics:
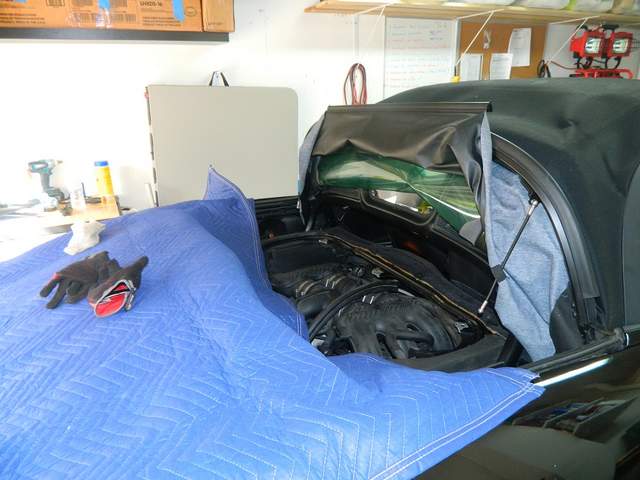

the reason from removing the clam shell, is to provide me with enough space to mount the engine support bar.
i started buy putting the clam shell in the full service mode, but then found out it might hit the garage door opener mechanistic when i lift the car up 
|
|
|
|
|
12-03-2012, 10:31 AM
|
#30
|
|
1999 base
Join Date: Dec 2011
Location: Coral Springs FL
Posts: 1,617
|
just for future reference, if someone need to channel wires from the driver compartment to the trunk, here is the process.
1. remove side cover behind driver seat (next to seat belt) by removing one Phillips screw, and pulling up.
2. disconnect defroster wires, and set aside the panel.
3. use a flexible plastic rod and channel it from the top of the main wire harness.
you will have to move the isolation foam aside to get to the passage.

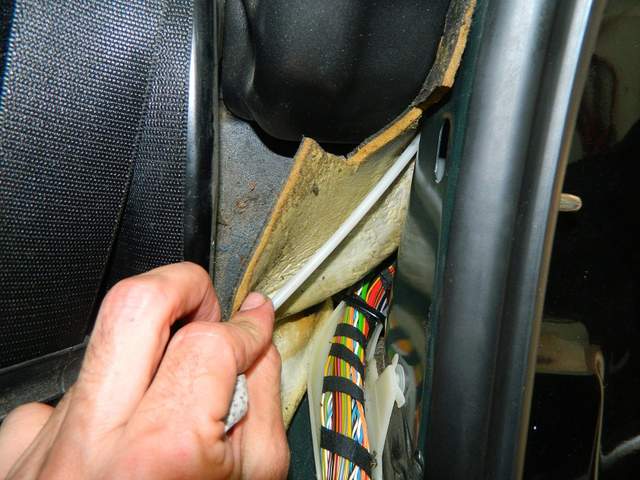
4. to "fish" the plastic rod on the other side, you will have to put the top in service mode, carefully remove the foam on the driver side rear corner.

as you can see from the pic, there are two layers of foam needed to be moved.
5. place the wires under the foam, and put it back in place.
6. channel the wires to the trunk.
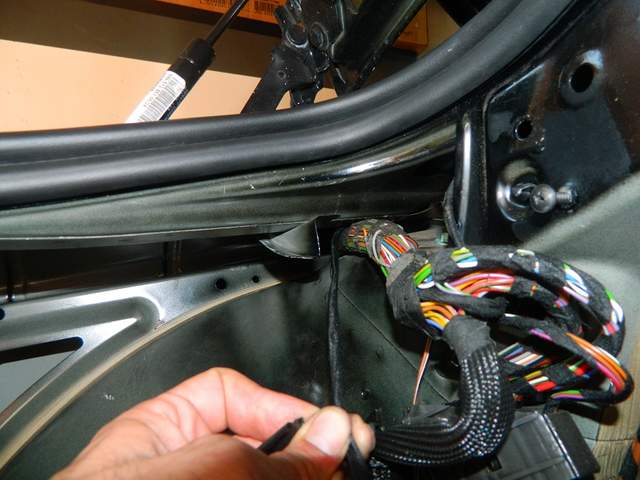

i think this procedure can also be very helpful for someone who wants to install the IMS guardian.
once you are in the trunk, there are several OEM rubber grommet , that can help to channel the wires to the oil drain plug.
|
|
|
|
|
12-03-2012, 10:53 AM
|
#31
|
|
1999 base
Join Date: Dec 2011
Location: Coral Springs FL
Posts: 1,617
|
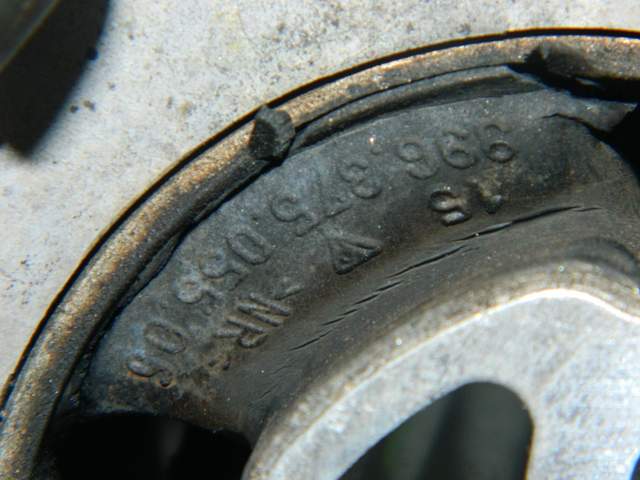
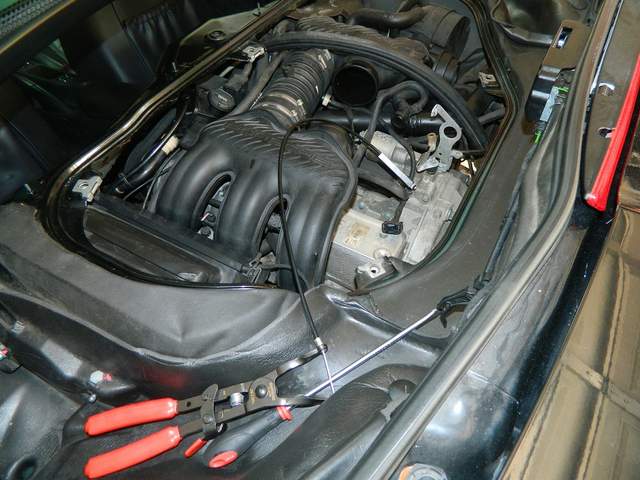
after spending more then 2 hours just to figure out how to channel the wires (should take 10 minutes if you know what you are doing) i moved to the front engine mount.
trying to make my life easy, i removed the two main water hoses that go from the engine block to the front of the car. drained the coolant first (needed to do that anyway for coolant tank replacement). didn't do an engine mount before, but with the hoses removed, it was a piece of cake. also helped me a lot with replacing the fuel filter.
as you can see, the engine mount wasn't totally toasted, but it was starting to fail.


|
|
|
|
|
12-03-2012, 11:06 AM
|
#32
|
|
1999 base
Join Date: Dec 2011
Location: Coral Springs FL
Posts: 1,617
|
also needed to modify the rubber discs the seat on both sides of the mount.
the new mount (on the right) is different from the old one.

had to cut the bottom of the disc.
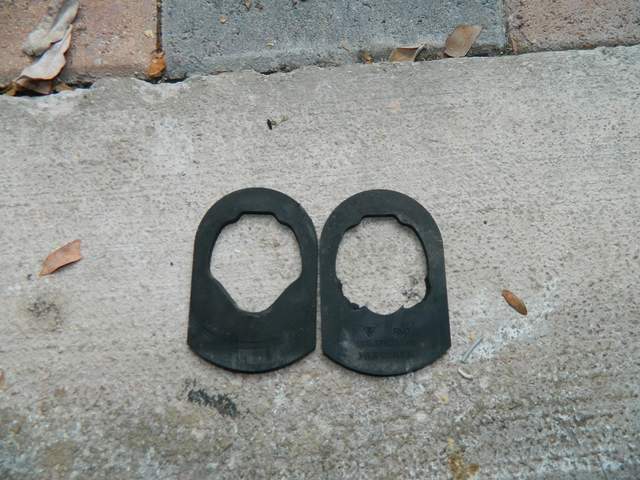
everything went back in place. installed the water hoses and new crash ring on the coolant plug.
the only hard thing in this job, was to torque the top left bolts that connect the mount to the engine. i used a crowfoot wrench attached to the torque wrench.
|
|
|
|
|
12-03-2012, 12:03 PM
|
#33
|
|
1999 base
Join Date: Dec 2011
Location: Coral Springs FL
Posts: 1,617
|
now for the last job of the day.
thought this one will be simple, so i saved it for last.
ho boy. how wrong was i.
it all started last year when i did my first oil change. i noticed a very small oil leak from one of the bolts that holds the oil sump.
the leak is very minor. literally a drop at a time. didn't even required me adding oil during the past year (obviously was monitoring it the whole time, making sure it is not getting worst).
this is how it looks:

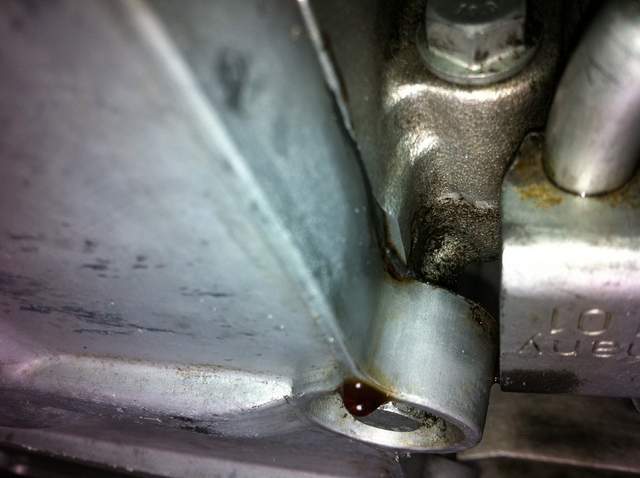
by the look of it, the sump was removed in the past. i can tell that by seeing residue of both the red OEM sealant, and the new black locktite.
so i assumed ill just remove the sump cover, clean it and reseal.
drained the oil and replaced oil filter.
magnetic plug cam out clean, except some grayish paste, which i believe to be normal.
didn't cut the oil filter, since i have the regular spin on type with the LN adapter.
didn't want to spend time on that, and the IMSB retrofit is going on anyway, in a week or two.
started removing the bolts,and found out that one of them is very short.
yep, that's the one that was located where the oil was dripping.
closer look and i could see that half of the bolt is still in the block, so i'm not sure if i broke it when i removed it, or the mechanic that worked on the car before, broke it and left it there held by 3 threads and loctite.
well, i never dealt with a broken bolt before, so i hope its not going to be complicated to remove.
i read a lot of threads on the subject, and i hope i will be able to extract it with no issue. it is in relevantly easy place to work on, and the initial torque is not that high so cross your fingers for me.
ordered some extractions tools, and got back to work.
shaving the old loctite with a blade wasn't that easy.
after spending an hour on it, it still looked dirty.
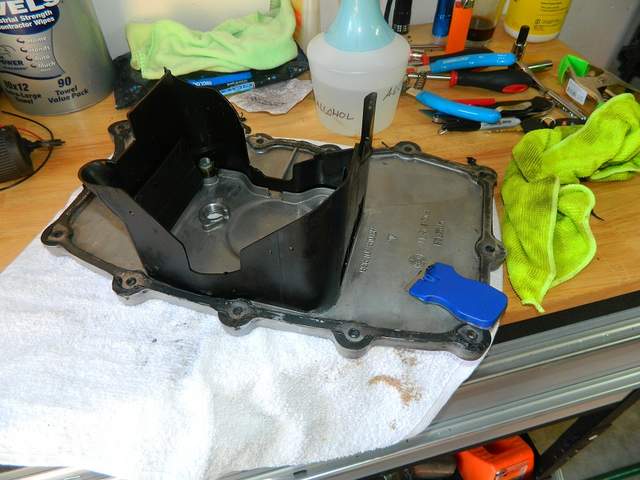
sprayed it with alcohol with not much difference.
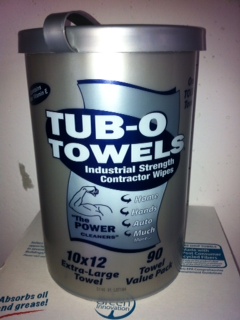
almost out of despair, i tried my beloved hand towels.
now this is not a joke, the only place i could find this product is lowe's.
on line, it cost double. i usually use it to clean my hands and tools when i work.
i gave it a try and this is the result.
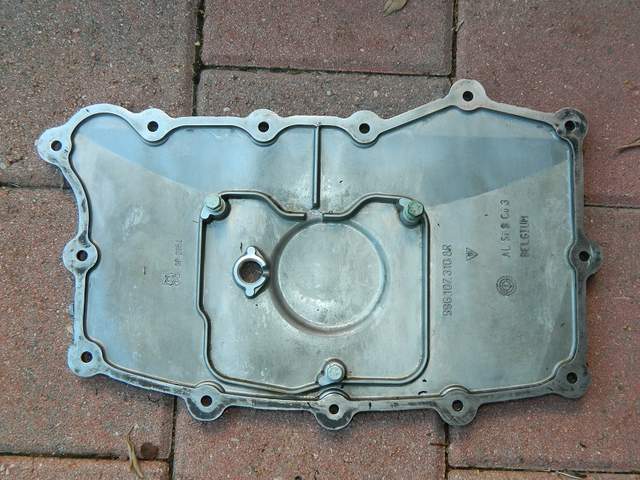
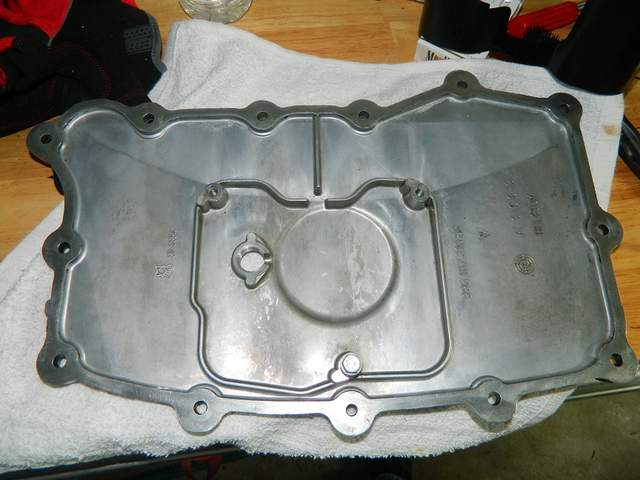
low part of the cover - blade after an hour work.
center top part of the cover -towel after 5 minutes.
final results after 20 minutes of rubbing with the towel:
this is the product:
|
|
|
|
|
12-03-2012, 05:25 PM
|
#34
|
|
Registered User
Join Date: Oct 2009
Location: Pittsburgh, PA
Posts: 153
|
Good tip on the towels -- those look very handy!
__________________
Barkinfool
'02 Boxster S
|
|
|
|
|
12-10-2012, 11:36 AM
|
#35
|
|
1999 base
Join Date: Dec 2011
Location: Coral Springs FL
Posts: 1,617
|
update
hello guys.
continued with my project this weekend.
unlike last week, i woke up to an 80 degrees morning, with 90% humidity 
not the perfect conditions to work in the garage, but definitely beats 30
started the day trading my neighbor storage room, for a break job on his 50 cc Yamaha scooter. toke me 10 minutes (let me know if someone needs the DIY ).
stored all the parts i previously removed from the car, and got back to the real deal.
started with removing the throttle body and plenum in order to gain access to the oil cooler.
the oil cooler is pretty easy to remove. just needed to disconnect the thin coolant hose on the top, and remove the 4 Allen screws that holds it in place.
once the bolts were out, i lifted it quick and removed it from the car. tried to do my best not to mix oil with coolant.
decided to leave the TB and plenum out of the car.
by the look of it, it will make my life easier when working on the AOS.
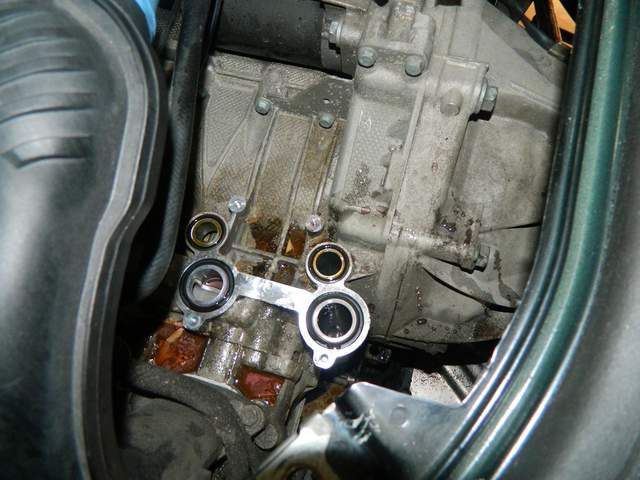
cleaned the surface carefully, and removed the old O-rings using this tool.
here in the picture you can see the tool with the old O-rings removed.

and here the old next to the new. the small ones are for the oil passages, and the large one for the coolant.

the new oil O-rings are green in color, so i guess they ware upgraded in some point (?).
put the new O-rings on (coated with a bit of oil) cleaned the cooler, and put it back on the engine.
Last edited by Meir; 12-10-2012 at 11:41 AM.
|
|
|
|
|
12-10-2012, 01:12 PM
|
#36
|
|
1999 base
Join Date: Dec 2011
Location: Coral Springs FL
Posts: 1,617
|
saturday
after installing the oil cooler, it was time to start working on the transmission.
removed the rear bumper and exhaust.
removed the diagonal plate and support bars.
disconnected sway bar and axles and set aside.
disconnected the clutch slave cylinder and electric plug for reverse switch
lowered the car, and removed top bolt of transmission.

i had some problem to fit a large brake bar to release this bolt.
i manage to take it out, but i'm sure i'm going to have an issue to fit my torque wrench, when time comes to assemble the transmission.
will appreciate any suggestion of how to do it.
when the bolt was out, i noticed someone marked it with the number 4.

so the transmission was removed in the past, but i'm not sure for what purpose.
the previous owner (that is also my boss now) told me that the transmission was never removed while he owned the car. he bought the car with 55K miles and sold it to me 5 years later with 74K. he never did anything to the car except oil change every 5k, and one set of tires.
i guess the transmission was removed during the first ownership (i'm the third owner) but since i don't have any records, i cannot tell what was done.
when the top bolt is out, i mounted the engine bar.
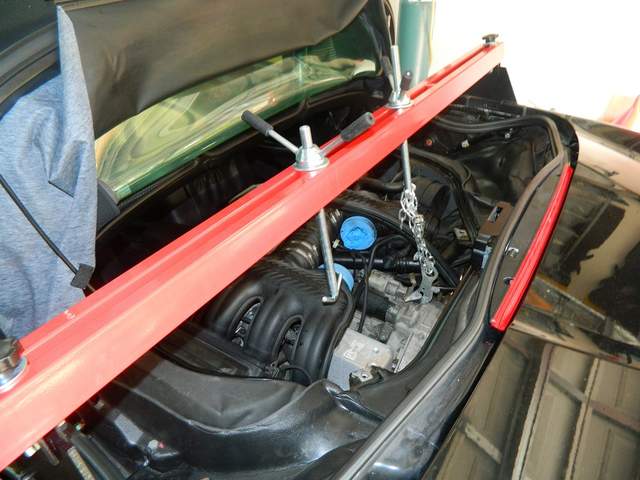
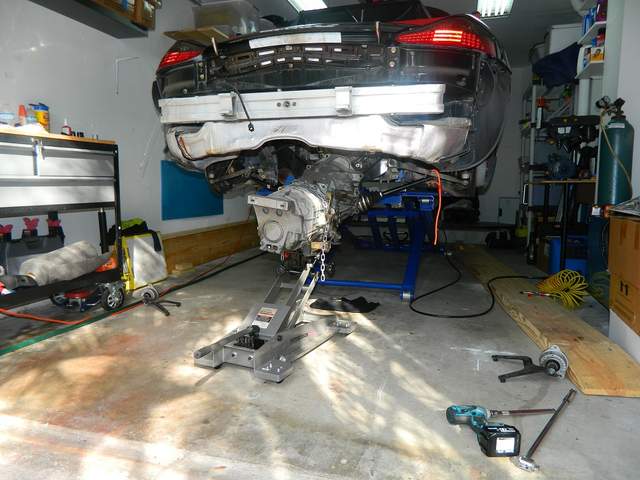
i also covered the intake inlets with Nitrile Gloves to prevent little frogs from jumping in (from some reason they like to hang out in my garage).
raised the car back, and removed the rest of the transmission bolts.
mounted the bolts on a cardboard (courtesy of Wayne ) made by my wife.

at this point i was ready to call it a day.
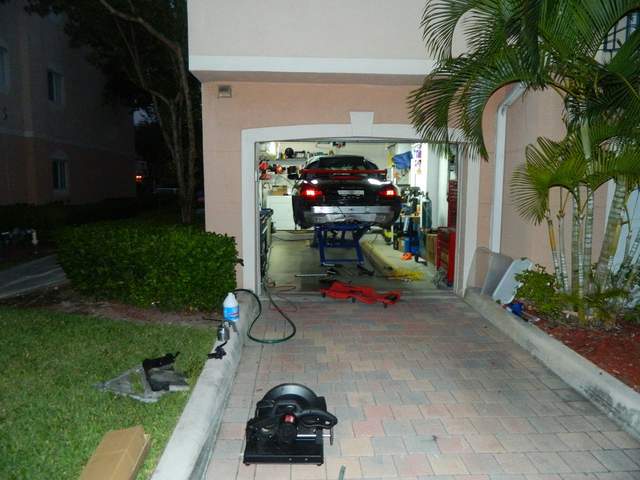
this is a picture of my "shop" before closing
Last edited by Meir; 12-10-2012 at 01:20 PM.
|
|
|
|
|
12-10-2012, 02:16 PM
|
#37
|
|
Homeboy981
Join Date: Jan 2012
Location: Sherman, TX
Posts: 663
|
[QUOTE=Meir;319339]
raised the car back, and removed the rest of the transmission bolts.
mounted the bolts on a cardboard (courtesy of Wayne ) made by my wife.
Gotta love a wife that DOES that! It is a REALLY GOOD idea
thank your wife for me! Now my wife can have some involvement too!
__________________
2002 Porsche Boxtser S - Silver & Chrome - Died from IMS failure AFTER IMS was replaced!
|
|
|
|
|
12-10-2012, 02:22 PM
|
#38
|
|
1999 base
Join Date: Dec 2011
Location: Coral Springs FL
Posts: 1,617
|
sunday
as i have only the transmission mounts holding the trans in place, i started the day early. started cleaning the garage and tools, putting everything in place so i can start fresh.
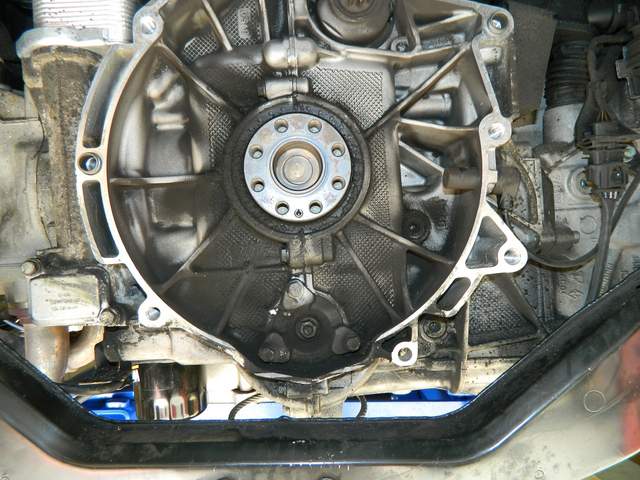
10 minutes after getting under the car, it was out.
first look at the clutch:

transmission:
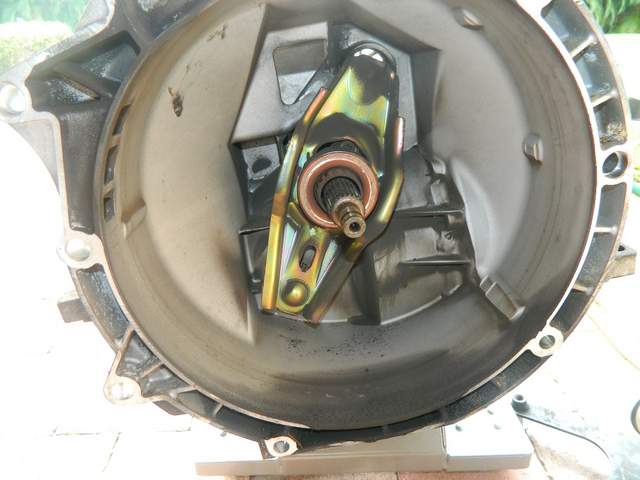
no oil leaks, but a lot of dust, and every thing is very dry, so no grease ether.
especially on the transmission side. the throw out bearing slides hard and make funny noises. no wonder my clutch was so hard to press.
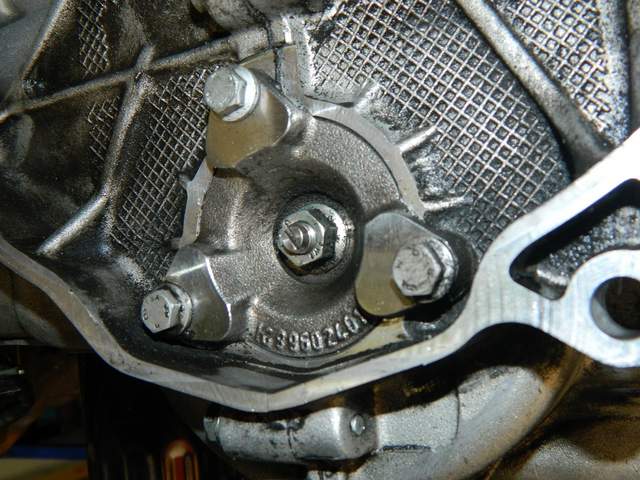
starting to remove the pressure plate bolts, i got to the last bolt, and guess what?
the bolt is rounded. at the beginning i thought to cut its head of with a Dremel, but the surface is not clear at that area.
then i remembered that i received the the "Quik Center" tool i ordered to remove the broken bolt from the oil pan. since i never removed a broken bolt in my life, i thought it would be a good opportunity to experiment on the clutch.
i'm going to replace all components including flywheel, so any damage that might occur, is not relevant.
so i started with fitting the correct "Quik Center" tool (6mm) and start drilling it with my battery power hand drill. at first i thought someting is wrong, the drill bit was going in as if i was drilling wood or plastic. i toke it out, and all is fine. metal shaving came out. kept on drilling a bit more, removed the tool, and this is what i got:

perfectly centered hole.
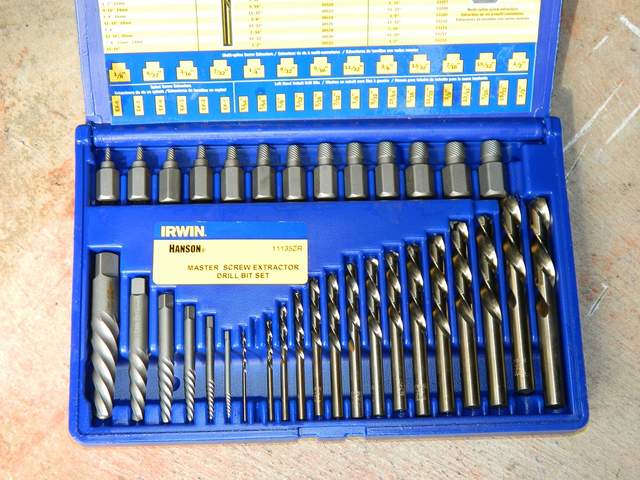
i found about this tool, from another post on this forum, that also recommended the use of irwin cobalt drill bits. thank you insite.
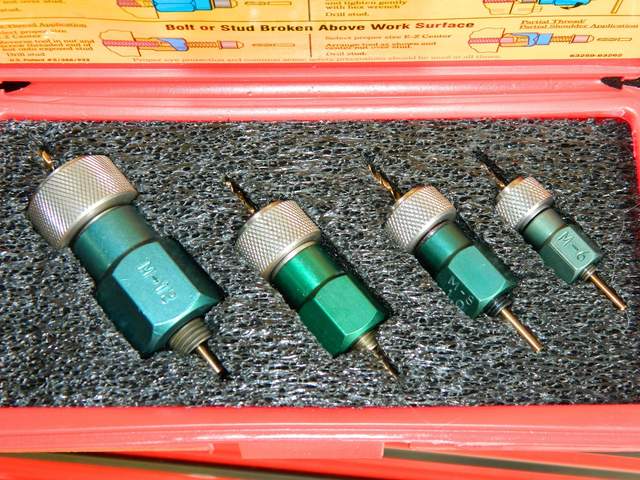
this tool is amazing, made in the USA, very high quality, and dose exactly what it supposed to.
this is how it looks like:
used the irwin left drill bit to enlarge the hole (same here, drilled it like butter).
topped the little thingy (that i don't know how its called, but it shows in the top raw in this picture), turned it counter clockwise, and the screw came out like a champ.
this is how it looks when the tool is still attached to the screw.
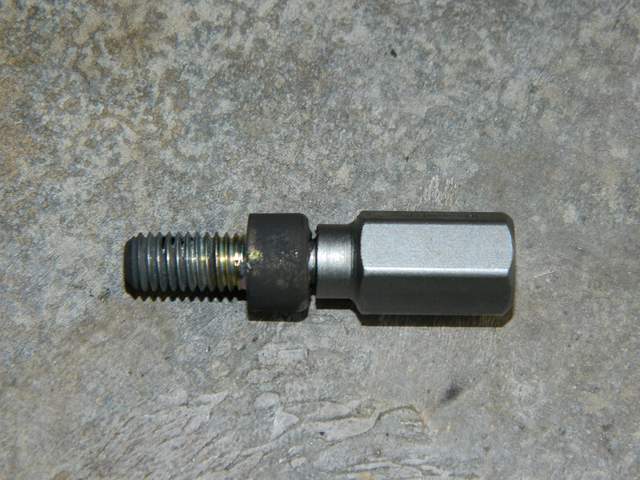
just needed to put the bolt in the vise, and twist the tool clock wise to extract it.
i know some of you are laughing right now (or smiling at the least). but for me it was a successful firs experience, and it build my confidence to tackle the broken bolt in the oil sump. no room for mistakes there.
|
|
|
|
|
12-10-2012, 03:07 PM
|
#39
|
|
1999 base
Join Date: Dec 2011
Location: Coral Springs FL
Posts: 1,617
|
[QUOTE=Homeboy981;319349]
Quote:
Originally Posted by Meir
raised the car back, and removed the rest of the transmission bolts.
mounted the bolts on a cardboard (courtesy of Wayne ) made by my wife.
Gotta love a wife that DOES that! It is a REALLY GOOD idea
thank your wife for me! Now my wife can have some involvement too! |
ya. now i need to train the dog to do some wrenching, and my life will be perfect
|
|
|
|
|
12-10-2012, 05:26 PM
|
#40
|
|
1999 base
Join Date: Dec 2011
Location: Coral Springs FL
Posts: 1,617
|
with the clutch removed, i could see the RMS and IMS.
measured the distance between the RMS and crankshaft, ant it seats on 14 mm.
so i guess it was replaced before, and that is the reason for the previous transmission removal.
a little bit of clean up, and a closer look, and i can tell i need to get the single row bearing (deep dish)
some pics of the clutch disc and pressure plate:


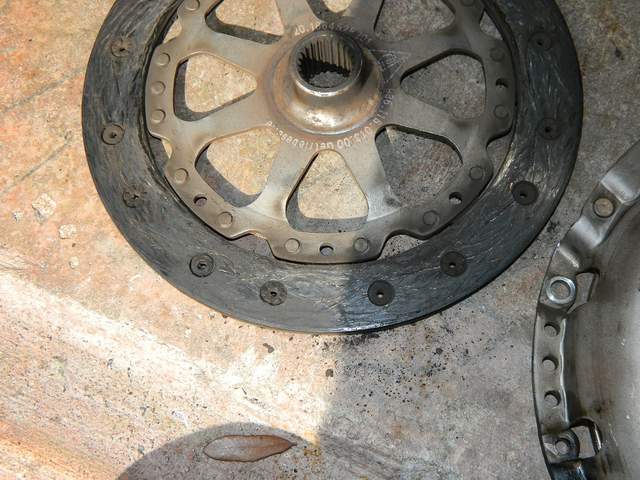
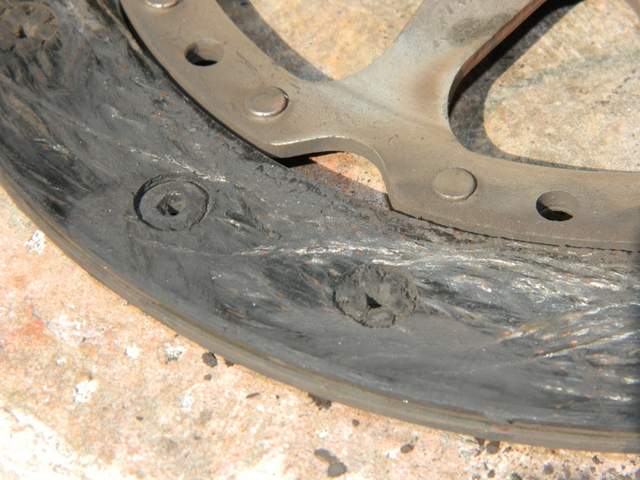
will take some pics of the flywheel and will post it later.
the clutch disc looks like it still got some "meat" on it, but not too much.
never had slipping issue, but i hope once the new clutch is in, it will be much more soft.
wonder if someone can tell if its the original clutch or not.
the kit i got from eBay, looks exactly the same.
Last edited by Meir; 12-10-2012 at 05:29 PM.
|
|
|
|
 Posting Rules
|
You may not post new threads
You may not post replies
You may not post attachments
You may not edit your posts
HTML code is On
|
|
|
All times are GMT -8. The time now is 07:30 PM.
| |


 boxster S
 2000 Porsche Boxster
 2001 Boxster S
 '02 Boxster S
 "Bernie" - PONZI that 'made off' with my money!
 Linear Mode


