 07-11-2015, 05:21 PM
|
#1
|
|
Registered User
Join Date: Nov 2014
Location: Long Island, NY
Posts: 160
|
Vertex strut inserts...
I ordered a set for the front. 2002 base, 140,000 miles. I haven't seen much on here about them so I figured I would give it a shot. I should be doing the work around next weekend so I will be sure to post the results and pictures if I can remember to take some during the project.
|

|

|
|
07-11-2015, 05:23 PM
|
#2
|
|
Registered User
Join Date: Apr 2014
Location: DFW
Posts: 253
|
Sweet!
(ten)
|
|
|
|
|
07-16-2015, 03:38 AM
|
#3
|
|
Registered User
Join Date: May 2015
Location: Orlando, FL
Posts: 69
|
Interested in this also. Didn't even realize insert replacements were an option.
|
|
|
|
|
07-16-2015, 08:56 PM
|
#4
|
|
Registered User
Join Date: Nov 2014
Location: Long Island, NY
Posts: 160
|
Something happened and my order never shipped so I called Vertex and within a few hours I had a shipping notification and tracking number. I should be getting them on Tuesday so depending on what time they come I will try to do this same day or Thursday. I'll keep this updated next week.
|
|
|
|
|
07-17-2015, 11:19 AM
|
#5
|
|
Registered User
Join Date: May 2013
Location: Orange County, California
Posts: 266
|
Interested in this as well. Please update! I wonder what the construction of the inside of these inserts are? Monotube or twin tube?
|
|
|
|
|
07-17-2015, 07:26 PM
|
#6
|
|
Registered User
Join Date: Nov 2014
Location: Long Island, NY
Posts: 160
|
I'm not sure how they are constructed, but, I'm sure it will be better than my 140,000 miles shocks.
|
|
|
|
|
07-19-2015, 03:50 PM
|
#7
|
|
Registered User
Join Date: Jan 2014
Location: Albuquerque, NM, USA
Posts: 747
|
I'd think inserts from Bilstein or Koni might be superior.
__________________
Kent Christensen
Albuquerque
2001 Boxster
2007 GL320 CDI, 2010 CL550
2 BMW motorcycles
|
|
|
|
|
07-22-2015, 05:05 AM
|
#8
|
|
Registered User
Join Date: Nov 2014
Location: Long Island, NY
Posts: 160
|
I received the struts yesterday. Hopefully I can install them today. I have the old strut tower out of the car and on my work bench. I just need to get the old strut apart. I am at the point now where I need to bend the metal to remove the old "insert". I have not yet tried to do it so we will see how it goes later. 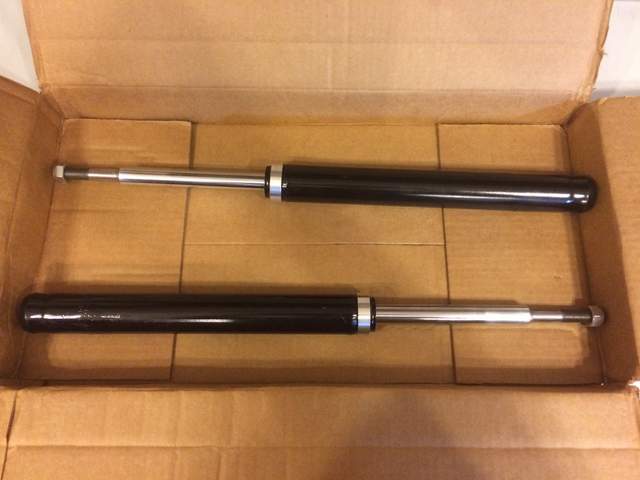
|
|
|
|
|
07-22-2015, 05:22 AM
|
#9
|
|
Registered User
Join Date: Jun 2014
Location: LB, Germany
Posts: 1,526
|
Hi,
please provide us with part numbers and further pictures. I'm really curious how this can be replaced.
Thanks & regards from Germany
Markus
|
|
|
|
|
07-22-2015, 08:18 PM
|
#10
|
|
Registered User
Join Date: Nov 2014
Location: Long Island, NY
Posts: 160
|
So, to get the old "insert" out, the best way I found for me was using a punch and a hammer. I started with a small punch to get it going and then busted out the bigger punch.
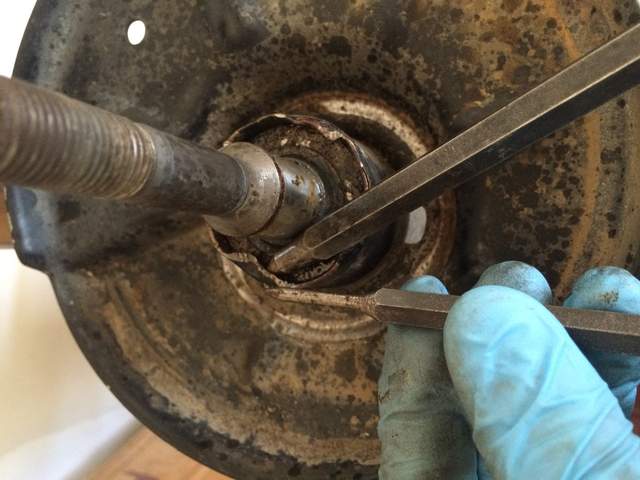
I actually could not pry the metal open with a 24 inch pry bar.
To finish removing the old insert, I cut off about 1/8 inch of metal with a dremel around where I had bent the crap out of the strut casing. I'm thinking now that this was a mistake but I had no other way of removing the old insert. The new insert is in but the collar does not grab as much as it probably should.
I am going to reassemble the strut with spring and all tomorrow and go from there. If it looks/feels good, I'll put it back on the car.
|
|
|
|
|
07-22-2015, 08:28 PM
|
#11
|
|
Registered User
Join Date: Nov 2014
Location: Long Island, NY
Posts: 160
|
My car is a 2002 base 986. Stock suspension. The part number from vertex auto is 996343041EPS.
I'll post more photos and info tomorrow as I go through this project. So far I can say that it would have been MUCH easier to buy the bilstein shocks ready to go. I would have had the front done and back together by now. Instead I am still putting the driver side back together. I didn't even start the passenger side. If this does work, I will have saved $240. I am not sure if it's worth the savings, however, given my current budget with having a 5 month old, this was definitely worth a shot! More to post soon....
|
|
|
|
|
07-25-2015, 04:58 PM
|
#12
|
|
Registered User
Join Date: Nov 2014
Location: Long Island, NY
Posts: 160
|
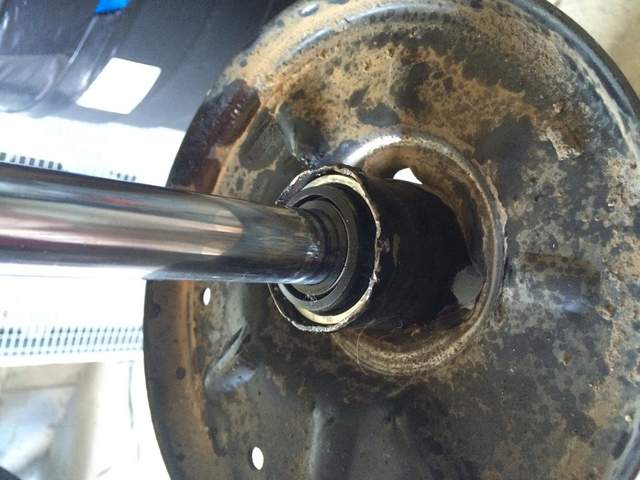
So, I got the car back together today and took it for a test drive. Now I have a much louder rattle noise in the front end. I think it's from the one strut casing that I ended up cutting to remove the old insert. I believe the insert is loose inside the old casing. So needless to say, I will be purchasing bilsteins in another day or so. I want to see if I can return these inserts to vertex but judging by the return policy they have, I think I'm SOL. This was educating to me so I am not too upset that I am spending more money than I would have if I had just done it the right way from the start. Now that I have done this project, taking everything apart again will go very quickly. Once I have the new shocks, it should be a very quick swap.
I do believe that if I did not have to cut the casing, this probably would have worked. I was tempted to buy a used strut so that I can just use the casing, but I have already spent so much time at this that its time to spend the extra money and have the peace of mind!
If anyone else wants to try this, I would be happy to let these inserts go for half of what I paid. I'll even include the two old strut cases so you can see where I went wrong. Basically, if you can successfully remove the old inserts, this should work.
These pictures are of the successful strut:
|
|
|
|
|
07-25-2015, 06:06 PM
|
#13
|
|
Registered User
Join Date: Apr 2014
Location: DFW
Posts: 253
|
Think I'll keep saving...thanks for letting us know!
|
|
|
|
|
07-26-2015, 02:06 PM
|
#14
|
|
Registered User
Join Date: Nov 2014
Location: Long Island, NY
Posts: 160
|
I have been thinking more about it and I bought a used strut off eBay to try this again. I am good at following directions as long as there are good directions to follow. Since the only source I have available to me is the video on vertex's website, I was only able to figure out what to do by watching that video. It had occurred to me that I should have probably bent the metal back down on the top of the insert instead of relying on the metal collar to hold everything together. After all, the metal bent down around the insert is how the originals were, right? (Yes, duh...) So, I am going to give this one last shot and see if I can make this work. I picked up a used shock with spring and all for $40 off eBay. All I need is the casing so now I'll have extra parts if needed. (If anyone is in need of a stock spring or other associated parts, let me know as I probably won't need them.). I'll post my results again when I am finished. If all goes well, I'll try to write up a step by step of what I did to make this work, along with a list of tools used. If this doesn't work, then at least we got a learning experience out of it. More to follow in the coming days/weeks.
|
|
|
|
|
07-27-2015, 12:36 PM
|
#15
|
|
Registered User
Join Date: May 2014
Location: Atlanta, GA
Posts: 101
|
Very nice job. I went through this crap with an Infinity Q45 before (some years had removable cartridges, and others were insane expensive - electric suspension)
|
|
|
|
|
07-27-2015, 07:09 PM
|
#16
|
|
Registered User
Join Date: Nov 2014
Location: Long Island, NY
Posts: 160
|
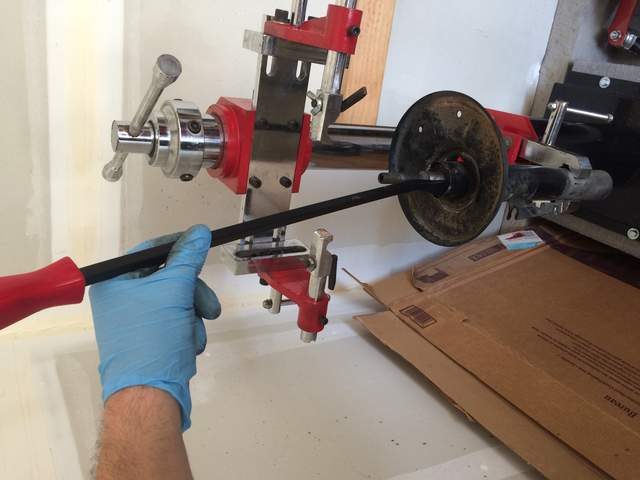
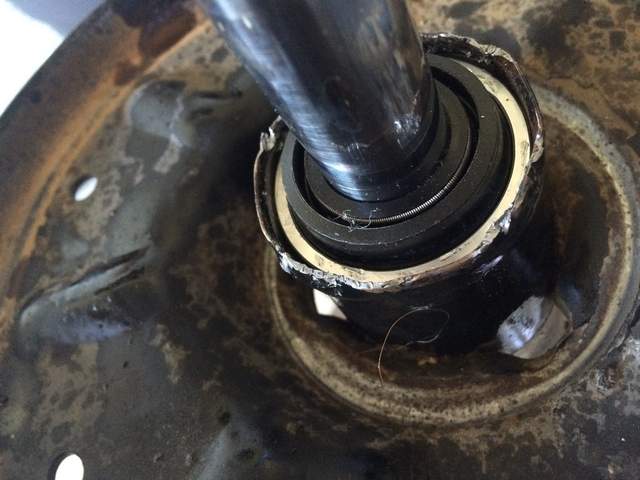
Thanks, but it's not over yet. I removed my passenger side struts again and did this to the insert... 
Now I need to redo the driver side when the new/used part comes in.
|
|
|
|
|
07-28-2015, 09:27 AM
|
#17
|
|
Registered User
Join Date: May 2013
Location: Orange County, California
Posts: 266
|
Thanks for doing this and letting us know. The video makes it seem easy, but it sounds like the hard part is playing around with and bending the metal casing. Please continue to update!
|
|
|
|
|
07-29-2015, 07:42 PM
|
#18
|
|
Registered User
Join Date: Nov 2014
Location: Long Island, NY
Posts: 160
|
Yes, bending the metal without destroying the casing is the kicker here. Everything else is fairly straight forward. The part that I am waiting for is coming on Monday so I will not be doing any work until then. I am anxious to see the end result this time around though. I am confident that this will work but you never know.
|
|
|
|
|
08-08-2015, 02:38 PM
|
#19
|
|
Registered User
Join Date: Nov 2014
Location: Long Island, NY
Posts: 160
|
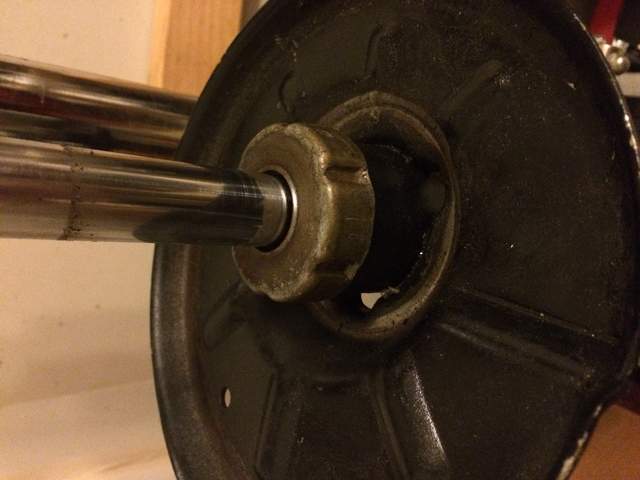
So, my idea worked. The car is back together and it seems pretty sound. No loud noises coming from the front end now and a low speed test drive around town went well! Bending the metal casing to hold the inserts in was needed. When I get time, I'll post what I ended up doing and the methods I used to get me through this project.
|
|
|
|
 Posting Rules
|
You may not post new threads
You may not post replies
You may not post attachments
You may not edit your posts
HTML code is On
|
|
|
All times are GMT -8. The time now is 07:51 PM.
| |


 Linear Mode


