Go Back   986 Forum - The Community for Porsche Boxster & Cayman Owners > Porsche Boxster & Cayman Forums > DIY Project Guides

Post Reply
 
LinkBack Thread Tools Display Modes
Old 11-10-2014, 12:38 PM   #1
Beginner
 
Jamesp's Avatar
 
Join Date: Mar 2013
Location: Houston
Posts: 1,659
Garage
Great thread. Way down on post #67 you have a shot of the cam cover and commented that whoever worked on this engine used lots of grey goo. There is a small oil galley in the cam cover just inboard a bolt hole towards the top of the photo. If that galley is plugged with sealant, the end of the camshaft blows off and can take the green plug with it pumping the engine oil onto the ground. Something to keep in mind during re-assembly.
__________________
2003 S manual
Jamesp is offline   Reply With Quote
Old 11-11-2014, 03:45 AM   #2
Engine Surgeon
 
Join Date: Aug 2008
Location: Cleveland GA USA
Posts: 2,425
I have a couple of seats left in the December 3-6 class.
__________________
Jake Raby/www.flat6innovations.com
IMS Solution/ Faultless Tool Inventor
US Patent 8,992,089 &
US Patent 9,416,697
Developer of The IMS Retrofit Procedure- M96/ M97 Specialist
Jake Raby is offline   Reply With Quote
Old 11-11-2014, 08:54 AM   #3
Registered User
 
flaps10's Avatar
 
Join Date: Jul 2014
Location: Tacoma
Posts: 429
Quote:
Originally Posted by Jake Raby View Post
I have a couple of seats left in the December 3-6 class.
Jake,
Bad timing for me, as Dec 3 is my woman's birthday and we have non refundable tickets to Mexico. When is the next possible class? I'm sure I can get support to attend.
flaps10 is offline   Reply With Quote
Old 11-11-2014, 07:01 PM   #4
Engine Surgeon
 
Join Date: Aug 2008
Location: Cleveland GA USA
Posts: 2,425
Quote:
Originally Posted by flaps10 View Post
Jake,
Bad timing for me, as Dec 3 is my woman's birthday and we have non refundable tickets to Mexico. When is the next possible class? I'm sure I can get support to attend.
The end of February,
email Kaley to get signed up. Kaley@rabyenginedeveloment.com
__________________
Jake Raby/www.flat6innovations.com
IMS Solution/ Faultless Tool Inventor
US Patent 8,992,089 &
US Patent 9,416,697
Developer of The IMS Retrofit Procedure- M96/ M97 Specialist
Jake Raby is offline   Reply With Quote
Old 11-12-2014, 06:57 PM   #5
Registered User
 
Join Date: Dec 2012
Location: DE
Posts: 126
Are any intro classes planned in the near future? Don't presently see any listings on the Worldpac site.

thanks
spendy is offline   Reply With Quote
Old 11-12-2014, 08:47 PM   #6
Engine Surgeon
 
Join Date: Aug 2008
Location: Cleveland GA USA
Posts: 2,425
Quote:
Originally Posted by spendy View Post
Are any intro classes planned in the near future? Don't presently see any listings on the Worldpac site.

thanks
No, we are done for 2014. The WTI class may go away, so I can offer my DFI Porsche engine class through WTI. I can only do 12 classes/ year.

That said, I will offer 3-4 enthusiast classes at our facility next year.
__________________
Jake Raby/www.flat6innovations.com
IMS Solution/ Faultless Tool Inventor
US Patent 8,992,089 &
US Patent 9,416,697
Developer of The IMS Retrofit Procedure- M96/ M97 Specialist
Jake Raby is offline   Reply With Quote
Old 11-25-2014, 05:46 PM   #7
Beginner
 
Jamesp's Avatar
 
Join Date: Mar 2013
Location: Houston
Posts: 1,659
Garage
How are you going to lift your engine into a stand? I built an overhead crane with a come along and a 2X8 bolted to the ceiling joists with angle iron. The truck the come along hangs from was made with iron strap and bolts. This was handy to lift the engine into a stand and to move heavy engine components from the engine to the bench and back in a very controlled manner. In this picture there is a second rope taking load on the cantilevered end of the engine to reduce the moment on the bell housing bolts. As is shown, I also used this setup to split the case.

__________________
2003 S manual
Jamesp is offline   Reply With Quote
Old 12-24-2014, 02:55 PM   #8
Registered User
 
flaps10's Avatar
 
Join Date: Jul 2014
Location: Tacoma
Posts: 429
I haven't posted to this thread in some time because I've been in parts ordering mode and of choose life, work, travel,etc can slow down a project.

I'm writing this from a tablet so please excuse any typo, punctuation, spelling errors or spazzed out photo links.

First pic...


The above pic is when i got all my pieces back from being ultrasonic cleaned, my crank polished and magna fluxed

At this point i should stop and clarify that i am not actually "rebuilding" this engine but merely repairing the truly honked up parts.


Above is a box of parts that are not going back in my engine as of about 30 minutes ago. It is by no means complete.

One of the things i needed to replace before i could get very far were the oil spray nozzles. They look almost like small rifle brass and are located in the bearing carrier. You need to install them before you can install the main bearings and because i didn't really wrap my head around them i didn't have them on order early enough. Once again Pelican Parts came through with the best prices and super fast delivery.

They came the other day along with new chain guides for the IMS chain. Since I've been sitting on all new crank bearings, rod bearings, a used but excellent rod to replace my number six rod, and APC rod bolts i was about out of excuses.

So today I turned the bus around and started putting this bucket of bolts back on the road.


This shows the bearing carrier with fresh bearings installed, thrust bearings in place and the crank laying in place.

I temporarily installed the old bearing carrier bolts and tightened them in the proper order but only to 5 ft lbs so i could get a feel for how the crank felt and get an idea of what kind of end play I am looking at. Wow is it smooth. I have APC bolts coming for the bearing carrier and expect them in the next few days. I will replace the existing bolts before i torque any further and check that end play.


This pic shows the APC rod bolts next to the stock ones. They are not cheap so it seems a shame to hide them so far inside. The piece of mind in knowing i have reduced the likelihood of having a bolt stretch or bearing spin is worth it though.

I used Joe Gibbs assembly grease on the rod bearings and the APC lube on the bolt threads. I made absolutely certain that the cracked interfaces on the rod bearing caps nested perfectly together before snugging them up. I spent a lot of time carefully wiping down the parts and really feeling how they went together.

The manual has you torque the rod bolts to 15 ft lbs, then 90 degrees more. The instructions with the APC bolts tell you to use a stretch guage (which i don't have) or going to 45 ft lbs. Having read up on the stretch guage idea i think i would go that way next time. Cool concept.


Above is the assembled bearing carrier as of just a while ago. Again, i spent quite a bit of time feeling each rod as they went together and I'm quite happy with my stopping place for the day
flaps10 is offline   Reply With Quote
Old 12-25-2014, 01:26 PM   #9
Registered User
 
rp17's Avatar
 
Join Date: Apr 2011
Location: DFW
Posts: 713
Nice job! What are your plans on the imx shaft? With the engine apart, there are few options.
__________________
What we're dealing with here is a complete lack of respect for the law.
rp17 is offline   Reply With Quote
Old 12-25-2014, 02:26 PM   #10
Registered User
 
Join Date: Apr 2008
Location: pa
Posts: 32
Thanks for taking the time to document -really informative .What are APC bolts ?Familiar with ARP but not APC .
Thanks..............
dcdrechsel is offline   Reply With Quote
Old 12-25-2014, 03:47 PM   #11
Registered User
 
flaps10's Avatar
 
Join Date: Jul 2014
Location: Tacoma
Posts: 429
It is ARP, sorry. CRS is obviously creeping in too.

As for ims options they number a bit fewer for those of us with a dual row bearing.
There is stock which is probably the weakest option. I take that back, the pelican kit that installs a single row bearing and spacer is my least favorite solution.
With no plain bearing ever going to happen, this leaves the roller bearing by EPS as sold by vertex or the LN dual row ceramic.

One thing I haven't noticed on any of the various porsche forums that i frequent is anyone saying either product had let them down. Also, when presented with the diagnoses for my metal filled engine Jake asked that i not use the LN bearing, and rightly so for someone wanting to protect a company reputation.

I don't know that anything I'm doing here would change his opinion. That said, the bearing is currently still available to the consumer and is easily the most confidence inspiring option available.

So far no one has called me for having all six connecting rods installed. In real life bank 1-3 rods have the piston attached and are pushed through the case and the rod caps done after. I really wanted to get a feel for how the parts fit. The entire thing is sitting at low torque..Ive decided to go in for a stretch gauge before exercising the new torque wrench i received for Christmas.
flaps10 is offline   Reply With Quote
Old 12-26-2014, 08:23 AM   #12
Registered User
 
Join Date: Jun 2006
Location: Florida
Posts: 146
Send a message via AIM to ultimate1 Send a message via Yahoo to ultimate1
Thumbs up

Quote:
Originally Posted by flaps10 View Post
It is ARP, sorry. CRS is obviously creeping in too.

As for ims options they number a bit fewer for those of us with a dual row bearing.
There is stock which is probably the weakest option. I take that back, the pelican kit that installs a single row bearing and spacer is my least favorite solution.
With no plain bearing ever going to happen, this leaves the roller bearing by EPS as sold by vertex or the LN dual row ceramic.

One thing I haven't noticed on any of the various porsche forums that i frequent is anyone saying either product had let them down. Also, when presented with the diagnoses for my metal filled engine Jake asked that i not use the LN bearing, and rightly so for someone wanting to protect a company reputation.

I don't know that anything I'm doing here would change his opinion. That said, the bearing is currently still available to the consumer and is easily the most confidence inspiring option available.

So far no one has called me for having all six connecting rods installed. In real life bank 1-3 rods have the piston attached and are pushed through the case and the rod caps done after. I really wanted to get a feel for how the parts fit. The entire thing is sitting at low torque..Ive decided to go in for a stretch gauge before exercising the new torque wrench i received for Christmas.
I also have a dual row bearing and on my second LN ceramic bearing and I added the TuneRS direct oil feed last year. Keep in mind that I drive my car a fair amount on the highway. I drive it like a Porsche was meant to be driven and I am at around 166k on the odometer. I do know that TuneRS has been racing their cars for several years using this setup. Here is the link. Plus you can use either the LN bearing, EPS bearing or the steal bearing just like the original one supplied with the Direct Oil Feed kit. I might add that the original IMS was not the reason I had to rebuild my engine at about 116k miles. The 5th and 6th cylnders had oil deposits. Another reason why you never follow Porsche corporate / dealership advice for oil changes every 15k or 7500 miles. Special thanks to whoever owned my car first for that. Anyway that ordeal taught me a lot about my Boxster.

Lubrication has always been the problem. I thing the EPS sounds like a good idea but I would feel a lot more comfortable if more people shared their experience with the EPS before I were to consider it in when I decide to drop in a 3.2 or 3.4 in my Boxster. Here is the link for you to check it out.

DIRECT OIL FEED (DOF) FOR IMS BEARINGS | TuneRS Motorsports

I am looking forward to your progress on this thread because I want to do the same thing with a 3.2 or 3.4 to have ready when I hit 200 or 250k on the odometer
ultimate1 is offline   Reply With Quote
Old 12-28-2014, 01:30 AM   #13
Registered User
 
rp17's Avatar
 
Join Date: Apr 2011
Location: DFW
Posts: 713
Quote:
Originally Posted by flaps10 View Post
It is ARP, sorry. CRS is obviously creeping in too.

As for ims options they number a bit fewer for those of us with a dual row bearing.
There is stock which is probably the weakest option. I take that back, the pelican kit that installs a single row bearing and spacer is my least favorite solution.
With no plain bearing ever going to happen, this leaves the roller bearing by EPS as sold by vertex or the LN dual row ceramic.

One thing I haven't noticed on any of the various porsche forums that i frequent is anyone saying either product had let them down. Also, when presented with the diagnoses for my metal filled engine Jake asked that i not use the LN bearing, and rightly so for someone wanting to protect a company reputation.

I don't know that anything I'm doing here would change his opinion. That said, the bearing is currently still available to the consumer and is easily the most confidence inspiring option available.

So far no one has called me for having all six connecting rods installed. In real life bank 1-3 rods have the piston attached and are pushed through the case and the rod caps done after. I really wanted to get a feel for how the parts fit. The entire thing is sitting at low torque..Ive decided to go in for a stretch gauge before exercising the new torque wrench i received for Christmas.

Perhaps the replacement shaft with triple row bearing from LN is not for sale anymore? Do recall not too many of those were being sold a year or two ago so it might be off the shelf.

Hope you had a good Christmas and got all the parts and tools you needed. Thanks for documenting this refresh/rebuild. If you have some spare time on your hands, here is another rebuild thread that you may like.


http://www.planet-9.com/987-cayman-boxster-service-tech/86847-engine-removal-question.html
__________________
What we're dealing with here is a complete lack of respect for the law.

Last edited by rp17; 12-28-2014 at 08:39 AM.
rp17 is offline   Reply With Quote
Old 12-28-2014, 09:34 PM   #14
Engine Surgeon
 
Join Date: Aug 2008
Location: Cleveland GA USA
Posts: 2,425
Quote:
Lubrication has always been the problem.
Load has always been the problem.
__________________
Jake Raby/www.flat6innovations.com
IMS Solution/ Faultless Tool Inventor
US Patent 8,992,089 &
US Patent 9,416,697
Developer of The IMS Retrofit Procedure- M96/ M97 Specialist
Jake Raby is offline   Reply With Quote
Old 12-27-2014, 02:31 PM   #15
Registered User
 
Join Date: Jun 2014
Location: LB, Germany
Posts: 1,526
Hi flaps10,

i know you will not do a complete engine rebuilt. Don't know what is on you replacement list. I hardly recommend to replace all plastic parts on the chain ramps. They sometimes fail and can produce massive engine fails. As an exmaple: over here in germany we had a 996 with a broken valve case cause by a broken plastic slide part of a chain ramp.

Thanks for your write up. I enjoy it.

Thanks for the DOF link, ultimate1. This looks very good instead of the LN solutions. Problem is that it is very expensive for poeple outside the US, because we have to pay shipping plus tax and customs on parts and shipping on it. So unfortunately it's very expensive - approx. 840 euros = 1025 usd at the moment. Plus eventually a new ceramic bearing which is around 250 euro = 305 usd. So in the end we end up at around 1330 usd.

Regards
Markus

Last edited by Smallblock454; 12-27-2014 at 02:43 PM.
Smallblock454 is offline   Reply With Quote
Old 12-30-2014, 08:49 AM   #16
Registered User
 
Join Date: Jun 2006
Location: Florida
Posts: 146
Send a message via AIM to ultimate1 Send a message via Yahoo to ultimate1
Quote:
Originally Posted by Smallblock454 View Post
Hi flaps10,

i know you will not do a complete engine rebuilt. Don't know what is on you replacement list. I hardly recommend to replace all plastic parts on the chain ramps. They sometimes fail and can produce massive engine fails. As an exmaple: over here in germany we had a 996 with a broken valve case cause by a broken plastic slide part of a chain ramp.

Thanks for your write up. I enjoy it.

Thanks for the DOF link, ultimate1. This looks very good instead of the LN solutions. Problem is that it is very expensive for poeple outside the US, because we have to pay shipping plus tax and customs on parts and shipping on it. So unfortunately it's very expensive - approx. 840 euros = 1025 usd at the moment. Plus eventually a new ceramic bearing which is around 250 euro = 305 usd. So in the end we end up at around 1330 usd.

Regards
Markus
Hi Markus,

I am not sure if these guys will save you on shipping and customs but might be worth a try as they are in UK

IMS Bearing Direct Oil Feed (DOF) Intermediate Shaft Retrofit Kit for Boxster 986 / 996 - 99610599602 | Design 911
ultimate1 is offline   Reply With Quote
Old 01-04-2015, 06:23 AM   #17
Beginner
 
Jamesp's Avatar
 
Join Date: Mar 2013
Location: Houston
Posts: 1,659
Garage
On post 75 you have a close up of the missing section of oil control ring. That picture also shows the wrist pin clip is incorrectly installed. The bent tab of the wrist pin clip should be pushed against the radius of the piston. Using a cell phone to document clip installation as shown below works well. This picture was taken by positioning the camera into the adjacent cylinder during assembly.


A long, thin flat blade screwdriver bent at 90 degrees in the middle works well to push the clip tab onto the radius if it is not initially installed perfectly. 3/4 inch electrical conduit with a square notch cut into the end for the tab of the wrist pin clip coupled with an appropriate sized socket on extensions are cost effective tools to install the wrist pin clips. I marked the installation tool and the block with a sharpie to help with tab alignment.
__________________
2003 S manual
Jamesp is offline   Reply With Quote
Old 01-05-2015, 07:52 AM   #18
Registered User
 
Join Date: Jun 2014
Location: LB, Germany
Posts: 1,526
Quote:
Originally Posted by ultimate1 View Post
Hi Markus,

I am not sure if these guys will save you on shipping and customs but might be worth a try as they are in UK

IMS Bearing Direct Oil Feed (DOF) Intermediate Shaft Retrofit Kit for Boxster 986 / 996 - 99610599602 | Design 911
Hi ultimate1,

thanks for the link. Yes, it's cheaper to buy in the UK for me. Less shipping costs and no custom taxes. Today the DOF Kit from the UK is around 700 Euro whereas from the US today its around 850 Euro. So that is a lot cheaper from the UK.

Main problem seems to be the weak Euro. Today less than 1,20 Euro = 1 USD. In April 2014 1 Dollar was around 1,40 Euro. So maye a good time for people in the US to buy european products. But not vice versa.

@ flaps10: Sorry for hijacking your thread.

Thanks & Regards
Markus
Smallblock454 is offline   Reply With Quote
Old 01-05-2015, 04:34 PM   #19
Registered User
 
flaps10's Avatar
 
Join Date: Jul 2014
Location: Tacoma
Posts: 429
Markus,
No worries. Post away.

Jamesp,
There are some great pointers in your post. If I may point out something in the picture that you posted, it looks like the edge of that ring groove is pretty hammered. I only noticed it because I saw a post elsewhere and the person managed to chip off a pretty good chunk of piston clear up to the oil ring groove.

I would seem that lining up the circlip insertion tool is super important, and that possibly some people are confusing a swift palm against the knob of the insertion tool with the need for extreme force.

I managed to install the circlips on my pistons 1-3 the other day without any special tooling, but I think I'll remove them once my insertion tool shows up and get a really good idea for what it feels like. Needless to say, the whole bank 4-5 thing is causing me to ponder things. I'm hoping Jake's new tool hits the market soon.

Update:
Not that anyone is sitting on the edge of their seats waiting for me to update this thread, but it has taken a turn or two recently.

The good news is that I'm on my way back together. The bad news is that everything from the bearing carrier "out" is going to be restricted to fresh seals. For now.

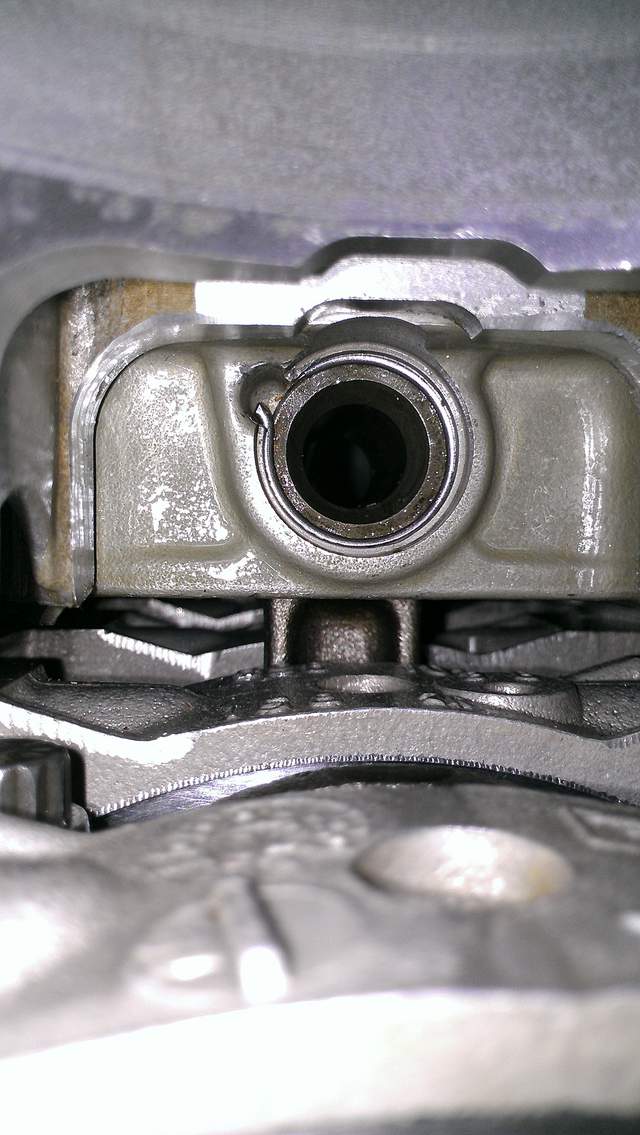
My reasoning is as follows. As just mentioned by user jamesp, I have a snapped off oil ring. For those not familiar, the oil ring is in three pieces. There is a heavily perforated T shape piece that goes in the groove and there are very thin steel rings that go above and below the perforated piece. Using a conventional ring compressor it would be very easy to get one of those super thin pieces out of shape and viola, you get a bore scratch just like I have. And a missing piece of ring that surely did some great work on its way to the filter. For the record, one of my recent purchases was an ARP tapered sleeve ring compressor which should go a long ways towards reducing the chances of buggering up another oil ring.

I did some pondering on the ring situation. In a normal engine (which the M96 is decidedly not) you would bore the cylinders to the next size up and then buy new pistons and rings to go with them. There are no off the shelf, next size up pistons for the M96. That sort of supports the idea that this is a throw away motor in Porsche's eyes and will eventually whack that line they love to publish in their ads (70% of all porsches ever made are still on the road). In the future that may only be true if you count the number of 986/996 cars with an LS or Subaru engine.

But I digress.

I was hoping to get this back together perhaps not "on the cheap", but at least not have to hang my head in shame as to what I put back inside. What I wanted to do was get fresh rings, do a bore hone to give them a new surface and hope that my scratch was diminished.

I took the case halves back to my local engine building shop, which is well known for doing V8 hot rods but he down plays any Porsche work he's done (he knows more than he lets on). His assistant pointed out my sleeve material and he held up his hands and said he would only be making my problem worse to even hone them out.

For anyone who is curious what is meant by that, removing material from the bores will also remove the high silicone content of the bore surface, leaving you with some dead soft aluminum to rub up against your steel rings. How much can you remove and still be safe? I don't know, but I'm glad that the shop I was in was honest enough to say he didn't know the answer either.

You can of course get the case halves resleeved and use stock size pistons and rings. Look up any shop that does sleeving (probably with iron sleeves), price stock pistons, and stock rings then do the math and you'll discover what I did: That the LN "Nickies" are the cheapest deal on earth by at least $1000. For a total throw down of about $4600 I can have my choice of 3.2, 3.4 or 3.6 liter with Nickies sleeves and JE pistons and rings.

What was not clear to me from the LN web page was whether they were selling case halves with the sleeves in them for that price or if it was exchange, or ship 'em in or what. I had to talk to someone at LN today anyway about my recent order and if anyone is curious the prices quoted on their web page are for you to send in your case halves for the work to be done. They have no stock of cases ready to rock. He told me current turn around is around 8-10 weeks.

Now I know that part at least.

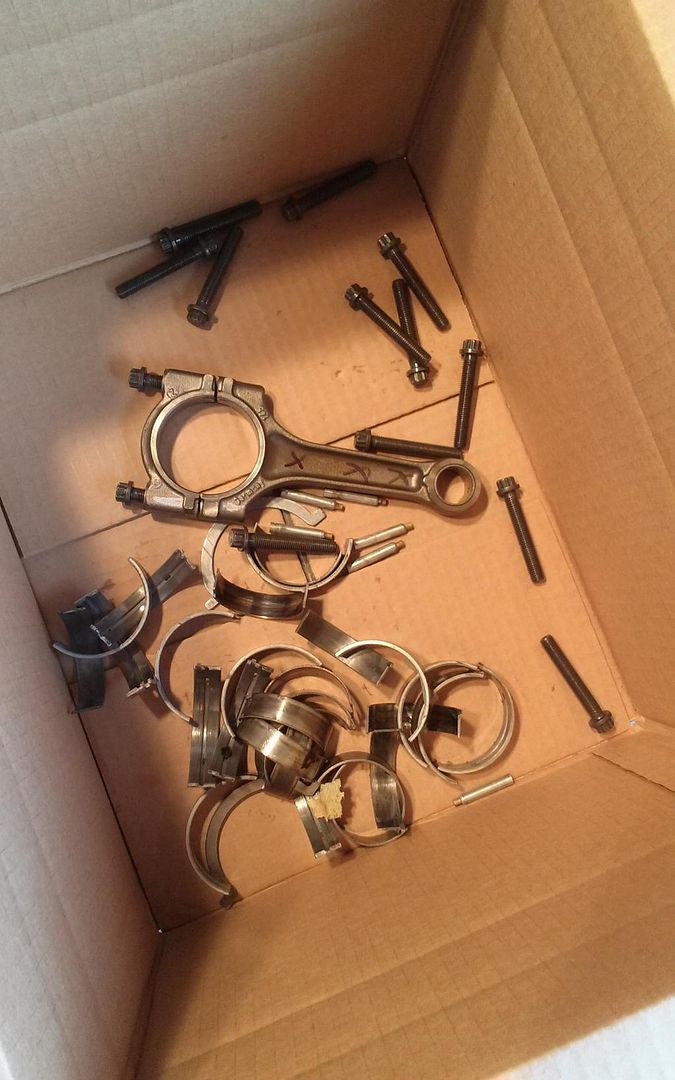
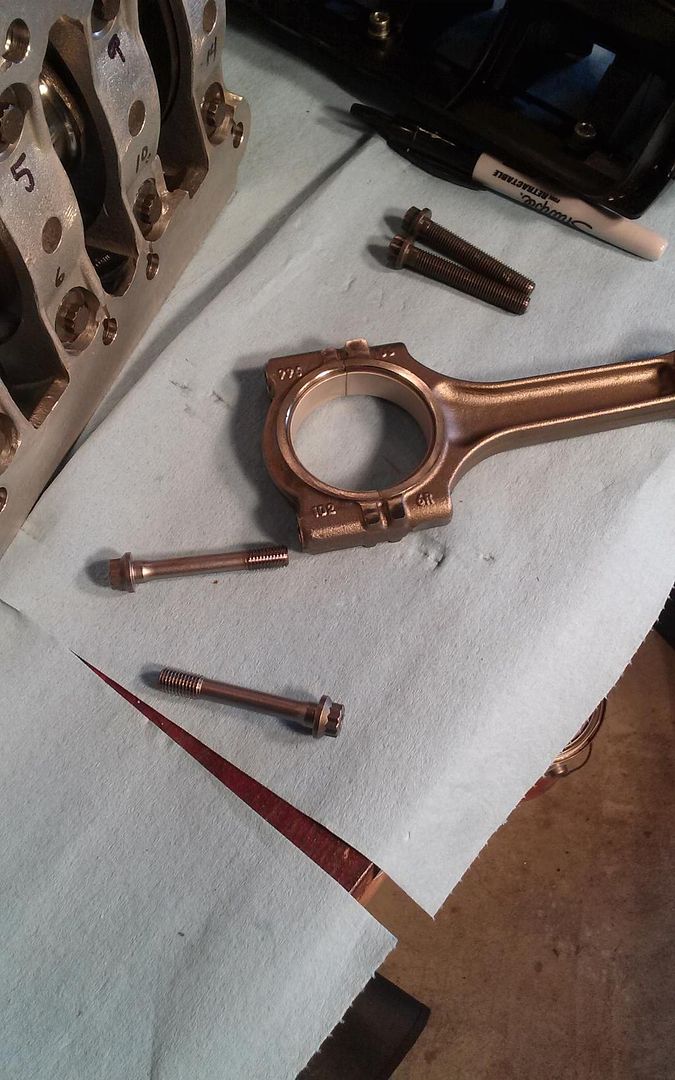
So here is the part where I hang my head in shame. I don't have $4600 right now, plus the $1500-1600 for a decent set of non throw away connecting rods and another $1300+ for LN to pin my IMS and install a three row ceramic bearing (dammit, just realized I forgot to ask if they still do that).

I can set aside that kind of money but it will be probably six months or so. Again, this car is a hobby - although I'm starting to think that hookers and blow are cheaper. Even though it's a hobby I still want to drive the damn thing.

My new plan is to go with my rebuilt lower end and reuse the case halves, pistons and rings except for the oil ring that is busted off. I can't even believe I just typed that, but there it is. It just seems like trying to re-ring the thing is throwing good money (stock rings are about $250/hole) after bad (out of round bores, my scratch, etc).

My reasoning continues as follows. First, my car ran perfectly when I pulled into my garage to start this project. It didn't burn or leak any unreasonable amount of oil. The car I will pull back out of my driveway will be much better than the one I pulled in - with no metal floating around inside. Oh, and by the way I'm installing the LN filter assembly and magnetic plug.

Next, I'm going to know a heck of a lot more on my second engine build than I will on this first one. I will be able to go to one of Jake's classes and have a heck of a lot higher chance of absorbing more information because I will have held all these parts in my hands already. And after that I'll be ready to have some case halves done and ready to go.

I've got the full support of my woman and the place to do all this.

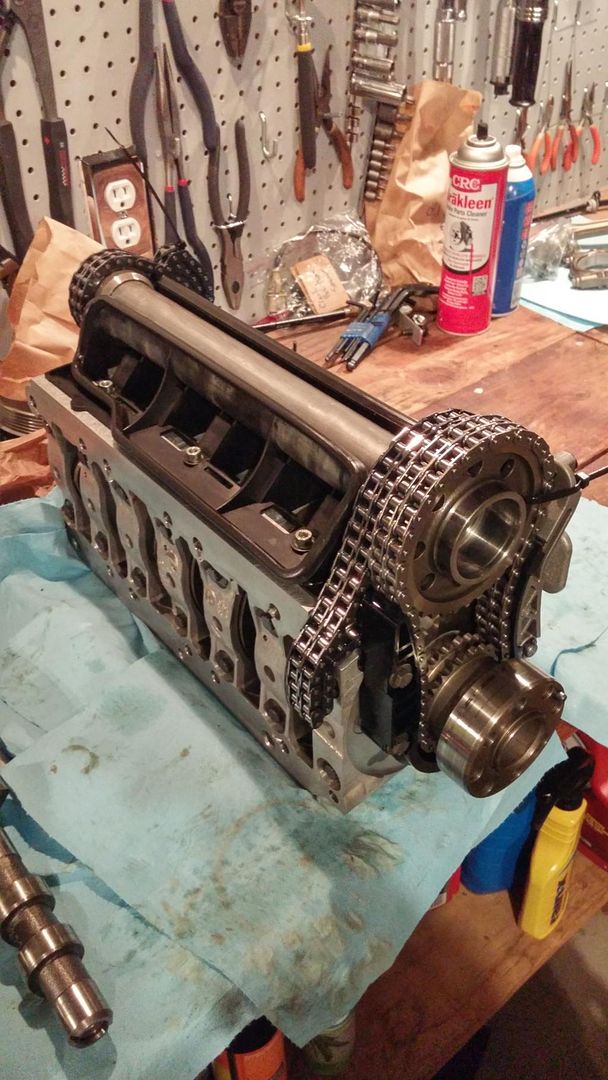
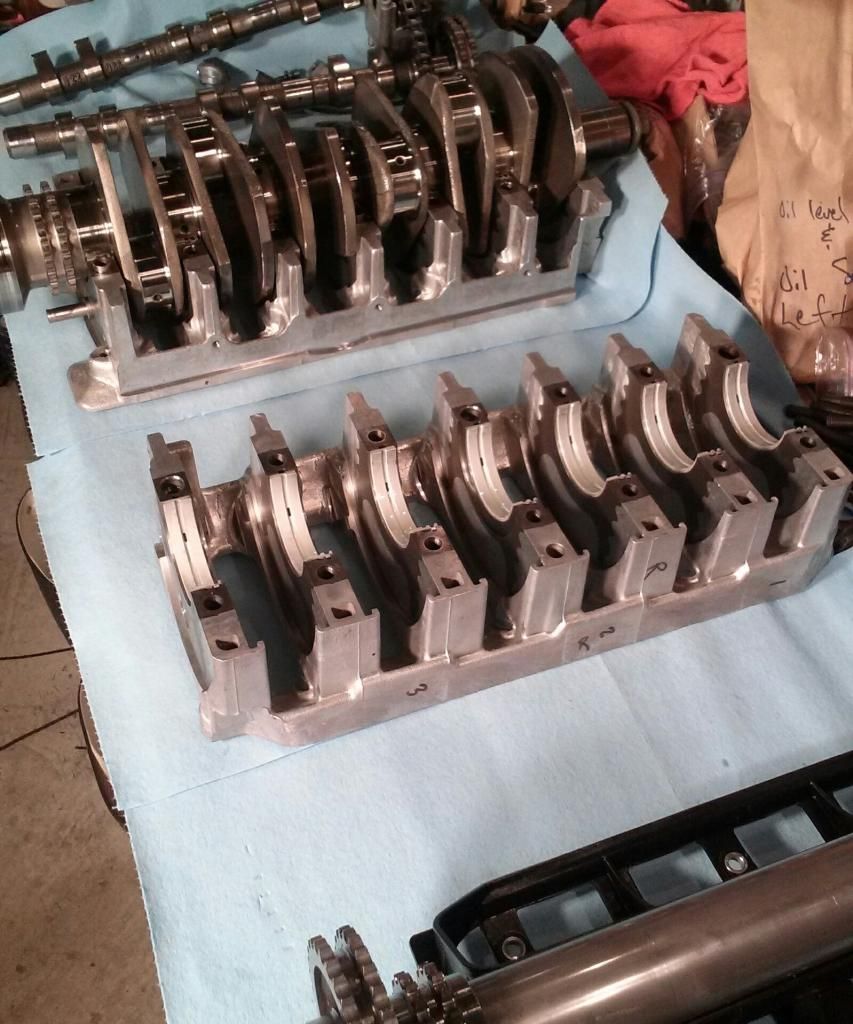
With that out of the way, here is a quick shot of my bearing carrier on the bench.


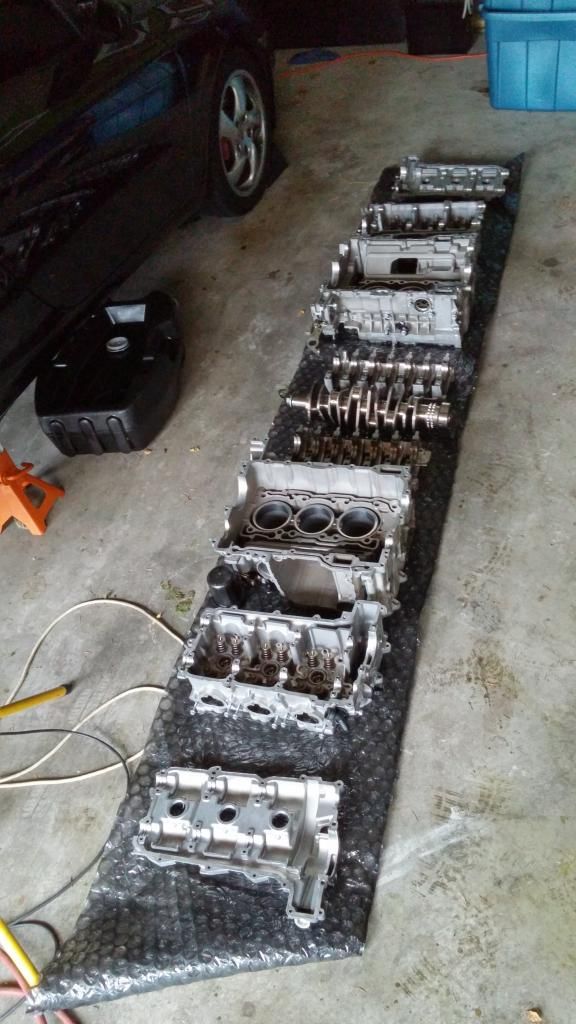
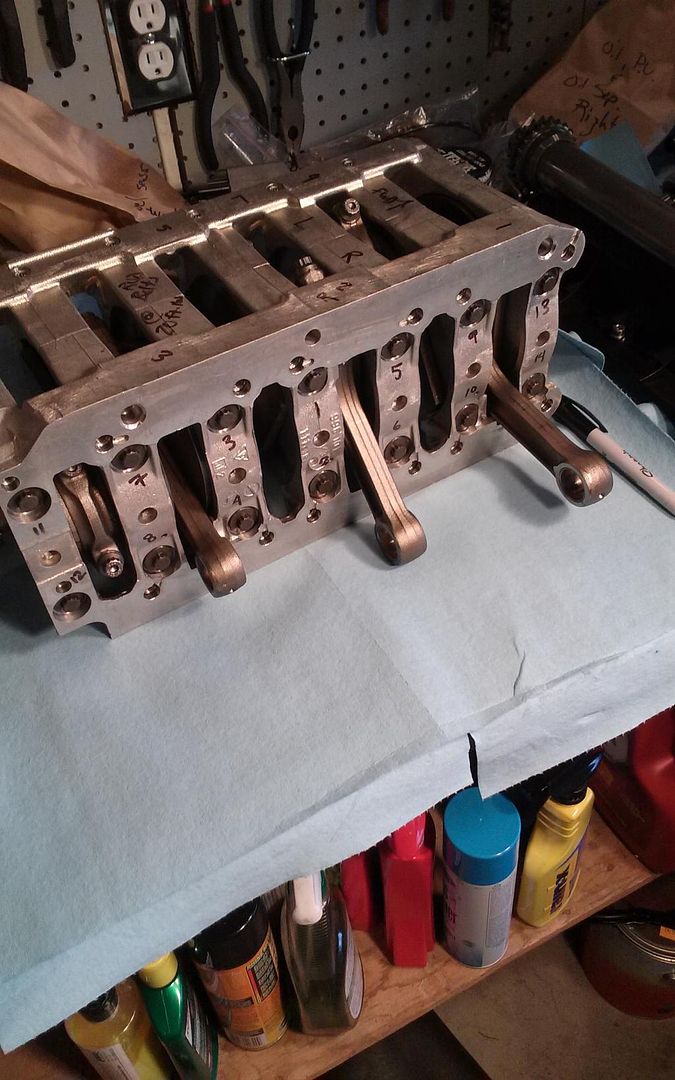
Case half for bank 1-3 is ready to go. The bad news from LN earlier today was that I won't see that tapered sleeve ring compressor until near the end of the month.

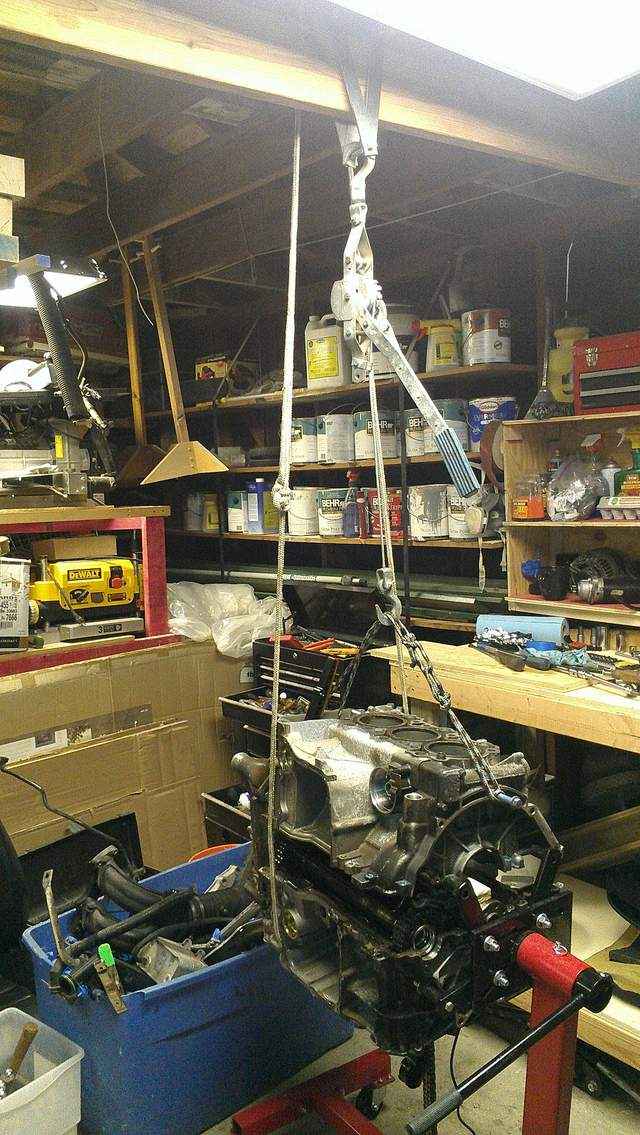
I am going to break down and source an engine stand, to answer another question posted earlier.
flaps10 is offline   Reply With Quote
Old 01-06-2015, 02:36 PM   #20
Registered User
 
Join Date: Apr 2008
Location: pa
Posts: 32
There is a post on Rennlist by speedrII who did a similar approach of reusing rings etc on a 996 and it worked .Not sure if you have seen it .

Dave
dcdrechsel is offline   Reply With Quote
Post Reply


Thread Tools
Display Modes

Posting Rules
You may not post new threads
You may not post replies
You may not post attachments
You may not edit your posts

BB code is On
Smilies are On
[IMG] code is On
HTML code is On
Trackbacks are On
Pingbacks are On
Refbacks are On


All times are GMT -8. The time now is 02:04 AM.


Powered by vBulletin® Version 3.8.7
Copyright ©2000 - 2026, vBulletin Solutions, Inc.
Content Relevant URLs by vBSEO 3.6.0
Copyright 2025 Pelican Parts, LLC - Posts may be archived for display on the Pelican Parts Website -    DMCA Registered Agent Contact Page