Go Back   986 Forum - The Community for Porsche Boxster & Cayman Owners > Porsche Boxster & Cayman Forums > DIY Project Guides

Post Reply
 
LinkBack Thread Tools Display Modes
Old 06-29-2014, 06:27 AM   #541
Boxster 1999
 
Join Date: Feb 2013
Location: Canada
Posts: 67
Garage
Really like mine also. Fountain de jouvence for our cars!

__________________
Boxster 99
Barteur is offline   Reply With Quote
Old 06-29-2014, 07:25 AM   #542
Registered User
 
BruceH's Avatar
 
Join Date: Jun 2012
Location: Bedford, TX
Posts: 2,708
Garage
Quote:
Originally Posted by Nine8Six View Post
Oh cool Bruce!!! Looking good.

and what's that blue reflect on the above pic? A Charles' special devil eye effect, LED, how did you guys managed that?
That's just the lights on, I was surprised it looked blue as well. Bonus I need to adjust the height of the beams, they are a bit low. High beams sure light the place up!
__________________
______________________________________________
2001 Boxster S Lapis Blue
TS Cat Bypass Pipes and exhaust
iPad Mini Dash Install
DEPO Tail Lights
BruceH is offline   Reply With Quote
Old 06-29-2014, 09:12 AM   #543
Registered User
 
Join Date: Dec 2013
Location: Dahlonega , Georgia
Posts: 1,346
Another mini update on the replacement seals . Just received an email from the supplier the tooling will be 5k but he feels like the numbers of 986/996 out there that may need these seals is great enough to move forward with the project. He has ordered the material to make the dies he estimates we are 8 weeks away from having a first piece article !!! He is going to make one side first I can't remember if I sent him a driver or passenger side ? If the fit is good he'll then do the opposite side. I may have to send him my old seals to get the other side but that's not a problem. Who knows with a little luck maybe these will be available by year end or a little sooner !
__________________
2002 Boxster S Arctic Silver with black top with glass window and black leather interior. Jake Raby 3.6 SS ( the beast ) with IMS Solution. 996 GT3 front bumper , GT3 rocker covers and GT3TEK rear diffuser and Joe Toth composites rear ducktail spoiler .
rfuerst911sc is offline   Reply With Quote
Old 06-29-2014, 01:09 PM   #544
Custom User Title Here
 
particlewave's Avatar
 
Join Date: Mar 2012
Location: Ft. Leonard Wood
Posts: 6,163
Garage
Quote:
Originally Posted by Van914 View Post
Fred & Charles,
This has to be one of the best Mods for our cars. I want to thank you for taking the time and effort.
I love mine.
The New styling is fantastic!
I'm glad that you're enjoying them!
Fred deserves an award for his efforts
__________________
https://youtube.com/@UnwindTimeVintageWatchMuseum
particlewave is offline   Reply With Quote
Old 06-29-2014, 01:13 PM   #545
Custom User Title Here
 
particlewave's Avatar
 
Join Date: Mar 2012
Location: Ft. Leonard Wood
Posts: 6,163
Garage
Quote:
Originally Posted by rfuerst911sc View Post
Another mini update on the replacement seals . Just received an email from the supplier the tooling will be 5k but he feels like the numbers of 986/996 out there that may need these seals is great enough to move forward with the project. He has ordered the material to make the dies he estimates we are 8 weeks away from having a first piece article !!! He is going to make one side first I can't remember if I sent him a driver or passenger side ? If the fit is good he'll then do the opposite side. I may have to send him my old seals to get the other side but that's not a problem. Who knows with a little luck maybe these will be available by year end or a little sooner !
That's good news! I have 2 sets of my own with gummy seals.

Quote:
Originally Posted by BruceH View Post
That's just the lights on, I was surprised it looked blue as well. Bonus I need to adjust the height of the beams, they are a bit low. High beams sure light the place up!
You have the adjustment instructions, right? I try to get them close, but there are always differences in cars due to ride height, etc.
If you need any help, let me know. Just be sure to keep an eye on the projectors when adjusting
__________________
https://youtube.com/@UnwindTimeVintageWatchMuseum
particlewave is offline   Reply With Quote
Old 06-29-2014, 02:49 PM   #546
Registered User
 
Pdwight's Avatar
 
Join Date: May 2013
Location: North Alabama
Posts: 2,079
Sear

or re-seal, after you take the lens off what do you use to reseal the lens back onto the headlight assembly?
Pdwight is offline   Reply With Quote
Old 06-29-2014, 04:21 PM   #547
Registered User
 
Nine8Six's Avatar
 
Join Date: Sep 2013
Location: Montreal, QC. (currently expat to Shanghai)
Posts: 3,249
Quote:
Originally Posted by Pdwight View Post
or re-seal, after you take the lens off what do you use to reseal the lens back onto the headlight assembly?
Pd, anything sticky really. Autostore's RTV, liquid silicon. Cheap TAR could also work but messy dunno. The headlight housing has this nice 10mm deep groove where you can pour the stuff in. You just fill up at 50%, the lip of the lens accounts for the other 50%, when pressed together it all becomes a nicely flush seal.

You can't screw up and even if you'd try you'd fail
__________________
______________________________
'97 Boxster base model 2.5L, Guards Red/Tan leather, with a new but old Alpine am/fm radio.
Nine8Six is offline   Reply With Quote
Old 06-29-2014, 04:25 PM   #548
Registered User
 
Nine8Six's Avatar
 
Join Date: Sep 2013
Location: Montreal, QC. (currently expat to Shanghai)
Posts: 3,249
Quote:
Originally Posted by Barteur View Post
Really like mine also. Fountain de jouvence for our cars!
"Fountain de jouvence". Is below what you had in mind? lol


hope you are done with the other mods (IMS) you've been doing to your box. Summer rocks at that time of the year back home (I'd pay a lot for open roof rides in the mountain roads right now)
__________________
______________________________
'97 Boxster base model 2.5L, Guards Red/Tan leather, with a new but old Alpine am/fm radio.
Nine8Six is offline   Reply With Quote
Old 06-29-2014, 05:26 PM   #549
Registered User
 
Pdwight's Avatar
 
Join Date: May 2013
Location: North Alabama
Posts: 2,079
Wow

I love those headlights...the best !!!!
Pdwight is offline   Reply With Quote
Old 06-29-2014, 08:01 PM   #550
Registered User
 
Nine8Six's Avatar
 
Join Date: Sep 2013
Location: Montreal, QC. (currently expat to Shanghai)
Posts: 3,249
Quote:
Originally Posted by Pdwight View Post
I love those headlights...the best !!!!
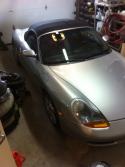
yea... they are alright. That mini h1 optic throws out a pretty sharp beam and that 35watts xenon is just perfect for this Porsche style headlight/lens angle design. Works, and it won't cook up your lens!

Surely they could be better. Recently tried a (true) 55watts hid kit on those. Brutal daylight blinding stuff but the heat is phenomenally high. Not only you can't touch the projector itself, it is difficult to hold your hand 1 inch away without getting burn after 2-3 secs. That poor porsche hood-style lens wouldn't last a month without a little brown burn

Unless there is a way to shield that 55w heat in a way, using mini exhaust PC fans? lol, 35 watts hid in these is pretty much what it is.... for us anyway

They are 'okay', and they look guud (i also think!)
__________________
______________________________
'97 Boxster base model 2.5L, Guards Red/Tan leather, with a new but old Alpine am/fm radio.
Nine8Six is offline   Reply With Quote
Old 06-29-2014, 08:08 PM   #551
Registered User
 
Pdwight's Avatar
 
Join Date: May 2013
Location: North Alabama
Posts: 2,079
Cold Mirror

I spent most of my life in the Professional Photo Finishing industry, we had a mirror on our lamp houses called a "Cold Mirror" , it was a piece of glass with a Dichroic coating, it looked slightly silver to the naked eye but was 90% transparent to infrared light, this passed the heat from the 4 500 watt bulbs out of the back of the lamphouse and not into the optics that projected the image onto the photographic paper. Most halogen bulbs that have a built in reflector have this coating, if you look at one with a night vision viewer the silver reflector will appear to be transparent. Im not sure if any of this technology could be used for HID lamp houses....but I was thinking about it while I read your post about the 55W envelopes and ballasts.
Pdwight is offline   Reply With Quote
Old 06-29-2014, 08:21 PM   #552
Registered User
 
BruceH's Avatar
 
Join Date: Jun 2012
Location: Bedford, TX
Posts: 2,708
Garage
Quote:
Originally Posted by particlewave View Post
You have the adjustment instructions, right? I try to get them close, but there are always differences in cars due to ride height, etc.
If you need any help, let me know. Just be sure to keep an eye on the projectors when adjusting
I still use the standard adjustments, correct?
__________________
______________________________________________
2001 Boxster S Lapis Blue
TS Cat Bypass Pipes and exhaust
iPad Mini Dash Install
DEPO Tail Lights
BruceH is offline   Reply With Quote
Old 06-29-2014, 08:38 PM   #553
Custom User Title Here
 
particlewave's Avatar
 
Join Date: Mar 2012
Location: Ft. Leonard Wood
Posts: 6,163
Garage
email sent, Bruce
__________________
https://youtube.com/@UnwindTimeVintageWatchMuseum
particlewave is offline   Reply With Quote
Old 07-05-2014, 10:46 AM   #554
Custom User Title Here
 
particlewave's Avatar
 
Join Date: Mar 2012
Location: Ft. Leonard Wood
Posts: 6,163
Garage
I just got my hands on my first sets of the Luminoso and Vivo bezels... I'm speechless. Fred's work is always great, but these are just works of art that I don't even want to put in a car
They belong in a modern industrial art exhibit!


__________________
https://youtube.com/@UnwindTimeVintageWatchMuseum
particlewave is offline   Reply With Quote
Old 07-05-2014, 11:17 AM   #555
Registered User
 
BruceH's Avatar
 
Join Date: Jun 2012
Location: Bedford, TX
Posts: 2,708
Garage
Always something new around the corner, they look fantastic! I guess mine are now classics
__________________
______________________________________________
2001 Boxster S Lapis Blue
TS Cat Bypass Pipes and exhaust
iPad Mini Dash Install
DEPO Tail Lights
BruceH is offline   Reply With Quote
Old 07-05-2014, 01:11 PM   #556
Custom User Title Here
 
particlewave's Avatar
 
Join Date: Mar 2012
Location: Ft. Leonard Wood
Posts: 6,163
Garage
I can sympathize, Bruce.
I've now had all 3 iterations. The good news is that if you get brave enough to open your headlights someday, 95% of the work is done.
You could just swap in the new units and sell the old ones as they are still in high demand. The sale of the old units can darn near pay for the new ones.

I realize that most people don't want to risk damaging their headlights (which is why I'm so busy ), but at least it's an option.
__________________
https://youtube.com/@UnwindTimeVintageWatchMuseum
particlewave is offline   Reply With Quote
Old 07-05-2014, 01:31 PM   #557
Registered User
 
BruceH's Avatar
 
Join Date: Jun 2012
Location: Bedford, TX
Posts: 2,708
Garage
Quote:
Originally Posted by particlewave View Post
I can sympathize, Bruce.
I've now had all 3 iterations. The good news is that if you get brave enough to open your headlights someday, 95% of the work is done.
You could just swap in the new units and sell the old ones as they are still in high demand. The sale of the old units can darn near pay for the new ones.

I realize that most people don't want to risk damaging their headlights (which is why I'm so busy ), but at least it's an option.
Oh, I'm good with what I have. They all look great. I'm glad the choices weren't there when I ordered. It was tough enough picking the right bezel color, LED's yes or no and the LED color and then of course the Light color temp. I got my beams raised to a perfect height. It took several turns but I still have plenty of clearance. Thanks for the detailed instructions
__________________
______________________________________________
2001 Boxster S Lapis Blue
TS Cat Bypass Pipes and exhaust
iPad Mini Dash Install
DEPO Tail Lights
BruceH is offline   Reply With Quote
Old 07-08-2014, 06:47 AM   #558
Registered User
 
Join Date: Dec 2013
Location: Dahlonega , Georgia
Posts: 1,346
Another email update from the gasket manufacturer, in about 10 days they start cutting the tooling and 1st articles will be aprox. 10 days after that. He believes he will have prototype parts in hand by the end of July. He also stated he is still considering three material compounds for the final product. All three compounds can be run through the same tooling dies. Yesterday I sent him my personal set of gaskets so he would have a left/right just to be safe. We are getting closer to this being reallity !
__________________
2002 Boxster S Arctic Silver with black top with glass window and black leather interior. Jake Raby 3.6 SS ( the beast ) with IMS Solution. 996 GT3 front bumper , GT3 rocker covers and GT3TEK rear diffuser and Joe Toth composites rear ducktail spoiler .
rfuerst911sc is offline   Reply With Quote
Old 07-09-2014, 10:35 PM   #559
Custom User Title Here
 
particlewave's Avatar
 
Join Date: Mar 2012
Location: Ft. Leonard Wood
Posts: 6,163
Garage
A small preview of what my headlights are going to look like...it's a work in progress.
No, I won't make these like this for anyone else. Not right now, anyway.

I'm not 100% sure where this is going yet.
Attached Images
 
__________________
https://youtube.com/@UnwindTimeVintageWatchMuseum

Last edited by particlewave; 07-09-2014 at 11:03 PM.
particlewave is offline   Reply With Quote
Old 07-09-2014, 10:40 PM   #560
Registered User
 
Pdwight's Avatar
 
Join Date: May 2013
Location: North Alabama
Posts: 2,079
Love the Projector

Will there not be a lens ?

Pdwight is offline   Reply With Quote
Post Reply


Thread Tools
Display Modes

Posting Rules
You may not post new threads
You may not post replies
You may not post attachments
You may not edit your posts

BB code is On
Smilies are On
[IMG] code is On
HTML code is On
Trackbacks are On
Pingbacks are On
Refbacks are On


All times are GMT -8. The time now is 04:00 AM.


Powered by vBulletin® Version 3.8.7
Copyright ©2000 - 2024, vBulletin Solutions, Inc.
Content Relevant URLs by vBSEO 3.6.0
Copyright 2024 Pelican Parts, LLC - Posts may be archived for display on the Pelican Parts Website -    DMCA Registered Agent Contact Page