Quote:
Originally Posted by jb92563

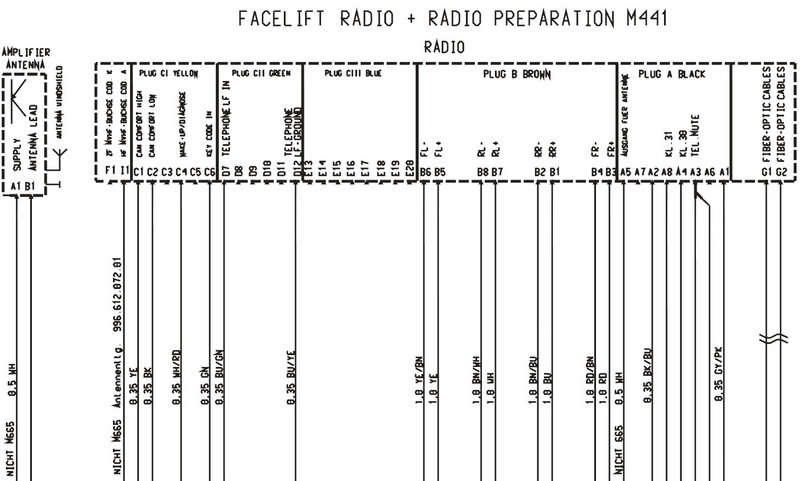
This might help from Pelican and 101projects.com
Note: Pin 6 on yellow portion of C-connector is the switched + power source.
|
Nope, my car has an entirely different configuration of the yellow connector - no switched power there.
I found this diagram on renntech.org - this is mostly consistent with what I found when measuring the voltages at the "A" (black) ISO connector in my car. According to this, pin 6 in the yellow connector is "Radio Code In". In the ACC ignition position, this wire is at just under 12 V, indicating I guess that the radio should ask for the code when plugged in again.
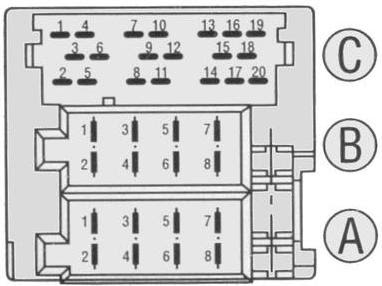
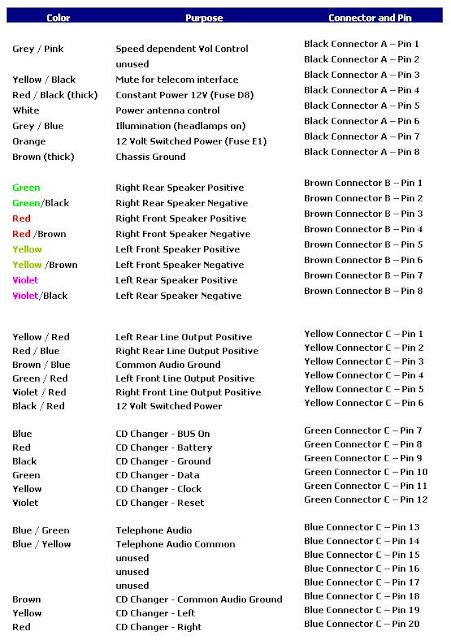
My car has the following pinout on the black ISO block:
- Gray/pink - Speedometer/speed dependent volume
- Blue/black - Reverse signal
- not used
- Red/black - Constant +12V
- White - Power to antenna
- not used
- not used
- Black - ground
Pin 7, which should be switched power, has no connection so I guess I have to get the switched power from the A/C panel as someone else suggested.
Pin 6, illumination, is not present either so I guess I'll just leave that one.


 "
" Porsche Boxster Silver
 Hybrid Mode


