Go Back   986 Forum - The Community for Porsche Boxster & Cayman Owners > Porsche Boxster & Cayman Forums > Boxster General Discussions

Post Reply
 
LinkBack Thread Tools Display Modes
Old 08-09-2022, 03:09 PM   #1
Registered User
 
elgyqc's Avatar
 
Join Date: Sep 2018
Location: Laval QC
Posts: 684
Garage
DIY rear window in my "new" top.

Picked up a used top in OK condition except that there was no rear window.
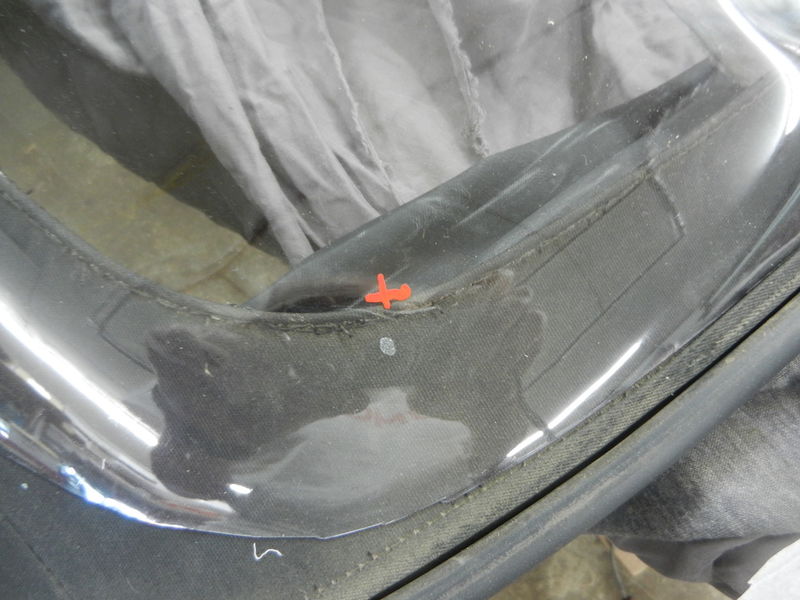
First thing was to remove what was left of the previous windows. I discovered there was evidence of the original sewn in window and a second one that had been installed using an adhesive.
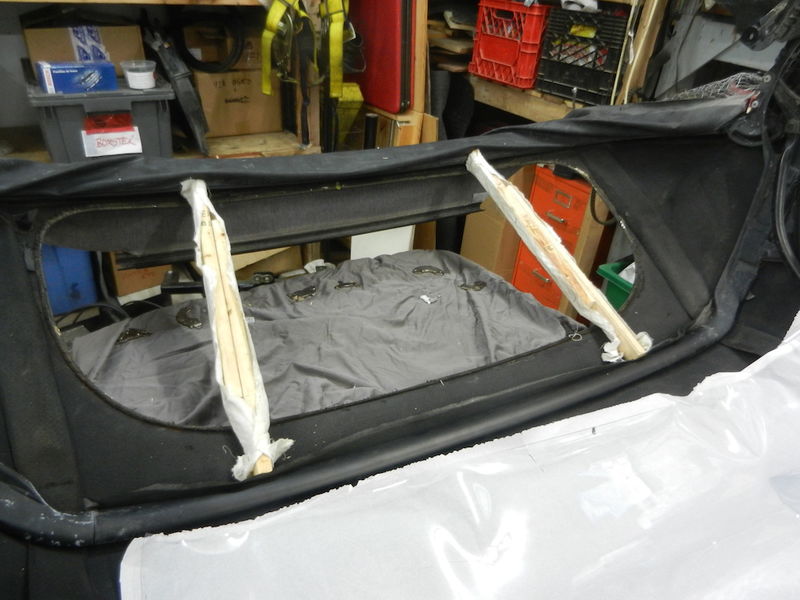
I needed a way to put tension on the top to have window opening fully open. I made a couple of braces, that I jammed between the last bow and the frame member at the bottom of the window. Note, the top is upside down in this photo.


The plan was to use an adhesive to hold the plastic in place and to seal between the top and the window and then hand sew around it using the original needle holes (more or less). I looked at several adhesives but settled on Goop, which may not be the best adhesive but it should be fine as a backup for the sewing. Also I had some Goop on hand.

I laid the plastic over the window hole on the outside of the top and marked where to cut it, leaving lots of extra. I put marks on the plastic to help position it during installation.


Because the bottom of the window goes between the fabric of the top and the bottom cross member I started there by pushing the plastic into the gap then putting the adhesive in. Clamps held it in place while it cured. After curing I sewed the bottom of the window in place.


Next was to glue the middle at the top, the corners and the middles of each side to get it straight in the opening. I then finished glueing all around.
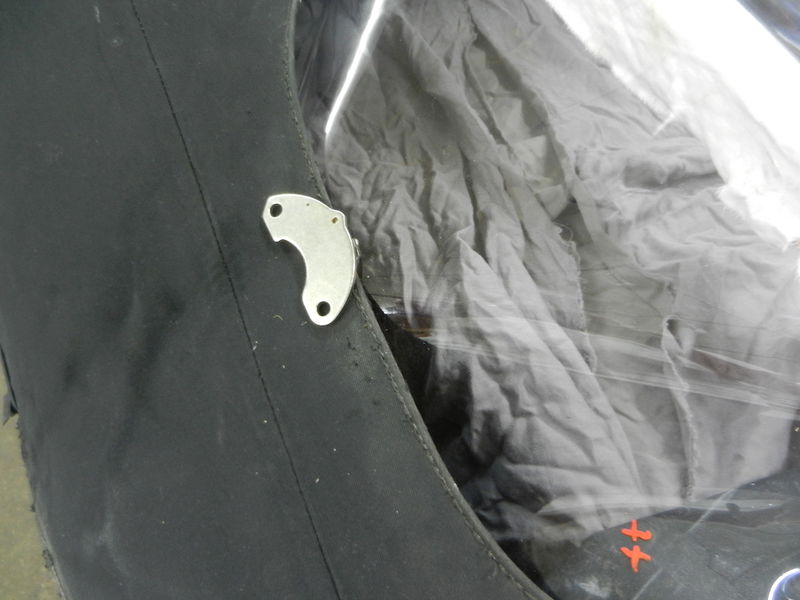
My secret for temporarily holding the window in place is to use Neodymium magnets salvaged from dead hard drives, put one on each side and the plastic is securely held in place. The magnets also functioned as clamps while the Goop cured.


Hand sewing was long and a PITA, but it is finished now. I will have to install the top to see how tight the window is. My experience with the last window I did was that it started out with lots of waves but tightened up with time and sunlight.


__________________
Grant
Arctic Silver 2000 Boxster S - bought with a broken engine, back on the road with the engine replaced
Green 2000 Boxster 5-speed and 1978 928 auto
1987 924S 5-speed (Sold) - Blue 2000 Boxster 5 spd (Sold)

Last edited by elgyqc; 08-09-2022 at 03:12 PM. Reason: clarification
elgyqc is offline   Reply With Quote
Old 08-10-2022, 05:46 AM   #2
Registered User
 
BruceH's Avatar
 
Join Date: Jun 2012
Location: Bedford, TX
Posts: 2,712
Garage
Wow, that is a lot of work, well done!
__________________
______________________________________________
2001 Boxster S Lapis Blue
TS Cat Bypass Pipes and exhaust
iPad Mini Dash Install
DEPO Tail Lights
BruceH is offline   Reply With Quote
Old 08-10-2022, 10:05 AM   #3
Registered User
 
Join Date: Oct 2018
Location: North Cali
Posts: 745
Garage
Good job. I did this with the top in place. I wouldn`t do it again.
Homeoboxter is offline   Reply With Quote
Old 08-10-2022, 10:27 AM   #4
Administrator
 
Join Date: Jan 2016
Posts: 204
This is awesome!
I love the dedication to it. I did the same on a BMW 3 series a few years ago but it came out nowhere near as clean as this.
I picked up 20 gauge UV rated clear vinyl, a pack of x20 neodymium magnets, some masking tape, and urethane caulking (like windo-weld).

It's still holding after 3 years but i really wish i took the time to sew it in properly

-Matt
Matt at Pelican Parts is offline   Reply With Quote
Old 08-19-2022, 03:51 PM   #5
Registered User
 
elgyqc's Avatar
 
Join Date: Sep 2018
Location: Laval QC
Posts: 684
Garage
My buddy Tony helped me to install the top today. Not too bad, there are some waves... that I hope will disappear with time and sunlight.
The top passed the garden hose water test with no leaks and I can see out the back again!


Now I have to do the window in my original roof and Tony wants me to do his this winter.
__________________
Grant
Arctic Silver 2000 Boxster S - bought with a broken engine, back on the road with the engine replaced
Green 2000 Boxster 5-speed and 1978 928 auto
1987 924S 5-speed (Sold) - Blue 2000 Boxster 5 spd (Sold)
elgyqc is offline   Reply With Quote
Old 08-26-2022, 12:59 PM   #6
Registered User
 
elgyqc's Avatar
 
Join Date: Sep 2018
Location: Laval QC
Posts: 684
Garage
I decided to do my original roof right away since the work area and tools were set up and the experience was fresh in my mind. This time I wanted to eliminate the wrinkles on the left and right sides (you can see them in the photo in the previous post) and tighten up the window as much as possible.
I used the same basic approach, glueing with Goop and sewing, and I again started with the bottom edge. Next I installed bungee cords under the last bow to pull the top of the window tight.


I added 2 other bungees diagonally to hold the top edge after this photo was taken.
With the window tight I sewed the top. After sewing I added the Goop as a sealant and glue between the window and the top.

Next I used more bungees to pull each end tight before sewing then sealing it.


The window is much tighter this time both horizontally and vertically. I will post a picture once it is installed on the car.
__________________
Grant
Arctic Silver 2000 Boxster S - bought with a broken engine, back on the road with the engine replaced
Green 2000 Boxster 5-speed and 1978 928 auto
1987 924S 5-speed (Sold) - Blue 2000 Boxster 5 spd (Sold)
elgyqc is offline   Reply With Quote
Old 08-27-2022, 07:30 AM   #7
Registered User
 
Rob175's Avatar
 
Join Date: Apr 2013
Location: Lincolnshire, IL
Posts: 445
Nice BUT way too much work for a used top in fair condition. Better to “bite the bullet” and buy a new top with either a plastic or glass rear window …… then if you want to save some money and have the time, install it yourself.

I went the route of a professional and used an experienced shop a few years ago. I recall that the total bill was $1,000 and it took them one day after the ordered top was received by the installer. (glass rear window)
__________________
98' Boxster
Rob175 is offline   Reply With Quote
Old 09-08-2022, 03:20 PM   #8
Registered User
 
elgyqc's Avatar
 
Join Date: Sep 2018
Location: Laval QC
Posts: 684
Garage
Quote:
Originally Posted by Rob175 View Post
Nice BUT way too much work for a used top in fair condition. Better to “bite the bullet” and buy a new top with either a plastic or glass rear window …… then if you want to save some money and have the time, install it yourself.

I went the route of a professional and used an experienced shop a few years ago. I recall that the total bill was $1,000 and it took them one day after the ordered top was received by the installer. (glass rear window)
Well, we have different priorities... I have more time than money. When I am ready to spend $1000 it will go into renewing the suspension.

Meanwhile I have been playing at musical tops. My original top is back on my car with its new window. I was able to do a better job than the first one, but still some wrinkles in the bottom left corner. If the top is taken off again I will tighten that up.


The "new" top which was on my car for a week or so came off and I pulled the sides a bit tighter before restitiching them. Got the worst of the wrinkles out. That top is now on my friend Tony's car and his top is in my garage waiting for its new window. Both new windows seem to be doing a good job of keeping water out.

The two windows that I have done so far are with 30 gauge vinyl that I bought a couple of years ago. After measuring what was originally on the tops I will be installing 40 gauge on Tony's.
__________________
Grant
Arctic Silver 2000 Boxster S - bought with a broken engine, back on the road with the engine replaced
Green 2000 Boxster 5-speed and 1978 928 auto
1987 924S 5-speed (Sold) - Blue 2000 Boxster 5 spd (Sold)
elgyqc is offline   Reply With Quote
Old 09-25-2022, 02:40 AM   #9
Registered User
 
elgyqc's Avatar
 
Join Date: Sep 2018
Location: Laval QC
Posts: 684
Garage
The third and final top is finished, I am steadily improving... I hope this will be the last one though.
The challenge is always to get the plastic as tight as possible so I used more bungee cords to pull the edges. As on the two others I started with gluing and sewing the bottom edge.

Pulling the top edge tight. This roof had a flap of material that connected to metal bow to the roof material so I could not pass the bungee under the bow. I used a big needle to pull some nylon cord through the flap and connect the bungee to the window.


Next, I used clamps to grab the edge of the roof and pull it down, the combination of pulling the window up and the edge of the roof down helped to tighten the installation.


At this point I sewed the top edge.

The ends are a challenge. Three bungee cords pulling the corners and the center and a clamp on the edge of the top to pull it in the opposite direction.


The ends were sewed and then the glue applied all the way around to seal the roof.

The roof is back on the car, I will add a photo... soon.
__________________
Grant
Arctic Silver 2000 Boxster S - bought with a broken engine, back on the road with the engine replaced
Green 2000 Boxster 5-speed and 1978 928 auto
1987 924S 5-speed (Sold) - Blue 2000 Boxster 5 spd (Sold)

Last edited by elgyqc; 11-24-2022 at 06:28 PM. Reason: spelling
elgyqc is offline   Reply With Quote
Old 09-30-2022, 03:24 PM   #10
Registered User
 
elgyqc's Avatar
 
Join Date: Sep 2018
Location: Laval QC
Posts: 684
Garage
Just a little loose in the bottom corners... but pretty good.

__________________
Grant
Arctic Silver 2000 Boxster S - bought with a broken engine, back on the road with the engine replaced
Green 2000 Boxster 5-speed and 1978 928 auto
1987 924S 5-speed (Sold) - Blue 2000 Boxster 5 spd (Sold)
elgyqc is offline   Reply With Quote
Old 11-24-2022, 07:54 AM   #11
Registered User
 
Join Date: Aug 2020
Location: Wheeling, West Virginia
Posts: 86
Garage
Great, now I have to at least try this before buying a new top. More work but like you more time than money to put into replacing a piece of plastic. I admire your dedication to getting this done. hope mine turns out even close to how good yours did.

Dllrd23 is offline   Reply With Quote
Post Reply


Posting Rules
You may not post new threads
You may not post replies
You may not post attachments
You may not edit your posts

BB code is On
Smilies are On
[IMG] code is On
HTML code is On
Trackbacks are On
Pingbacks are On
Refbacks are On


All times are GMT -8. The time now is 03:32 AM.


Powered by vBulletin® Version 3.8.7
Copyright ©2000 - 2024, vBulletin Solutions, Inc.
Content Relevant URLs by vBSEO 3.6.0
Copyright 2024 Pelican Parts, LLC - Posts may be archived for display on the Pelican Parts Website -    DMCA Registered Agent Contact Page