 11-28-2018, 07:27 PM
|
#21
|
|
Registered User
Join Date: Sep 2018
Location: Ca
Posts: 119
|
Thanks...thats what I thought but I really appreciate your feedback. 
Just waiting on my head gaskets and a little spare time...
|

|

|
|
12-05-2018, 05:55 PM
|
#22
|
|
Registered User
Join Date: Sep 2018
Location: Ca
Posts: 119
|
Had a little time to mount the head with the new gasket and new bolts.
Interesting process for those that have never done it before (me).
First you tighten, in sequence, all 12 bolts to 22 ft/lbs....and then loosen them back up. Next, you tighten them in sequence to 15 ft/lbs. Then, you use a torque angle gauge and tighten them 60* more...same sequence. Finally, you tighten each another 60*.
 
I will try and get cams back in by the weekend....
.....and I got lucky at an estate sale a couple weeks ago. Have wanted a lift for a while and could not pass this up. Works great.
There was some serious redneck engineering involved in getting it home.....fully assembled....7 miles.....on the back of a 5x8 Uhaul trailer.
No tickets.

Should make oil changes at home much easier....
|
|
|
|
|
12-06-2018, 06:43 AM
|
#23
|
|
Registered User
Join Date: Jan 2014
Location: New Jersey
Posts: 1,631
|
Well done sir!
|
|
|
|
|
12-08-2018, 01:08 PM
|
#24
|
|
Registered User
Join Date: Sep 2018
Location: Ca
Posts: 119
|
Went to install the new lifters today. Brand new INA units. I could not depress them at all. My old used units could easily be 'plungered' with firm finger pressure.
Can I assume the new units are full of oil from the manufacturer and do no require pumping up on the bench?
Also, my access to shop computers wont resume until monday...does anyone have an online source for torque specs for cam follower housing, cam caps, etc?
Thanks
|
|
|
|
|
12-12-2018, 06:58 PM
|
#25
|
|
Registered User
Join Date: Sep 2018
Location: Ca
Posts: 119
|
Big day today. Was able to finally mount the cams....twice!

After tinkering for a while to get the bottom/exhaust cam to seat into its drive sprocket and getting everything torqued down....I did a victory lap around the shop. Once back down to earth, I grabbed my next baggie of bolts which contained the 3x5 note card and 4 bolts. The card read "Head Bolts-3 external, one internal".
WTF? Internal?
It was at this time, he realized he ********* up.
I even remember thinking when I was tearing down...'Don't want to forget about that one'...
It was located behind the chain after it looped over the intake sprocket. The only way to get to it....undo all the progress of mounting the cams and start over.

The second time was much easier...probably had the whole thing done in 20 minutes.
Surprisingly little amount of torque on cam caps @ 10nm/7.5ft lbs and for the exhaust cam sprocket mounting bolts at 13nm/10.3 ft lbs...
Last edited by Ottomotion; 12-12-2018 at 07:02 PM.
|
|
|
|
|
12-12-2018, 08:02 PM
|
#26
|
|
Registered User
Join Date: Jun 2012
Location: Bedford, TX
Posts: 2,755
|
I hate it when that happens! I always seem to forget something and have to start over. Im glad Im not the only one. Nice work
__________________
______________________________________________
2001 Boxster S Lapis Blue
TS Cat Bypass Pipes and exhaust
iPad Mini Dash Install
DEPO Tail Lights
|

|
|
|
12-18-2018, 09:27 PM
|
#27
|
|
Registered User
Join Date: Sep 2018
Location: Ca
Posts: 119
|
Got the 4-6 bank all buttoned up and started to tear down the 1-3 side. Much quicker this time since I have the experience of doing the other side under my belt. My thinking is since the motor is out, I will replace springs and lifters on both sides as well as even up the head surface amounts.
Got all the way down to the head studs and hit a snag.
I know there is a small bolt hiding behind the upper chain guide (see earlier post for how came to know this so well). However, that chain guide did not seem to want to drop down to give me access to that bolt. I undid the rail pivot pin on the side of the head but the guide seems to hold firm. I know there is one deeper back, but I still have the transmission bolted to the motor and can not see where that pins head is accessed.
So, question for the experts....should that guide pivot downward with just the front pivot pin out? If not, where is the rear pin located?
Thanks in advance for any guidance...
This is a 3 chain motor.

Last edited by Ottomotion; 12-18-2018 at 10:22 PM.
|
|
|
|
|
12-19-2018, 06:38 AM
|
#28
|
|
Registered User
Join Date: Sep 2018
Location: Ca
Posts: 119
|
Looked at some pics and I see what appears to be my answer....the allen-head of the rear pin just to the right and above the IMS bearing....inaccessible with the transmission still mounted.
Can someone confirm whether or not the guide will pivot with the front pin removed?
|
|
|
|
|
12-24-2018, 04:38 PM
|
#29
|
|
Registered User
Join Date: Sep 2018
Location: Ca
Posts: 119
|
On the Twelfth day of Christmas my true love gave to me....Twelve installed new valve springs! (Ok...she didn't give those to me, but she did let me sneak down to the shop for a few hours to get them done).
Head is staying on so I just installed them myself with a valve spring compressor. Working with magnets and dental tools to place the keepers correctly all the while trying not to mar the smooth surfaces that surround the springs...


|
|
|
|
|
12-29-2018, 06:09 PM
|
#30
|
|
Registered User
Join Date: Sep 2018
Location: Ca
Posts: 119
|
Pretty big day....
For all you guys that have experienced that moment when you turn the key and it comes to life.....sure is a rush.
Smoke cleared up after a minute or so.....a little residual in the cylinders to keep them lubed during the build.
https://youtu.be/nOvUWr3ckR4
|
|
|
|
|
12-29-2018, 06:18 PM
|
#31
|
|
Registered User
Join Date: Jun 2012
Location: Bedford, TX
Posts: 2,755
|
Nice, has to be a great feeling
__________________
______________________________________________
2001 Boxster S Lapis Blue
TS Cat Bypass Pipes and exhaust
iPad Mini Dash Install
DEPO Tail Lights
|
|
|
|
|
12-29-2018, 07:25 PM
|
#32
|
|
Registered User
Join Date: Feb 2018
Location: Portland OR
Posts: 35
|
Great job, Otto.
Andrew
|
|
|
|
|
12-29-2018, 08:02 PM
|
#33
|
|
1997 Tip, 2018 Macan
Join Date: Aug 2015
Location: Upland, CA
Posts: 1,338
|
Well done sir. That is great feeling indeed. :dance:
|
|
|
|
|
12-29-2018, 08:05 PM
|
#34
|
|
Registered User
Join Date: Aug 2018
Location: OK
Posts: 186
|
awesome job!
__________________
07 Porsche Cayman S speed yellow
87 Porsche 924S Carrera GT project/ 951 engine transplant
2015 BMW X5
|
|
|
|
|
12-30-2018, 10:55 AM
|
#35
|
|
Registered User
Join Date: Oct 2018
Location: North Cali
Posts: 858
|
Congrats! You buttoned it up quite quickly, I`m still so far behind with mine but coming along slowly.
|
|
|
|
|
12-30-2018, 02:27 PM
|
#36
|
|
Registered User
Join Date: Sep 2018
Location: Ca
Posts: 119
|
Well the Durametric is showing a p1341 code.(Porsche fault code 900-inlet camshaft bank 1) I am certain the cams were reinstalled in the exact spots prior to disassembly, both banks were locked using the cam lock tool while the crank was pinned at TDC during the operation.
The data shows no deviation for the first few minutes. Then, bringing the motor off of idle to @ 2000-2500 rpm, the Durametric starts showing CP1 Dev at -0.98 and CP2 Dev at 1.14 where they stay steady regardless of rev or idle.
No CEL light on.
Any thoughts?
The car has had the IMS done using LN bearing....
Last edited by Ottomotion; 12-30-2018 at 03:10 PM.
|
|
|
|
|
12-30-2018, 03:16 PM
|
#37
|
|
Registered User
Join Date: Sep 2018
Location: Ca
Posts: 119
|
second test an hour and a beer later...
Car idled for 5 minutes.....no deviatiion.
Ran the revs up to 3000 rpm for 5 minutes...no deviation
did several revs up off of idle to 3500-4000 and let back to idle when it finall started showing a p1341 again. This time Cam 1 -0.89 and cam 2 1.28
Still no CEL
What are the allowable deviation values and could it be I am within them?
|
|
|
|
|
12-30-2018, 05:46 PM
|
#38
|
|
Registered User
Join Date: Dec 2009
Location: Orange County, CA
Posts: 2,014
|
Otto, I believe that in order to get an accurate cam deviation reading you should drive your car for at least 20 minutes to ensure it is properly warmed up.
|
|
|
|
|
12-30-2018, 05:53 PM
|
#39
|
|
Who's askin'?
Join Date: Mar 2018
Location: Utah
Posts: 2,448
|
Quote:
Originally Posted by Ottomotion

What are the allowable deviation values and could it be I am within them?
|
I've read elsewhere on this forum that deviation numbers up to 7 are "acceptable". Anything over 5 though, should indicate a problem.
Your numbers seem just grand to me. Considering the imperfect way the cams are driven.... it's amazing we can get THAT close, honestly.
Sent from my SM-G930T using Tapatalk
|
|
|
|
|
12-30-2018, 06:51 PM
|
#40
|
|
Registered User
Join Date: Sep 2018
Location: Ca
Posts: 119
|
Well...I had to go on a test drive :dance:
I have logged 30 miles and temps are holding well.
Deviations are as well.....
Cam 1 -0.75
Cam 2 1.28
...and they have not really moved off of those numbers. I think getting the car warmed up and in proper operating temps was important.
Still no CEL
I wonder if they ever came from porsche with dead-on numbers?
Thanks for the input!
Going to try for a smog cert tomorrow....
Otto
|
|
|
|
 Posting Rules
|
You may not post new threads
You may not post replies
You may not post attachments
You may not edit your posts
HTML code is On
|
|
|
All times are GMT -8. The time now is 04:52 AM.
| |


 2001 Boxster S
 1997 Porsche Boxster
 2018 Porsche Macan
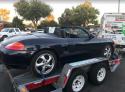 Boxster
 Linear Mode


