 11-08-2017, 05:58 AM
|
#21
|
|
Registered User
Join Date: Apr 2017
Location: Indiana
Posts: 1,512
|
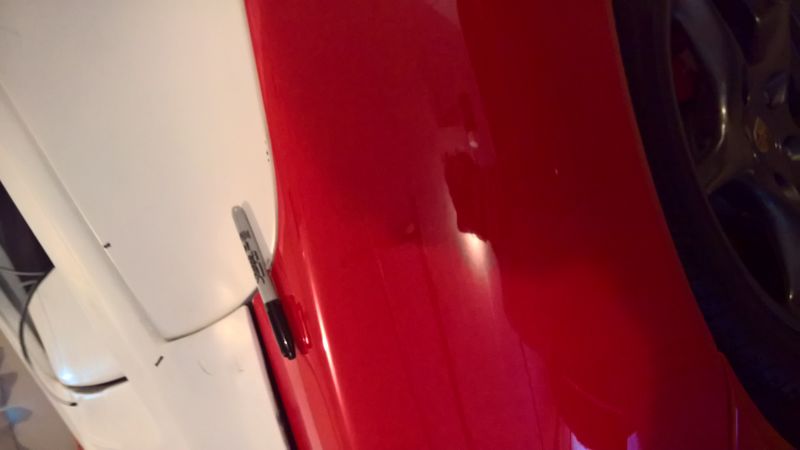
Its not the spinlock shafts. They are the same length on factory. Don't know if you can tell by this pic but pass side is flush. Hatch on without hinges, latched. It won't go any lower even with weight or downward pressure. Still waiting for small molding piece so i can make the final, very minor trimming. I'm going to work on driver's side today its almost flush. Got tired last night. I'll update as soon as I see how that's going to go. 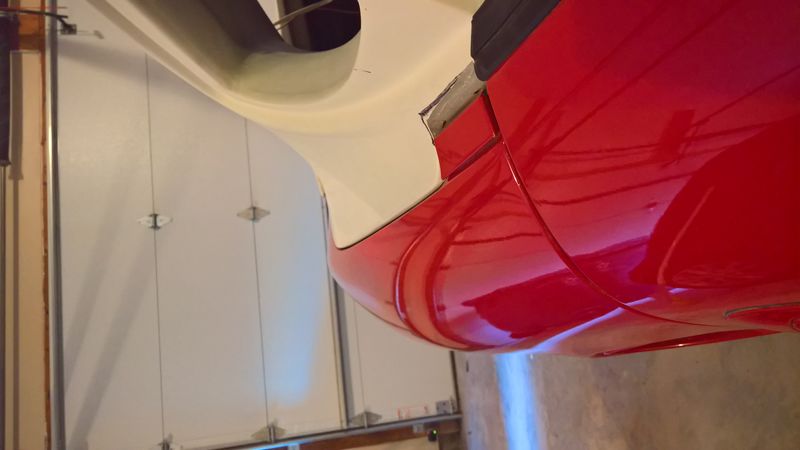
|

|

|
 11-08-2017, 06:00 AM
|
#22
|
|
Registered User
Join Date: Apr 2017
Location: Indiana
Posts: 1,512
|
Quote:
Originally Posted by itsnotanova

If you bought them used, maybe they sold you the front hinges and not the rear? The hinges I sold JBuaer were off a 2001 or 98. I can't remember which one but I believe they're all the same from1997-04.
|
I believe Bran bought new hinges. Maybe they are too tightly put together being new? Mine fit really nice. ��
Last edited by JBauer; 11-08-2017 at 06:30 AM.
|

|

|
 11-08-2017, 08:22 AM
|
#23
|
|
WALDMEISTER
Join Date: Sep 2013
Location: Germany
Posts: 1,381
|
Quote:
Originally Posted by itsnotanova

If you bought them used, maybe they sold you the front hinges and not the rear? The hinges I sold JBuaer were off a 2001 or 98. I can't remember which one but I believe they're all the same from1997-04.
|
Hmmm....I bought mine brand new from my dealership:
98651215101
98651215201
If I use the standard holes, the hatch sits too high up and too up front.
So I extended the holes in the hinges...will see how it fits with the modifications
@JB: What screws did you use for the hatch? Manual says "not to use wrong screws", but does not mention what the correct ones are for the hatch...lol...
__________________
Original Owner | PORSCHE Boxster 2.7L (MY01) | Seal Gray
|

|

|
 11-08-2017, 08:29 AM
|
#24
|
|
WALDMEISTER
Join Date: Sep 2013
Location: Germany
Posts: 1,381
|
I checked the rubber seal underneath the TOP...it sits on it.
But I think it should, to keep moisture/water away. So I would say to keep it where it is. Nonetheless a cool idea to let the TOP sink extra mm.
__________________
Original Owner | PORSCHE Boxster 2.7L (MY01) | Seal Gray
|

|

|
 11-08-2017, 09:07 AM
|
#25
|
|
Registered User
Join Date: Apr 2017
Location: Indiana
Posts: 1,512
|
Quote:
Originally Posted by BRAN

Hmmm....I bought mine brand new from my dealership:
98651215101
98651215201
If I use the standard holes, the hatch sits too high up and too up front.
So I extended the holes in the hinges...will see how it fits with the modifications
@JB: What screws did you use for the hatch? Manual says "not to use wrong screws", but does not mention what the correct ones are for the hatch...lol...
|
I used the factory bolts. That way I cant lose them and the fit great.
|

|

|
 11-08-2017, 09:10 AM
|
#26
|
|
Registered User
Join Date: Apr 2017
Location: Indiana
Posts: 1,512
|
Quote:
Originally Posted by BRAN

I checked the rubber seal underneath the TOP...it sits on it.
But I think it should, to keep moisture/water away. So I would say to keep it where it is. Nonetheless a cool idea to let the TOP sink extra mm.
|
Ya I thought about that. I'm thinking about replacing it with something rubber that is thinner.
|

|

|
 11-08-2017, 09:52 AM
|
#27
|
|
WALDMEISTER
Join Date: Sep 2013
Location: Germany
Posts: 1,381
|
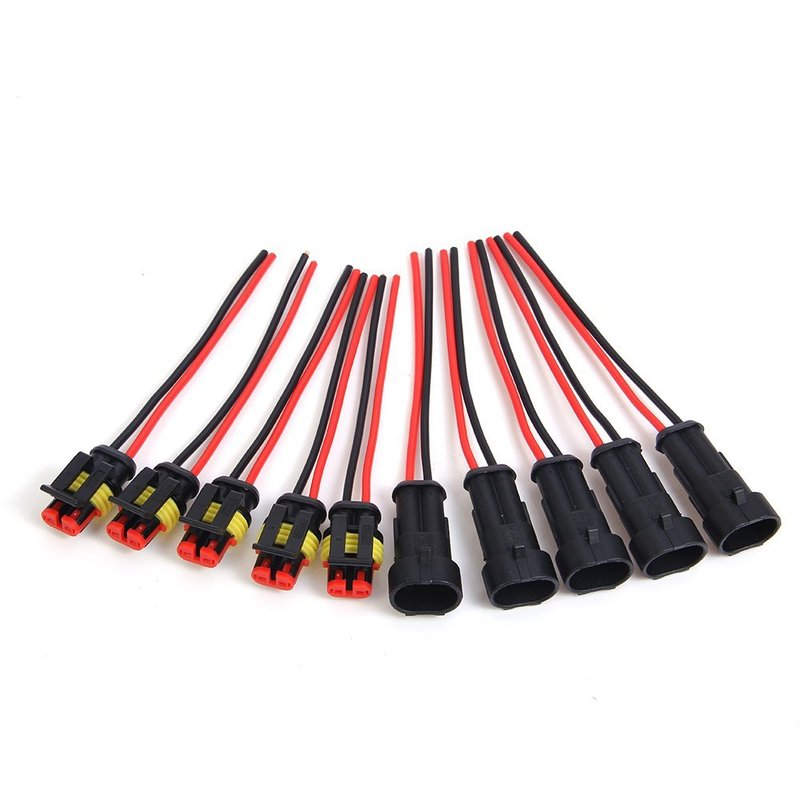
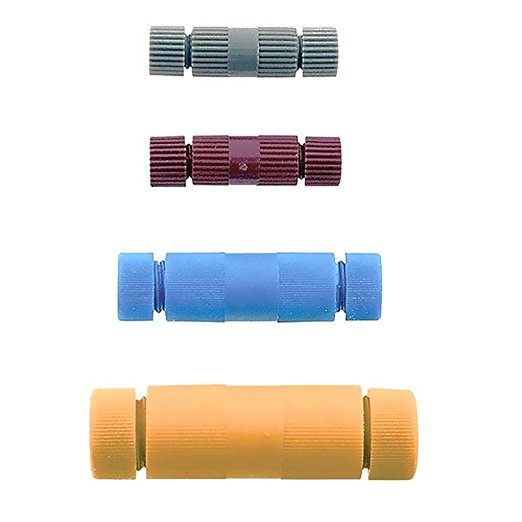
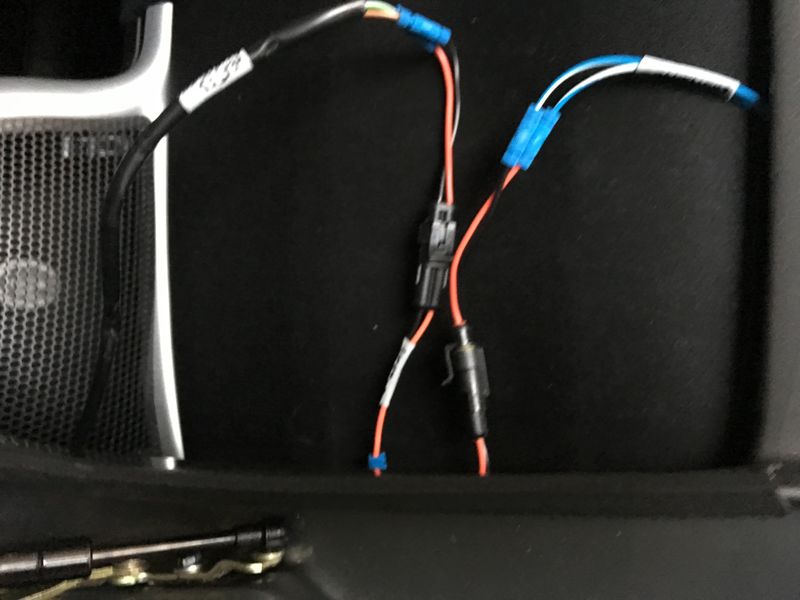
some plug'n'play mods, takes 10secs now to cable connect the Z-top.
I pulled the cables out for a pic, 3rd brake light and rear window defroster.
I usually route them underneath the TOP.
What I bought:
OEM cables:
-cable adapter Hardtop 98661208300
-REAR 3RD BRAKE LIGHT WIRING HARNESS WIRE 99661204100
aftermarket stuff:
-CABLE CONNECTORS 9 STCK1.0 - 2.5MM POSI LOCK PL601
-car, waterproof male/female connectors
-crimps etc..

__________________
Original Owner | PORSCHE Boxster 2.7L (MY01) | Seal Gray
Last edited by BRAN; 11-08-2017 at 10:06 AM.
|

|

|
 11-09-2017, 04:21 AM
|
#28
|
|
Registered User
Join Date: Apr 2017
Location: Indiana
Posts: 1,512
|
I'll definitely pickup some those. We wiring and windows should be a challenge.
Thanks again
|

|

|
 11-09-2017, 07:38 PM
|
#29
|
|
Registered User
Join Date: Apr 2017
Location: Indiana
Posts: 1,512
|
|

|

|
 11-10-2017, 07:14 AM
|
#30
|
|
Registered User
Join Date: Apr 2017
Location: Indiana
Posts: 1,512
|
Bran, no need to remove your clamshell gasket to get a better fit. All you need to do is pop it loose and remove this thing. It just clips to the bottom of the gasket a few inches from the end it on each side. That's what I believe was keeping the top from seating better. It's almost a 1/2 inch thick. Those remove, gasket back on I see no diff from the fit with gasket removed :dance:
Oh and does anyone know what this is for? 
Last edited by JBauer; 11-10-2017 at 07:19 AM.
|

|

|
 11-10-2017, 09:16 AM
|
#31
|
|
Registered User
Join Date: Apr 2017
Location: Indiana
Posts: 1,512
|
Trimming
Started trim today on my top to try to get the bow out of my decklid.
Sorry I have no idea why these pics are all diff ways. The pic were loaded right side up
Measure twice, grind once: 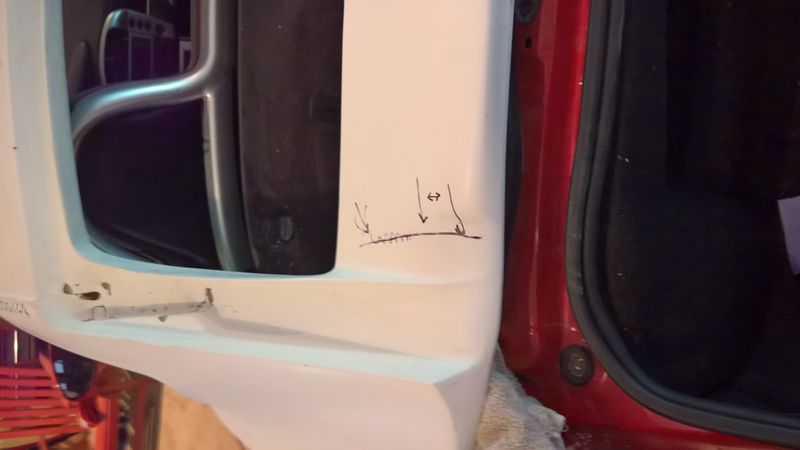
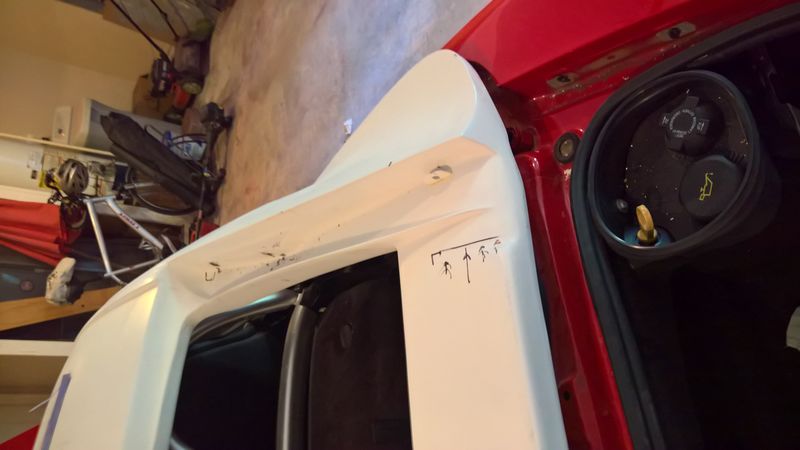
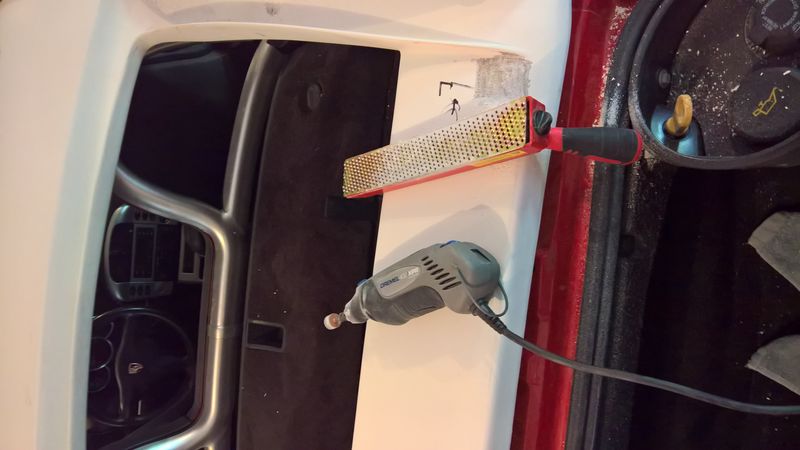
Several have told me they had to wallow out the holes in his their hinges to fit but after assessing the situation I decided to also shave off the FGlass where the hinges were bottoming out. 
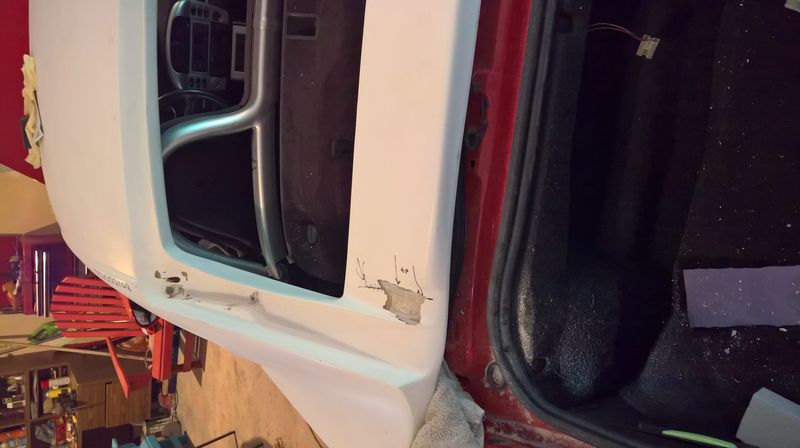
The hinges will now adjust to the lowest level possible but I think I'm going to have to shave a little more at the contact points to get rid of the bow.
Better but not gone yet. 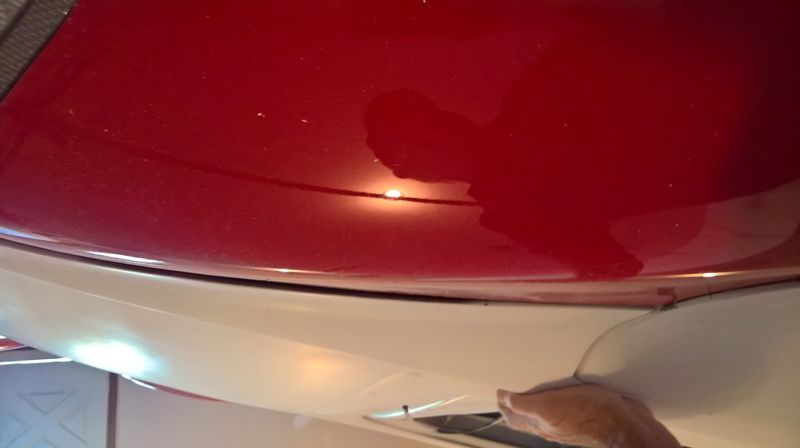 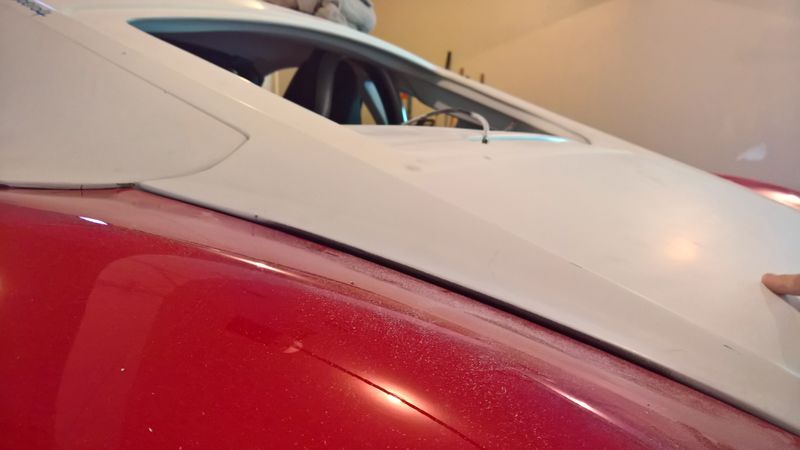
Last edited by JBauer; 11-10-2017 at 10:14 AM.
|

|

|
 11-10-2017, 12:38 PM
|
#32
|
|
Registered User
Join Date: Apr 2017
Location: Indiana
Posts: 1,512
|
|

|

|
 11-10-2017, 03:53 PM
|
#33
|
|
Registered User
Join Date: May 2016
Location: Northern Indiana
Posts: 410
|
Quote:
Originally Posted by JBauer

Oh and does anyone know what this is for?  |
If you can make out the p/n, search the .pdf of PET catalog, but my guess is an alignment bracket for the gasket or a stop for the frunk hood, but then again just a guess.
|

|

|
 11-10-2017, 05:49 PM
|
#34
|
|
Registered User
Join Date: Apr 2017
Location: Crown King and Sun City, AZ
Posts: 66
|
That is an adjuster for the convertible top under the clamshell on each side. I think it adjusts how firmly the clamshell rests on the weather stripping. Iím sure others will chime in. I just replaced one last week, $8.50 at Sunset
__________________
Dave
1998 Boxster
1978 R100RS BMW Motorcycle 140K, 1 owner
|

|

|
 11-11-2017, 07:27 AM
|
#35
|
|
Registered User
Join Date: Apr 2017
Location: Indiana
Posts: 1,512
|
Messaged the guy that makes these tops today to get some help on fitting. Really nice guy.
Last edited by JBauer; 11-11-2017 at 03:12 PM.
|

|

|
 11-12-2017, 07:39 AM
|
#36
|
|
Registered User
Join Date: Apr 2017
Location: Indiana
Posts: 1,512
|
Last edited by JBauer; 11-12-2017 at 07:58 AM.
|

|

|
 11-12-2017, 07:59 AM
|
#37
|
|
Registered User
Join Date: Apr 2017
Location: Indiana
Posts: 1,512
|
Forgot one. I haven't finished trimming here. 
|

|

|
 11-12-2017, 01:34 PM
|
#38
|
|
Registered User
Join Date: Apr 2017
Location: Indiana
Posts: 1,512
|
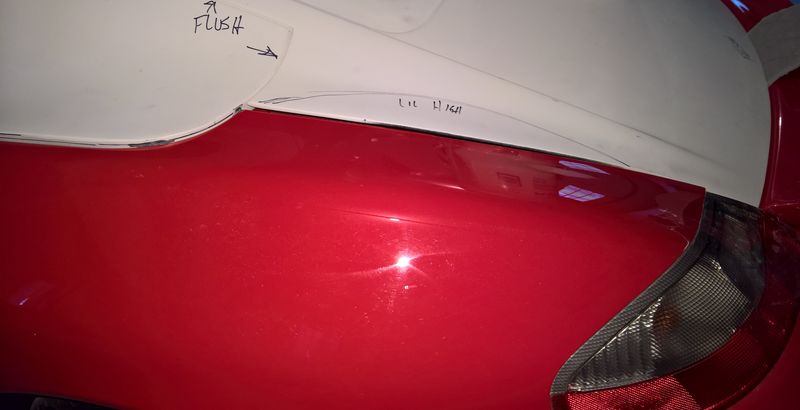
Working those trunk bows out 😀 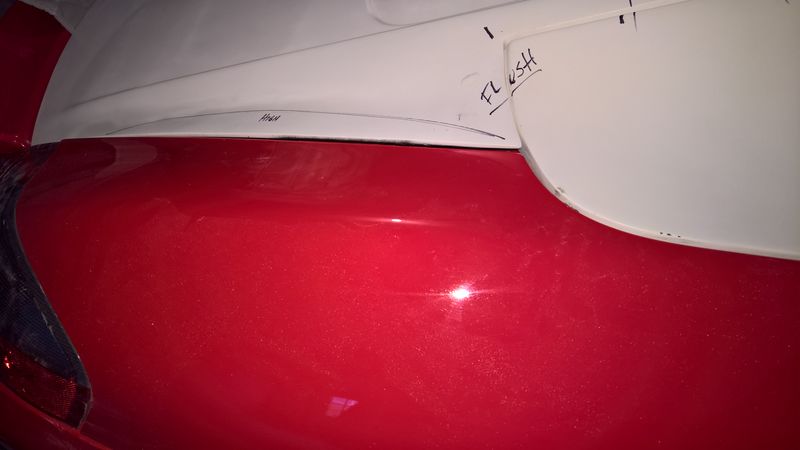
|

|

|
 11-13-2017, 09:42 AM
|
#39
|
|
Registered User
Join Date: Apr 2017
Location: Indiana
Posts: 1,512
|
|

|

|
 11-13-2017, 10:31 AM
|
#40
|
|
Registered User
Join Date: Apr 2017
Location: Indiana
Posts: 1,512
|
|

|

|
 Posting Rules
|
You may not post new threads
You may not post replies
You may not post attachments
You may not edit your posts
HTML code is On
|
|
|
All times are GMT -8. The time now is 04:44 AM.
| |