 07-02-2019, 05:39 AM
|
#5101
|
|
Registered User
Join Date: Jan 2019
Location: PA
Posts: 1,726
|
Quote:
Originally Posted by Starter986

Saturday was cruising the 62 in the lower desert, after coming from above. The outside temperature was rising and, top down, the wife was finding it uncomfortable. Came to that complete stop... put it in park... emergency brake up... and closed the top.
Sunday morning took the 37 seconds to pull the relay... bend pin 18... and slap it back in. Went for a three block cruise opening the top while driving at ~30 MPH. Closed it at ~30MPH. Works great. Free convenience mod.
The only downside is that employing that feature means no karate chop.
Cheers!
|
I've been thinking about that mod. I've been wondering if there are any downsides to it, but I guess there aren't, except the "karate chop". I Don't even know what that is! LOL
30PMH! Wow you're brave! I'd be afraid of the top acting like a parachute and snapping the frame! 
Last edited by piper6909; 07-02-2019 at 05:45 AM.
|

|

|
|
07-02-2019, 06:53 AM
|
#5102
|
|
1998 Boxster Silver/Red
Join Date: Sep 2017
Location: 92262
Posts: 3,105
|
Quote:
Originally Posted by piper6909
I've been thinking about that mod. I've been wondering if there are any downsides to it, but I guess there aren't, except the "karate chop". I Don't even know what that is! LOL
30PMH! Wow you're brave! I'd be afraid of the top acting like a parachute and snapping the frame! |
No downside that I know of.
The karate chop is when you start to lower the top... about half-way... hop out... and "chop" the middle of the vinyl window in the middle so that when completely you open the top the window nicely will be folded in the middle... as opposed to scrunching up.
Some put a soft towel or microfiber cloth to further mitigate any light scratching or crease marks.
If you do the top mod and find it's not for you... you can just bend back #18.
There was no wind that morning I tested the feature. I wouldn't try it in a strong headwind. 
I found Pedro's instructions were complete.
Top Operational while-in-motion
Cheers!
__________________
1998 Porsche Boxster
|
|
|
|
|
07-02-2019, 08:22 AM
|
#5103
|
|
Registered User
Join Date: Jan 2019
Location: PA
Posts: 1,726
|
Quote:
Originally Posted by Starter986
No downside that I know of.
The karate chop is when you start to lower the top... about half-way... hop out... and "chop" the middle of the vinyl window in the middle so that when completely you open the top the window nicely will be folded in the middle... as opposed to scrunching up.
Some put a soft towel or microfiber cloth to further mitigate any light scratching or crease marks.
If you do the top mod and find it's not for you... you can just bend back #18.
There was no wind that morning I tested the feature. I wouldn't try it in a strong headwind.
I found Pedro's instructions were complete.
Top Operational while-in-motion
Cheers! |
Awesome! Thanks!
|
|
|
|
|
07-02-2019, 04:45 PM
|
#5104
|
|
Registered User
Join Date: Feb 2015
Location: QC
Posts: 415
|
Quote:
Originally Posted by Starter986
Saturday was cruising the 62 in the lower desert, after coming from above. The outside temperature was rising and, top down, the wife was finding it uncomfortable. Came to that complete stop... put it in park... emergency brake up... and closed the top.
Sunday morning took the 37 seconds to pull the relay... bend pin 18... and slap it back in. Went for a three block cruise opening the top while driving at ~30 MPH. Closed it at ~30MPH. Works great. Free convenience mod.
The only downside is that employing that feature means no karate chop.
Cheers!
|
Just did this. Another up side is putting the roof up in slow moving traffic when rain starts.
I was in your neck of the woods,(stayed at the best Western on 62 in Yucca), for Memorial Day weekend. Joshua tree, Pappy& Harriets, stoned and dusted. Love the area but it was unseasonably cold Sunday night in the mountains for stoned and dusted. Planning to return.
|
|
|
|
|
07-02-2019, 05:44 PM
|
#5105
|
|
Registered User
Join Date: Mar 2018
Location: Fort Langley
Posts: 253
|
Adjusted parking brake and then installed new fuel filter. Car has ~175k kms (109k miles) on the dial now.
Thinking fuel pump next. I'm getting sporadic hesitation when I pin the gas, like it's not getting enough fuel. So thinking the fuel pump is on it's last legs and I don't want to get stranded. Might as well do water pump as well.
__________________
----------------------------
98 Boxster - Ocean Blue metallic. Bringing it back to life and having fun doing it!
20 Harley Streetbob -
Last edited by Zzorro; 07-02-2019 at 05:46 PM.
|
|
|
|
|
07-03-2019, 02:31 PM
|
#5106
|
|
Registered User
Join Date: Mar 2013
Location: New York
Posts: 347
|
Headlights
I replaced my original lights with CCFLS purchased from Dubaday. Not to hard to do. Also replaced the trunk struts.
|
|
|
|
|
07-04-2019, 05:22 AM
|
#5107
|
|
1998 Boxster Silver/Red
Join Date: Sep 2017
Location: 92262
Posts: 3,105
|
Quote:
Originally Posted by WillH
Just did this. Another up side is putting the roof up in slow moving traffic when rain starts.
I was in your neck of the woods,(stayed at the best Western on 62 in Yucca), for Memorial Day weekend. Joshua tree, Pappy& Harriets, stoned and dusted. Love the area but it was unseasonably cold Sunday night in the mountains for stoned and dusted. Planning to return.
|
The Best Western... right up the street from me. Connect with me next time you're in town. We'll race up and down the pass. I'm up to 100MPH. Coming up the curves.
__________________
1998 Porsche Boxster
|
|
|
|
|
07-04-2019, 06:26 AM
|
#5108
|
|
Registered User
Join Date: Aug 2018
Location: OK
Posts: 186
|
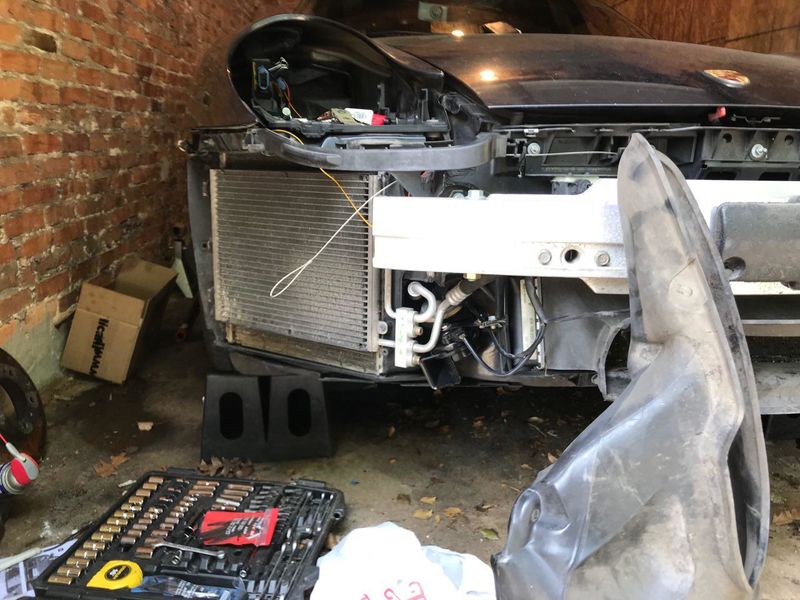
Finally got the Boxster back on the road after replacing a broken CV joint, motor/tranny mounts, wheel bearings, new clutch/flywheel/RMS, IMS bearing, AOS, spark plugs, all filters, coolant tank, coolant, water pump, Tstat, and to top it off...speedline style wheels

__________________
07 Porsche Cayman S speed yellow
87 Porsche 924S Carrera GT project/ 951 engine transplant
2015 BMW X5
Last edited by jmitro; 07-04-2019 at 06:28 AM.
|
|
|
|
|
07-04-2019, 06:40 PM
|
#5109
|
|
Registered User
Join Date: Jan 2014
Location: New Jersey
Posts: 1,631
|
Today I drove my 2003 S 460 miles to Mt Tremblant for an HPDE. Returning to the scene of the crime as it were, it is exactly 1 year ago that I drove here and my IMSB failed before I got on the track. So far so good, the event starts in the morning!
__________________
Current: 2022 718 Cayman GT4, PDK bone stock (the dark side).
Former: 2003 S, 3.6 LN Nickies, ARP rod bolts, under-drive pulley, Fabspeed sport headers, Softronic tune, 987 airbox 987 motor mount, Function-First Sport motor mount insert, Ben's short shifter, Nine8Six projector headlights & center caps, ROW M030, stainless flexible brake lines, B-K rollbar extension & fire extinguisher mount, hardtop
|
|
|
|
|
07-05-2019, 05:12 AM
|
#5110
|
|
1998 Boxster Silver/Red
Join Date: Sep 2017
Location: 92262
Posts: 3,105
|
Quote:
Originally Posted by jmitro
Finally got the Boxster back on the road after replacing a broken CV joint, motor/tranny mounts, wheel bearings, new clutch/flywheel/RMS, IMS bearing, AOS, spark plugs, all filters, coolant tank, coolant, water pump, Tstat, and to top it off...speedline style wheels
|
Did you effect the repairs, or a shop?
__________________
1998 Porsche Boxster
|
|
|
|
|
07-05-2019, 06:48 AM
|
#5111
|
|
Registered User
Join Date: Aug 2018
Location: OK
Posts: 186
|
I did them all myself
__________________
07 Porsche Cayman S speed yellow
87 Porsche 924S Carrera GT project/ 951 engine transplant
2015 BMW X5
|
|
|
|
|
07-05-2019, 10:32 AM
|
#5112
|
|
Registered User
Join Date: Feb 2015
Location: QC
Posts: 415
|
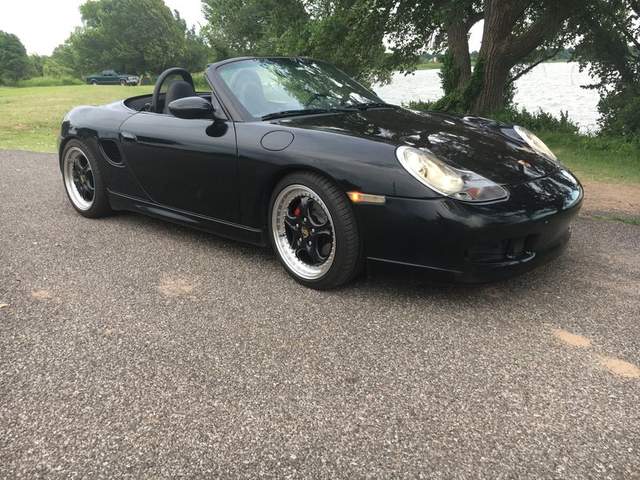
Received a performance award in it 
|
|
|
|
|
07-06-2019, 04:38 AM
|
#5113
|
|
Registered User
Join Date: Oct 2018
Location: Evergreen, CO
Posts: 108
|
Super quick trip to Durango and back from the foothills of Colorado for the Fourth of July. 5.5 hours each way but a beautiful drive, top down almost all the way. Even caught up to a base model in the same color combo as my S model. (Didnt think to take pics of that tho.)
Overnight 1 in Salida at a great hostel, which is much more of a B&B. Overnight 2 just outside Durango and then back home yesterday.
Car did beautifully the whole way.
     
imhighlander
Evergreen CO
PCA-RMR
2004 986S/6
|
|
|
|
|
07-06-2019, 11:08 AM
|
#5114
|
|
Registered User
Join Date: Aug 2017
Location: Los Osos, CA
Posts: 32
|
I replaced my headlamp switch and installed a Continental CDD7416UB-OR head unit.
|
|
|
|
|
07-06-2019, 01:24 PM
|
#5115
|
|
Registered User
Join Date: Jun 2013
Location: Central Pennsylvania, USA
Posts: 102
|
Went for drive with my daughter on the Autobahn to enjoy the afternoon, knock some rust off the brakes and listen to (her) K-Pop. Unfortunately, I heard and felt a thunk from the clutch pedal as I was shifting and the pedal stayed on the floor. A couple of hours waiting and a flatbed trip later, my car is sitting in my mechanic's parking lot, dripping fluid. Ugh.
__________________
2000 Boxster S - B.A.D. short shifter and intake plenum - 996 throttle body - Fred's xenon projector headlights - blue LED instrument cluster - and a few other things
Driving this car makes me wish I lived farther away from work!
|
|
|
|
|
07-06-2019, 01:37 PM
|
#5116
|
|
Registered User
Join Date: Jan 2019
Location: PA
Posts: 1,726
|
Quote:
Originally Posted by Troy.Boxster
Went for drive with my daughter on the Autobahn to enjoy the afternoon, knock some rust off the brakes and listen to (her) K-Pop. Unfortunately, I heard and felt a thunk from the clutch pedal as I was shifting and the pedal stayed on the floor. A couple of hours waiting and a flatbed trip later, my car is sitting in my mechanic's parking lot, dripping fluid. Ugh.
|
Sounds like you many have just burst a hydraulic line. Sucks, but I could have been worse.
|
|
|
|
|
07-06-2019, 02:21 PM
|
#5117
|
|
Registered User
Join Date: Jun 2013
Location: Central Pennsylvania, USA
Posts: 102
|
Quote:
Originally Posted by piper6909
Sounds like you many have just burst a hydraulic line. Sucks, but I could have been worse.
|
That is what I'm thinking about the line, but I'm no expert with the clutch hydraulic system. I'm sure I have many hoses and lines that are ready to be replaced. Luckily, the auto-hobby shop is opening on the base where I live, so I should have easy access to get after these soon-to-fail items.
And you're right... it could have been worse. Lots of thoughts were going through my head about if it was the engine, transmission, or what as I was pulling off the road... but everything else seemed fine so it might just be something with the hydraulics, I hope.
__________________
2000 Boxster S - B.A.D. short shifter and intake plenum - 996 throttle body - Fred's xenon projector headlights - blue LED instrument cluster - and a few other things
Driving this car makes me wish I lived farther away from work!
|
|
|
|
|
07-06-2019, 02:32 PM
|
#5118
|
|
Registered User
Join Date: Jan 2019
Location: PA
Posts: 1,726
|
Quote:
Originally Posted by Troy.Boxster
That is what I'm thinking about the line, but I'm no expert with the clutch hydraulic system. I'm sure I have many hoses and lines that are ready to be replaced. Luckily, the auto-hobby shop is opening on the base where I live, so I should have easy access to get after these soon-to-fail items.
And you're right... it could have been worse. Lots of thoughts were going through my head about if it was the engine, transmission, or what as I was pulling off the road... but everything else seemed fine so it might just be something with the hydraulics, I hope.
|
Yeah, I'll bet dollars to donuts that it's a hydraulic line. Pedal on the floor is the dead giveaway.
You're on a base? You're in the service? Thank you!
|
|
|
|
|
07-07-2019, 06:39 PM
|
#5119
|
|
Registered User
Join Date: Jan 2019
Location: Baltimore, MD
Posts: 24
|
love seeing your babes ;)
I see a lot of beautiful boxsters being posted - thanks for sharing and for the motivation to get mine out hahaha..
Still have a bunch of work I really wanna do. Cleared some items off the the to-do list this weekend. Replaced the low tone horn that wasn't working, cleaned out the side vents at the same time and replaced cabin/engine filter. In the process of flushing transmission fluid and engine oil/filter (with the filter-housing-magnets mod)
Not gonna have beautiful pics out of my girl out yet, but hopefully by the end of the summer...


|
|
|
|
|
07-08-2019, 05:22 AM
|
#5120
|
|
Seal1968
Join Date: May 2019
Location: Chatsworth, Canada
Posts: 137
|
Drove her to the Auburn area for the weekend...roughly a 7 hour trip each way...ran flawlessly.
She pulled hard through the twisty hills, and on the freeway.
It was my first long drive with my S...top down most of the way.
Just need to remember sunblock lol.
|
|
|
|
 Posting Rules
|
You may not post new threads
You may not post replies
You may not post attachments
You may not edit your posts
HTML code is On
|
|
|
All times are GMT -8. The time now is 10:15 AM.
| |


 Linear Mode


