Installed a 997 Shifter and Revised E-Brake Switch
I had to take out the center console to re-paint it. The silver paint was bubbling in a few places. While I had the console out, I installed the 997 shifter that I bought used about two years ago. I also installed the revised e-brake switch. My e-brake switch had been sticking from time-to-time which interfered with the soft-top operation.
Here are some pictures of the old and new shifters. The first two photos show the 997 shifter and the third is the original 986 shifter. The 997 shifter has a substantial metal mounting bracket that attaches the mechanism to the shift lever.
The shifts with the 997 part are much more precise and the distance I need to move the gear lever between gears is slightly shorter than with the 986 factory part. Porsche made a short shifter for the 997, but that has a different part number.
__________________
2000 Arctic Silver/Black, Hard Top, On Board Computer
PNP Rear Speakers, HAES 6-Channel Amp, Avic Z140BH,
Painted Bumperettes, 2004 (OEM) Top, Homelink integrated in dash with Targa switch, 997 Shifter, Carrera Gauge Cluster with silver gauge faces, heated 997 adaptive sports seats, Litronics, silver console
I took the 'muffler' off and sent it to Hasbro to help him lighten his car. I kind of miss it already even though I wasn't driving that car for the last few months. I think I'll make another.
__________________ I am not an attorney, mechanic, or member of the clergy. Following any advice given in my posts is done at your own peril.
I took the 'muffler' off and sent it to Hasbro to help him lighten his car. I kind of miss it already even though I wasn't driving that car for the last few months. I think I'll make another.
Jon, I don't blame you for wanting to make another! It sounds awesome! Granted, more of a track sound but I'm out in the boonies and the Bro Dozers (trucks) and Mustangs are every bit as loud - and they don't sound like a Porsche. Saved 21 lbs. The center is currently "attached' with a bungee cord and I understand the muffler also stabilized the suspension so that needs to be dealt with.
Today was a nice 30 mile drive with the sun out. Yesterday, the same trip during a driving rainstorm. The car is a daily driver and is as reliable as a fine canine. Word!!
Today... Today I hope to wrap up the stereo install. Just have to wire up the D-4.800 and then clean up the garage.
So far this weekend I installed Focal 3 way components (6", 3.25", tweeter), Sony AV-7000 (Deck powers the rear shelf), micro bypass, xm radio hide away antenna pedestal). No sub. Kind of sucks but I cant see stuffing something in the foot well or behind the seat.
Once I get the amp installed I'll need to tune the DSP. That will be interesting.
Location: Montreal, QC. (currently expat to Shanghai)
Posts: 3,249
Lil'roadster made it back home yesterday! Now sporting brand new wheel bearings all around and had the whole filters, plugs, coils and belt refitted with genuine porsche parts this time (for a change lol). I was hoping to gain +425 horsepower with all that gaga but sadly the car drives just like it was before :/ Oh well...
That freaky humming wheel noise is gone now, how luv-e-ly! All mine now, time to Drive!
__________________
______________________________
'97 Boxster base model 2.5L, Guards Red/Tan leather, with a new but old Alpine am/fm radio.
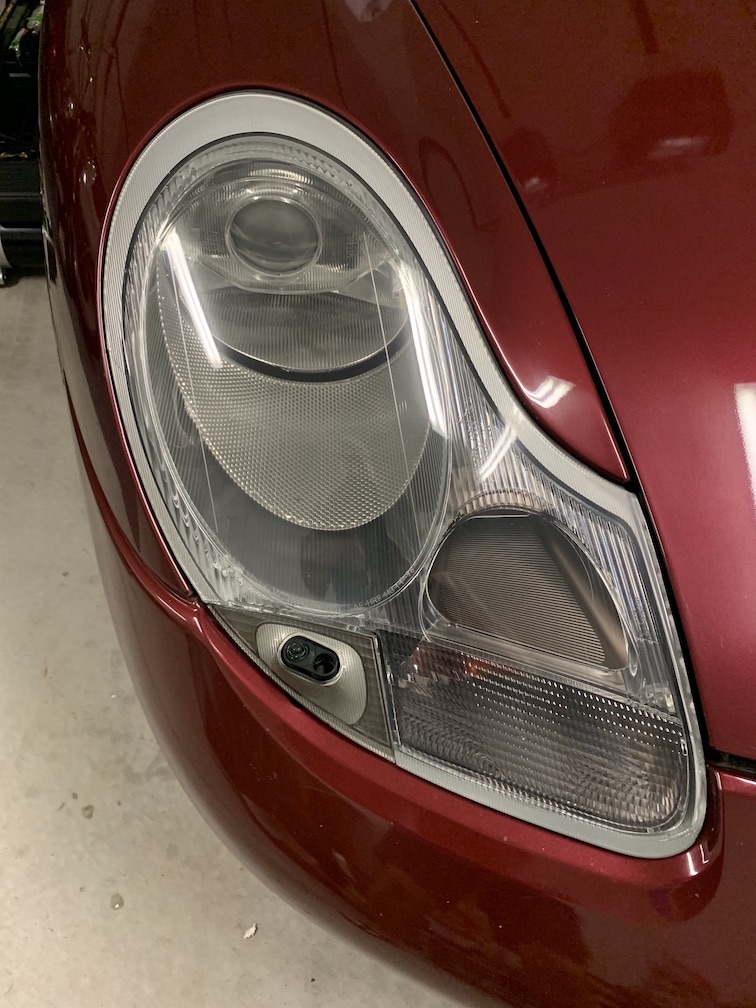
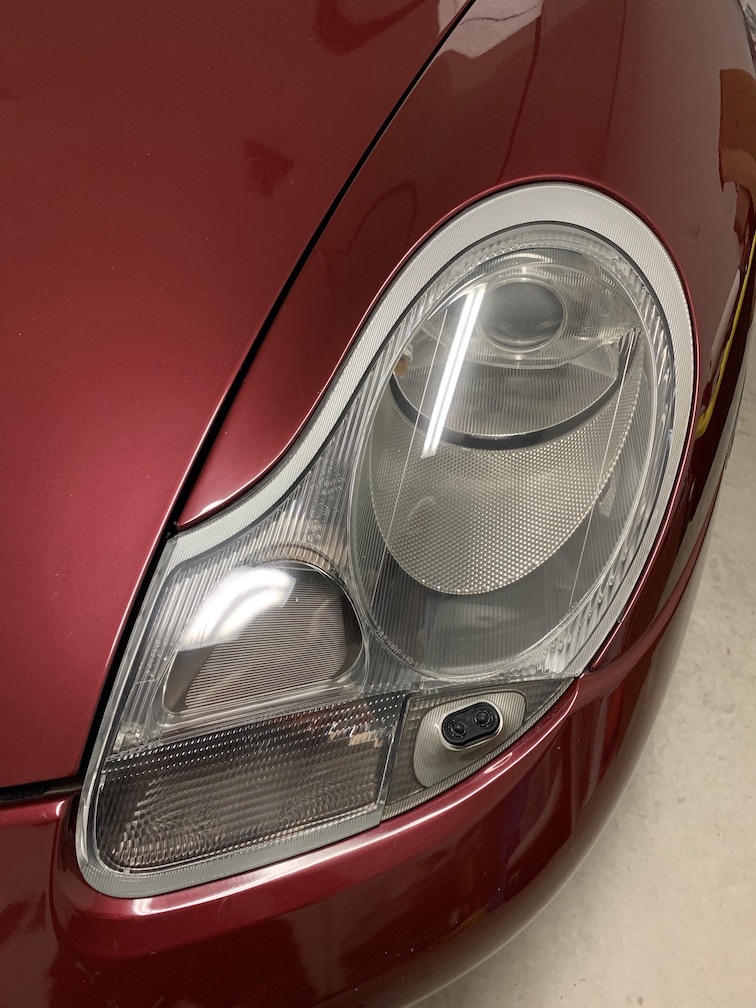
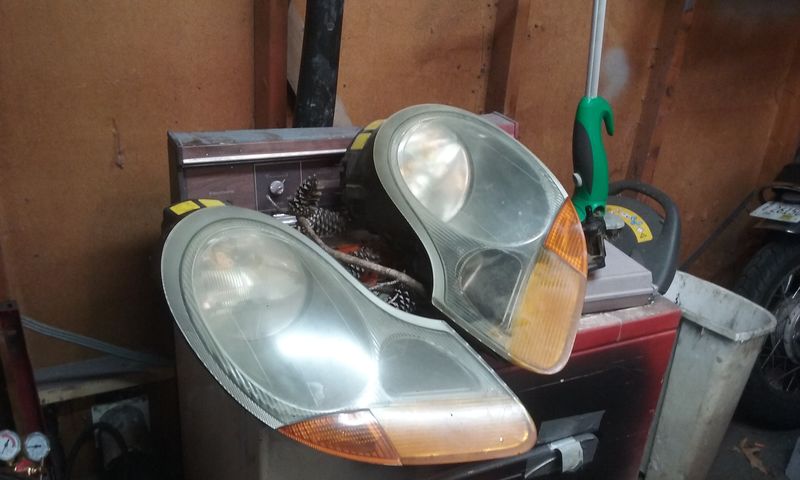
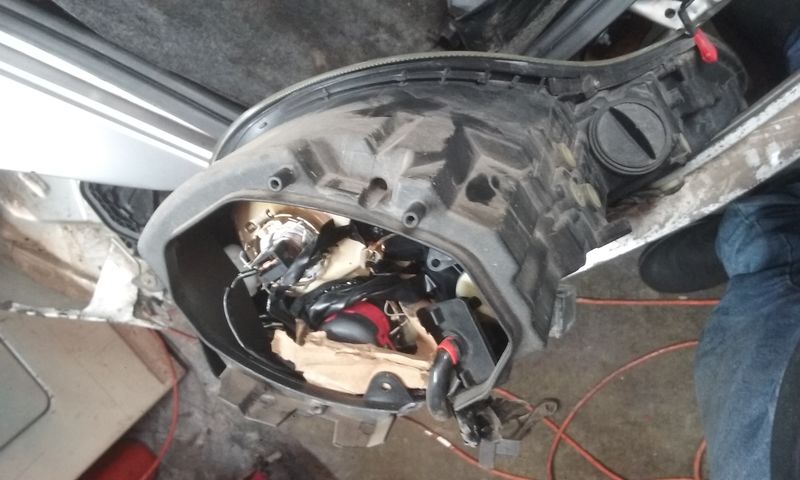
Re-installed the headlights after having them sanded and clear-coated locally based on a recommendation from a fellow forum member (thanks dghii). The wiring for the turn signals crumbled when I pulled the headlights out so while they were being reworked I dismantled the connectors and replaced the insulation with heat shrink. Before re-installing, I peeked inside the headlights to check all the other wiring fearing it might also be crumbling. Yeah! Everything looked good. Well, that was until I started to replace the parking signal bulbs. The wires crumbled if you looked at them much less touch them. So, for the moment I just taped up the exposed wires with electrical tape until I can find the time to disassemble everything and either replace the wiring or cover with heat shrink.
I know, I know. I should have stopped and repaired the issue properly. But sometimes I just want to drive the car instead of always working on it. Can you ever get ahead of the maintenance on this car? Just venting ......
The shop did an excellent job. There were some dust particles trapped in the clear coat in the main lens area but when I pointed these out they re-sanded and re-sprayed everything. Top class folks. There are still a few dust spots but nothing major and not in the main lens. Here are the results (the lighting in the garage is not that great. The actual headlights are really clear with no hue):
Re-installed the headlights after having them sanded and clear-coated locally based on a recommendation from a fellow forum member (thanks dghii). The wiring for the turn signals crumbled when I pulled the headlights out so while they were being reworked I dismantled the connectors and replaced the insulation with heat shrink. Before re-installing, I peeked inside the headlights to check all the other wiring fearing it might also be crumbling. Yaah! Everything looked good. Well, that was until I started to replace the parking signal bulbs. The wires crumbled if you looked at them much less touch them. So, for the moment I just taped up the exposed wires with electrical tape until I can find the time to disassemble everything and either replace the wiring or cover with heat shrink.
I know, I know. I should have stopped and repaired the issue properly. But sometimes I just want to drive the car instead of always working on it. Can you ever get ahead of the maintenance on this car? Just venting ......
Man, I am doing the exact same thing. Except my box doesn't even run so I'm going to re-solder all the wires.
On the plus side my clear came out FABULOUS. Only a spec of trash in the amber section, but other than that its flawless. Kinda bad because now you can see the imperfections on the inside of the headlights.
^^^ before
^^^ The PO's "upgrade" for HID. LMAO yeah that screams fire hazard. Even has a little kindling paper for when the wires short and get hot.
Photos don't really do justice. This is some pretty good paint work.
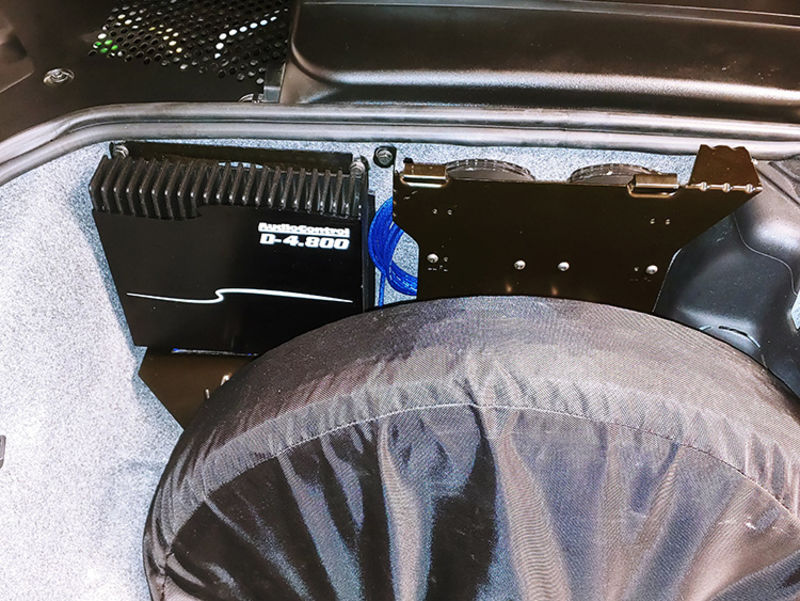
I finally managed to wrap up the stereo install this weekend!
Here is what I started with:
Alpine something 149bt:
Not a bad deck by any stretch. I could have lived with it.
I wanted something more modern to tie into my phone. I picked up a Sony... something something 7000. Same as the 5000 except it has 55W per channel and an anti-glare capacitive touch screen. I only regret that I can't upload a custom wall paper. Only has 5 or 6 to chose from and they are all very boring.:
Boring Background:
My other main goal was to ditch the stock 6 channel amp (yes, I had a 6 channel amp) and DSP. The HVAC panel was moved to the DSP slot.
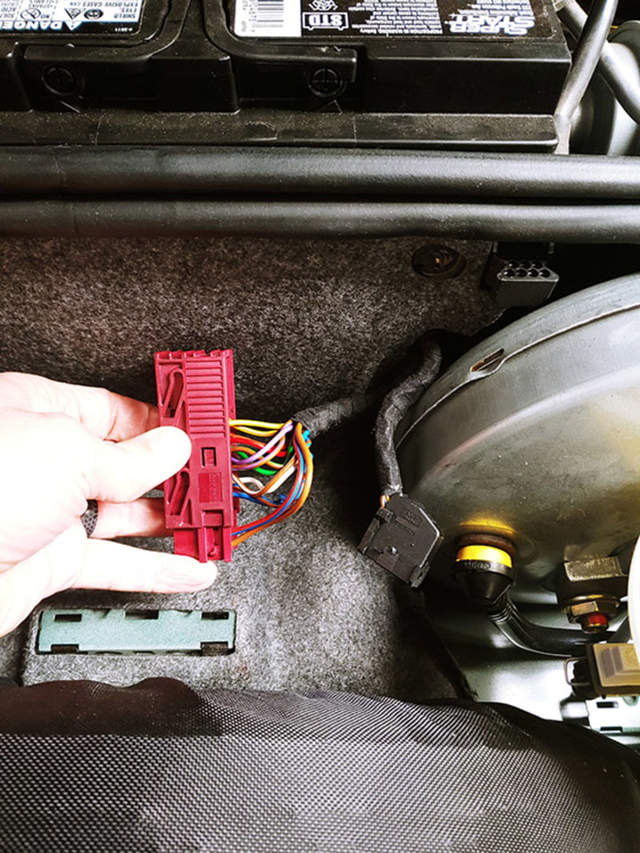
With that all moved I was able to pull out the 6 disc changer and install a modern amp with built in DSP. Because the car originally had an aftermarket deck in it the install of the deck was extremely simple. Everything I needed for the speakers was located on this one handy plug:
Handy amp plug:
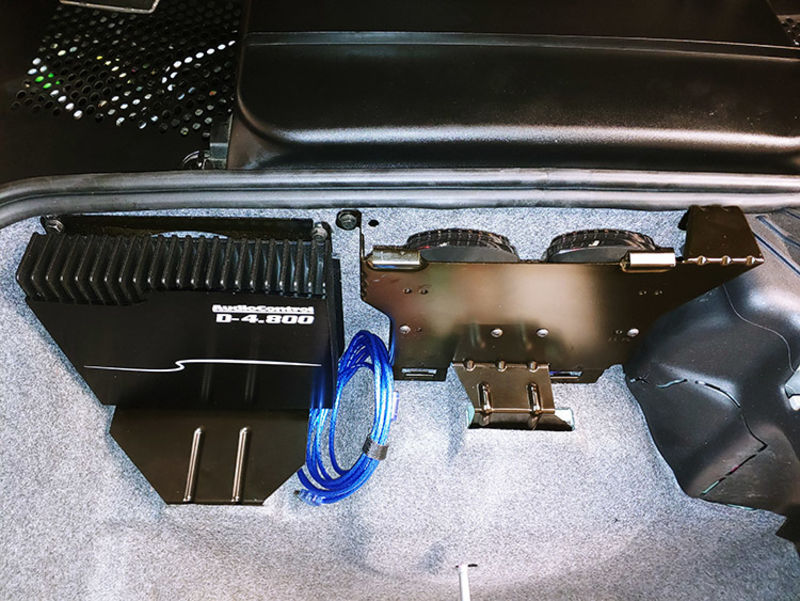
I chose to modify the existing CD changer bracket to hold the amp. I used the old amplifier bracket to hold the cross overs.
I went with an AudioControl D-4.800.:
I wired the amp directly to the battery with Stinger 4 gauge and a big ole fuse. Picked up remote out from the deck. I ran one set of Stinger RCA's to the DSP. I also wired in a bypass to avoid the whole e-brake nonsense.
I went with some 3 way Focal speakers. (https://www.focal.com/en/car-audio/car-audio-kits-solutions/performance/access/component-kits/165-as3) For whatever reason I didn't take any photos of the speaker install. I followed along with what most folks already found successful. I modified all of the existing Hayes brackets for the dash. For the 6" drivers I carved up the coveted smaller Hayes boxes to embed a 6" ABS mounting ring. I sealed up the edges around the ring and speaker and left the box ported/vented with the existing vent.
I'm sending Deck power (50-55W per channel) to the rear storage compartment speakers (4 - 3.5" speakers). I ran one set of RCA's from the deck to the amp. I send the output through channels 1-4. Front channel is through DSP to the cross overs / caps to the tweeters and mid-range on channels 1 and 2. The 6" drivers are being sent directly through the DSP using channels 3 and 4. I am choking down the drivers through the DSP. Chose to protect the mids/highs with the existing crossovers. May remove those later. Not sure. The way this is wired I can fade to front between front (D-4.800) and rear shelf to achieve a nice sound stage. May need to invest in better clock radio speakers behind my head.
Result was great. Need to learn this DSP software (and educate myself on frequency ranges!) to make this sound better. I was honestly blown away with how punchy the 6" speakers are. Impressed so far.
Hang on! Did you spray paint the disk, wheel carrier and all the associated hardware with a metallic paint? There are no wear marks visible and all the pieces seem to have the exact same color!
__________________
2004 Boxster S Silver - FUNTOY
2002 Boxster Base Guardsy Red - FUNBOX
1987 Caterham Super 7 1700 Supersprint
2009 Mercedes Benz CLK 350 convertible
1941 Dodge Luxury Liner Coupe
Hang on! Did you spray paint the disk, wheel carrier and all the associated hardware with a metallic paint? There are no wear marks visible and all the pieces seem to have the exact same color!
Well mostly I was referring to my work on the caliper. And the headers behind it.
But yes, I painted the rotor hat and the outer edge of the rotor with caliper paint. Everything else is overspray.
And never you mind, anker. Those cheap ceramic pads that are in there now will clear off that paint on the rotor before I even leave the garage ;-)
Hang on! Did you spray paint the disk, wheel carrier and all the associated hardware with a metallic paint? There are no wear marks visible and all the pieces seem to have the exact same color!
I'm replying again, cuz as I thought about this, it made me laugh out loud, Haha.
So in that photo, you got a shiny new- looking caliper. You got bad-ass wrapped and coated headers. You got a shiny red new adjustable toe-link. And you've got stainless braided brake lines.
And you saw the silver paint on the rotor!?!? Ha. Tough room! ;-)
Sent from my SM-G970U using Tapatalk
I noticed the headers too, but thought they may have been done some time ago. There really wasn't much to go on from your description.
But I, too, was wondering about what stood out to me front and center: The painted friction surface of the rotor! haha. I thought it was odd, but didn't question it because I figured you've been around long enough to know what you're doing.
I'm replying again, cuz as I thought about this, it made me laugh out loud, Haha.
So in that photo, you got a shiny new- looking caliper. You got bad-ass wrapped and coated headers. You got a shiny red new adjustable toe-link. And you've got stainless braided brake lines.
And you saw the silver paint on the rotor!?!? Ha. Tough room! ;-)
Sent from my SM-G970U using Tapatalk
Maytag, might want to think about wrapped headers. Leaking fluids drip (oil, PS fluid possibly) right onto those guys and eventually could cause a fire. I was thinking of wrapping mine, but watched a few vids of cars going up in smoke because of this very issue. Just a thought!


 Parts Car, car parts
 Honda Del Sol(s)
 "Hers"
 My Original '99
 The 78 F350
 This
This That
That The S 2.5
 Other
Other


 FunToy
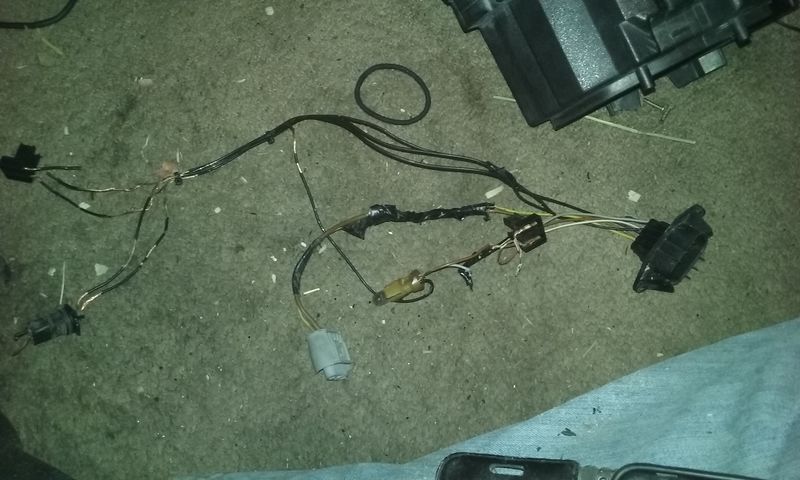


 Hybrid Mode


