 03-18-2017, 02:44 PM
|
#3181
|
|
Registered User
Join Date: Feb 2015
Location: QC
Posts: 415
|
Spark plug tubes, Motul oil change, and cleaned MAF 
|

|

|
|
03-18-2017, 03:52 PM
|
#3182
|
|
Registered User
Join Date: May 2016
Posts: 115
|
Today I did an oil change. Nice to see no metal on my filter. Although the filter fell apart on me. The previous seller supposedly changed the oil and filter for me at time of sale 10,000kms ago. . I'll let u guys be the judge.
 
Sent from my SM-G928F using Tapatalk
|
|
|
|
|
03-18-2017, 04:35 PM
|
#3183
|
|
2003 Base 5-speed
Join Date: Jul 2015
Location: Stoneham, MA
Posts: 949
|
Holy crap! I just changed my oil and filter today as well (about 5,000 miles and 6 months since I last did so), and I can safely say my old filter didn't look like that! Makes me wonder if the car's filter had ever been changed.
Sent from my iPhone using Tapatalk
|
|
|
|
|
03-18-2017, 06:46 PM
|
#3184
|
|
Registered User
Join Date: Dec 2014
Location: Pasadena
Posts: 261
|
Oh Wow Holy ********************
|
|
|
|
|
03-18-2017, 07:19 PM
|
#3185
|
|
I am No. 1348
Join Date: Dec 2016
Location: Tampa/FL
Posts: 340
|
Quote:
Originally Posted by itskenallen

Today I did an oil change. Nice to see no metal on my filter. Although the filter fell apart on me. The previous seller supposedly changed the oil and filter for me at time of sale 10,000kms ago. . I'll let u guys be the judge.
Sent from my SM-G928F using Tapatalk |
Makes you wonder what other crap he told you that wasn't true??? 
__________________
Current: 2004 Boxster S 550 Spyder Anniversary Edition (BSSE)
|
|
|
|
|
03-18-2017, 09:45 PM
|
#3186
|
|
Registered User
Join Date: Sep 2014
Location: santa barbara, CA & Devon, UK
Posts: 316
|
Holy Crap - never seen that before!
I think I would do a filter-only change after 500 miles just to make sure there are no bits of filter in the system!
|
|
|
|
|
03-19-2017, 12:07 AM
|
#3187
|
|
Registered User
Join Date: Nov 2015
Location: New Jersey
Posts: 99
|
Quote:
Originally Posted by njbray
Holy Crap - never seen that before!
I think I would do a filter-only change after 500 miles just to make sure there are no bits of filter in the system!
|
That filter is in bad shape. That's not bad advice and if the filter is loaded with crap, drop the oil again.
|
|
|
|
|
03-19-2017, 07:52 AM
|
#3188
|
|
Registered User
Join Date: Oct 2014
Location: California Central Coast
Posts: 1,476
|
That filter looks like it was in for a looooooong time. Probably plugged and passing minimal oil through it. I imagine the oil bypass in the filter got used more than not. I'd recommend getting a new filter housing and replace the one that's on there.
|
|
|
|
|
03-19-2017, 03:40 PM
|
#3189
|
|
Registered User
Join Date: May 2016
Posts: 115
|
All is good now guys. The filter was in one piece when it came out. It fell apart like the pictures show when I tried to disect it to inspect it. But yeah, I'd say the last 2 oil changes were done with a syphon pump.
Sent from my SM-G928F using Tapatalk
|
|
|
|
|
03-19-2017, 06:40 PM
|
#3190
|
|
Motorist & Coffee Drinker
Join Date: Jul 2014
Location: Oklahoma
Posts: 3,955
|
Quote:
Originally Posted by itskenallen
All is good now guys. The filter was in one piece when it came out. It fell apart like the pictures show when I tried to disect it to inspect it. But yeah, I'd say the last 2 oil changes were done with a syphon pump.
Sent from my SM-G928F using Tapatalk
|
I'm cheap, but so are filters. In between oil changes I've checked the condition of my oil by unscrewing the cup and pulling the filter. (Guess I'm still a bit paranoid about the M96s) When I do, I put a new $10-$15 filter in. Hard to understand why anyone would change the oil, but not the filter.
__________________
I am not an attorney, mechanic, or member of the clergy. Following any advice given in my posts is done at your own peril.
|
|
|
|
|
03-19-2017, 10:20 PM
|
#3191
|
|
2000 Boxster S
Join Date: Mar 2017
Location: Woodside, Ca
Posts: 18
|
Had a "road force" balancing done along with new front brake pads and rotors. Rebadged both front and back deck lids to original. Applied navy blue Porsche side decals to match the top. I bought the car about a month ago, best bang for the buck I could imagine as cars go. 😋 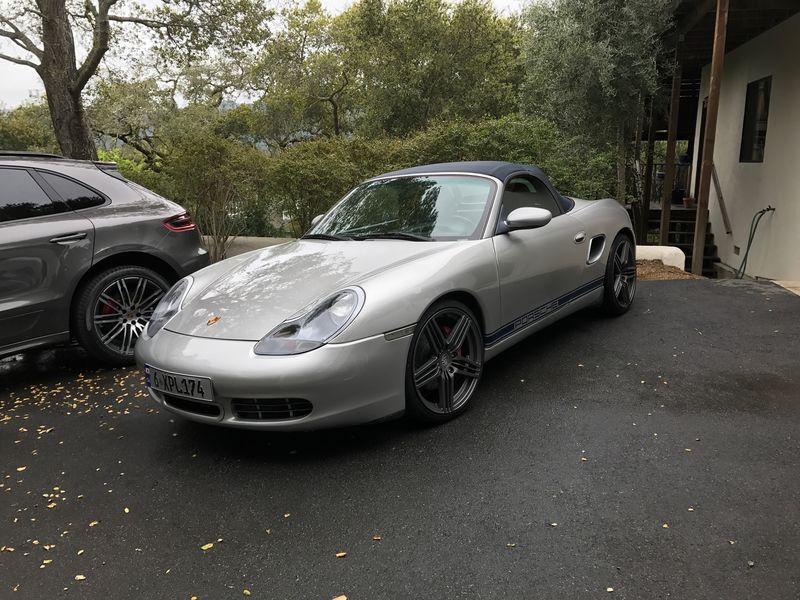
|
|
|
|
|
03-20-2017, 03:09 AM
|
#3192
|
|
Registered User
Join Date: Nov 2015
Location: New Jersey
Posts: 99
|
Since it was warm it got washed, since it was warm out, we went out and got dirty again...
|
|
|
|
|
03-20-2017, 03:14 AM
|
#3193
|
|
Registered User
Join Date: May 2016
Posts: 115
|
Quote:
Originally Posted by 78F350
I'm cheap, but so are filters. In between oil changes I've checked the condition of my oil by unscrewing the cup and pulling the filter. (Guess I'm still a bit paranoid about the M96s) When I do, I put a new $10-$15 filter in. Hard to understand why anyone would change the oil, but not the filter.
|
I agree fully.
|
|
|
|
|
03-20-2017, 03:27 AM
|
#3194
|
|
Registered User
Join Date: Aug 2015
Location: Callahan, FL
Posts: 462
|
I drove it like I stole it! That is the only way to drive it, isn't it?
__________________
99 Boxster base
1966 912 3 gauge
|
|
|
|
|
03-20-2017, 04:21 AM
|
#3195
|
|
Multi-Boxer Driver
Join Date: Nov 2010
Location: Orange Park, FL
Posts: 1,434
|
Hoping to pick it up from the body shop today.
__________________
-Chris
2004 Porsche Boxster 2.7 (gone  )
2004 Porsche 911 C4S Cab
1991 Porsche 911 C2 Targa 3.6
2017 Subaru Outback 3.6R
|

|
|
|
03-24-2017, 10:12 PM
|
#3196
|
|
Registered User
Join Date: Oct 2014
Location: California Central Coast
Posts: 1,476
|
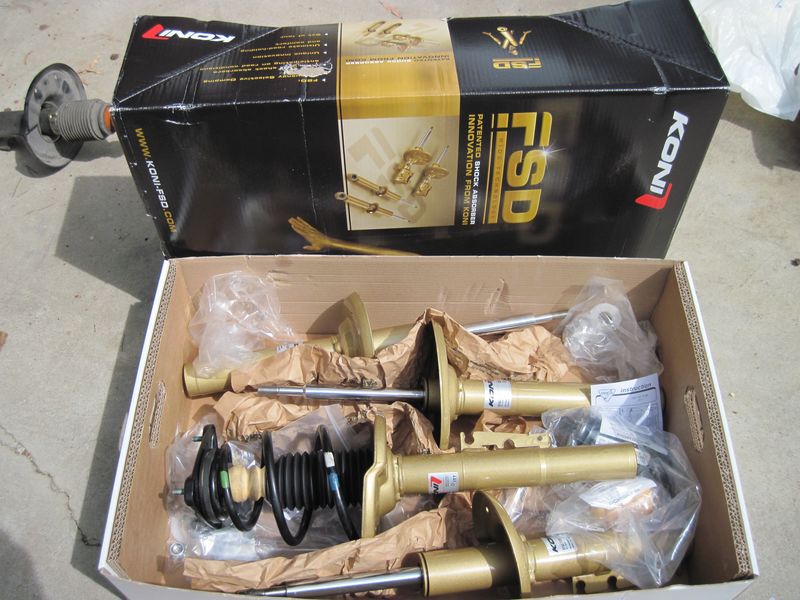
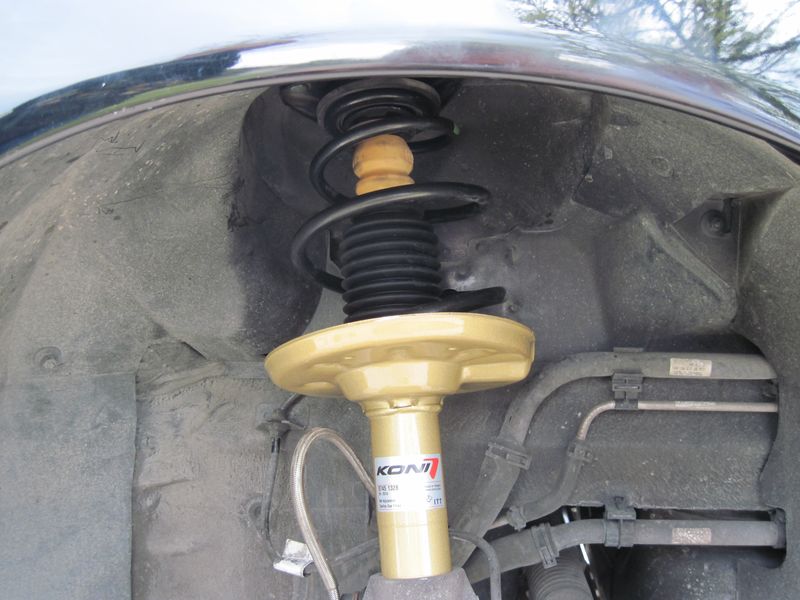
Began Koni FSD install
Snagged a Koni FSD kit from Race Consulting Agency for $798.00 before price increased. With the current $70.00 rebate made the FSD's final cost $728.00 !!! New bump stops, bearings, boots & seals arrived yesterday. All in New struts for $1018.00. R+R front struts today.
Last edited by 911monty; 03-24-2017 at 10:23 PM.
|
|
|
|
|
03-25-2017, 09:06 AM
|
#3197
|
|
Registered User
Join Date: Mar 2014
Location: Eastern NC
Posts: 701
|
Installed a replacement starter from Pelican Parts. Install was a breeze.
__________________
"YouTube Certified in Various Specialties"
|
|
|
|
|
03-25-2017, 12:17 PM
|
#3198
|
|
Registered User
Join Date: Jan 2014
Location: New Jersey
Posts: 1,631
|
Installed new Stabilus hood struts on the front trunk. Easy peasy!
|
|
|
|
|
03-25-2017, 12:55 PM
|
#3199
|
|
Registered User
Join Date: May 2016
Posts: 115
|
Today I fitted a HID headlight bulb kit that I got a few weeks back. Didn't have the weather up to now so I went out and enjoyed the most of the sunny weather today. They make a big difference to the car.
In the first pic you can see the HID and the standard halogen H7 on the car together.  
Sent from my SM-G928F using Tapatalk
|
|
|
|
|
03-25-2017, 01:45 PM
|
#3200
|
|
Custom User Title Here
Join Date: Mar 2012
Location: Ft. Leonard Wood
Posts: 6,169
|
Looks great!
The lack of projectors may cause MOT issues, though.
|
|
|
|
 Posting Rules
|
You may not post new threads
You may not post replies
You may not post attachments
You may not edit your posts
HTML code is On
|
|
|
All times are GMT -8. The time now is 05:29 AM.
| |


 Blue Box
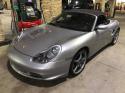 Janice
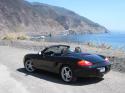 1998 Porsche Boxster
 Parts Car, car parts
 Honda Del Sol(s)
 "Hers"
 My Original '99
 The 78 F350
 This
This That
That The S 2.5
 Other
Other Boxster S
 991.1 S
 1990 Porsche 944 S2 Cabriolet
 Boxster
 Linear Mode


