|
IMS Replacement... The Jager Saga
986 Forum team,
Im not sure how many pictures I can add in a single post, or how many pictures can be put on a thread, most likely I will find out the hard way. If youre like me I really enjoy looking at the pictures from others on this site. I would like to share my project with the forum; hopefully a few folks will cheer me on while others will give me a hard time, and yet I know others will help if I run into problems. Brucelee please dont get too upset if I use-up all the hard drive space on the server. : 0
A post from a well know member of this forum a few weeks ago, in response to a question I had on, whats the highest mileage you have seen on a Boxster? (BTW I have over 210,000 miles on my car now) got me out of my chair to dust-off the old torque wrenches. My 2001 Boxster has been a great car, the best car I have ever owned, but I was reminded, indirectly, that I should take care of a known possible issue, and not to ignore its faithful wearing of parts.
While digging deep into the guts of my 986 I will replace the flywheel, clutch, rear main seal, O2 sensors, and motor mount.
|


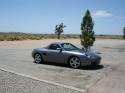 Jägermobile
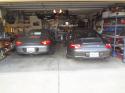 Jagermobiles
 Jager4Smobile


 Threaded Mode


