Go Back   986 Forum - The Community for Porsche Boxster & Cayman Owners > Porsche Boxster & Cayman Forums > Boxster General Discussions

Post Reply
 
LinkBack Thread Tools Display Modes
Old 12-15-2008, 01:22 PM   #1
Porscheectomy
 
Join Date: Mar 2006
Location: Seattle Area
Posts: 3,011
Boxster Dash Guts Pictures

I decided while I had the car in storage, I would go ahead and try to get rid of a loud click that I would get from the dashboard area when going up a curb.

There have been a couple of TSBs about the issue. One places teflon pads between the front support structure (where the steering wheel housing and passenger airbag attach) and the bulkhead just under the windsheild. The other places felt pads between the aluminum lower dash beam and the center of the front support structure. The bulletins show how to do these without removing the dashboard, but it's actually easier to do this by taking the dashboard off than trying to squeeze and pry things into small places.

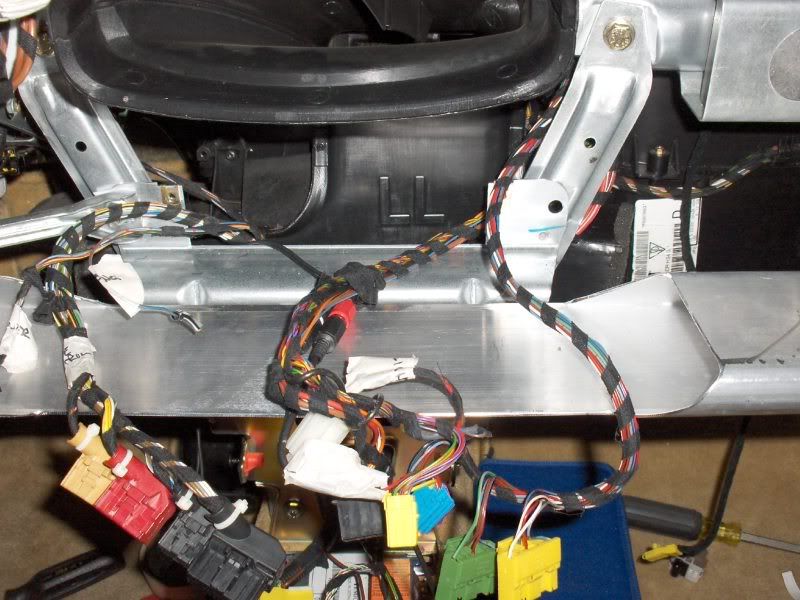
These first two pictures show the dash ready to come off:


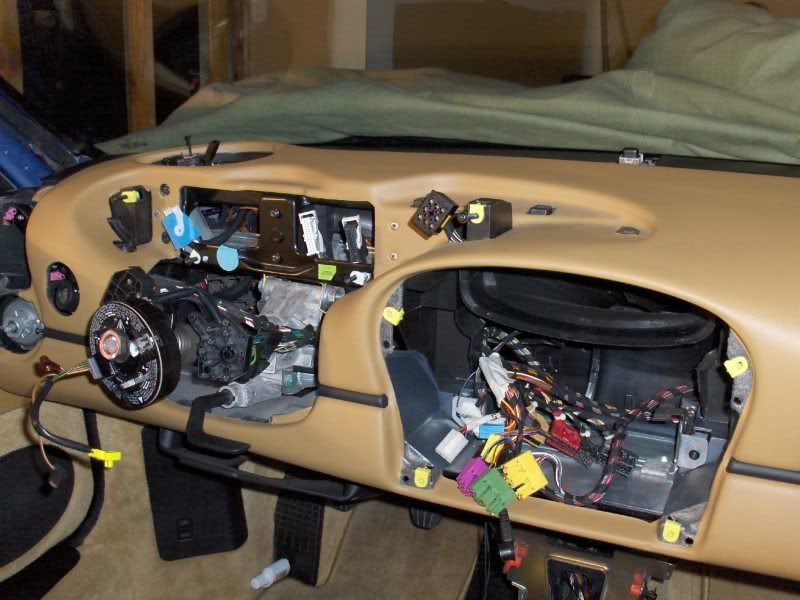
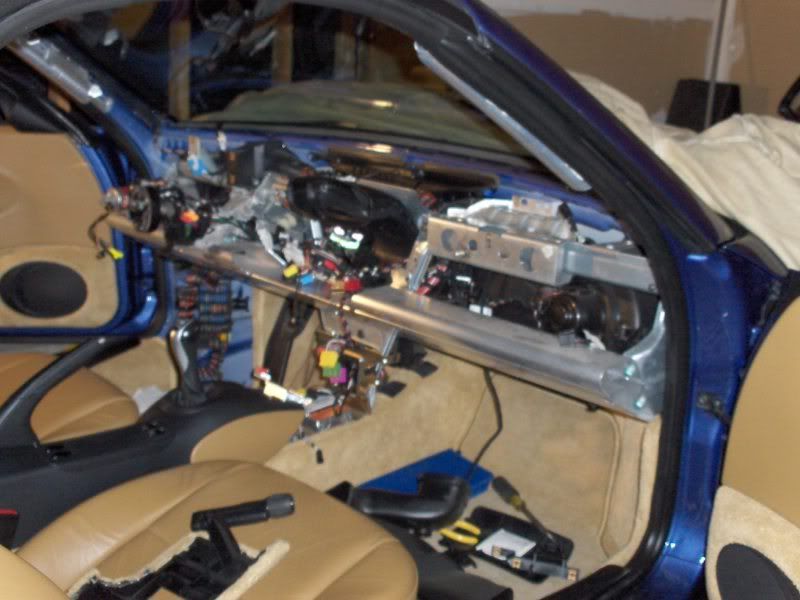
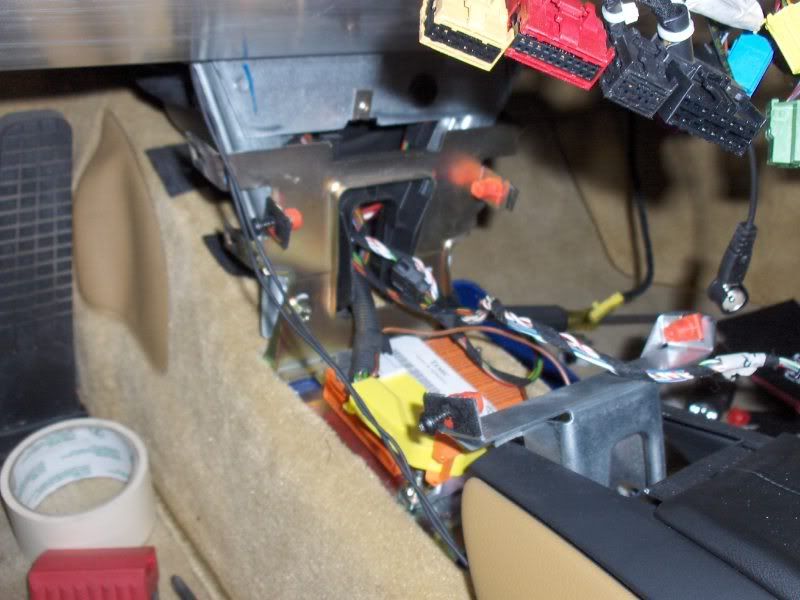
The next four show the dashboard removed. There sure are alot of wires running back there:


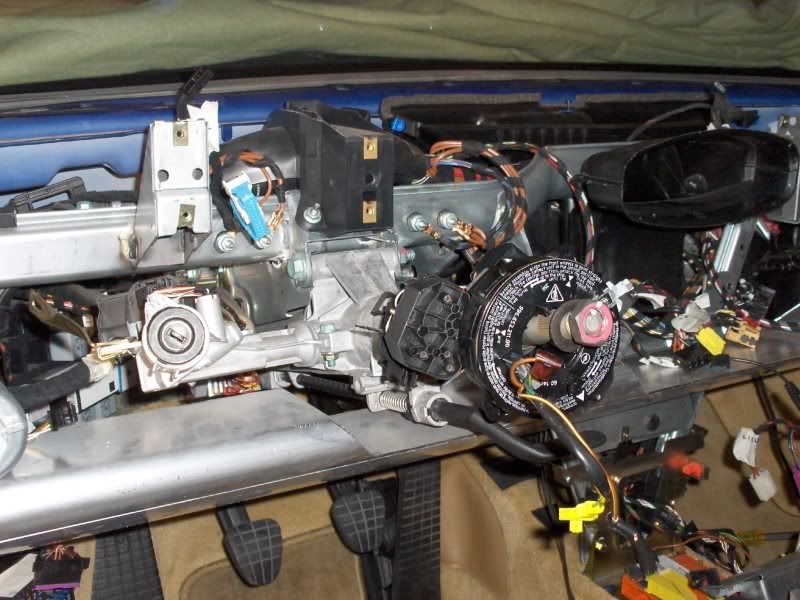
Here you can see the teflon pad on the passenger side. This is close to where the passenger side airbag mounts:


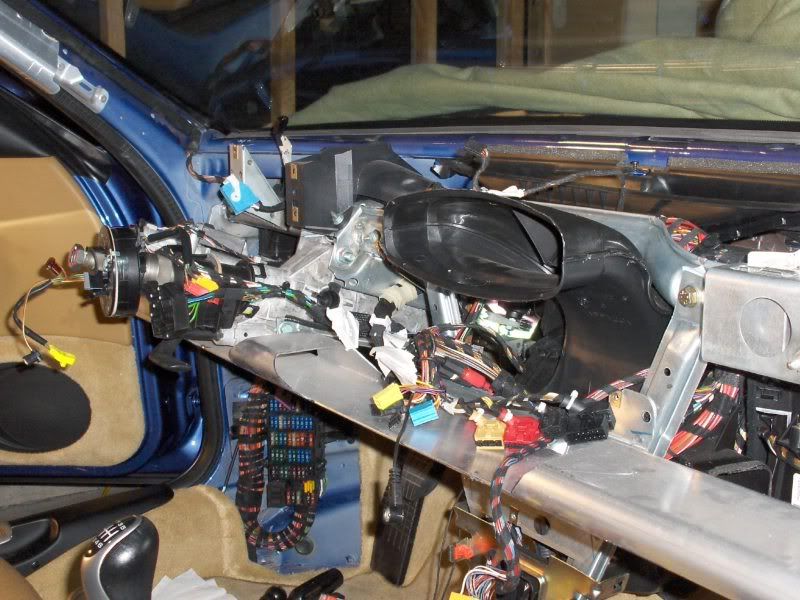
On the driver side, there is a plastic housing that manages the wiring harness as it passes over the steering column:


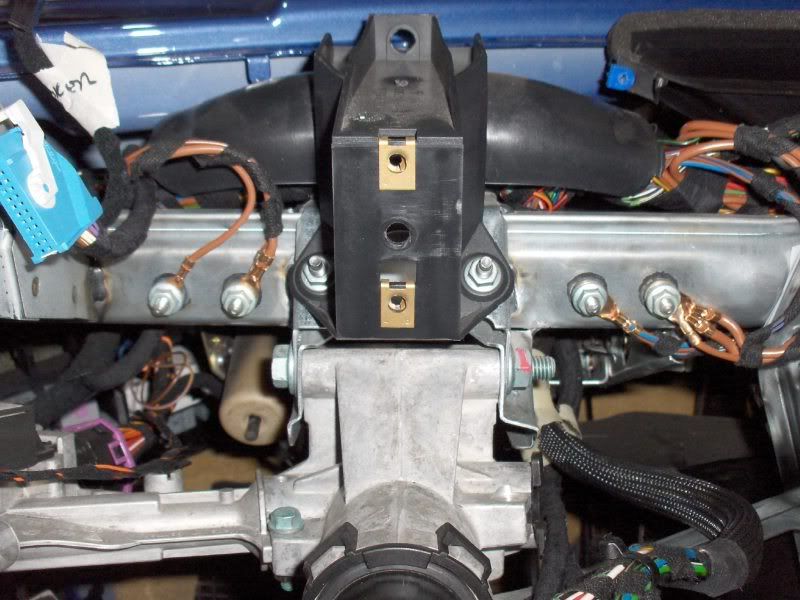
On the driver side, the teflon pad is between the chassis bulkhead and the support structure. The same bolt that attachs these two parts also holds the upper end of the plastic cable guide:


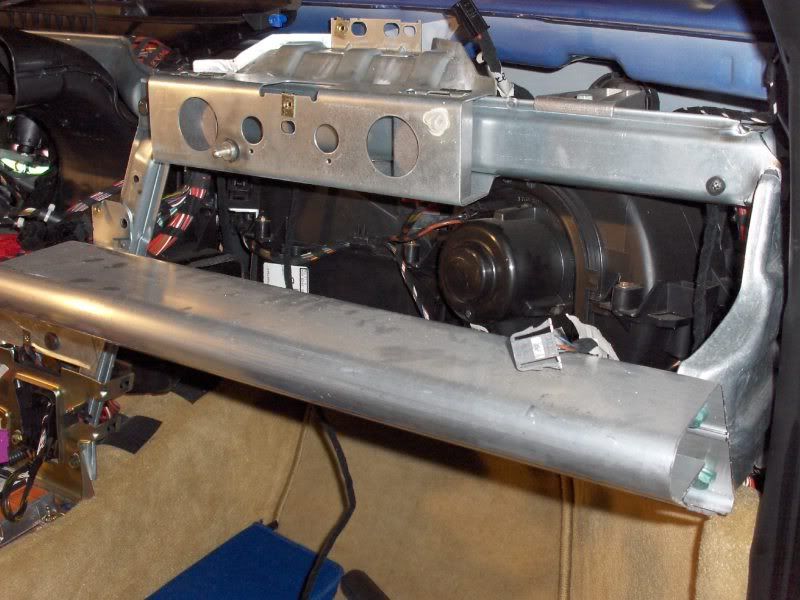
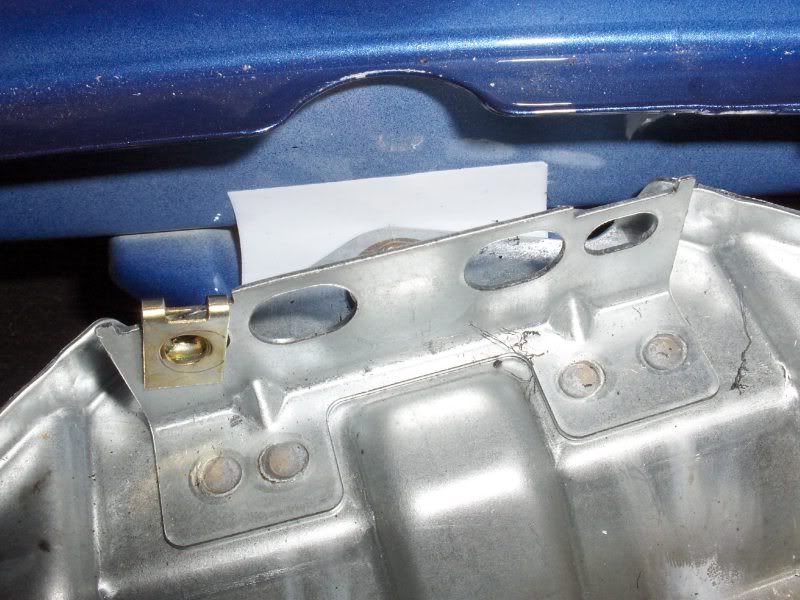
There is an aluminum beam that runs the length of the dashboard at it's bottom edge. Where this beam meets the support structure under the radio, the two parts can rub against each other and cause the popping noise that I have been experiencing when going up the curb to my driveway. The solution, according to Porsche, is to place large felt pads between the two parts so that when they do move relative to each other, the don't move in a metal on metal pop.

There are significant witness marks on the aluminum beam where it touches and rubs against the center structure, so hopefully the felt pads solve the problem. In this picture is the beam and structure joint. They are held together by a nut and threaded insert. The felt pads are between the two parts:


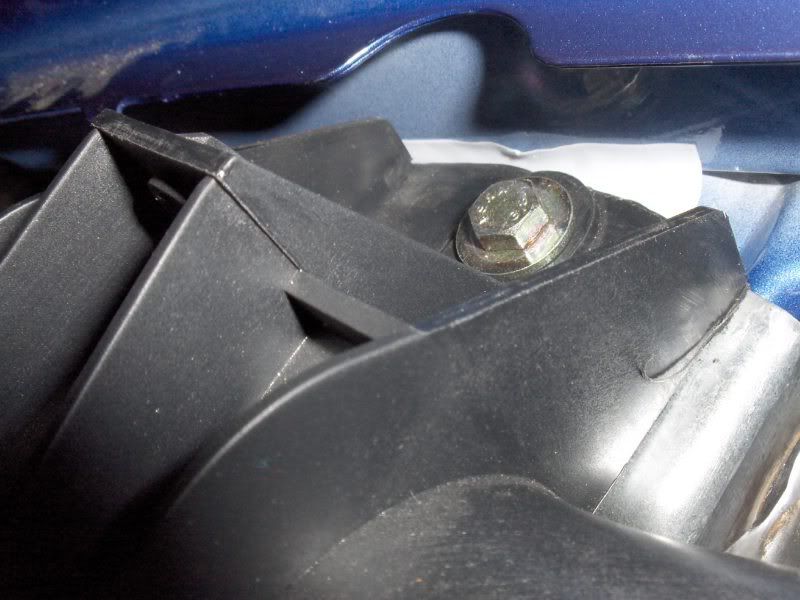
This is the lower side of the center support. You can see the aluminum beam at the top of the picture:


I'm really hoping these will take care of my issue. Unfortunately, it's going to be 3-4 months before I can test it out.


Last edited by blue2000s; 12-15-2008 at 03:36 PM.
blue2000s is offline   Reply With Quote
Old 12-15-2008, 05:45 PM   #2
Registered User
 
Join Date: Aug 2007
Location: Virginia
Posts: 244
Wow! Quite a project. My dash is still quiet after 98,000 miles. However, I do have a rattle in the driver's door that I need to find and fix... it is so quiet passengers can't hear it, but I'm sure you understand how annoying squeaks and rattles can be!

Thanks for sharing the pics of the major dash surgery... very educational.
__________________
-- John
'00 Boxster S
'86 911 Carrera Coupe (Sold)
Lucky is offline   Reply With Quote
Old 12-15-2008, 09:49 PM   #3
Registered User
 
Join Date: Jun 2007
Location: Freeport, New York
Posts: 471
Great Job!

You might want to double up the teflon pad application so it doesn't wear through.

I can't imagine doing that job twice!

Regards, Maurice.
schoir is offline   Reply With Quote
Old 12-15-2008, 10:08 PM   #4
Registered User
 
Perfectlap's Avatar
 
Join Date: Nov 2004
Location: New Jersey
Posts: 8,709
Which is the part that always rattles?
__________________
GT3 Recaro Seats - Boxster Red
GT3 Aero / Carrera 18" 5 spoke / Potenza RE-11
Fabspeed Headers & Noise Maker
BORN: March 2000 - FINLAND
IMS#1 REPLACED: April 2010 - NEW JERSEY -- LNE DUAL ROW
Perfectlap is offline   Reply With Quote
Old 12-16-2008, 04:06 AM   #5
Registered User
 
edevlin's Avatar
 
Join Date: Jul 2006
Location: Virginia
Posts: 916
Way cool pics of the dash, I still cannot believe the size of the wire bundles that are running around in our cars. Its hard to believe that the cars continue to work as well as they do. They remind me of the complexity of the space shuttle with multiple modes of potential electrical failure....

Ed

__________________
My Car Webpage

2000 2.7L Boxster 102K; TTP intake, headers, high-flow cats; Dansk high-flow muffler; Autothority ECU chip; TechnoTorque 2; Bilstein coilovers; Racing Dynamics strut brace; stress-bar suspension kit; Aasco lightweight flywheel, B&M short shiftkit; 18" wheels; spare tire delete; OEM GT3 seats; JL audio speakers and subwoofer; Alpine PDX-5/PDX-2 amps; Kenwood DNX8120 CD/DVD/Nav; litronics, deambered
edevlin is offline   Reply With Quote
Old 12-16-2008, 04:39 AM   #6
Porscheectomy
 
Join Date: Mar 2006
Location: Seattle Area
Posts: 3,011
Quote:
Originally Posted by Perfectlap
Which is the part that always rattles?
It's not rattling so much as popping when one corner of the car is lifted by driving up a curb. I strongly believe it's motion between the aluminum beam and the center structure, where the felt goes.
blue2000s is offline   Reply With Quote
Old 12-16-2008, 04:41 AM   #7
Porscheectomy
 
Join Date: Mar 2006
Location: Seattle Area
Posts: 3,011
Quote:
Originally Posted by schoir
You might want to double up the teflon pad application so it doesn't wear through.

I can't imagine doing that job twice!

Regards, Maurice.
Hopefully there isn't enough movement between the parts to wear through.
blue2000s is offline   Reply With Quote
Old 12-16-2008, 05:44 AM   #8
FTD
Registered User
 
Join Date: Nov 2007
Location: Atlanta, GA
Posts: 834
Good grief, you're brave. I get anxieties just looking at your pictures.

Very educational and thank you for thinking to document it. I hope I never need to take my dash off. All that wiring intimidates me.
FTD is offline   Reply With Quote
Old 12-16-2008, 05:53 AM   #9
Registered User
 
Join Date: Nov 2007
Location: Chicago suburbs
Posts: 1,675
Wow! A complete dashectomy. If I took mine apart like that I'd never get it back together.
__________________
JGM
2002 Boxster S
1973 911 Green FrankenMeanie
PCA DE Instructor circa '95
jmatta is offline   Reply With Quote
Old 12-16-2008, 06:20 AM   #10
Porscheectomy
 
Join Date: Mar 2006
Location: Seattle Area
Posts: 3,011
There are alot of pieces that make up the dashboard, I've mostly got them sitting in the other car that I store over the winter.

As long as you're patient and keep track of all the screws and where they go, it's not really hard to get everything off and to know where they go when you put it back together. My process is to remove an assembly, say the passenger side vent, and then put the screws that hold the vent back into the dashboard (there are 3 in that case). That way you can keep track of how many screws went into the assembly, avoiding the frustrating extra screw situation after it's all put back together and it ensures that the right screws have gone back in the right places. There are 4-5 different screws that I can think of that I found. There are more parts that just pull off with no screws at all than I would have expected. You can just pull the emergency flasher button, the ignition switch surround, the defroster panels, the a-pillar covers (with some pre-removal work), and the bat-wing.

I also tagged every connector so that I know where they plug back in when I'm reassembling.

I'd say the hardest part of the procedure is getting the windshield defroster panels off. They are just clipped in and only need a pull to get them separated from the dash, but it's an awkward reach right up against the windshield and they are really tight. It's also a pain to get the passenger side air ducting back in after installing the airbag, I've done it once before. You have to dick around with the ducting the from under the dash trying to get three pieces to snap together without much room to work.

I've been thinking about what else I could do while I've got the dash off, like the OBC hack, replace with a glove box dash, 911 gauges, I've got time before I have to put it back together, but I think I like the car just the way it is.

Last edited by blue2000s; 12-16-2008 at 06:35 AM.
blue2000s is offline   Reply With Quote
Old 12-16-2008, 06:34 AM   #11
Registered User
 
Join Date: Dec 2005
Location: South Riding, VA
Posts: 322
blue2000s,
I agree, it's really not that hard. I removed mine a few months back to cover it in leather and it took just under 3 hours to remove. I used zip-lock bags with labels to put all the fasteners in. About the same time to re-install.
88 screws
30 electrical connectors.
42 pieces of trim.
1 nut.
And, of course, I still had 2 screws left over- but I didn't break anything.

Good luck on the re-install.
Regards,
mike
derb is offline   Reply With Quote
Old 12-23-2008, 10:09 AM   #12
Registered User
 
Join Date: Dec 2007
Location: Florida
Posts: 207
Pics

Hi Derb,

Can you post some pics of your dash with the leather? I been wanting to convert my grey dash to black but haven't really decided on what the best way to do it is. Some pics for inspiration might help. BTW, if anyone else have any ideas or approaches, it will help me out a lot. I was thinking of pulling out the dash and painting it. But a bit concerned about the long-term "worthiness" of the paint for such applications. Anyone else have dash color conversions let me know.

Cheerios,

Trieullionaire
trieullionaire is offline   Reply With Quote
Old 12-23-2008, 07:59 PM   #13
Registered User
 
Join Date: Dec 2006
Location: Chicago
Posts: 291
Quote:
Originally Posted by trieullionaire
Hi Derb,

Can you post some pics of your dash with the leather? I been wanting to convert my grey dash to black but haven't really decided on what the best way to do it is. Some pics for inspiration might help. BTW, if anyone else have any ideas or approaches, it will help me out a lot. I was thinking of pulling out the dash and painting it. But a bit concerned about the long-term "worthiness" of the paint for such applications. Anyone else have dash color conversions let me know.

Cheerios,

Trieullionaire
Back in high school I had a Fiero GT with a two-tone tan interior. The dash surround was an ugly dark brown that I wanted black so my father used some sort of black vinyl dye that he sprayed on with an airgun. From what I recall it held up really well and looked factory. You might look into something like that if you don't want to mess around with leather. I wouldn't use paint though, I would think with the crazy temp extremes a dash gets exposed to daily it would make short work of the finish.
shaman1204 is offline   Reply With Quote
Old 12-24-2008, 05:38 AM   #14
Registered User
 
Join Date: Aug 2007
Location: CA
Posts: 115
Quote:
Originally Posted by trieullionaire
Hi Derb,

Can you post some pics of your dash with the leather? I been wanting to convert my grey dash to black but haven't really decided on what the best way to do it is. Some pics for inspiration might help. BTW, if anyone else have any ideas or approaches, it will help me out a lot. I was thinking of pulling out the dash and painting it. But a bit concerned about the long-term "worthiness" of the paint for such applications. Anyone else have dash color conversions let me know.

Cheerios,

Trieullionaire
I didn't do this myself (look at the first pic and you'll see why), but I wanted to convert my dash to leather w/red stitching while I was doing the rest of the interior in leather/alcantara.


Ofishbein is offline   Reply With Quote
Old 06-21-2009, 07:02 PM   #15
Porscheectomy
 
Join Date: Mar 2006
Location: Seattle Area
Posts: 3,011
With everything back together and having driven the car for a few months with the felt and teflon pads, I can report that the popping is completely gone. It seems to have worked.
blue2000s is offline   Reply With Quote
Old 06-22-2009, 06:04 AM   #16
Registered User
 
Join Date: Mar 2006
Location: Orlando, FL
Posts: 998
Wow! How did I miss this thread?! Very nice pictorial thank you for taking the time to post all this and the follow up report. My 99 is really starting to creek and rattle...
__________________
kabel

Orlando - 99 BMW M Coupe (autocross toy), '11 Mazdaspeed 3 (dog hauler), '99 10AE Miata (the new daily driver)
kabel is offline   Reply With Quote
Old 06-22-2009, 08:10 AM   #17
Registered User
 
Join Date: May 2009
Location: richmond bc
Posts: 47
where did you get those sick sweet pedals?
MIMA is offline   Reply With Quote
Old 06-23-2009, 02:50 AM   #18
Registered User
 
Join Date: May 2009
Location: Seattle - It's not Hell, but you can see it from here!
Posts: 236
where did you get those sick sweet gauges?


__________________
dave

2001 Porsche Boxster S
1988 Porsche 928 S4
Dave928 is offline   Reply With Quote
Post Reply


Posting Rules
You may not post new threads
You may not post replies
You may not post attachments
You may not edit your posts

BB code is On
Smilies are On
[IMG] code is On
HTML code is On
Trackbacks are On
Pingbacks are On
Refbacks are On


All times are GMT -8. The time now is 01:52 AM.


Powered by vBulletin® Version 3.8.7
Copyright ©2000 - 2024, vBulletin Solutions, Inc.
Content Relevant URLs by vBSEO 3.6.0
Copyright 2024 Pelican Parts, LLC - Posts may be archived for display on the Pelican Parts Website -    DMCA Registered Agent Contact Page