The idea was to make the job a lot easier and cut down the 5 hours it usually takes to do the coolant tank replacement. First off, make 100% sure your tank is bad because once you start there is NO going back. Time to take the tank completely off is under 30 minutes (depending on your dremel skills) and it took me almost 1 1/2 hours to put the new tank back in. You ARE going to bust some knuckles and rub your arm raw while in the engine compartment putting the tank back in. Here you go.
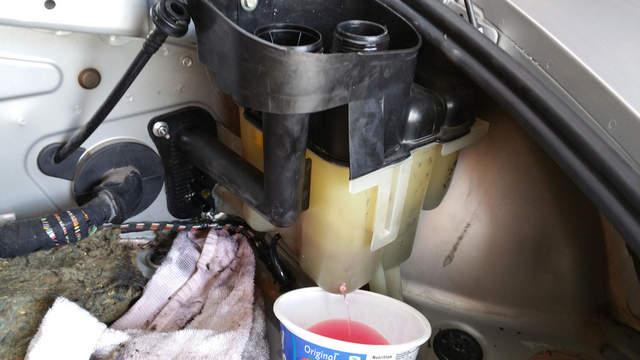
Step 1. Prep the job by removing the carpet, oil dipstick, caps and plastic ring around the rim of the tank. You will also want to drain the tank as in picture 1. I did it by drilling a small hole near the bottom so it makes less of a mess during the job.
Step 2. Remove the hoses from the outside of the tank that goes in to the black bracket where the fixed oil fill tube is that goes through the coolant tank.
Step 3. As seen in picture 2, cut the tank off near the firewall. Be careful not to hit any of the wires or oil fill tube. I used a dremel with a drill bit which cut right through it and gave it some reach.
Step 4. Remove the screws holding in the tank and the two nuts where the filler tube is. Remove the tank by lifting up and clean up the coolant that spills out.
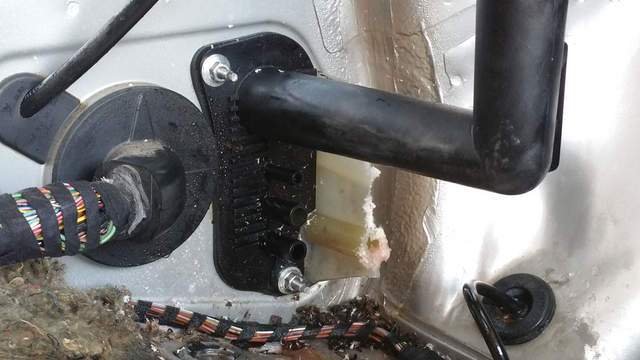
Step 5. Using the dremel again with the drill bit, cut around the main tube that goes through the firewall as seen in picture 3. remove the cut off pieces and pull out the bracket with the oil filler tube enough to remove the remainder of the tank piece still attached.
Step 6. Gently pull on the oil fill tube bracket and remove the 3 hoses with a pair of curved needle nose pliers. You also want to move the clamp holding the oil fill tube on the inside of the firewall and remove the tube from the black bracket.
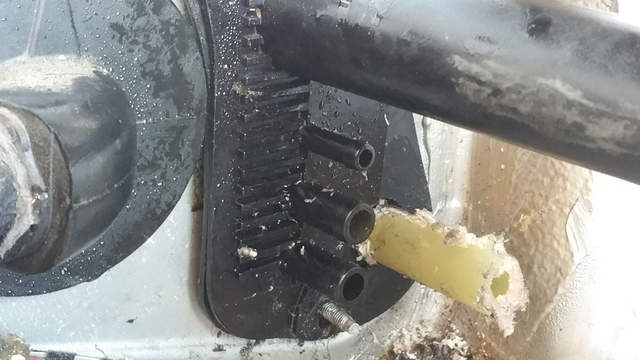
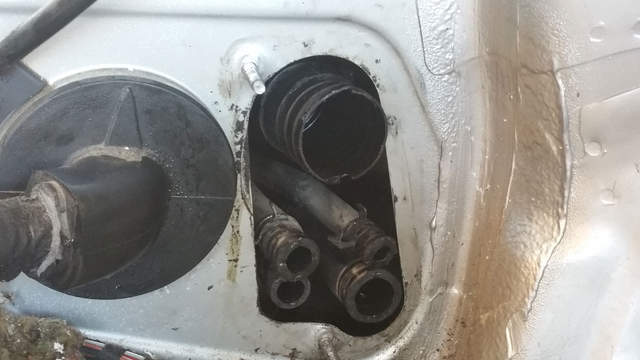
Step 7. After removing the black oil fill tube and hose bracket you will have easy access to the main tube that came from the tank that is now cut down to a small piece. Remove the cut off piece from the hose and you are left with what you see in picture 4.
Step 8. Now that the tank is removed you need to swap the sensor and attach the new tank and black oil fill tube bracket back in the car. I did this by aligning the hoses as well as i could and attach the bracket with the 2 nuts on loosely (don't forget to put on new screw type clamps and remove the factory clamps). I started with the main tube from the tank and tighten the clamp. Next move to the three hose starting with the top one and work your way down. the bottom hose has no clamp so save it for last.
Step 9. Finally completely fasten the tank and bracket on inside the trunk. This will make it easier to attach the oil fill tube from the engine.
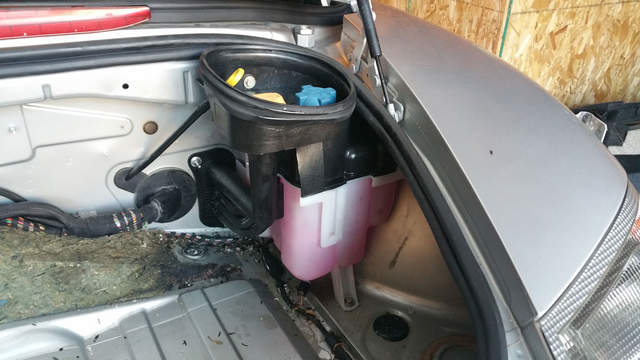
Step 10. Slowly fill the tank till it is at the max level ,as in picture 5, and then bleed the system.
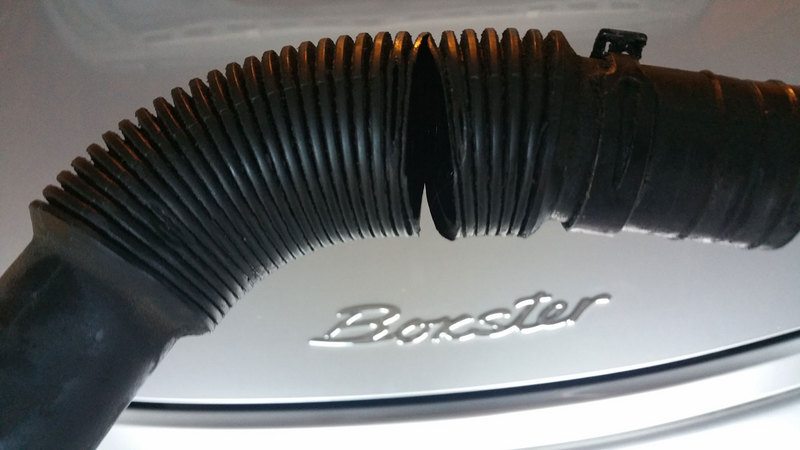
You are now done. Make sure to inspect your flex oil fill tube that goes from the fixed tube attached to the engine and coolant tank. Mine was severely cracked and needed replacing too. Shown in picture 6 as requested.
pic 1
pic 2
pic 3
pic 4
pic 5
pic 6
