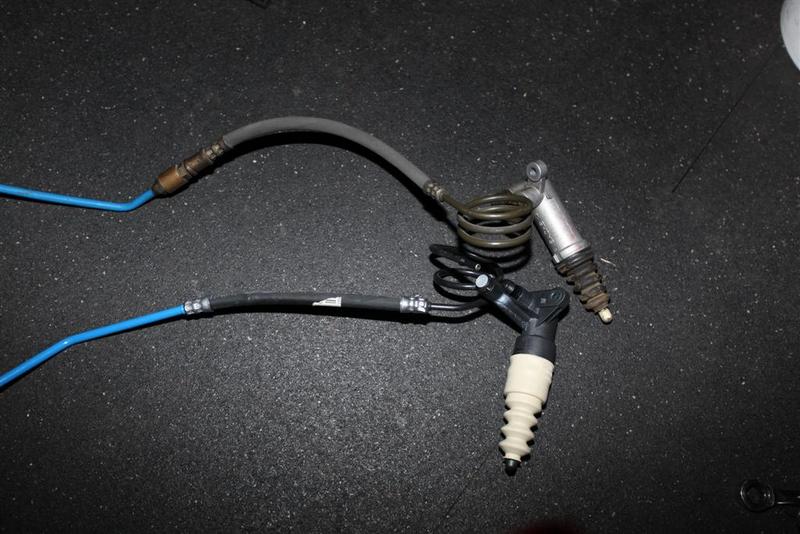
Maybe this might help you a bit as this was from my build project a couple years ago:
Next up, my next to last order from Pelican showed up having my new clutch slave cylinder line and connector. I had ordered the slave and master cylinder but failed to notice that you have to order two additional parts. The little connector and new line added $320.00 to the build bringing the upgrade of just the slave to over $400.00. Porsche is mighty proud of these parts. Oh well, out with the old and in with the new:

You would think this would be a simple conversion, pull the old line out, replace with the new connector, install the new line and attach the slave. Wrong. The instructions are in German with no English or French translations. So, I first translated the directions which are as follows:
überwurfmutter von kupplungsstutzen abschrauben!
überwurfmutter bis zum anschlag an den stecker schieben!
baugruppe mit montagestopfen bis zum anschlag in die!
uberwurfmutter einstecken!
überwurfmutter gemeinsam mit der baugruppe vom stecker abziehen!
überwurfmutter halterosette und baugruppe demontieren!
In English:
union nut from unscrewing clutch clip!
union nut to stop the slide connector!
subassembly mounting stuff up to the fence in the!
Insert the nut over !
union nut pull together with the subassembly from the plug!
union nut holding rosette and subassembly dismantle!
Translation to me:
Huh?
OK, I called Pelican and asked if they could simply confirm what the pictures in the instructions were indicating as it appeared that the plastic piece (see below) was being used...but I was not making sense of it.

Pelican had nothing in the books, on file or in their database to help and they were surprised as this is an upgraded piece that had a TSB on it, but could not find that either. OK, so a little brain power was needed on my end (for a Friday that's asking a bit). What is happening here is the black plastic piece is simulating the brass end of the new slave line in holding the plastic compression fitting. You attach the new connector to the existing line with the plastic piece in place, remove it before you reach a tight fit, insert you new slave line and than tighten. The whole thing is to keep parts and pieces aligned for the final assembly. Not that difficult, but going through it for the first time you do need to think about what you are doing. In the end, the slave was installed and I was happy.
Next up was the clutch master cylinder...how hard can this be? I set the car at a height I can get to the clutch peddle and into the bonnet with ease and begin the process of removing parts. If you have never done the master cylinder, the slave cylinder line is removed by pinching the protruding ends of the black fitting together while pulling at the same time. It releases the spring clip holding it. Note: put something under these lines as you will get drippedge and you don't want to ruin your paint. Now to what I hoped was the easy part, removing the master from the clutch peddle. Not! You need to be a 5' 1" contortionist to stick your fingers, arms, head, light and tools into this area to remove the two nuts and one cir clip. I was able to do it as it just took patience and a slow approach. In the end the master cylinder came out, the new one went in and this portion of the project was completed. Time to complete was about 2 hours.

