 10-30-2017, 03:03 PM
|
#41
|
|
Registered User
Join Date: Apr 2017
Location: Indiana
Posts: 1,512
|
😍😍😍👇👇👇 

|

|

|
|
10-30-2017, 03:54 PM
|
#42
|
|
WALDMEISTER
Join Date: Sep 2013
Location: Germany
Posts: 1,381
|
NOICE! Congratz, JB!
1st task was:
DREMEL /cutting those little edges, otherwise the roof wouldn't sink into a proper position
It was even more, than the photos show. The paint shop fixed the holes in the fiberglas later on.
2nd task was:
carefully drilling the screw-holes open. I noticed, that all the screws would only go like half way in, and the seller gave me the advice to drill them open and NOT to use force screwing them in/through.
__________________
Original Owner | PORSCHE Boxster 2.7L (MY01) | Seal Gray
Last edited by BRAN; 10-30-2017 at 04:03 PM.
|
|
|
|
|
10-30-2017, 04:08 PM
|
#43
|
|
Registered User
Join Date: Apr 2017
Location: Indiana
Posts: 1,512
|
Quote:
Originally Posted by BRAN

NOICE! Congratz, JB!
1st task was:
DREMEL /cutting those little edges, otherwise the roof wouldn't sink into a proper position
It was even more, than the photos show. The paint shop fixed the holes in the fiberglas later on.
2nd task was:
carefully drilling the screw-holes open. I noticed, that all the screws would only go like half way in, and the seller gave me the advice to drill them open and NOT to use force screwing them in/through. |
Thanks for the tips. I was going to ask you about things that you did and wished you didn't. I know it's not in the car but it seems to fit together nicely on the floor. Only fkaw I can fin is a small chip around the wiring hose.
|
|
|
|
|
10-30-2017, 04:26 PM
|
#44
|
|
WALDMEISTER
Join Date: Sep 2013
Location: Germany
Posts: 1,381
|
I would say adjusting the hinges will be the biggest task.
You will see, that the right side hinge may collide with the inner rubber seal and that the screws in general won't always sit in a flush angle. So the work you will face is to correct that stuff and make it proper, what actually should have been done during the design and production phase.
But it is manageable...
chips....hmmm...the paint shop said, the primer was so bad, that the color would chip sooner rather than later...so I got the whole shebang sanded, properly primed and then painted. 
__________________
Original Owner | PORSCHE Boxster 2.7L (MY01) | Seal Gray
Last edited by BRAN; 10-31-2017 at 06:10 AM.
|
|
|
|
|
10-31-2017, 04:53 AM
|
#45
|
|
Registered User
Join Date: Apr 2017
Location: Indiana
Posts: 1,512
|
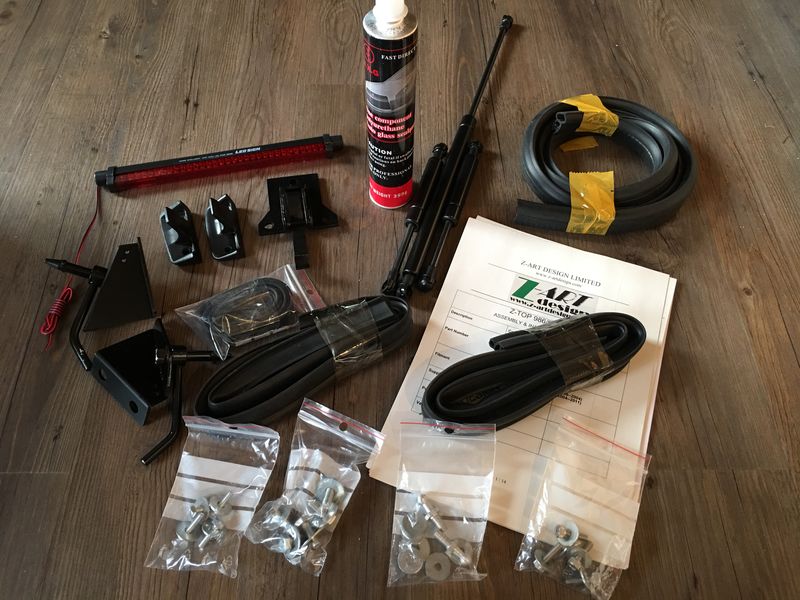
Question, this is all that came with it in terms of a front latch. I'm guessing you hook it first then tighten the bolts?
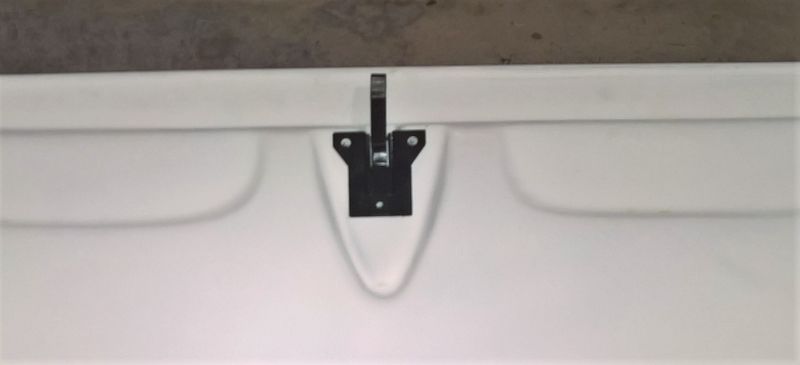
On the pic online at website it also shows this reinforcement?? below but it didn't come with the parts and isn't listed on the parts included list. I'm guessing they had a change in the parts needed after the pic was taken? Is this like your latch?
Opinions on what the second pic missing piece below is?
Thanks
Last edited by JBauer; 10-31-2017 at 05:01 AM.
|
|
|
|
|
10-31-2017, 06:09 AM
|
#46
|
|
WALDMEISTER
Join Date: Sep 2013
Location: Germany
Posts: 1,381
|
Front latch looks the same, but those two side pieces are missing?
They might be the same as for the regular TOP/Hardtop (not sure though)
Take a look at my pic and see what is missing on your side.
Transfered from another thread:
Quote:
Originally Posted by RedTele58
BRAN - lots and lots of pictures and a detailed write-up please of prepping the top and installation. Thanks!
|
Sure thing!!
The top comes with a 14 page installation manual, side and rear windows and parts.
Recommendation was: ALWAYS make sure, that the windshield-roof alignment is perfect throughout the whole adjustment process...so much for the very welcome tips of the seller.
What was missing in general:
hinges: Got a pair of new PORSCHE hinges
"Superglue": I used Liqui Moly 3805 & CSR-Automotive Elch Pro P1 1K-PU-GLUE ZB079 for the rubber seals (dunno what the pros where using for the side and back window).
cables: I got a pack of male/female connectors, to create plug'n'drive connections for the break light & heated rear window.
PLUS: I got the Porsche cable for the rear window OEM-hard top.
__________________
Original Owner | PORSCHE Boxster 2.7L (MY01) | Seal Gray
|
|
|
|
|
10-31-2017, 07:46 AM
|
#47
|
|
Registered User
Join Date: Apr 2017
Location: Indiana
Posts: 1,512
|
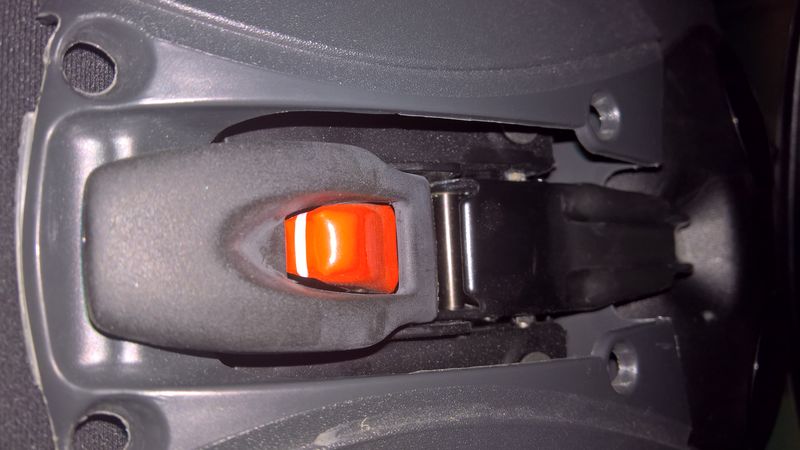
Ok Thanks. That's exactly what I received. I guess I expected a latch like the factory top has. One that snugs tight when latching like this. I guess since its not removed alot it doesn't matter? . 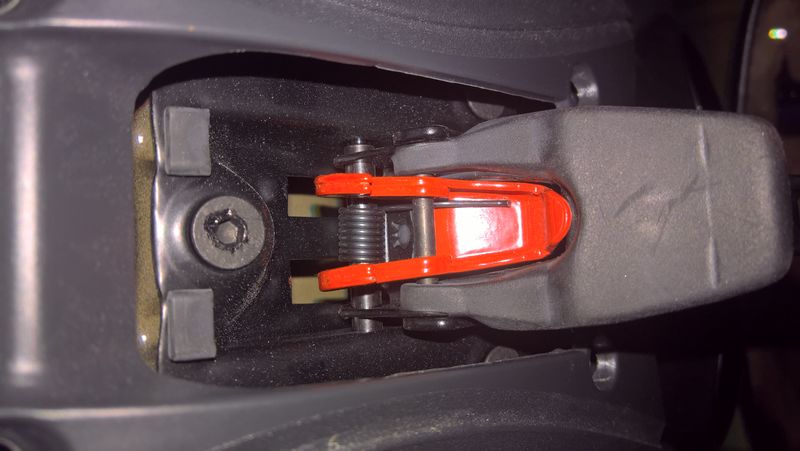
|
|
|
|
|
10-31-2017, 07:49 AM
|
#48
|
|
Registered User
Join Date: Apr 2017
Location: Indiana
Posts: 1,512
|
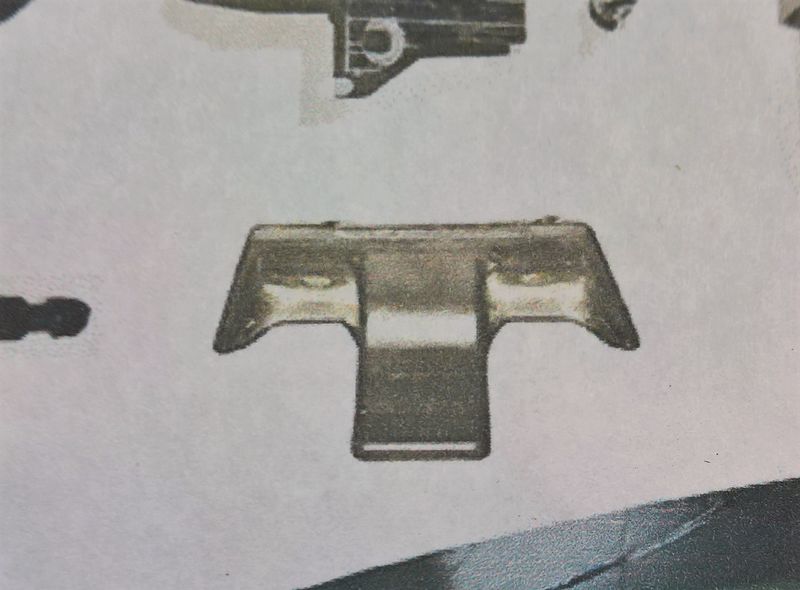
This piece is missing I thought but i dont see it in your pic either: 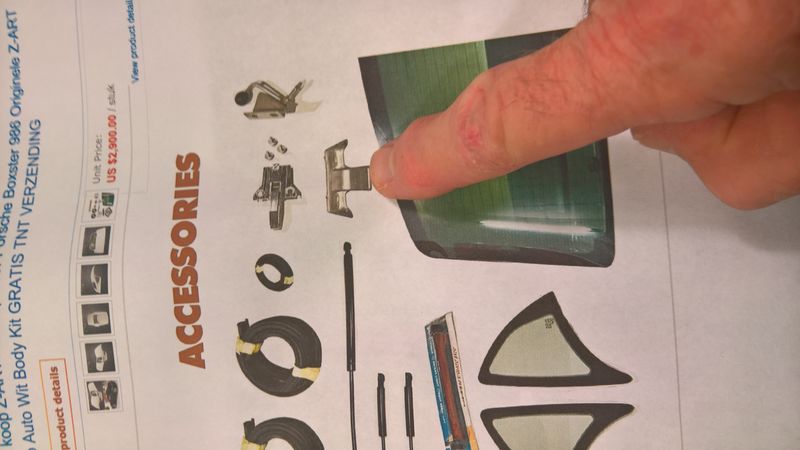

Last edited by JBauer; 10-31-2017 at 07:51 AM.
|
|
|
|
|
10-31-2017, 10:03 AM
|
#49
|
|
WALDMEISTER
Join Date: Sep 2013
Location: Germany
Posts: 1,381
|
JB, look at my picture...left to the latch are 2 black pieces...those are the ones you need. BTW left and right side are not symmetrical. Funny that the website shows only one.
The 2 front latch screws are never touched anymore once installed, and the top screw NEEDS to be screwed in after putting the TOP on, so it does not pop off, I guess
__________________
Original Owner | PORSCHE Boxster 2.7L (MY01) | Seal Gray
|
|
|
|
|
10-31-2017, 11:30 AM
|
#50
|
|
Registered User
Join Date: Apr 2017
Location: Indiana
Posts: 1,512
|
Quote:
Originally Posted by BRAN
JB, look at my picture...left to the latch are 2 black pieces...those are the ones you need. BTW left and right side are not symmetrical. Funny that the website shows only one.
The 2 front latch screws are never touched anymore once installed, and the top screw NEEDS to be screwed in after putting the TOP on, so it does not pop off, I guess |
Ok thanks. I've got those. I just wondered why that pictured piece was missing 🙂
|
|
|
|
|
10-31-2017, 12:34 PM
|
#51
|
|
Registered User
Join Date: Apr 2017
Location: Indiana
Posts: 1,512
|
Well I got it on but the top seems to be interfering with tge roof to keep it from seating. Did you have to trim the underside of the top or am Imissing something? 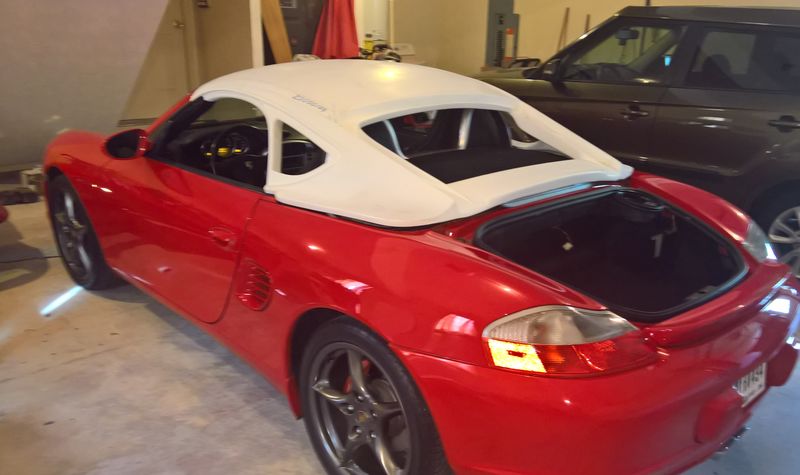 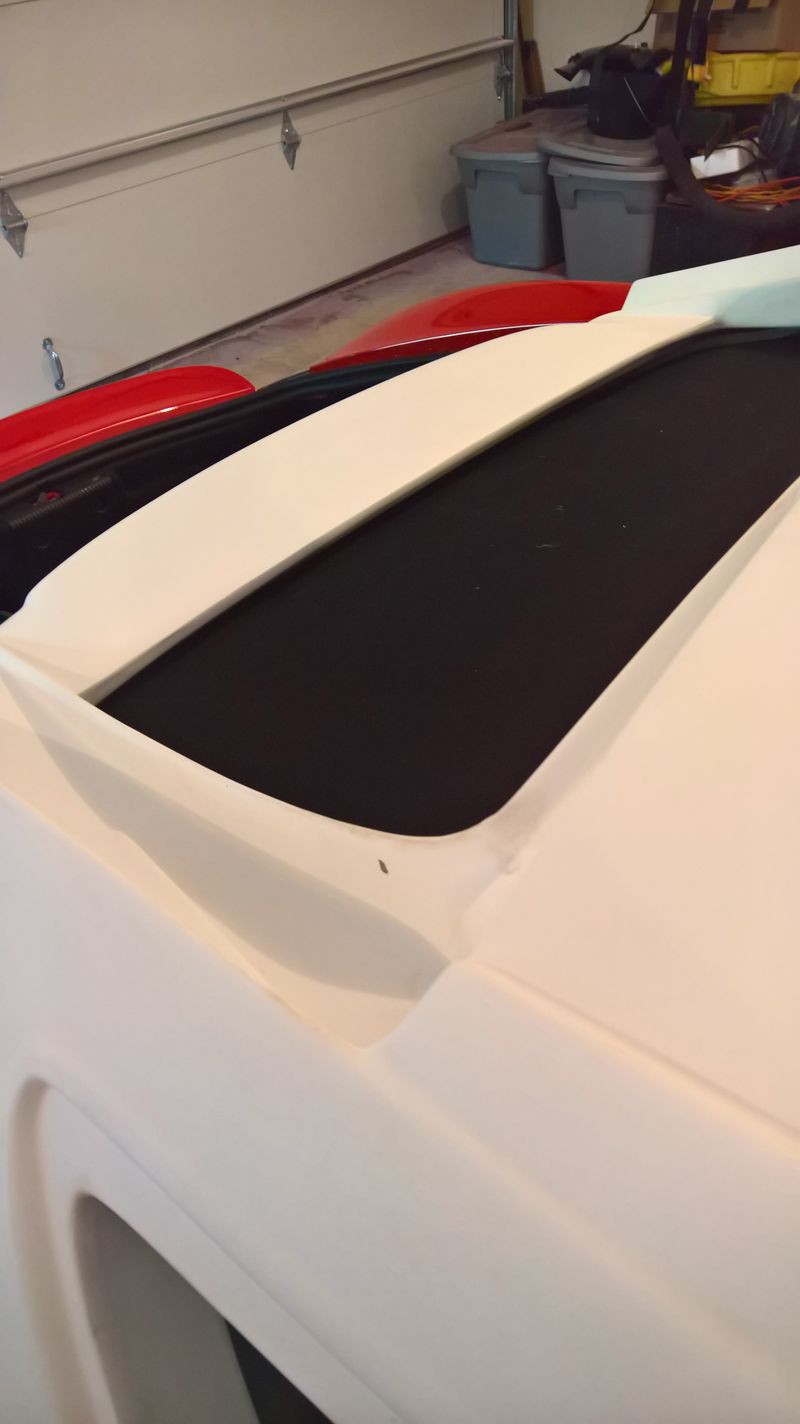
|
|
|
|
|
10-31-2017, 12:45 PM
|
#52
|
|
Registered User
Join Date: Jun 2012
Location: Bedford, TX
Posts: 2,755
|
Just guessing, but BRAN showed above in a couple of pictures where he had to trim to get it to seat. No idea about interfering with the soft top.
__________________
______________________________________________
2001 Boxster S Lapis Blue
TS Cat Bypass Pipes and exhaust
iPad Mini Dash Install
DEPO Tail Lights
|
|
|
|
|
10-31-2017, 12:48 PM
|
#53
|
|
Registered User
Join Date: Apr 2017
Location: Indiana
Posts: 1,512
|
Quote:
Originally Posted by BruceH
Just guessing, but BRAN showed above in a couple of pictures where he had to trim to get it to seat.
|
Ya I know about those parts that need trimming but it seems to be resting on the soft top. I should get one side to slip into the slot but the top seems to be getting in the way 
|
|
|
|
|
10-31-2017, 12:54 PM
|
#54
|
|
WALDMEISTER
Join Date: Sep 2013
Location: Germany
Posts: 1,381
|
Yep, assuming that you trimmed those edges, the 3rd break light "should" be removed...AND it needs the spin locks to REALLY make it sink.
It is all very tight, but a piece of paper should always be used to check gaps, fitments to see if stuff is sitting on each other...should make horrible creak sounds later on otherwise 
Take your time and give the TOP some sink time, too
We're gonna be fine. 
__________________
Original Owner | PORSCHE Boxster 2.7L (MY01) | Seal Gray
|
|
|
|
|
10-31-2017, 01:26 PM
|
#55
|
|
Registered User
Join Date: Apr 2017
Location: Indiana
Posts: 1,512
|
Quote:
Originally Posted by BRAN
Yep, assuming that you trimmed those edges, the 3rd break light "should" be removed...AND it needs the spin locks to REALLY make it sink.
It is all very tight, but a piece of paper should always be used to check gaps, fitments to see if stuff is sitting on each other...should make horrible creak sounds later on otherwise
Take your time and give the TOP some sink time, too
We're gonna be fine. |
Yep, I over reacted. It's the parts that need trimmed. Once i put the weight of the hatch, and it's not heavy it seem to rest against the ears that need trimmed. Did you trim your a little at a time? One side then the other back and forth until it went in? Mine doesn't look like it needs much trimmed to me. 
|
|
|
|
|
10-31-2017, 01:50 PM
|
#56
|
|
WALDMEISTER
Join Date: Sep 2013
Location: Germany
Posts: 1,381
|
Yup, that's how it did it...i tried to keep a 4mm gap. Was careful first, but got confident pretty fast.
__________________
Original Owner | PORSCHE Boxster 2.7L (MY01) | Seal Gray
|
|
|
|
|
10-31-2017, 02:35 PM
|
#57
|
|
Registered User
Join Date: Apr 2017
Location: Indiana
Posts: 1,512
|
How's this,cover come off? 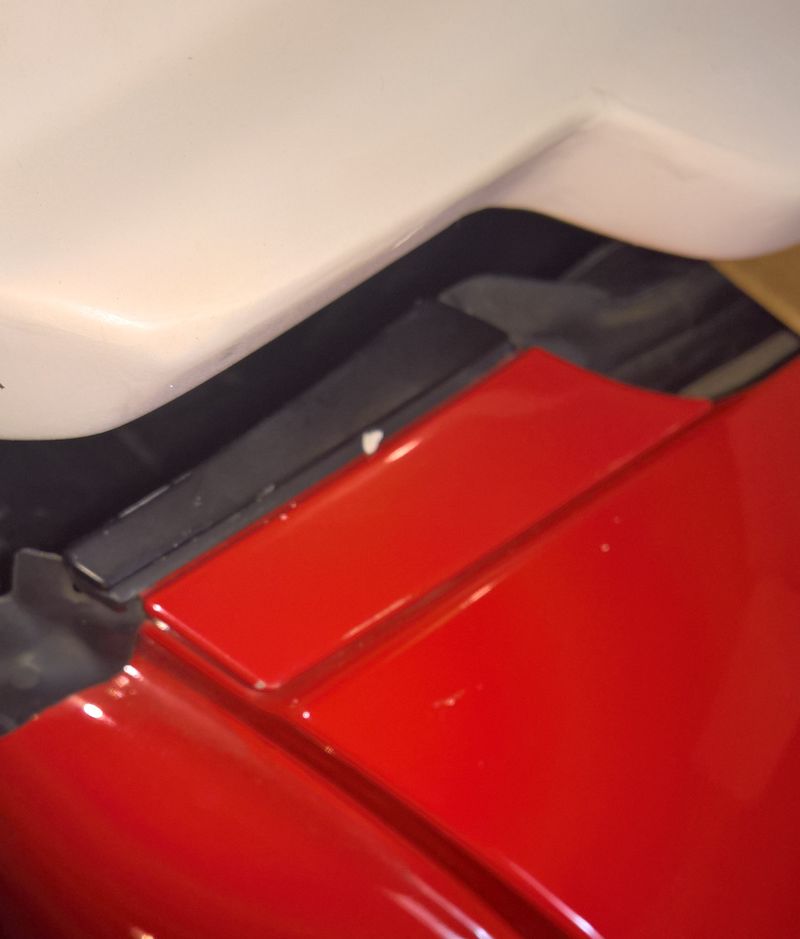
|
|
|
|
|
11-01-2017, 07:08 AM
|
#58
|
|
Registered User
Join Date: Apr 2017
Location: Indiana
Posts: 1,512
|
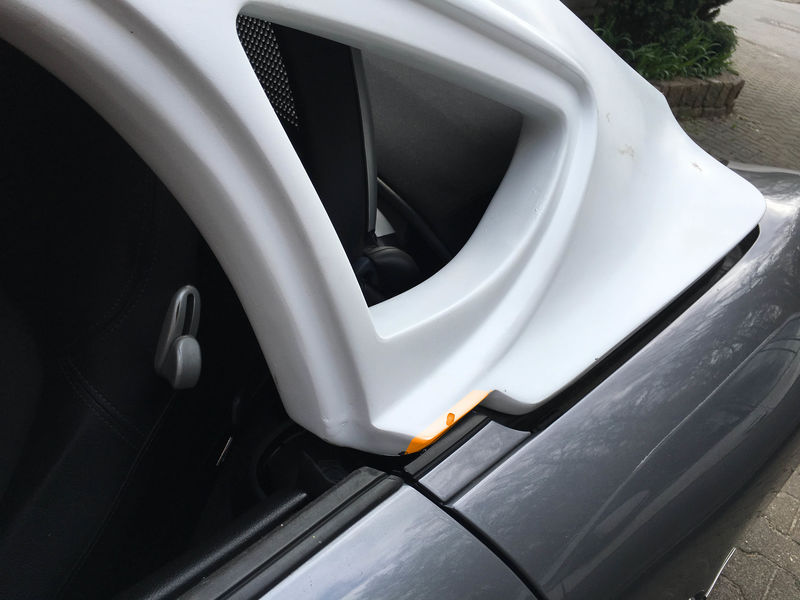
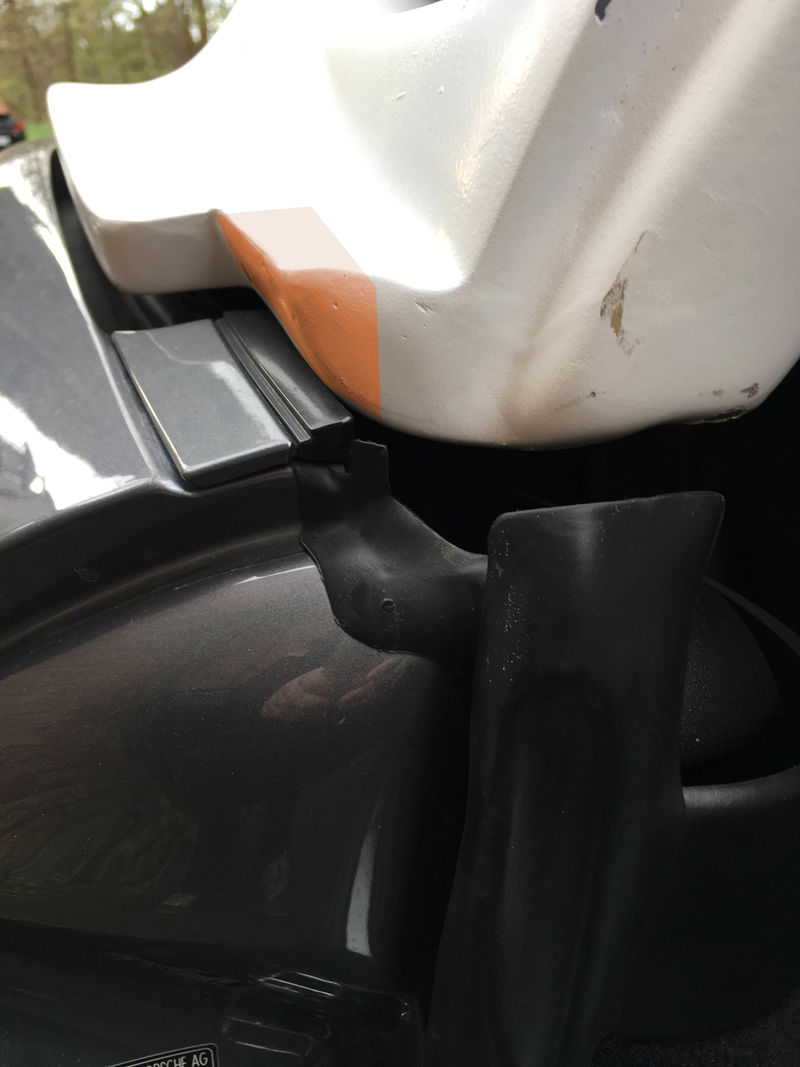
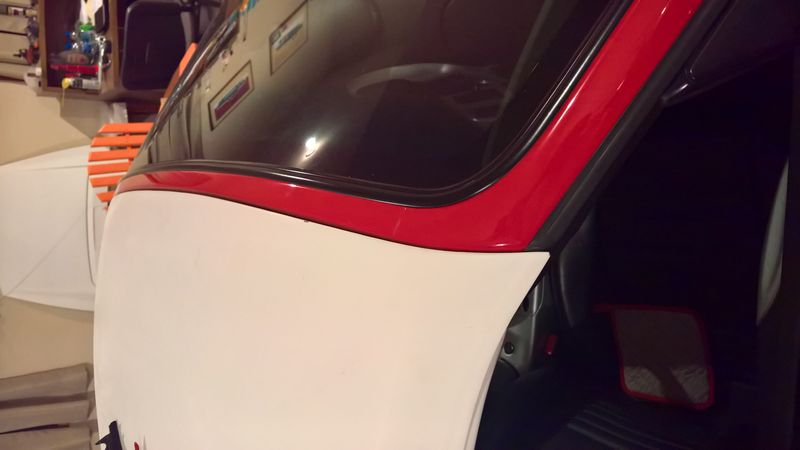
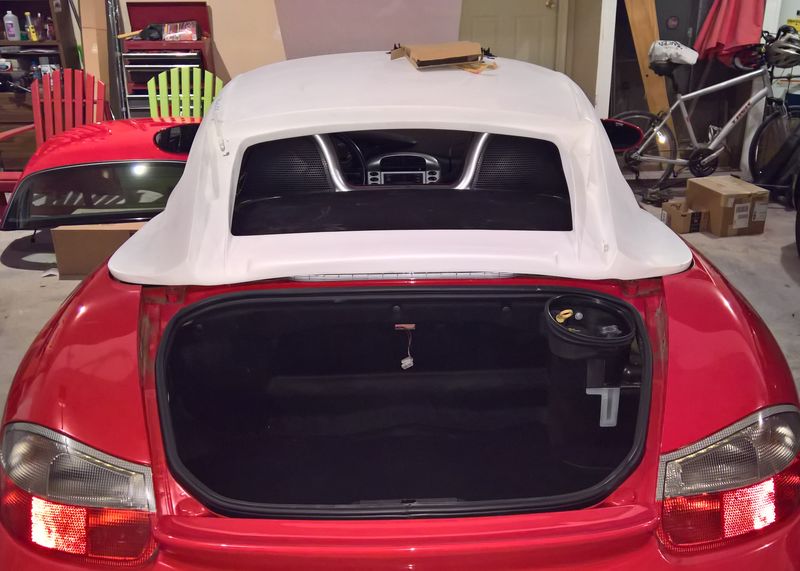
Here are some pics of what ive found.
1. Oddly my top doesn't seem to need trimmed at all.
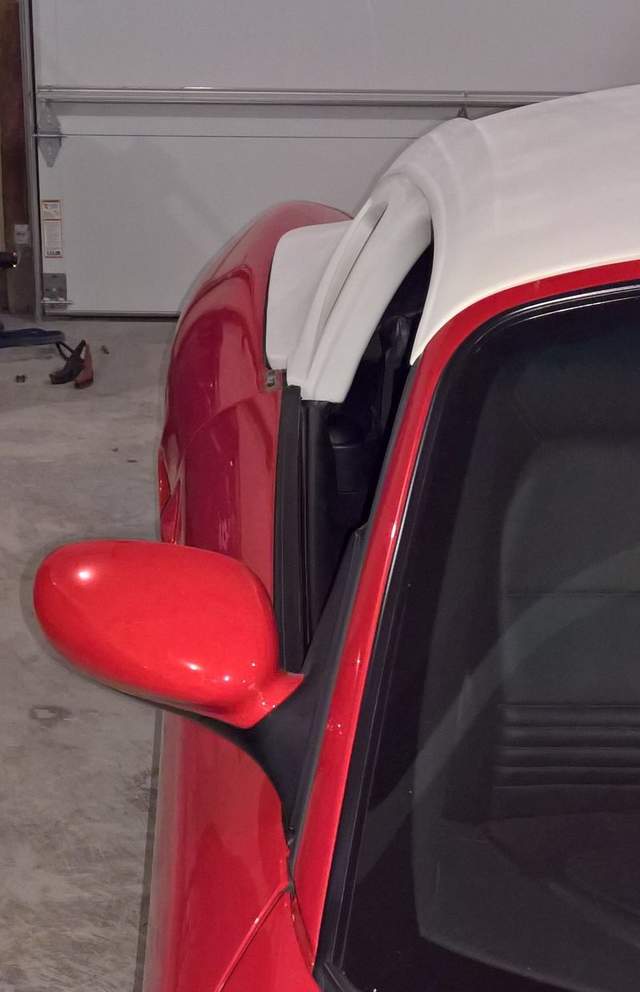
2. The only thing keeping my top from resting where it supposed to is its hitting the covt top.
3. Applying quite a bit of downward force only gets me 1/2 an inch from being flush.
After thinking about this I'm going to have to remove quite a bit of material from the underside of the top.
OR what if I just removed the convertible top and stored it for the winter? Not sure if it's true but I've done a search and several articles I've came up with day this is something that fairly easy to do.
Also I removed brake light and it made no difference.
Opinions?

Last edited by JBauer; 11-01-2017 at 07:20 AM.
|
|
|
|
|
11-01-2017, 12:41 PM
|
#59
|
|
WALDMEISTER
Join Date: Sep 2013
Location: Germany
Posts: 1,381
|
I assume, that pre-FL and FL soft tops kind of fold into the same "volume", otherwise the clamshell would differ. So it should not make a difference for the hard top fitment.
Did you check, where the exactly the top sits on the soft top?
I had that impression, too... at first, but i proofed myself wrong.
I think, that the spot where the Top is sitting on (spin locks) needed to be reduced/trimmed to make the TOP sink to a "flush" state. I decided against doing that, as I don't want to weaken critical spots by reducing material.
You can ONLY get a REAL first impression on how the TOP sits, by installing the locks/latches and lock them in...you will see how MUCH that will sink the TOP. Additional the hatch puts a little weight on the back of the TOP as well.
All in all, my Top is not 100% flush, it sits ~5mm higher which is okay with me.
I trimmed my TOP sides, as I decided to keep the side covers where they are. That is what the manual says, as well as the seller and what some YouTube videos showed. It might work out for you to keep them untouched, you should try first.
Oh...and btw...that hard, plastic tube for the cables....THAT is useless and definitely conflicting with the soft top. I yanked it out...helped too, I think.
__________________
Original Owner | PORSCHE Boxster 2.7L (MY01) | Seal Gray
|
|
|
|
|
11-01-2017, 01:08 PM
|
#60
|
|
Registered User
Join Date: Apr 2017
Location: Indiana
Posts: 1,512
|
The reason I removed the covers was I watched the video on the site that sells the top and he shows vaguely how the should go in. In the video he has the cover removed and I thought the black molding. He just had the covers off, Hus demo Boxster didn't have the molding painted black so I misunderstood. As for the top its definitely the problem. When I removed the top the primer was smashed into the top all the way across the highest edge. I put the lift gate on it and the top it preventing either side top slip into place. Even with alot of downward pressure it wasn't even close. As you can see in the pics it should fall into place without trimming because it is narrower than both of the metal ears. I'm not sure why my top is like new and hasn't ever been a problem. I'll try the spinlocks attached but they are pretty far forward of where the interference problems is. I dont mind taking the top off for I plan on leaving this top on for awhile.
Thanks for your help!
|
|
|
|
 Posting Rules
|
You may not post new threads
You may not post replies
You may not post attachments
You may not edit your posts
HTML code is Off
|
|
|
All times are GMT -8. The time now is 04:16 PM.
| |


 "GRAY"
 2001 Boxster S
 Linear Mode


