 08-30-2020, 10:02 AM
|
#421
|
|
WALDMEISTER
Join Date: Sep 2013
Location: Germany
Posts: 1,381
|

I see what PORSCHE is doing...
__________________
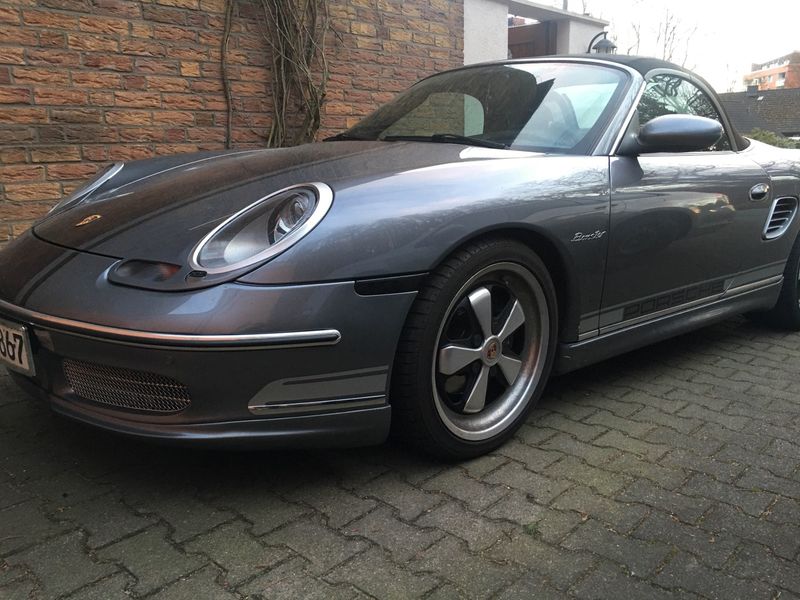
Original Owner | PORSCHE Boxster 2.7L (MY01) | Seal Gray
|

|

|
|
09-05-2020, 08:16 AM
|
#422
|
|
WALDMEISTER
Join Date: Sep 2013
Location: Germany
Posts: 1,381
|
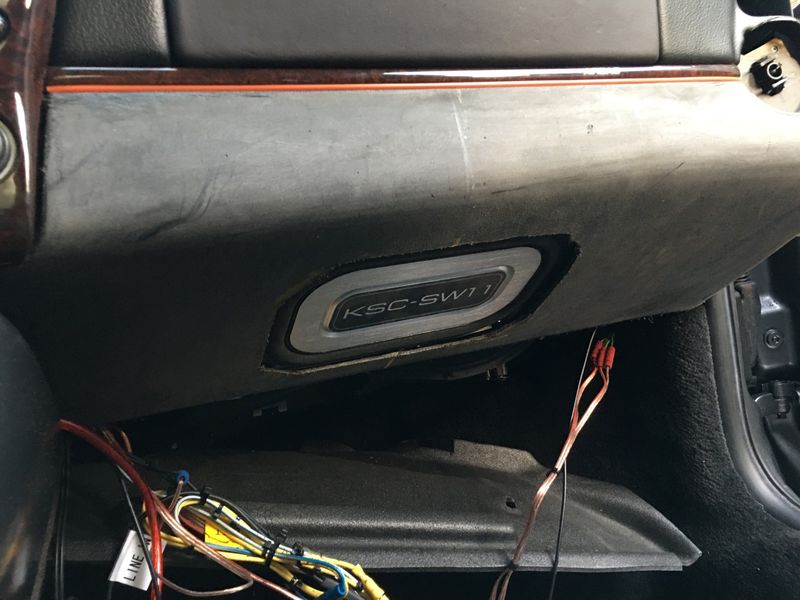
After exchanging the passenger airbag cover, I discovered the perfect spot for my Kenwood active Mini-Sub. Yup, facing downwards, right under the airbag.
There is enough room and clearing space to the airbag system. Will cut a hole into the dashboard, attach the sub inside with 4 screws and cover it with a modded Kenwood mesh.
Going to use my favourite tool for that:A multi cutter, much faster than my Dremel

__________________
Original Owner | PORSCHE Boxster 2.7L (MY01) | Seal Gray
Last edited by BRAN; 09-05-2020 at 08:19 AM.
|
|
|
|
|
09-05-2020, 06:15 PM
|
#423
|
|
Registered User
Join Date: Jun 2019
Location: Australia
Posts: 7
|
Sounds interesting... pictures please 
|
|
|
|
|
09-16-2020, 09:40 AM
|
#424
|
|
WALDMEISTER
Join Date: Sep 2013
Location: Germany
Posts: 1,381
|
Most of the cocoa interior parts are still available from PORSCHE, for really cheap money.......not.
Some major parts are already gone forever...sadly.
1. cocoa dashboard
2. cocoa firewall carpet
3. cocoa subwoofer box
Sooo, I am going to keep my sturdy black dashboard and see what I can do with it. Will upholster the lower part with cocoa leather after modding the subwoofer into it.
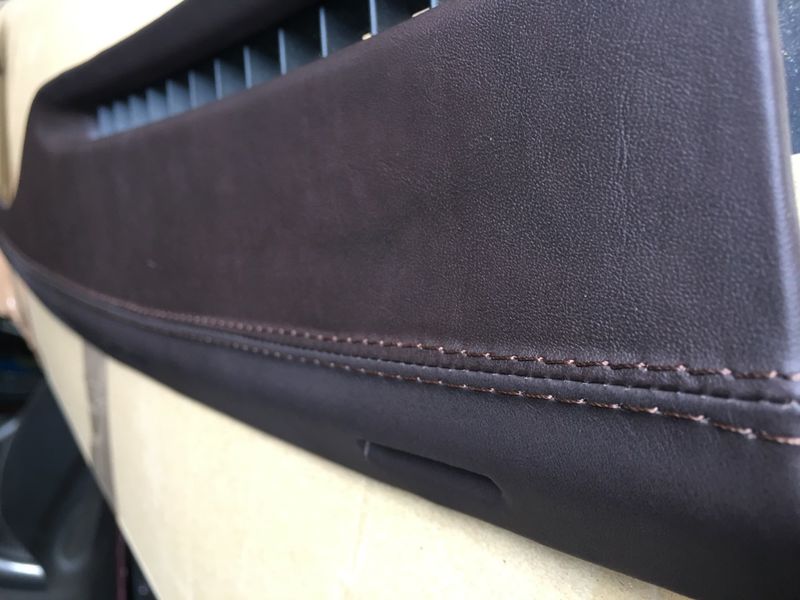
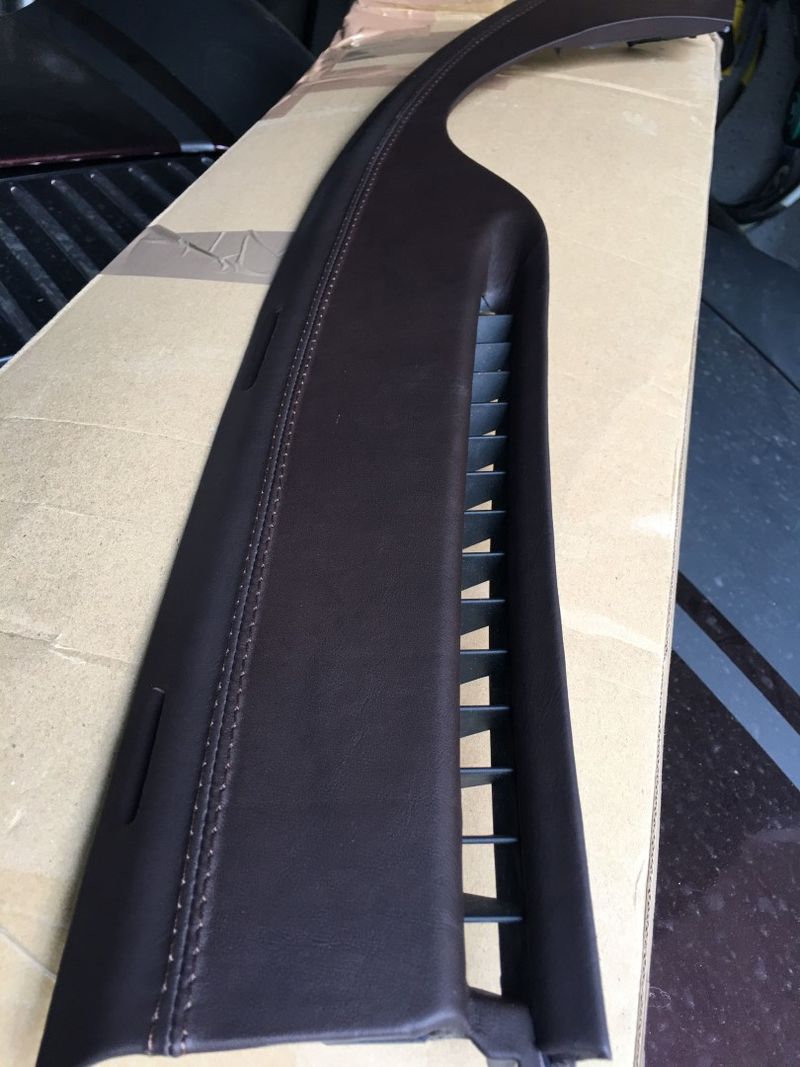
yep...OEM cocoa airbag cover & upholstered cocoa leather dashboard defroster trim plus cocoa stitching. Looks 100% OEM, but it actually never existed. 
__________________
Original Owner | PORSCHE Boxster 2.7L (MY01) | Seal Gray
Last edited by BRAN; 09-20-2020 at 12:07 PM.
|
|
|
|
|
11-08-2020, 07:56 AM
|
#425
|
|
WALDMEISTER
Join Date: Sep 2013
Location: Germany
Posts: 1,381
|
UNUSED SPACE put to use...
It is a struggle to grind those inner support strips down for a flash and tight fight. But I am getting there...
...the amp (in a small bespoke case) will be sitting right of the sub, towards the vent.
AND the final mods will be, the original black protective mesh and cococa leather.
__________________
Original Owner | PORSCHE Boxster 2.7L (MY01) | Seal Gray
Last edited by BRAN; 12-05-2021 at 03:08 AM.
|
|
|
|
|
11-08-2020, 05:02 PM
|
#426
|
|
Registered User
Join Date: Jul 2019
Location: Charleston
Posts: 561
|
Your feet are gonna "FEEL THE NOISE". LOL
You say mesh, but I feel plexiglass covering... with backlighting.
__________________
'99 supercharged 4.3 chevy Boxsterado
'98 PP13B powered "RX986"
This hairdresser only cuts mullets
|

|
|
|
11-08-2020, 11:20 PM
|
#427
|
|
Custom User Title Here
Join Date: Mar 2012
Location: Ft. Leonard Wood
Posts: 6,169
|
__________________
https://youtube.com/@UnwindTimeVintageWatchMuseum
|
|
|
|
|
11-09-2020, 08:43 AM
|
#428
|
|
2003 S, Arctic Silver, M6
Join Date: Oct 2014
Location: Winnipeg, MB, Canada
Posts: 1,346
|
Quote:
Originally Posted by particlewave

|
Wonderful article. I read it wearing my bespoke eyeglasses.
|
|
|
|
|
11-09-2020, 02:56 PM
|
#429
|
|
Registered User
Join Date: Jul 2019
Location: Charleston
Posts: 561
|
Quote:
Originally Posted by particlewave
|
I bought my top from a guy who had already sold it to another, but the other seller backed out... It had "been spoken for"; does that make my Z-top bespoke? It has been customized for my car. ")
__________________
'99 supercharged 4.3 chevy Boxsterado
'98 PP13B powered "RX986"
This hairdresser only cuts mullets
|
|
|
|
|
01-27-2021, 07:27 AM
|
#430
|
|
WALDMEISTER
Join Date: Sep 2013
Location: Germany
Posts: 1,381
|
I like to split hairs. Bespoke & customised...both are referring to a contractual situation with at least 2 individuals, most likely with a commercial background (seller-customer).
So I agree, neither can I use the term bespoke nor customised, if I craft or modify something on my own.
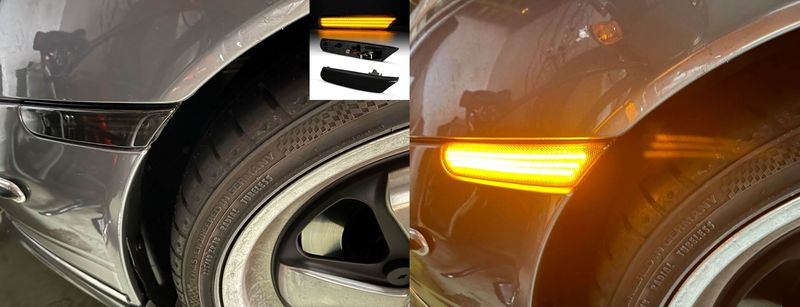
Not sure, if those were shown here already, but I found new side markers...will shoot some better pics (I was actually just checking, if they work).
REALLY AFFORDABLE, don't want to use the word "cheap", as they seem to be of good quality. A steal! Certified, road legal!
Plain like the OEM ones, not raised like the aftermarket ones I have. Plug'n'play, perfect fit.
__________________
Original Owner | PORSCHE Boxster 2.7L (MY01) | Seal Gray
|
|
|
|
|
02-28-2021, 02:18 PM
|
#431
|
|
WALDMEISTER
Join Date: Sep 2013
Location: Germany
Posts: 1,381
|
new sidemarkers/blinker
MAG SAFE wireless iphone holder "Blade Runner/Fallout style", before air brushing...
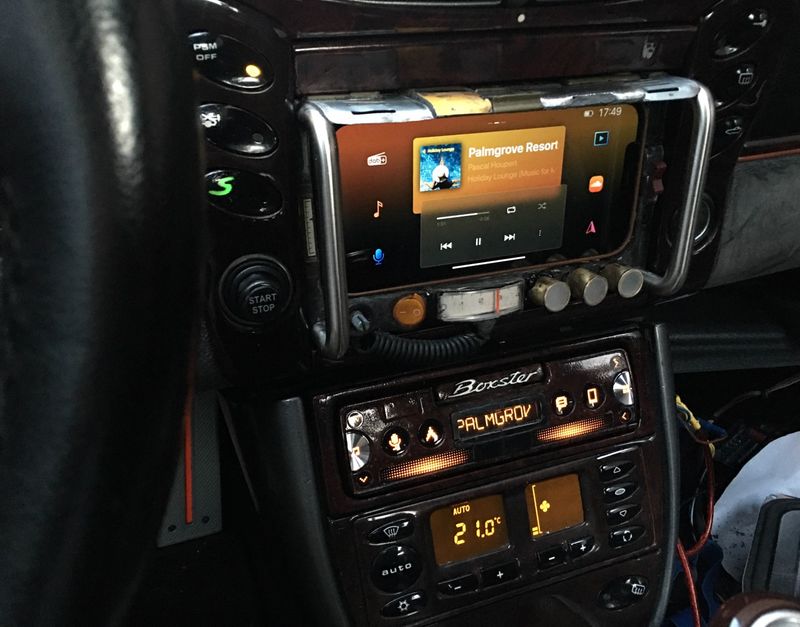
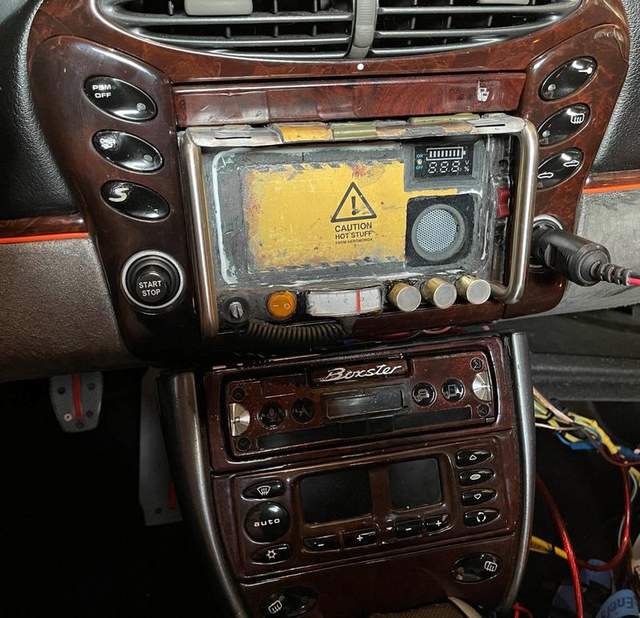
...including battery status tester & backup speaker...
IPHONE 12 pro max just fits perfect...
__________________
Original Owner | PORSCHE Boxster 2.7L (MY01) | Seal Gray
Last edited by BRAN; 03-01-2021 at 01:29 AM.
|
|
|
|
|
02-28-2021, 03:51 PM
|
#432
|
|
Registered User
Join Date: Jun 2012
Location: Bedford, TX
Posts: 2,755
|
Very cool
__________________
______________________________________________
2001 Boxster S Lapis Blue
TS Cat Bypass Pipes and exhaust
iPad Mini Dash Install
DEPO Tail Lights
|
|
|
|
|
04-05-2021, 03:43 AM
|
#433
|
|
WALDMEISTER
Join Date: Sep 2013
Location: Germany
Posts: 1,381
|
__________________
Original Owner | PORSCHE Boxster 2.7L (MY01) | Seal Gray
|
|
|
|
|
04-10-2021, 04:06 AM
|
#434
|
|
WALDMEISTER
Join Date: Sep 2013
Location: Germany
Posts: 1,381
|
just for my link collection...not new, but still interesting those guys from ItalianSteelArt.
https://www.italiansteelart.com/
__________________
Original Owner | PORSCHE Boxster 2.7L (MY01) | Seal Gray
|
|
|
|
|
04-11-2021, 02:01 PM
|
#435
|
|
Registered User
Join Date: Nov 2015
Location: Bracebridge, Ontario
Posts: 256
|
Quote:
Originally Posted by BRAN
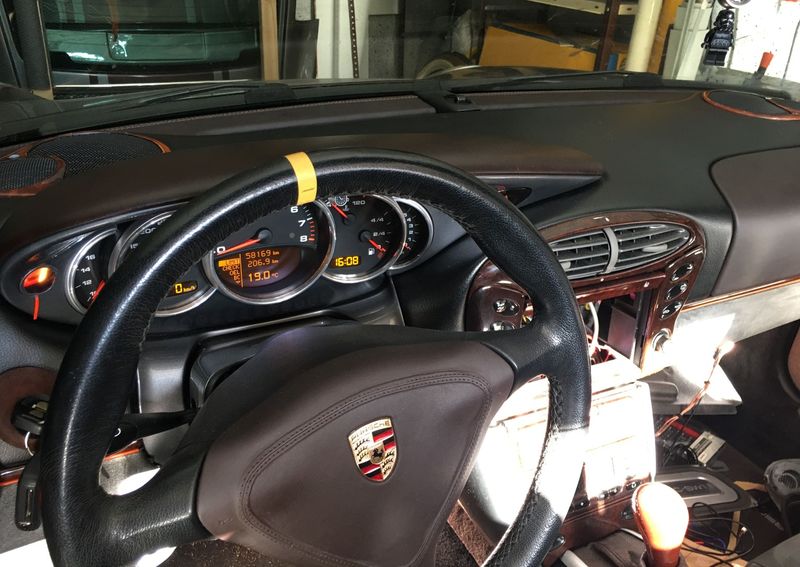
Polished Trim rings (credits to Chuck )
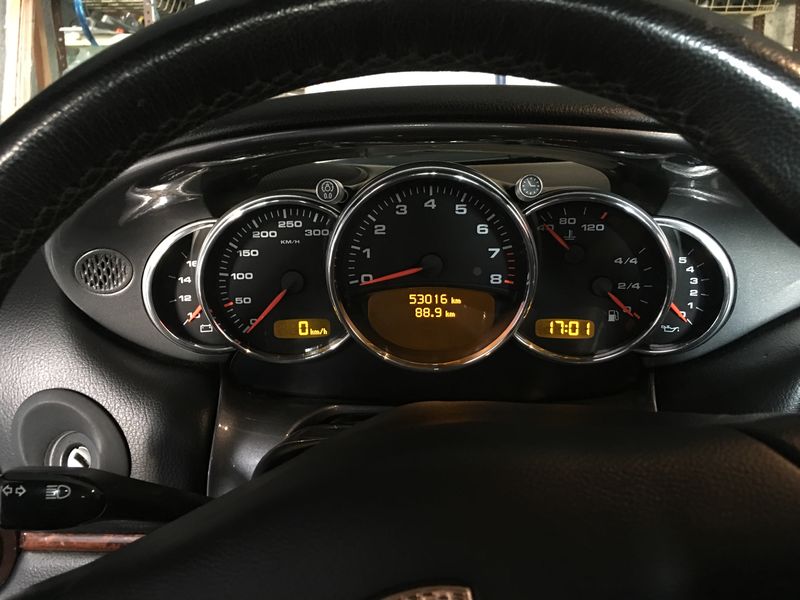
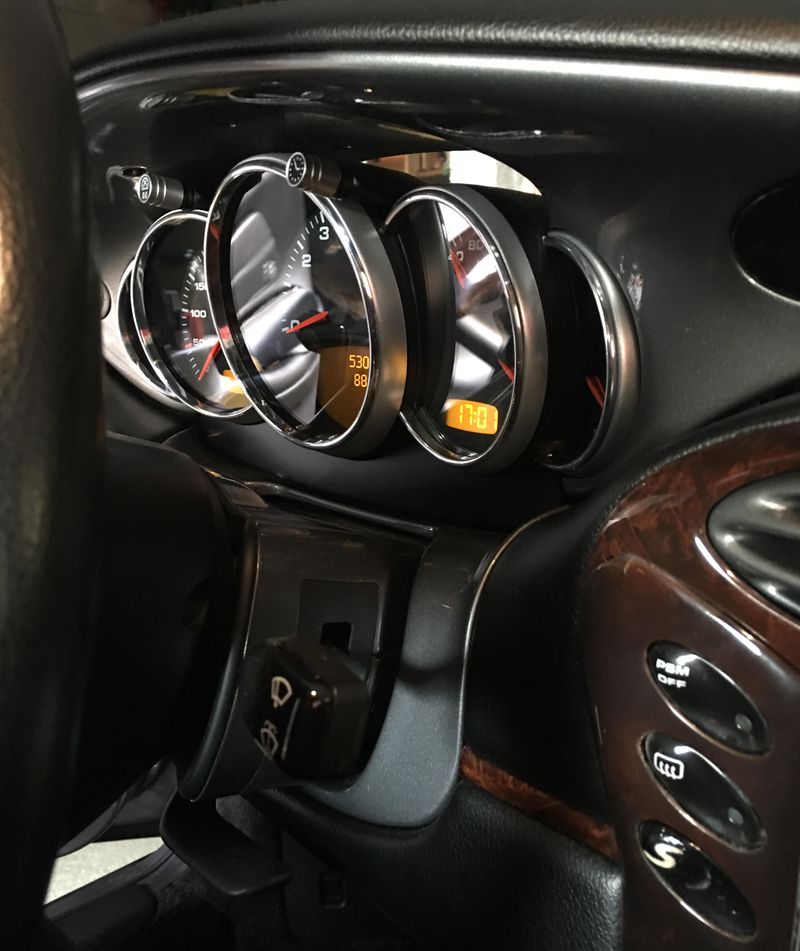
almost no glare despite all the seal grey surrounding the gauges...sooooo old school, love it! |
Looks Great
What cluster did you use? Year/Model
Where did you get the Crome trim rings.
Thanks Bart
__________________
My Beast 2004 Boxster SE #0174
- 3.8 with all the internal goodies, Under-mount Pulley, IPD Plenum, 996 Intake, Softronic Tune, 987 Factory Sport Exhaust, skid plates, IMS solution, Ohlins R&T, RSS Toe Links, Camber Plates, Michelin Pilot Super Sport on all 4 corners, Alpine Double Din c/w new speakers & amps.
|
|
|
|
|
04-13-2021, 12:23 AM
|
#436
|
|
WALDMEISTER
Join Date: Sep 2013
Location: Germany
Posts: 1,381
|
Quote:
Originally Posted by Muskoka Minute
Looks Great
What cluster did you use? Year/Model
Where did you get the Crome trim rings.
Thanks Bart
|
Thanks Bart,
Chrome rings: Offered by a company from Poland. A quality product, no doubt. I need to concentrate not to misspell their name, let's see "DIDO TUNING"
Cluster: Long time ago...year 2004 not sure what model, but I followed the 101 projects guide line, what to get and what to avoid.
__________________
Original Owner | PORSCHE Boxster 2.7L (MY01) | Seal Gray
|
|
|
|
|
04-13-2021, 02:57 PM
|
#437
|
|
Registered User
Join Date: Nov 2015
Location: Bracebridge, Ontario
Posts: 256
|
Quote:
Originally Posted by BRAN
Thanks Bart,
Chrome rings: Offered by a company from Poland. A quality product, no doubt. I need to concentrate not to misspell their name, let's see "DIDO TUNING"
Cluster: Long time ago...year 2004 not sure what model, but I followed the 101 projects guide line, what to get and what to avoid.
|
Thanks for that info.
Cheers!
__________________
My Beast 2004 Boxster SE #0174
- 3.8 with all the internal goodies, Under-mount Pulley, IPD Plenum, 996 Intake, Softronic Tune, 987 Factory Sport Exhaust, skid plates, IMS solution, Ohlins R&T, RSS Toe Links, Camber Plates, Michelin Pilot Super Sport on all 4 corners, Alpine Double Din c/w new speakers & amps.
|
|
|
|
|
04-24-2021, 11:28 AM
|
#438
|
|
WALDMEISTER
Join Date: Sep 2013
Location: Germany
Posts: 1,381
|
Another little project I got myself into...modding a zunsport grill...for a perfect inlay fit. Why? Just WHY?
Because...
WIP
__________________
Original Owner | PORSCHE Boxster 2.7L (MY01) | Seal Gray
Last edited by BRAN; 12-05-2021 at 03:06 AM.
|
|
|
|
|
05-10-2021, 09:28 AM
|
#439
|
|
WALDMEISTER
Join Date: Sep 2013
Location: Germany
Posts: 1,381
|
finally plasti dipped my center caps - matte black
never used plasti dip before. Pretty easy to use stuff, I am impressed.
__________________
Original Owner | PORSCHE Boxster 2.7L (MY01) | Seal Gray
Last edited by BRAN; 12-05-2021 at 03:05 AM.
|
|
|
|
|
05-25-2021, 08:04 AM
|
#440
|
|
WALDMEISTER
Join Date: Sep 2013
Location: Germany
Posts: 1,381
|
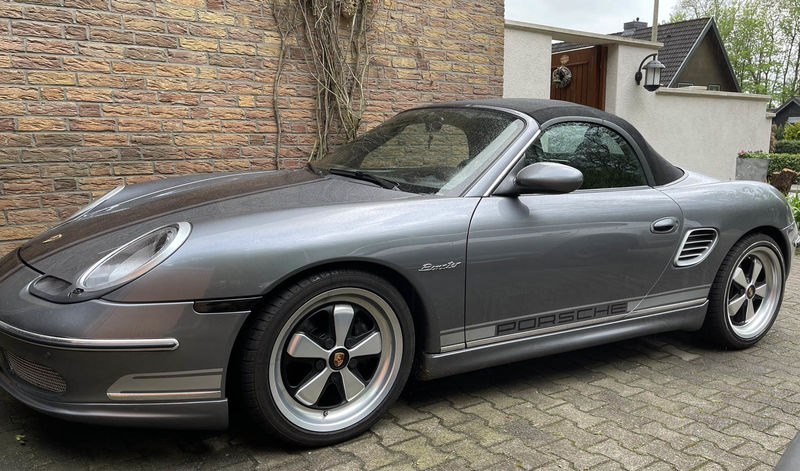
The 2 parts (handle lock & holder) I had to replace on my speedster humps look different these days...somehow better, hopefully

__________________
Original Owner | PORSCHE Boxster 2.7L (MY01) | Seal Gray
Last edited by BRAN; 05-25-2021 at 09:23 AM.
|
|
|
|
| Thread Tools |
|
|
| Display Modes |
 Linear Mode Linear Mode
|
 Posting Rules
|
You may not post new threads
You may not post replies
You may not post attachments
You may not edit your posts
HTML code is Off
|
|
|
All times are GMT -8. The time now is 01:22 PM.
| |


 "GRAY"
 2001 Boxster S
 My Beast


