This how to is for a non Bose, no Amp car with a CDR-23 head unit and CDC-4 frunk cd changer. Guess I was fortunate to have he poor mans edition!?!?!? This means I had direct speaker connections behind the head unit so could wire in directly with no faffing around in the frunk and running additional speaker cables..
The reason I changed the head unit apart from the modern connectivity benefits was that I was getting intermittent "Protect" errors. The CDR-23 reads its code from the ECU on wake up. If the car had been "asleep" for a few hours it would start with no problem but if only off for a short period of time then no joy. This only kicked off regularly this season but it had happend the odd time over the last few summers.
So after a bit of looking around at head units I opted for the Pioneer SPH-10BT.
This unit uses your smart phone and a pioneer app so your phone basically becomes a touch screen interface for the system. Its also colour tunable as I wanted something that fitted the original look. It has a pull out holder that holds the phone above the head unit but this blocks the AC controls so I don't use it. I have the original Porsche side pod and mount the phone on that.
Overall it was straightforward so here goes. I recommend that you disconnect the battery to be safe! (I didn't but I was very careful - I like to live on the edge)
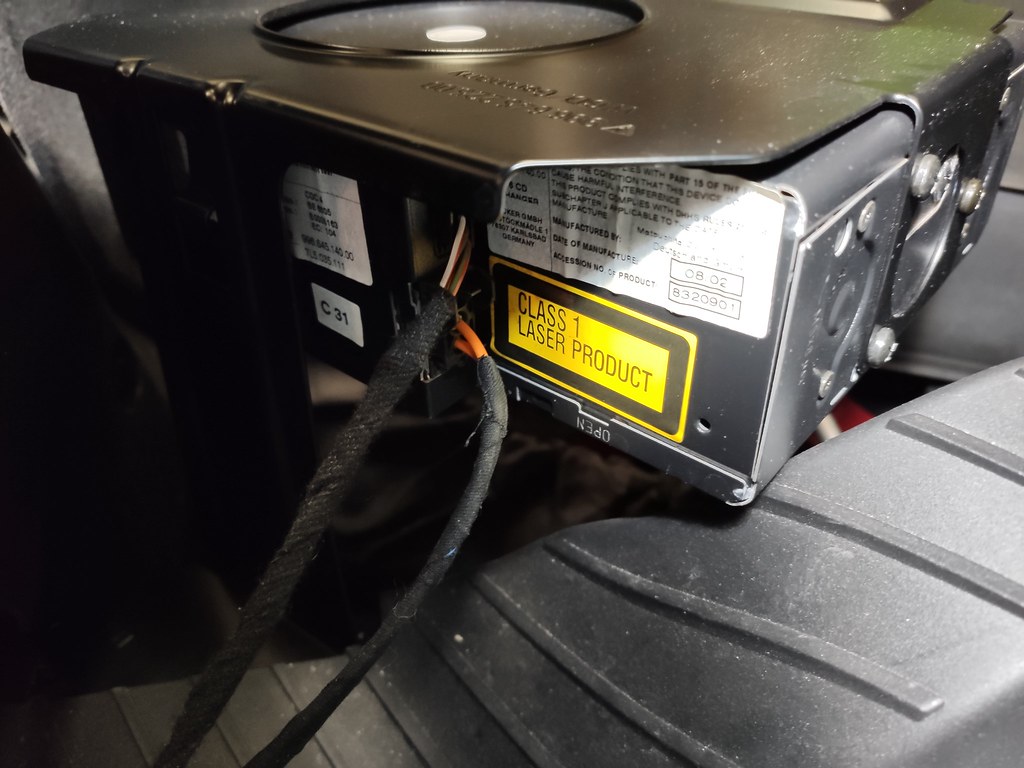
First job remove the frunk CD changer.
This is mounted on a bracket that it is pressed down onto. It is held there with spring clips. They are really tight so a flat head screw driver to spread them will help it pop up no end. In my case I had two cables, power and the dreaded fibre optic MOST connector. In my case the MOST is the comms between the changer and the head unit. This pops out easily. The other connector did out up a fight but eventually it was verbally persuaded to co-operate.

So with that out of was back inside - Pro tip, do this with the roof down, just gives you more light and easier to hop in and out of the car.
Pull out the head unit - you will need the appropriate release tools (need to add a pic of these)
These need a very firm push into the head unit slots and in my case it took a decent pull to shift it. Slide it out and you should see the connectors on the back. The yellow is the can bus, remove carefully and I taped it back to the harness out of the way. I did this to protect it so that the original kit can be reinstalled in the unlikely event that the Boxster ever becomes a classic and should be returned to factory original. The CAN bus will not be used on the new install and the new unit will need a switched power from the ignition to turn on. The green is the phone connection which I removed completely as my car had a parrott system installed that didn't work.
Disconnect the others and that's the old out of the way. I tucked the MOST cable back in carefully so it doesn't kink or get damaged also.
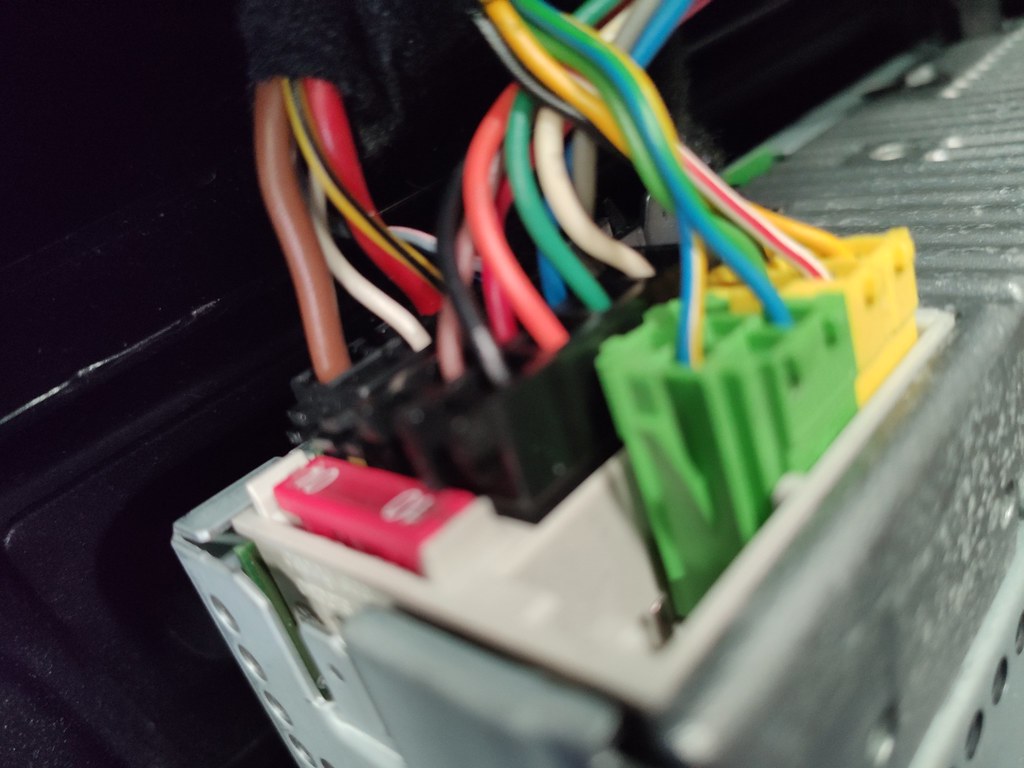
So as I'm paranoid I checked all cables and harness to see what I had to work with. My findings and measurements are below but you should check yours to be 100%. I don't like zapping stuff.

So with everything checkout out I decided I needed a bit more room to work and that the climate control had to come out of the way. Gently pull the surround at the base and work it around. It is held in place by two push fittings (see the pic down further with white plastic and circular holes), one on each side half way up. It should come off easily enough, might need a screwdriver underneath it just to give it the final pop. When its off there are two screws holding the climate control module in the dash. Take them out and it will slide out, it is really light and fortunately the harness have decent length. I was able to prop it on the stalk (indicator) so it was out of the way.

At this point I had verified the wiring of the new head unit against the existing wiring so hooked everything up. The existing power connection on connector A provided permanent power. I rigged up a 12 V from the cigarette lighter to simulate switched power and up came the unit. Tuned in a station and all sounded good. By the way this was a test - you cannot use the cigarette lighter feed as its always live to facilitate battery charging - its fed directly from the battery, not switched via the ignition.
Once happy with the fact it worked I installed the new cage. This was tight so the plastic need a rub with a file for it to fit left to right. It was only a tiny amount but I didn't want to force it.
***This was the only mistake I made, not a big deal but it did restrict my big paws so I should have done it later after completing all the messing with the cables.***

The next task was to get out the old phone wiring. This proved harder than expected. It was cable tied and wrapped in all sorts of ways. Took a good hour or two of chasing and pulling off panels, the ones down the side of the center being a royal pain the poodles privates and even worse to get back on. Anyway, job done and in the process I found a fused switched live that I soldered a new cable onto and ran back up to the back of the radio to give me the ignition switched power I needed. I hate old unused wiring on anything - just confuses things down the line.
I located the new phone mic on the steering column in front of the gauge cluster. It has lots of cable so I can move elsewhere if there isn't a success. The only additional item I needed to but was a Fakra antenna adopter connect the aerial to the new head unit. Tidied everything up and pushed in the head unit. Having the AC unit out means I could reach in and move the harness so that nothing was pinched.

AC unit back in and tested everything before snapping on the trim surrounds.

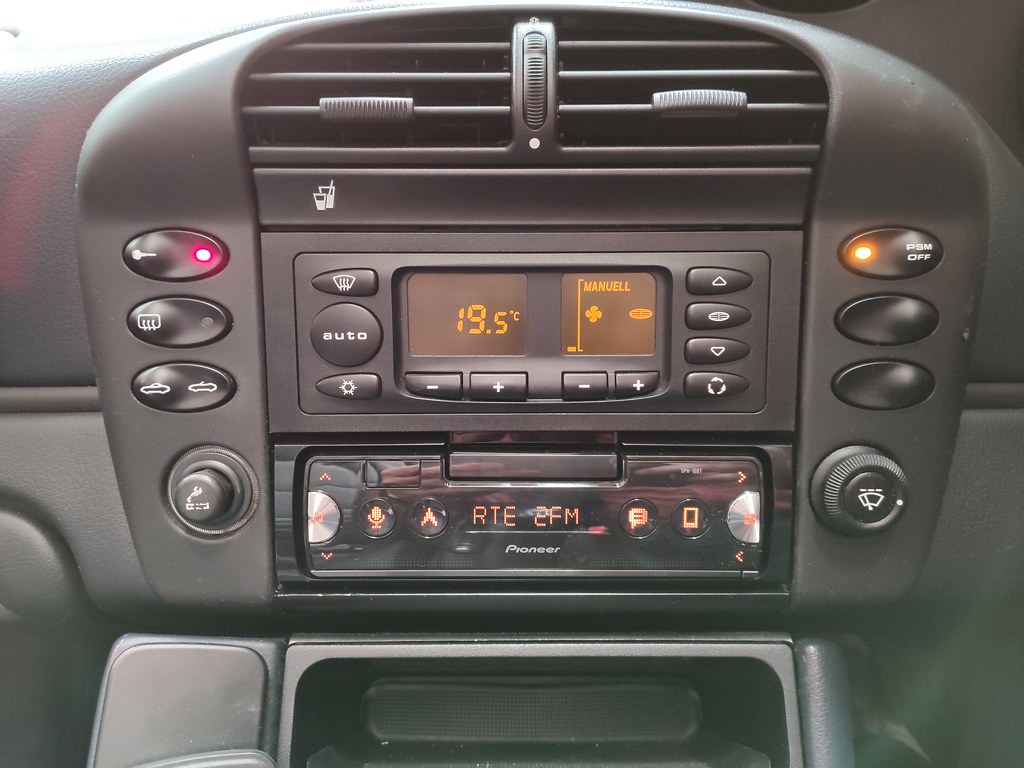
All done and dusted, the large bottom orange lights are on when the phone and app is connected by Bluetooth. The orange colour is a really good match better than the pic shows. The font isn't perfect and the surround plastic is a little shiny but I suppose you can't have everything, a small price to pay to have all the mod cons though.

Next plan:
Now that I have the outputs I will add two 3 x 4 speakers to the rear storage cubby.


 Threaded Mode


