Go Back   986 Forum - The Community for Porsche Boxster & Cayman Owners > Porsche Boxster & Cayman Forums > DIY Project Guides

Post Reply
 
LinkBack Thread Tools Display Modes
Old 03-27-2017, 04:51 PM   #1
Beginner
 
Jamesp's Avatar
 
Join Date: Mar 2013
Location: Houston
Posts: 1,659
Garage
Installing Freds HID Kit

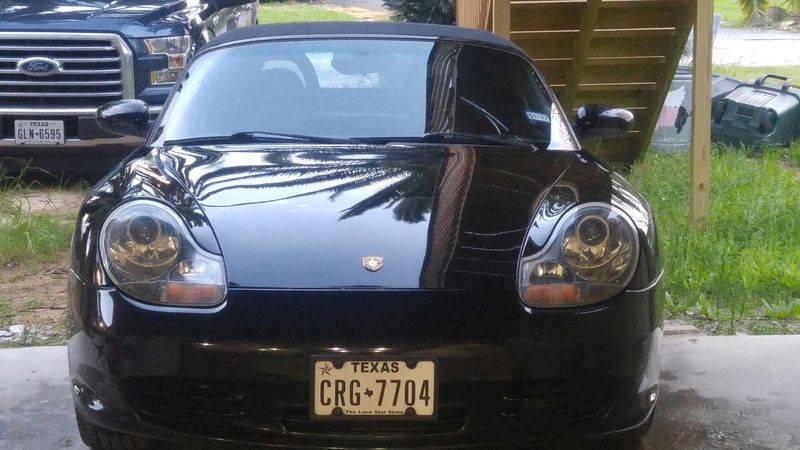
This is my experience installing Fred's kit

First on the kit, it is high quality - I have the angel eyes which have been problematic particularly if run with the HIDs. I left my options open when installing the kit by drilling an additional hole in the stock reflector for those wires and the high beam solenoid so I can use the original high beam and parking light bulb holes.

There is plenty on line regarding removing the lens and installing the kit available on Fred's post.

What is not available is a guide to rebuilding the light wiring harness.

to start with, if you live in the south as I do, you can expect the electrical insulation on the wires in your headlights to be rotted away.


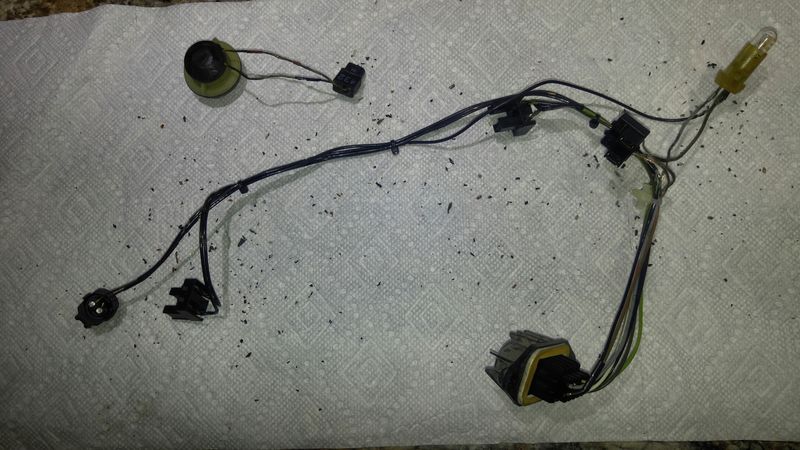
The flakes on the paper towel fell off the wires as they were handled. Note the bare wires. The entire harness has to be rebuilt.

To do this solder, wire and a few tools are needed.

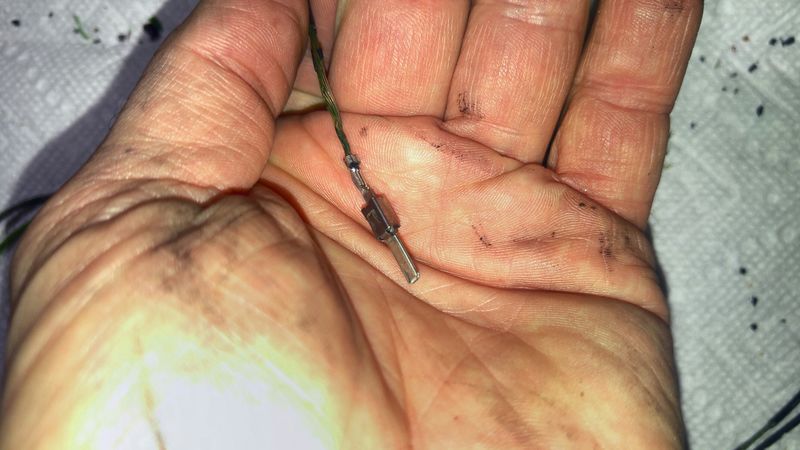
A small jewelers screw driver can be used in the square holes next to the pins in the headlight connector. There are two small metal tabs,one on either side of each pin that have to both be released at the same time to pull the pin. To do this, pull back on the wire while trying to release one pin, switch sides and try the other pin - never stop slightly pulling on the wire. Keep switching back and forth until both tabs are depressed and the pin pulls free


You'll end up with this - note there is no insulation left on the wire, it simply fell off.


You'll need to know how to make a solder splice, a simple way to do that follows:

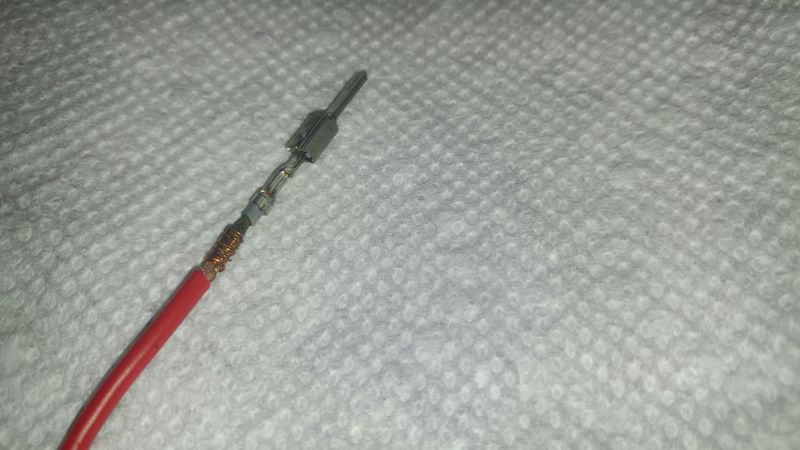
About 1/8 to 5/32 inch of wire is needed on the connector or between wires to be spliced. Interleave the strands of the wires to be spliced. Here I have 2 wires interleaved with one. The next photo shows a pin with the next step after interleaving the wires.


Then bind the interleaved wires together with a single strand of wire (sorry for the wire color change - poor photo documentation)


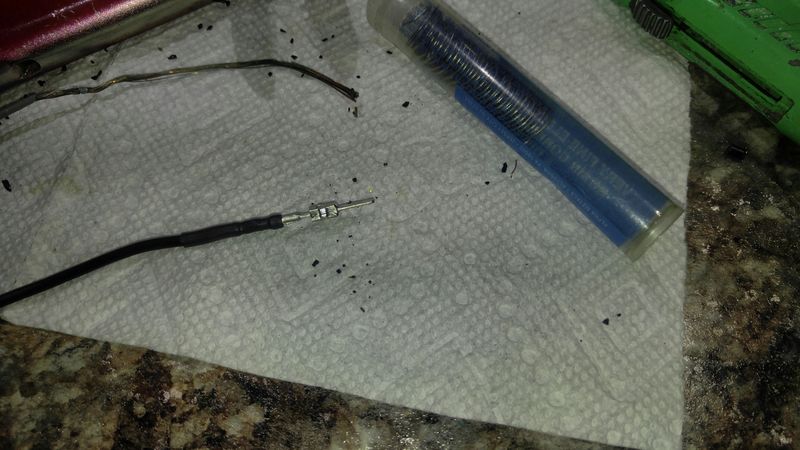
Solder the spliced joint by heating the wires with a soldering tip and touching the tip and heated wire with the solder, it will flow into the wire. You'll need to flip the wire do the same to the other side.

The splice is finished with shrink tubing


Rebuilding the harness one wire at a time helps to avoid mixing up the wires. Measure the length of the new wire against the one being replaced. Photo documenting the harness is also very helpful in putting it back together correctly. It's easy to mix up pins if more than one is removed at a time.

You end up with a new harness after going through this process - it will be modified from the OEM to take into account Fred's kit, and to add PWs relay to turn off the angel eyes when the headlights are on.


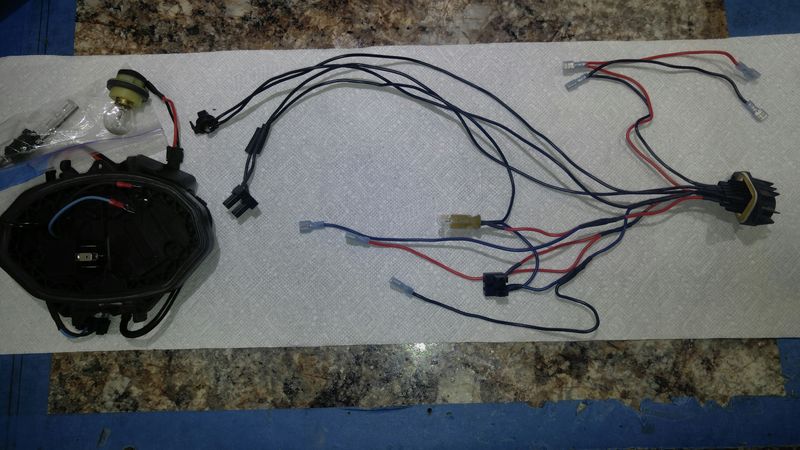
After that its a matter of stuffing the new harness into the light assembly.

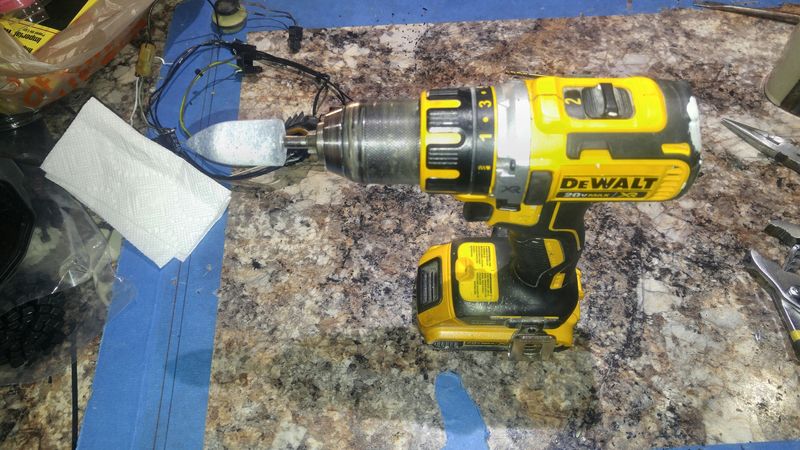
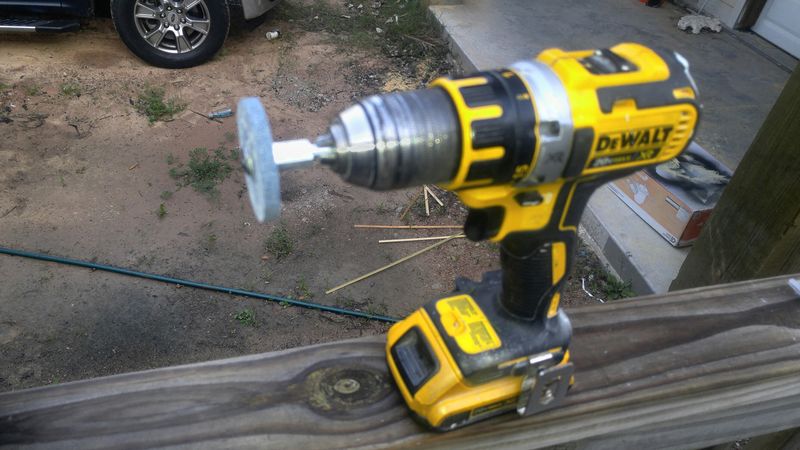
Ifound a 3/4 inch conical griner anda small flat grinding wheel made quick work of modifying the reflector assembly


I'd show a shot of new wiring installed in the light, note the blue and white wires coming out of the new hole in the reflector, but I'mout of photo's, so thats it unless someone has a question.

__________________
2003 S manual
Jamesp is offline   Reply With Quote
Old 03-29-2017, 06:51 AM   #2
Registered User
 
Chuck W.'s Avatar
 
Join Date: Sep 2008
Location: Agoura Hills (LA) So.Cal.
Posts: 1,574
Nice write up. I look forward to seeing your progress.
__________________
1995 Porsche C4 Cab

2016 BMW M2, 6 Speed LBB - ED 7/2016
1997 993 Cab - Sold; 1997 993 Turbo - Sold
2001 Boxster S - Original Owner - 30K Miles -SOLD
Chuck W. is offline   Reply With Quote
Old 03-30-2017, 01:34 PM   #3
Registered User
 
itskenallen's Avatar
 
Join Date: May 2016
Posts: 115
👍 nice write up

Sent from my SM-G928F using Tapatalk
itskenallen is offline   Reply With Quote
Old 03-31-2017, 01:50 PM   #4
986 Newb
 
Join Date: Feb 2017
Location: SW, KS
Posts: 5
I'm looking at doing this myself. Where did you get the kit from?

Thanks,
Chris
Crispyfritter is offline   Reply With Quote
Old 03-31-2017, 04:18 PM   #5
Registered User
 
Nine8Six's Avatar
 
Join Date: Sep 2013
Location: Montreal, QC. (currently expat to Shanghai)
Posts: 3,249
So cool, thanks for the write-up and for posting pics

Subscribed!
__________________
______________________________
'97 Boxster base model 2.5L, Guards Red/Tan leather, with a new but old Alpine am/fm radio.
Nine8Six is offline   Reply With Quote
Old 03-31-2017, 06:46 PM   #6
Beginner
 
Jamesp's Avatar
 
Join Date: Mar 2013
Location: Houston
Posts: 1,659
Garage
Quote:
Originally Posted by Nine8Six View Post
So cool, thanks for the write-up and for posting pics

Subscribed!
No problem, very nice, high quality kit. The installation was way easier than I thought it would be.

The hardest part was rebuilding the harnesses. For some reason (seems silly now) I was terrified of prying off the lens covers. Particlewave's YouTube made that easy (Thanks Particlewave!)

Here is a pic of the back of the light with the angel eye and high beam solenoid wiring running through an additional hole drilled into the reflector. That way the original running light (now a 6K LED - looks GREAT!) can be used behind the HID housing. The original high beam is also available.


Here is the result


Not too shabby.
__________________
2003 S manual
Jamesp is offline   Reply With Quote
Old 03-31-2017, 06:58 PM   #7
Registered User
 
Nine8Six's Avatar
 
Join Date: Sep 2013
Location: Montreal, QC. (currently expat to Shanghai)
Posts: 3,249
Sick.

The picture reflections, the car's dark/paint color, the Texas plate... everything.

The headlights; just so-so

ps: nicely done, now can you do us 50x harnesses (pairs, of course) please loll
__________________
______________________________
'97 Boxster base model 2.5L, Guards Red/Tan leather, with a new but old Alpine am/fm radio.
Nine8Six is offline   Reply With Quote
Old 03-31-2017, 08:51 PM   #8
Custom User Title Here
 
particlewave's Avatar
 
Join Date: Mar 2012
Location: Ft. Leonard Wood
Posts: 6,163
Garage
Nice work! The car looks amazing

I'm glad my crappy video was of some use (I never was much of a showman).
particlewave is offline   Reply With Quote
Old 04-02-2017, 09:12 AM   #9
986 Newb
 
Join Date: Feb 2017
Location: SW, KS
Posts: 5
That looks great. Where did you get the kit? My headlights have burn marks inside, and the halogens aren't cutting it.

Chris
Crispyfritter is offline   Reply With Quote
Old 04-02-2017, 10:00 AM   #10
Beginner
 
Jamesp's Avatar
 
Join Date: Mar 2013
Location: Houston
Posts: 1,659
Garage
Quote:
Originally Posted by Crispyfritter View Post
That looks great. Where did you get the kit? My headlights have burn marks inside, and the halogens aren't cutting it.

Chris
You get them right here on the forum in this DIY section - Look for the Nine8six post on prototyping headlights.

These are metal, not plastic. Very important if you're not into roasting marshmallows over your hood.

__________________
2003 S manual
Jamesp is offline   Reply With Quote
Post Reply


Thread Tools
Display Modes

Posting Rules
You may not post new threads
You may not post replies
You may not post attachments
You may not edit your posts

BB code is On
Smilies are On
[IMG] code is On
HTML code is On
Trackbacks are On
Pingbacks are On
Refbacks are On


All times are GMT -8. The time now is 08:46 PM.


Powered by vBulletin® Version 3.8.7
Copyright ©2000 - 2024, vBulletin Solutions, Inc.
Content Relevant URLs by vBSEO 3.6.0
Copyright 2024 Pelican Parts, LLC - Posts may be archived for display on the Pelican Parts Website -    DMCA Registered Agent Contact Page