 07-12-2013, 11:55 AM
|
#1
|
|
Registered User
Join Date: Feb 2012
Location: Toledo, OH
Posts: 58
|
You have me sold. I just got the kit for my dash from sportscarLEDs.com, the surface mount LEDs from the link you provided and a new climate control module from ebay.
Porsche Boxster, Carrera 996/997 LCD Replacement Repair Kit for Climate Control
Item# 200926743312
I needed just a LCD as mine leaked its liquid. But I found the whole module for $75 so now I have a test-bed for the soldering.
:dance:
|

|

|
|
07-16-2013, 12:34 AM
|
#2
|
|
Registered User
Join Date: Aug 2010
Location: Germany
Posts: 97
|
anyone doing this project please note: apparently '01 and later uses a different type of led for the lighted center display in the speedo. I ordered the leds to do mine, and received 5 socket-type leds. When I opened up the gauge cluster, I found an array of surface-mount LEDs, similar to the AC unit.
Sportscarleds.com sent me a pic of a gauge cluster with all blue gauges, but the center display was stock orange.
Otherwise, I HIGHLY recommend this project. Not difficult, couple hours, and an incredible improvement over the dated orange.
|
|
|
|
|
07-16-2013, 06:32 AM
|
#3
|
|
Registered User
Join Date: Jun 2012
Location: Bedford, TX
Posts: 2,759
|
I looked into this once also for my 2001 and was told the same, so they have remained stock orange.
__________________
______________________________________________
2001 Boxster S Lapis Blue
TS Cat Bypass Pipes and exhaust
iPad Mini Dash Install
DEPO Tail Lights
|
|
|
|
|
07-16-2013, 11:46 AM
|
#4
|
|
Custom User Title Here
Join Date: Mar 2012
Location: Ft. Leonard Wood
Posts: 6,169
|
Based on complaints of quality, luminosity, and size, I am now recommending these LEDs.
They are the same size as the OEM LEDs and plenty bright.
Sorry for any confusion.
__________________
https://youtube.com/@UnwindTimeVintageWatchMuseum
Last edited by particlewave; 07-16-2013 at 12:08 PM.
|
|
|
|
|
07-30-2013, 11:49 AM
|
#5
|
|
Registered User
Join Date: Feb 2012
Location: Toledo, OH
Posts: 58
|
I swapped out these LEDs this weekend and everything went well. The latest LEDs posted by particlewave are actually the same size as the old ones which makes life a bit easier. I am by no means an expert at soldering but I didn't find it too hard. Each LED on the board is oriented in the same way (they have a cut-out on one corner) so you can replace one and then test it before you change all of them. Getting them to stay in place while you solder them on is the hardest part. I used a small screwdriver with petroleum jelly on the tip.
|
|
|
|
|
08-25-2013, 02:30 PM
|
#6
|
|
Living in the desert.
Join Date: Jun 2013
Location: Tombstone, AZ
Posts: 82
|
This is so neat particlewave! Do leds come in pink? How much do you charge to do this?
Thanks! 
PS: why can't I send you a private message? I tried clicking on your username, but there is no link for messaging 
Last edited by tonichristi; 08-25-2013 at 02:32 PM.
|
|
|
|
|
01-20-2014, 02:14 PM
|
#7
|
|
Custom User Title Here
Join Date: Mar 2012
Location: Ft. Leonard Wood
Posts: 6,169
|
Quote:
Originally Posted by tonichristi

This is so neat particlewave! Do leds come in pink? How much do you charge to do this?
Thanks!
PS: why can't I send you a private message? I tried clicking on your username, but there is no link for messaging |
I was a baaaad boy and got myself banned for a little while 
Contact me via PM for custom installs.
__________________
https://youtube.com/@UnwindTimeVintageWatchMuseum
|
|
|
|
|
01-20-2014, 02:10 PM
|
#8
|
|
Custom User Title Here
Join Date: Mar 2012
Location: Ft. Leonard Wood
Posts: 6,169
|
Sorry about the pictures. I tried fixing the links, but the originals are gone.
Long story short: someone joined this forum with the sole intent of harassing me and gaining personal info. I didn't have time to sort through years of photobucket pics, so I deleted them all figuring that I'd go back and add the pictures that I wanted. Now I can't find the originals anywhere on my pc
__________________
https://youtube.com/@UnwindTimeVintageWatchMuseum
Last edited by particlewave; 01-20-2014 at 02:12 PM.
|
|
|
|
|
01-20-2014, 02:39 PM
|
#9
|
|
Registered User
Join Date: May 2012
Location: Kalamazoo, MI
Posts: 149
|
I've done all of mine, except for the intermittent wiper dial and I get a lot of complements on it. If you have average skill with a soldering iron and a pair of tweezers, you can do the switches and climate control without too much hassle. I have an "early" 2000 gauge cluster, so I don't know what the '02's are like. Mine are just twist in bulbs which weren't too difficult, but the small LEDs needed the contacts bent a bit and they (unlike the stock bulbs) are polarized and so orientation was a trial and error thing. The LCD backlight LEDs are not polarized and no bending was necessary. I looked, but I didn't save my pictures either.
__________________
2000 986 S - "The Black Widow"
|
|
|
|
|
01-20-2014, 03:05 PM
|
#10
|
|
Registered User
Join Date: Dec 2013
Location: Ranson wv
Posts: 237
|
I'm not at all opposed to soldering it in myself. Soldered dozens of things on dozens of cars, and worked on motherboards in the past. Just curious what separates the 01 and up 986s from the early ones. Also, would love to know what the newest recommended LEDs are for doing the job. Seems fairly simple as long as you aren't afraid to solder.
__________________
02 Boxster
71 VW Karmann Ghia
71 VW Super Beetle
|
|
|
|
|
01-20-2014, 03:08 PM
|
#11
|
|
Registered User
Join Date: Dec 2013
Location: Ranson wv
Posts: 237
|
Btw particlewave, your dash looks great. That's the exact look I want. Matches the new clarion head unit I put in a few weeks ago.
__________________
02 Boxster
71 VW Karmann Ghia
71 VW Super Beetle
|
|
|
|
|
01-20-2014, 03:48 PM
|
#12
|
|
Registered User
Join Date: May 2012
Location: Kalamazoo, MI
Posts: 149
|
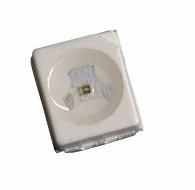
These are what I used, which are exact replacements, except for being blue. If you want a different color, make sure you pick the "super" version, which is brighter, and in the PLCC2 size.
PLCC2 Surface mount Top Led - Super Blue
__________________
2000 986 S - "The Black Widow"
|
|
|
|
|
01-20-2014, 04:05 PM
|
#13
|
|
Registered User
Join Date: Dec 2013
Location: Ranson wv
Posts: 237
|
That is exactly what I needed. Now the question comes, how many of them do I need?
__________________
02 Boxster
71 VW Karmann Ghia
71 VW Super Beetle
|
|
|
|
|
01-20-2014, 04:53 PM
|
#14
|
|
Registered User
Join Date: May 2012
Location: Kalamazoo, MI
Posts: 149
|
Quote:
Originally Posted by Swhitcomb
That is exactly what I needed. Now the question comes, how many of them do I need?
|
23 for climate control
2 per switch
1 for wiper speed dial (if you have one)
7 or 9 for the headlight switch (7 if you want to leave the 2 green, 9 if you want to change all)
For the cig lighter, and ash tray you need to get creative with 3mm LEDs
__________________
2000 986 S - "The Black Widow"
|
|
|
|
|
01-21-2014, 04:38 AM
|
#15
|
|
Registered User
Join Date: May 2012
Location: Kalamazoo, MI
Posts: 149
|
Quote:
Originally Posted by Benjamin
7 or 9 for the headlight switch (7 if you want to leave the 2 green, 9 if you want to change all)
|
I take that back. I tore into my headlight switch this morning and found that (at least on mine) they are 3mm LEDs, and not the PLCC2 SMD type.
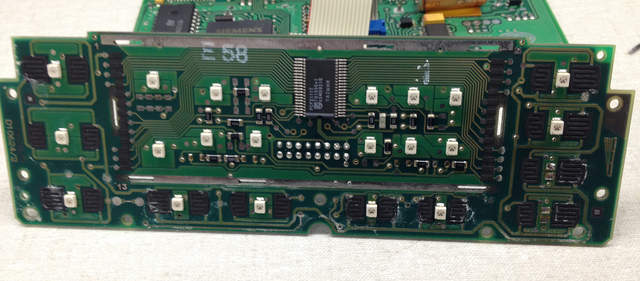
And here is a picture of the inside of a climate control. I have a water damaged one on my parts shelf that I used to replace my LCD. I removed two LEDs on the lower right when I was practicing my removal technique.
__________________
2000 986 S - "The Black Widow"
|
|
|
|
|
01-20-2014, 05:43 PM
|
#16
|
|
Custom User Title Here
Join Date: Mar 2012
Location: Ft. Leonard Wood
Posts: 6,169
|
They're low cost...get some spares 
__________________
https://youtube.com/@UnwindTimeVintageWatchMuseum
|
|
|
|
|
01-21-2014, 08:41 AM
|
#17
|
|
Registered User
Join Date: Dec 2013
Location: Ranson wv
Posts: 237
|
Thank you. That's exactly what I was looking for. That doesn't look hard at all. Especially with a desoldering bulb.
__________________
02 Boxster
71 VW Karmann Ghia
71 VW Super Beetle
Last edited by Swhitcomb; 01-21-2014 at 08:54 AM.
|
|
|
|
|
01-22-2014, 05:09 AM
|
#18
|
|
Registered User
Join Date: May 2012
Location: Kalamazoo, MI
Posts: 149
|
Quote:
Originally Posted by tonichristi
This is so neat particlewave! Do leds come in pink?
|
Yes, they do come in pink and a variety of other colors.
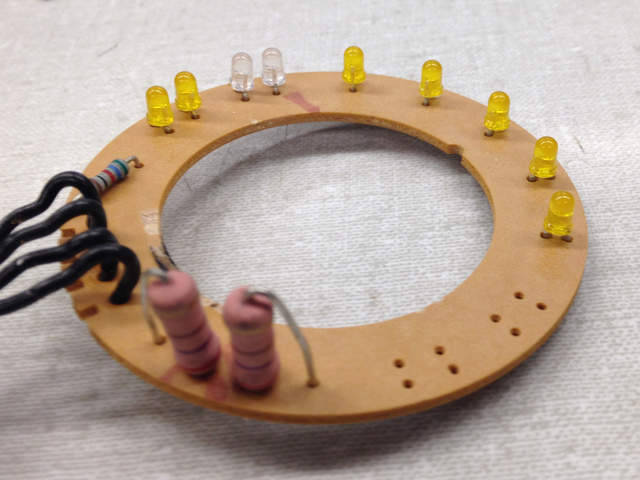
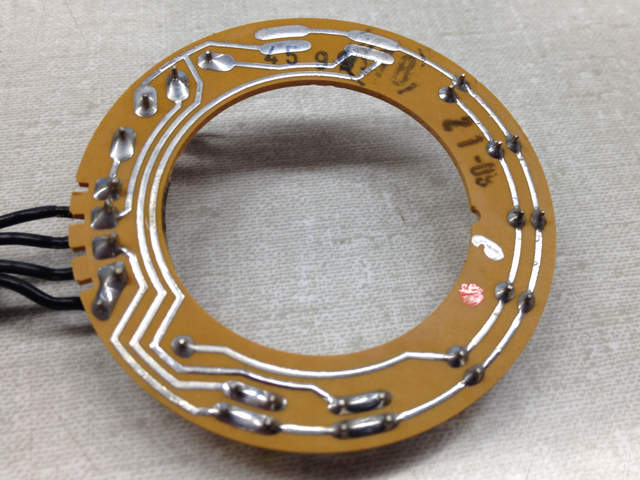
I just finished my headlight switch, and cig lighter:

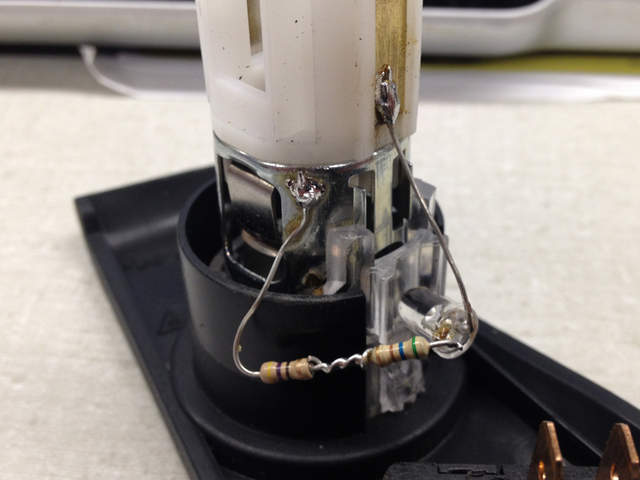
I used 5mm LEDs for the headlight switch, and they fit just fine. Everything still snaps back together. I probably should have used some spaghetti tube for the positive lead on the cig lighter, but didn't think of it in time. I don't think I will have any problems with it touching anything where it is.
__________________
2000 986 S - "The Black Widow"
|
|
|
|
|
01-22-2014, 05:20 AM
|
#19
|
|
Registered User
Join Date: Dec 2013
Location: Ranson wv
Posts: 237
|
Ok, one more question. A friend of mine told me that the surface mount LEDs are most likely glued to the circuit board in some way. Are they? If they are, how hard were they to remove? As near as I can see from the pictures, they look to just be soldered onto the board and can be unsoldered.
__________________
02 Boxster
71 VW Karmann Ghia
71 VW Super Beetle
|
|
|
|
|
01-22-2014, 05:44 AM
|
#20
|
|
Registered User
Join Date: May 2012
Location: Kalamazoo, MI
Posts: 149
|
Nope, just solder. I tin the iron with a small dab of solder so that heat will flow quickly into the soldered LED. Touch the iron to the end of the LED where it meets the board and after a second, "flick" the end of the LED upwards to pull it away from the board. Once it is sufficiently disconnected, repeat on the other end, and it should fall away, or stick to the iron. Since you won't be reusing them, it's not a big deal if they get destroyed in the process.
To attach the new LEDs, I prepare the board by removing as much solder as I can from one of the pads, and leaving a "bump" of solder on the other one. Hold the LED with tweezers in the right spot and, with a tinned iron, touch the same spot where the LED and board meet (on the "bump" end. When the solder starts to flow, make sure you push down on the LED so that it's flat against the board and hold it steady for a few seconds until the solder hardens. Then solder the other end with a tinned iron and a small poke of solder from your spool. The reason I leave a bump on one side and no solder on the other is that if both were flat, I would need 3 hands to hold the LED, hold the iron, and hold the solder. If I have bumps at both ends, the LED will never sit flat, or I would need 3 hands again.
__________________
2000 986 S - "The Black Widow"
|
|
|
|
 Posting Rules
|
You may not post new threads
You may not post replies
You may not post attachments
You may not edit your posts
HTML code is On
|
|
|
All times are GMT -8. The time now is 04:31 AM.
| |


 Stella
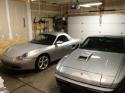 1983 Porsche 944
 2001 Boxster S
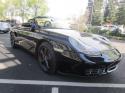 The Black Widow
 Hybrid Mode


