Go Back   986 Forum - The Community for Porsche Boxster & Cayman Owners > Porsche Boxster & Cayman Forums > Boxster General Discussions

Post Reply
 
LinkBack Thread Tools Display Modes
Old 10-14-2018, 04:06 PM   #1
Registered User
 
Join Date: Jun 2013
Posts: 14
Need stereo wire identification for 987 Gen 2 Boxster

I'm putting a new stereo in my 2010 Boxster to replace the CDR30 unit. I'm hoping that someone can help me identify the wires. The main connector has a blue block, a green block and two vertical pin outs labeled 1-8 and 9-16 (the long blue sections in the diagram).

Blue Connector Block
Black
Blue
White/Red
Yellow/
White

Green Connector Block
Green
Orange
Black
Pink

The vertical 1-8 block are the speaker wires so I know about those.

Second Vertical Block (9-16)
Black/Blue
Yellow/Blue
Green
White
Red/Brown (thick)
Brown (thick. I believe ground).


Lastly, after taking the dash apart, I noticed another unused antenna at the based of the center dash. See the picture. What is this antenna? See the picture taken from the driver's side footwell. Thank you.


petropolis is offline   Reply With Quote
Old 11-04-2018, 06:02 PM   #2
Registered User
 
Join Date: Jun 2013
Posts: 14
I'm done installing my Pioneer AVH-W4400NEX Carpplay/Android auto stereo in my 2010 Boxster (987 Gen 2). I'll explain the whole process here. I bought the stereo, adapter, and faceplate on Crutchfield since they have support and gave me some advice. My Boxster doesn't have the Bose system which makes the installation much more painful because you (may) have to replace the speakers. Fortunately I didn't have to do that, but I did have to run a power wire to make sure the amplifier under the passenger seat is powered up (I'll discuss later).

To get through this, I consulted a lot of sources. Some of them are

Article on where to find the amplifier power wire and switched power wire
PDF with a lot of excellent wiring information
Pelican Parts article on installing stereo (not exactly right color wires for 987 Gen 2)
I bought the factory service manuals for emanualsonline which are helpful but basically it is a web site made into a PDF so it is hard to find anything
How do remove the center console


First of all, you need to install your backup camera which I did by connecting it to the license plate. I ran the wire through the hole in the back bumper and I removed the rear right taillight and ran the wire through the hole there. I used a bent clothes hanger to get the wire through. Then I threaded it through the rear trunk into where the soft top is. To run it through to the door jamb, I put the soft top in the service position (half way up) and threaded it. While you have to rear tail light out, you'll need to run another wire for the reverse sensor wire (this is the signal that turns on the backup camera when you are in reverse). I tapped into the blue/black wire running to the tail light and ran it in addition to my camera wire. This wire is also connected to the control unit under the drivers seat but that was too hard to get to and I already had to disassemble everything so I found it easier to run this from here. Thread the wires down the door jamb, under the door sill and to the front.

More in the next post.

Last edited by petropolis; 11-25-2018 at 12:17 PM.
petropolis is offline   Reply With Quote
Old 11-04-2018, 06:15 PM   #3
Registered User
 
Join Date: Jun 2013
Posts: 14
Now that you've run the reverse backup camera, there are some things that need to be done in the front trunk. I mounted the GPS antenna under the plastic cowl where the windshield wipers are. This gives good access to GPS antenna but protects it from the rain. The GPS signal will go right through the plastic. Here is a picture of where I mounted it (left of the battery).


The second thing that you'll want to do in the front trunk is run the wire for the Vehicle Speed Sensor (VSS). This is a signal that varies based on your speed. You don't really need to run this since it is only used to approximate where you are if you are in a tunnel, but my receiver had an input for it and I ran it. This is the white/brown wire in the big thick wiring harness running to the controller on the right front of the front trunk. There are two wires here: a mostly brown one that has some white and a white one that has a little brown. You want the mostly white one. The big control unit cable bundle goes through the front trunk compartment so tap into it near the battery:


You'll need to get these two wires through the front trunk compartment into the cockpit of the car. This is easy. There is a big rubber grommet to the right of the battery (looking from the front) and you can cut a slice in it and run the wires through. I'd loosen the battery and move it to the left to make it easier to see:


Next, wiring up the dash.

Last edited by petropolis; 11-05-2018 at 07:01 PM.
petropolis is offline   Reply With Quote
Old 11-04-2018, 06:34 PM   #4
Registered User
 
Join Date: Jun 2013
Posts: 14
Next we have to connect the wires in the cockpit of the car. I have a PDK. I won't tell you have to get the factory radio out as there are other posts on that. However, I will help you get the center console out since you'll need to access the parking brake wire (this connection disables video when you are driving) and I ran the AUX input to the stereo in the same spot as the existing AUX connector in the back of the armrest. This AUX connector won't work anymore so I drilled a hole and ran my AUX connector to the back of the armrest. By the way, your steering wheel controls won't work anymore and there isn't a Datalink adapter for the Porsche but I think that a backup camera and Carplay is more important than the steering wheel controls.

I had to get the steering knob off the PDK shifter and to do this I put the car in reverse and turned the little coupling at the base of the shifter and pulled straight up. It came off:


You'll need to tap into the parking brake yellow wire below the parking brake handle to run this to the stereo:


I ran an AUX line next to the old AUX line:


I also drilled a hole in the little tray and ran the Lightning and Android micro-USB wires from the stereo through the tray


and I store my cables in it:


Next post is about the rest of the wiring in the center dash.

Last edited by petropolis; 11-04-2018 at 08:25 PM.
petropolis is offline   Reply With Quote
Old 11-04-2018, 07:01 PM   #5
Registered User
 
Join Date: Jun 2013
Posts: 14
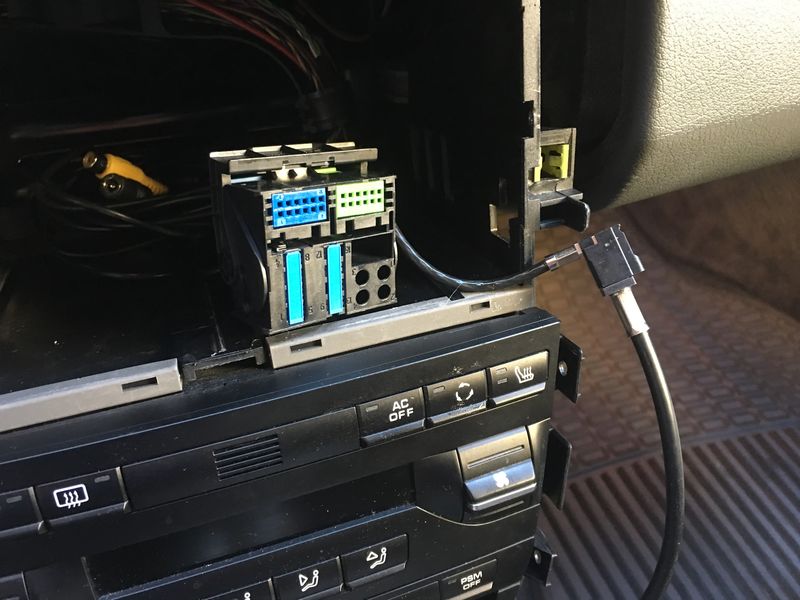
To adapt to the wiring harness for for old CDR unit, I used the adapter Crutchfield sent me. The Porsche stereo connector has four "blocks". A green block, a blue block (you won't use either of these) and two sets of "blade pin" connectors. One of these blade pin connectors is all the speaker wires and you'll just solder the adapter speaker wires onto the speaker wire outputs of your stereo. The other leads coming off this adapter are a red lead that is a permanently hot wire coming from the car (it isn't switched) and this connects to the permanently hot wire coming from the stereo. The black adapter lead is the ground and goes to the ground on your stereo. The leads coming from the car are brown (ground) and red/black (permanently hot).

The blue/green connectors are for steering wheels controls and such and you won't be able to use them. However, you MUST connect one wire from your stereo to the red/white wire on the blue connector to power the amp under the passenger seat. If you don't do this, you won't get any sound which is what happened when I first did this. On my Pioneer stereo, the blue/white wire provides power to the red/white wire on the blue connector and keeps the amp powered.


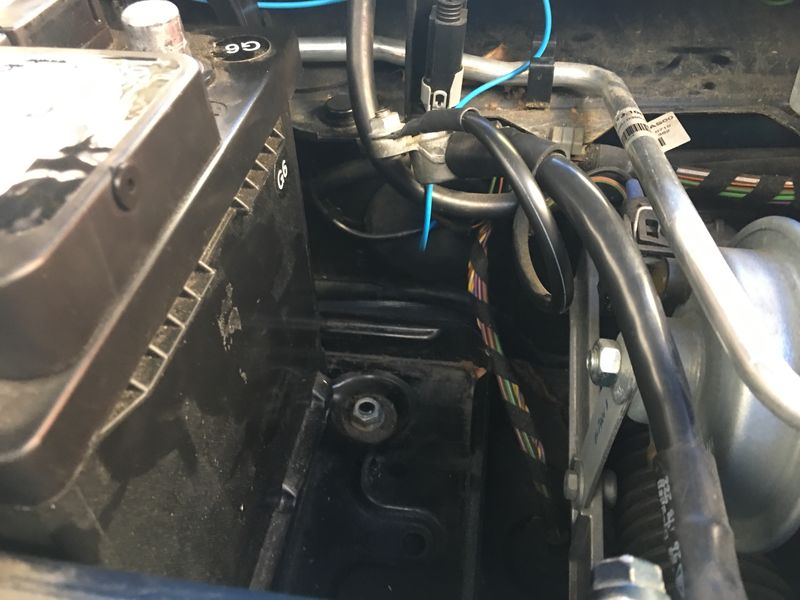
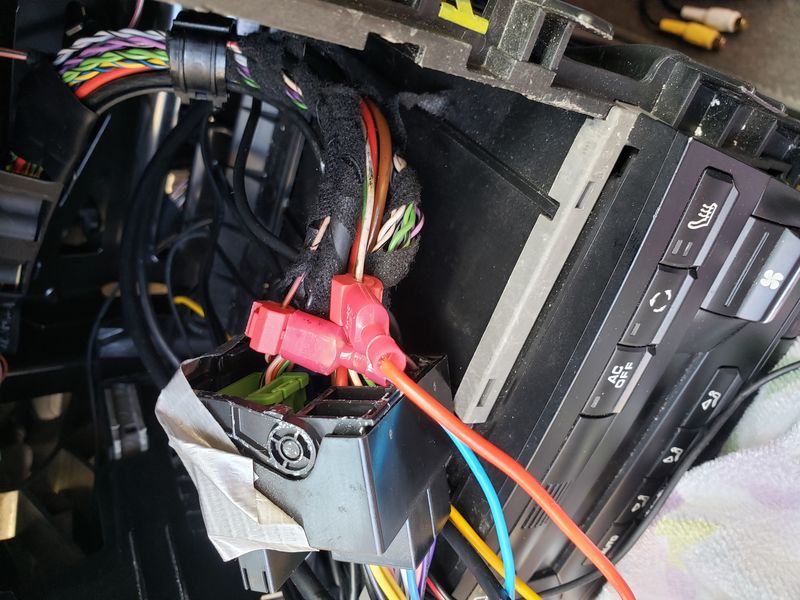
The only wire missing is the switched wire. This is the important one. There isn't a factory phone connector wire on the 987.2 and you needn't run to the fuse box to get this switched power. If you look at the base of the console there is a connector flowing into the heating/cooling controls and you'll see a harness that looks like this:


That big orange wire is switched. Just tap into it. The grey/red wire next to the orange wire is the illumination wire and you can run this to your stereo too so tap it. (If you don't run this, your stereo won't dim at night).

The microphone I just mounted on the steering stalk next to the windshield wiper lever:


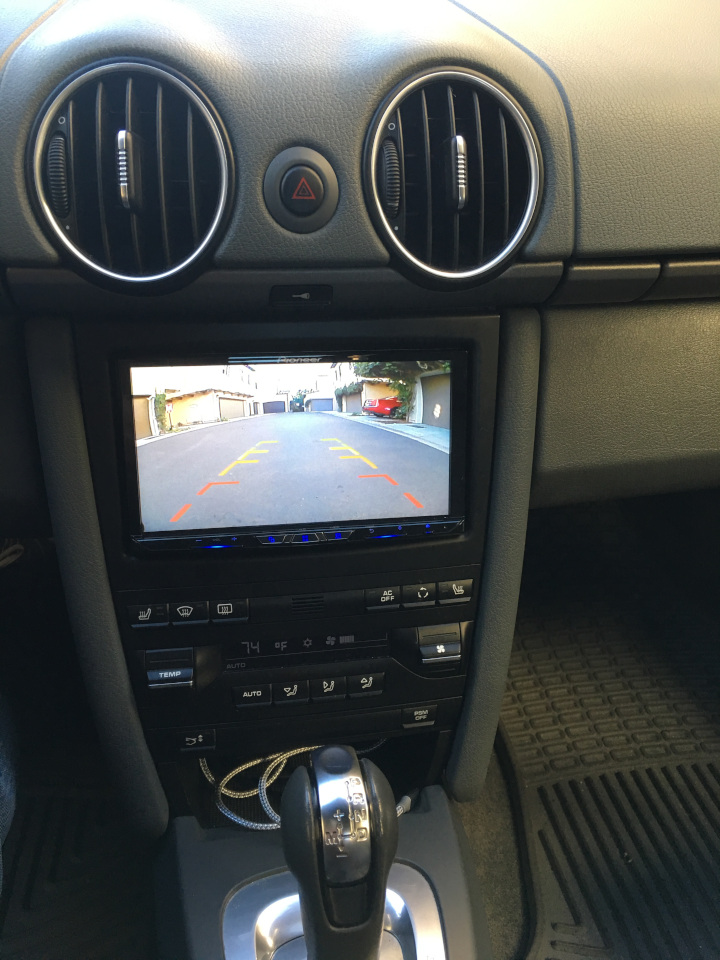
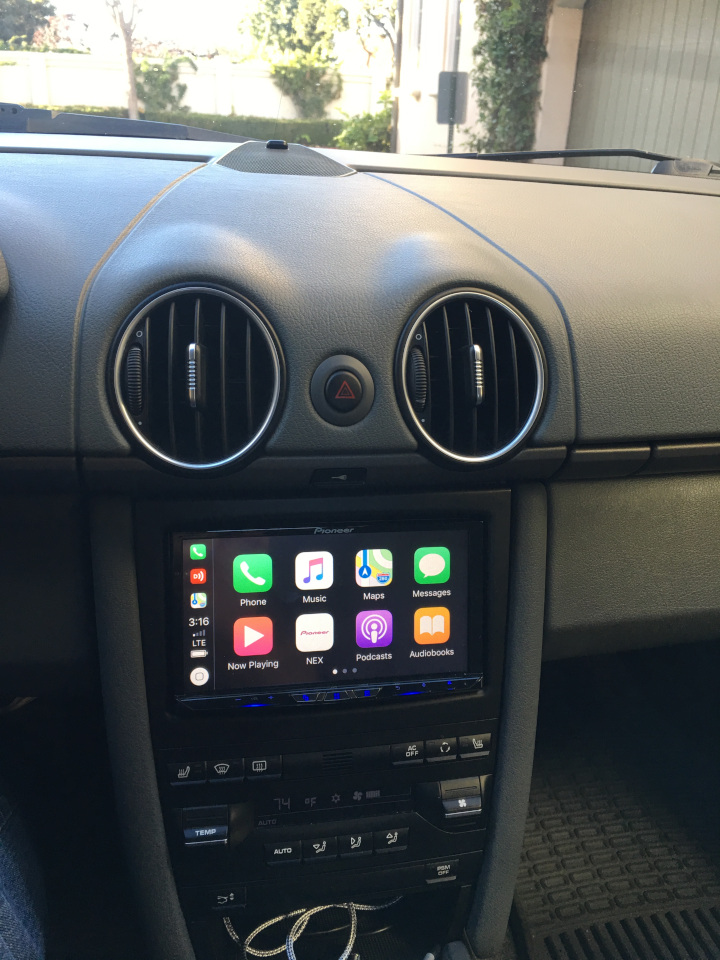
After connecting all the wires and connectors, I wrapped some electrical tape around the whole bundle to protect the wires and I zip tied it. I originally was going to run an HDMI cable and RGB cables but there is so little room behind the stereo that I took them out. It is a tight fit. The bezel I got from Crutchfield came with a 1 DIN cubby that I didn't need and I had to shave off a couple of tabs but then I inserted the radio and everything worked:

Name:  backup.jpg
Views: 2964
Size:  223.2 KB
Name:  carplay.jpg
Views: 3396
Size:  235.4 KB

Last edited by petropolis; 11-09-2018 at 07:56 AM.
petropolis is offline   Reply With Quote
Old 11-04-2018, 07:18 PM   #6
Registered User
 
Join Date: Jun 2013
Posts: 14
My backup camera by default reverses the picture which is the correct orientation for my Pioneer stereo. My backup camera came with a wire you could short to put the image in the opposite way but I didn't need to do that. My Pioneer has a system setting where you can check the GPS strength and my mounting location is excellent (16-19 GPSs green and others are yellow). I turned on the headlights and my unit dims. I didn't hook up the video HDMI and RBG audio video cables because even if I use these in the car, the Pioneer unit won't show video when the parking brake isn't applied. Also, the space behind the unit it tight and I initially couldn't get the stereo in until I wrapped the wires and zip tied them. I also tested the speed sensor monitoring on my Pioneer and it shows a count that increases at the car speeds up and decreases as it slows down but it does not show mph. It shows a value like 3000 for 50 mph (or something like that). This is normal.

One last warning: do not close your hood with the battery disconnected! I did this and thought I was really up a creek without a paddle. If you do this, there is a pull out positive bar in the fuse box that you can connect positive 12 volt to and negative to the body and wait a few seconds and then open with either the front trunk release or the key fob. Apparently this is so common Porsche thought of this and put this little pull out bar in the fuse box. It even has a little picture on it showing you can use it to open the front trunk.

Last edited by petropolis; 11-05-2018 at 07:05 PM. Reason: Information in posting is below. I'll leave it there instead.
petropolis is offline   Reply With Quote
Old 01-07-2020, 11:59 AM   #7
Registered User
 
Join Date: Jun 2013
Posts: 14
There is one more wire you need to connect. The Porsche uses a powered antenna and if you don't power the antenna then you'll get bad FM reception and no AM reception. To power the antenna, you'll have to connect a wire from the switched wire on your stereo to a white wire on the same connector that has the power for your amplifier. This document lists the power wire.
petropolis is offline   Reply With Quote
Old 01-08-2020, 04:21 AM   #8
Registered User
 
Join Date: Feb 2017
Location: texas
Posts: 155
Don't give up on your steering wheel controls (SWC) so easily. Check to see if they are a network of resistors. If they are a network of resister you can find the control wire and many radios will read the SWC directly. If Canbus….without an interpreter not so easy.
obthomas is offline   Reply With Quote
Old 07-10-2020, 07:20 PM   #9
Registered User
 
Join Date: Jun 2013
Posts: 14
I got the steering wheel controls working. I did a reinstall and the process was much easier. I used a Crux interface:

This enables the steering wheel controls and makes the installation much easier as it supplies all the lines like switched power, speed control, illumination, etc. The only thing that didn't work was reverse line which I wired from a reverse wire on the tail lamp.

You still need to put the switched power to the amp (or you won't get sound) and to the power antenna (or you won't get good reception, especially on AM). This is the switched power you have to add:


There isn't a lot of space behind the radio I installed so I installed the Crux interface behind the metal plate at the back.

petropolis is offline   Reply With Quote
Post Reply


Thread Tools
Display Modes

Posting Rules
You may not post new threads
You may not post replies
You may not post attachments
You may not edit your posts

BB code is On
Smilies are On
[IMG] code is On
HTML code is On
Trackbacks are On
Pingbacks are On
Refbacks are On


All times are GMT -8. The time now is 05:56 PM.


Powered by vBulletin® Version 3.8.7
Copyright ©2000 - 2024, vBulletin Solutions, Inc.
Content Relevant URLs by vBSEO 3.6.0
Copyright 2024 Pelican Parts, LLC - Posts may be archived for display on the Pelican Parts Website -    DMCA Registered Agent Contact Page