Go Back   986 Forum - The Community for Porsche Boxster & Cayman Owners > Porsche Boxster & Cayman Forums > Boxster General Discussions

Post Reply
 
LinkBack Thread Tools Display Modes
Old 05-27-2018, 06:36 AM   #1
Registered User
 
JBauer's Avatar
 
Join Date: Apr 2017
Location: Indiana
Posts: 1,460
Still playing with my rod ☹

If anyone has any I ideas on this problem please chime in. I removed my convertibletop when I put my Z-top on. I unhooked the cables, took out the rods and took out the top. Unfortunately I forgot to mark the adjustable rods for easy reinstall.
With no baseline to where the are supposed to be Im having real trouble getting the clamshell to fit right. I've found an easy way to hook them up and adjust but how do I know it's right. Last night I put the top up and latched it, adjusted the rods and attached them to fit snug with the top latched. Thought I was finally getting some where. Unlatched the top, pushed the button and the top started to go down. Really big bang �� stop and looked. One rod popped of and the other one the tip sheared off. Back to square one with tips on order. I know there must be a process to install and adjust these on the car but it would be nice to have an idea what to do next.
Thought about repeating what I did before but with the top down instead of up but I hate to keep buying parts if I'm wrong.
Any comments appreciated. Can go to manual top and get by but really don't want to.


JBauer is offline   Reply With Quote
Old 05-27-2018, 04:01 PM   #2
MWS
Registered User
 
Join Date: May 2016
Location: Northern Indiana
Posts: 410
I was thinking that these were the rods that went back, but these are the ones that go forward...Grrrrrr. These are harder to get a pic of (with top on) so I tried to do my best. The three images are of the drivers side showing how far each area is adjusted...I hope this helps. I'm sure these adjustments vary, but at lest this is some sort of baseline.


MWS is offline   Reply With Quote
Old 05-27-2018, 04:19 PM   #3
MWS
Registered User
 
Join Date: May 2016
Location: Northern Indiana
Posts: 410
Also, I was thinking...is it possible that the position of the arm that both the front and rear rods attach to is incorrect? Below is a pic of the arm with the clamshell closed (also from drivers side). Anyway, just a thought...


MWS is offline   Reply With Quote
Old 05-27-2018, 05:02 PM   #4
Registered User
 
oldskool73's Avatar
 
Join Date: May 2015
Location: Sydney, Australia
Posts: 335
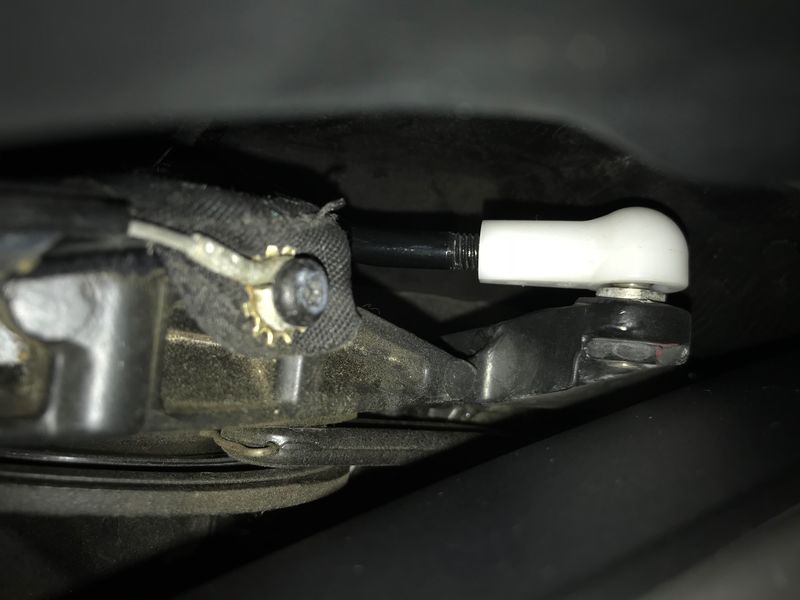
How I do it is put it into service position and take the clamshell off (6 bolts underneath) so you can get to the rods when it's closed.

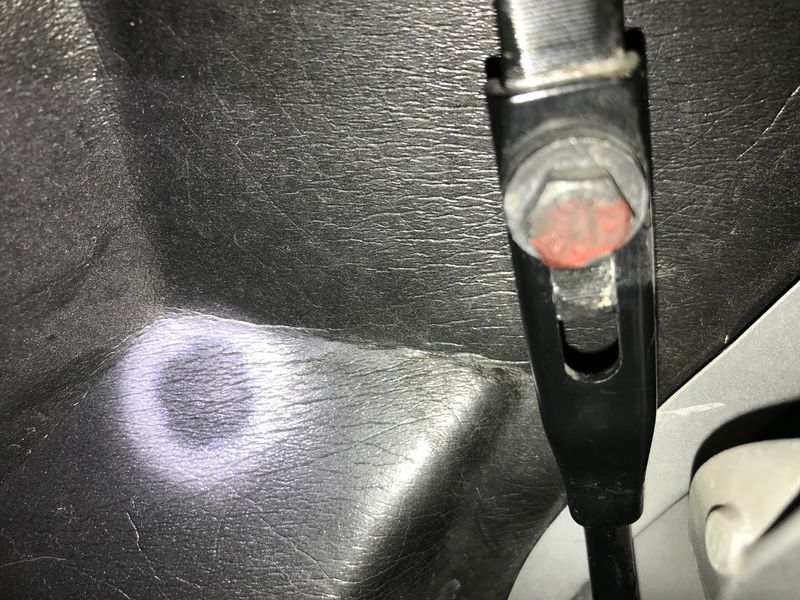
Start with the plastic ball joints screwed on as far as they will go. Close the top most of the way, stop and loosen of the bolt on the push rods on both sides, let the top slip as far forward as it wants to go till it's resting on the window frame, but don't latch it up, then run the motor all the way closed. Then pull on the b-pillar pieces ever so slightly to get a tiny amount of slack between the frame front and the window frame, and tighten the bolts back up (if you run out of room on the bolt runners, then you can turn the plastic ball joints a few times to get more length).

Carefully run the roof all the way back, then all the way forward again, and watch how the front moves when it gets near the window. If you give the rods too much length, the top will reach the window slightly before then end of the run and kind of 'bounce' and retract back again (this places stress on the plastic joints I think, which may be what you had when you fitted it latched). If they are too short, it will come up short of the window frame (and you'll need to pull hard on the handle to latch it, which will stress the top and it'll eventually separate at the back... see my recent howto fix that ). If either happens, loosen of the bolts and try again. You want it so it just gently touches the window frame, or even a few millimetres before.

When you think it's good, run it back and forward a few times to check nothing pops, then bolt back the clamshell and give it a try....
oldskool73 is offline   Reply With Quote
Old 05-27-2018, 05:32 PM   #5
Registered User
 
JBauer's Avatar
 
Join Date: Apr 2017
Location: Indiana
Posts: 1,460
Thank all. I get my new ball ends next week and Ill let you know how it goes.

Thanks again

Last edited by JBauer; 05-29-2018 at 01:56 AM.
JBauer is offline   Reply With Quote
Old 05-27-2018, 08:45 PM   #6
Registered User
 
oldskool73's Avatar
 
Join Date: May 2015
Location: Sydney, Australia
Posts: 335
Worth noting also, you have the red ball joint, which is the original colour and I think are known to be a bit easier to break. The white ones are newer.
oldskool73 is offline   Reply With Quote
Old 06-08-2018, 09:24 AM   #7
Registered User
 
JBauer's Avatar
 
Join Date: Apr 2017
Location: Indiana
Posts: 1,460
Thanks to Oldskools instructions I now have the rod ends replaced and my top insync. It open and closes again. I still have a small gap on the clamshell with the top opened or closed that I never had before but I'm starting to think that Ive caused that. I did the rear top reattach when I put it back in because it had came loose. I used the M tape and I think I may have pulled it too tight when I reattached it. I think it's hitting the clamshell and stopping it from being flush. I'll live with it for now. Just happy to have it working again.
Thanks again Oldskool 😀
JBauer is offline   Reply With Quote
Old 06-08-2018, 05:46 PM   #8
MWS
Registered User
 
Join Date: May 2016
Location: Northern Indiana
Posts: 410
Congrats! Good to hear you got it all sorted out.

MWS is offline   Reply With Quote
Post Reply


Posting Rules
You may not post new threads
You may not post replies
You may not post attachments
You may not edit your posts

BB code is On
Smilies are On
[IMG] code is On
HTML code is On
Trackbacks are On
Pingbacks are On
Refbacks are On


All times are GMT -8. The time now is 02:51 AM.


Powered by vBulletin® Version 3.8.7
Copyright ©2000 - 2024, vBulletin Solutions, Inc.
Content Relevant URLs by vBSEO 3.6.0
Copyright 2024 Pelican Parts, LLC - Posts may be archived for display on the Pelican Parts Website -    DMCA Registered Agent Contact Page