I'm crossposting from "What did you do today with/to your Boxster"
Refinished my BBS Sport Design wheels with Duplicolor spray cans.
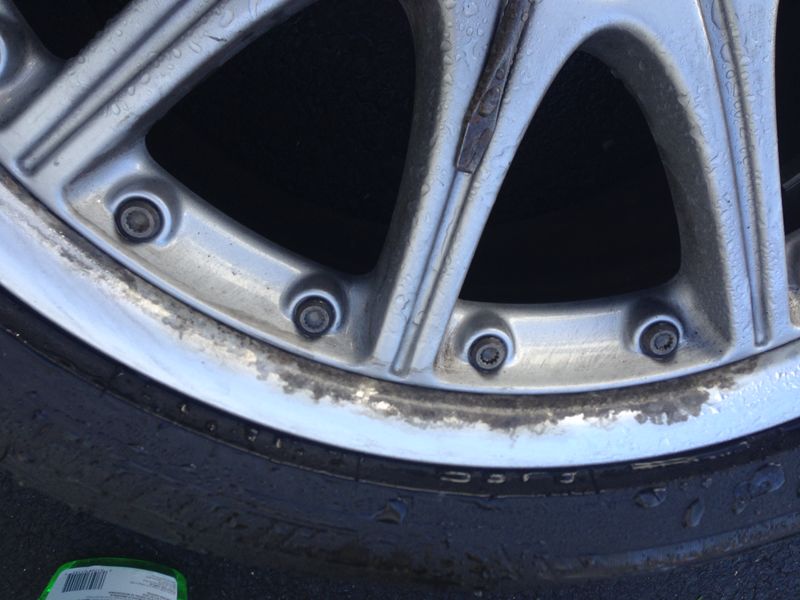
Partially refinished I should add, because the wheel centers were in OK condition, far better than the perimeters. These are two-piece BBS Sport Design wheels, all of which seem to suffer from corrosion in the finish on the perimeter of the rim. My sense is that this arises because the wheel centers do not perfectly seal on the rim (they don't need to actually) and let cleaning agents drip out over time long after you think that you've rinsed it all off, and proceed to eat up the finish. My belief is reinforced by the fact that the damage was not uniform and instead was localized. Moreover, on one occassion when a zealous detailer used some strong chemicals, the next morning I could see bubbling in the finish of all the wheels at the 6:00 position.
I know that the proper way to do these is to remove the 20 titanium bolts and take each wheel apart. This was more than I wanted to undertake, and I know that if you do this you run the risk of snapping off a bolt (they are set with Locktite), hopefully leaving enough of a stub to get a grip on them and still remove them. Instead I carefully hand sanded the perimters. Used 150 wet or dry sand paper followed by 220 and 400. I removed the wheels from the car as it would be kinder on my back.
The first picture is my wheels before this work. Classic failure mode on these wheels.
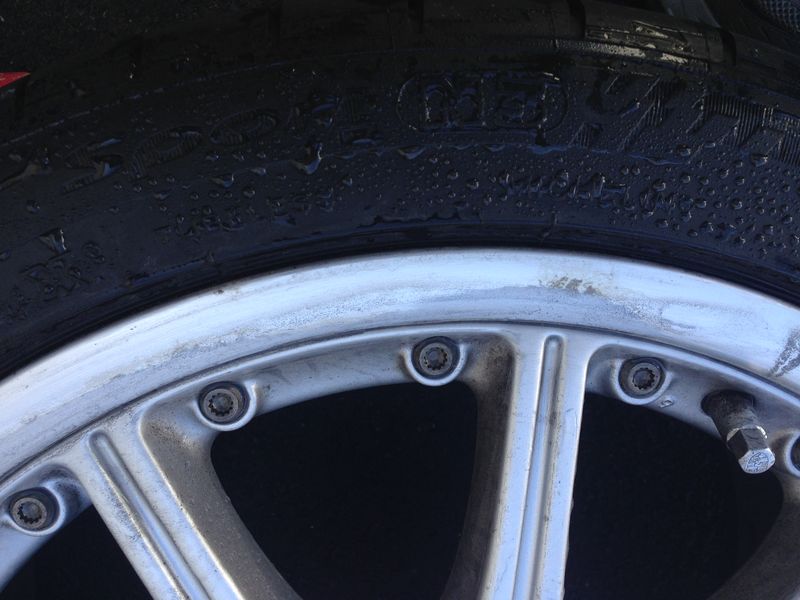
Here is what they looked like after sanding. My goal was to remove the visible corrosion completely and then abrade the remainder to provide a tooth for the new finish. Hopefully without damaging the finish on the centers as they were in OK shape.Since I was painting them silver I just needed the clear coat to be well adhered and not totally removed
I know the wheel centers don't look that great in the "before" pics. They are just dirty and clean up quite well. See the "finished" picture before making a final judgement
After a thorough cleaning and allowing them to dry in the sun, I masked the wheels using index cards between the wheels and tire, blue painters tape between the two parts of the wheel (trimmed with a razor knife following the seam between the two parts of the wheel) and a damp folded towel over the centers.
Important: You remember how I talked of how cleaning solutions slowly leaked out throught the wheel seams? I used an aircompresser to blow the water out of that seam after letting the wheels dry in the sun. Without the air compresser this liquid would have continued to slowly dribble out onto the finish before it was fully cured. A high speed drive would not be enough to force the water out of the seams. The damage at the 6:00 position that I noted the morning after a detailer cleaned them had been after a 40 mile drive.
Finally the finished wheel perimeter. That was after 3 coats of Duplicolor self etching primer (DAP 1690), four coats of color (HWP101 Silver) and three coats of Matte Clear (HWP106)
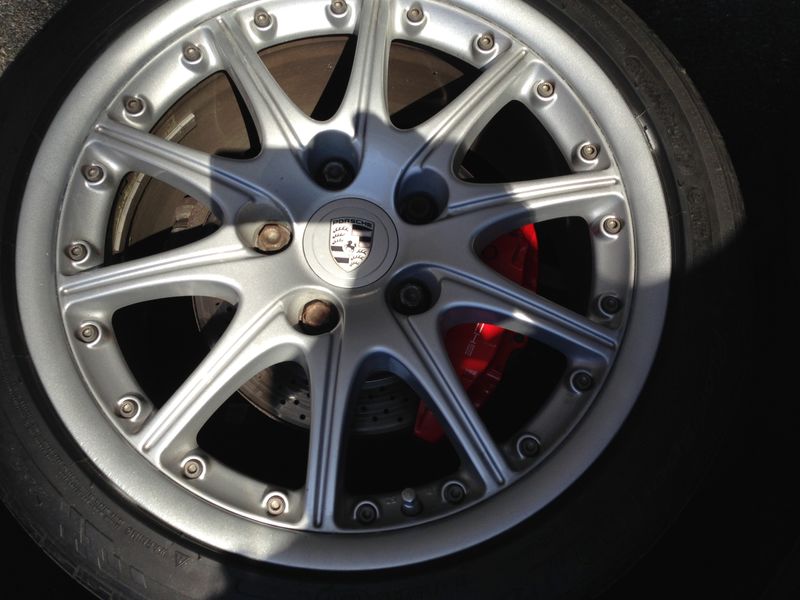
I did both wheels on one side working from noon to 7:00 PM. We'll see how they hold up over time, but for now I'm pleased. My expectations for this project were far exceeded. My initial goal was for them to be just "better." I would say that they are 90-95% - pleasantly surprised, both in the quality of my work and how well the Duplicolor matched the finish on the wheel centers.
Two down two to go!