Vehicle: 2000 986 Base, 2.7L
Problem: Howling/whistling noise from fuel filler area while driving
Difficulty: Really easy, because I was able to do it.
The 986 has a system to capture and prevent fuel tank fumes from escaping into the environment. The EVAP system consists of a series of vacuum lines and valves along with a carbon canister that stores the fumes until they can be burned in the engine. The major components of the system can be found in the passenger side wheel well/fender area. Failure of the components of the system can lead to a CEL, or can cause difficulty filling the tank with fuel.
One of the more common issues caused by a problem with this system is the infamous "whistle" that emanates from the fuel filler door/fender area while driving. In some cases, the noise sounds like someone blowing across the top of a soda bottle. My 2000 base developed this whistle recently.
My research indicated that a number of component failures can cause the whistle. A bad gasket in the gas cap is the easiest and cheapest fix. Another common cause of the whistle is the Fuel Tank Vent Valve (p/n 996-201-143-01, currently $124 from Pelican) which is mounted on the filler tube. Pelican has an excellent video on replacing the Fuel Tank Vent Valve here:
https://www.youtube.com/watch?v=zulI06TPBVc.
In my case, whatever malfunction I was experiencing with this system was not throwing a CEL, which might have made diagnosis a bit easier. I decided that the only real choice I had was to use the process of elimination to see if I could silence the coke-bottle-whistle.
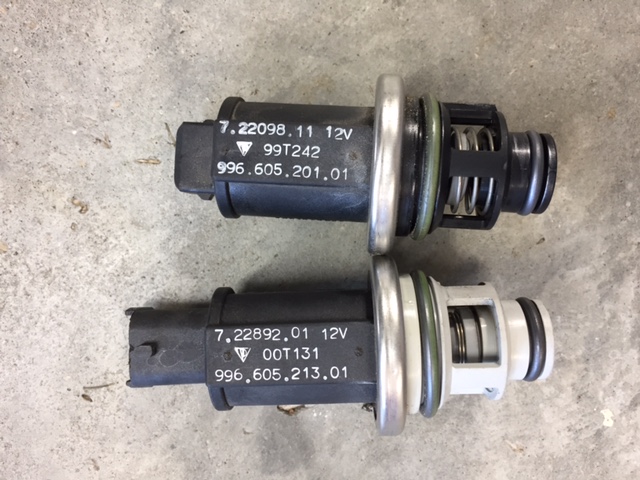
I started by replacing the fuel cap. That was a fail. So I replaced the fuel tank vent valve. Same result. After some research here and other forums, I decided to replace the Carbon Control Valve (p/n 996-605-213-01). This valve is located inside the passenger side fender behind the headlight assembly. It is mounted in a plastic valve housing side-by-side with another valve in the system: p/n 996-605-201-01. I decided to replace both valves while I was in there.
Parts Required:
Carbon Control Valve: P/N 996-605-213-01 ($108 via Pelican)
Purge Valve Fuel Vapor Canister (optional, if you decide to replace both valves): P/N 996-605-201-01 ($85 via Pelican)
Tools Required:
T25 Torx bit.
Recommended: ¼ in ratchet with 3 in extension.
Also recommended: trained chimpanzee. Space is tight in the fender!
Begin by removing the passenger side headlight assembly. As you shine a flashlight up into the fender, you’ll see the valve housing and the two valves. (Note: I had removed the wheel well liner for another project)
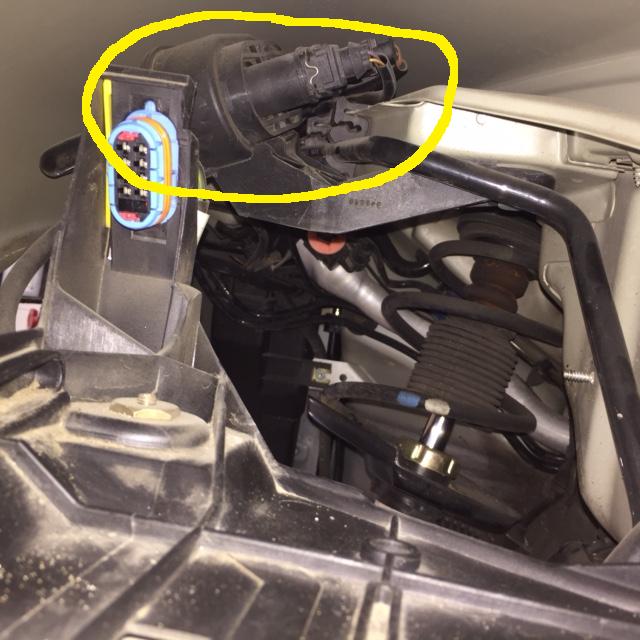
The two valves are mounted side-by-side. You’ll need to remove the valve nearest you, P/N 996-605-201-01, to get to the other valve. Both valves are different sizes and have different electrical connections, so you can’t mix them up.
The first valve has a metal clip. Pry it out gently then the connector pulls off relatively easy. This will give you a bit of extra space to get to the torx screw that holds the plastic retainer. You’ll need to remove this screw to slide up the retainer and remove the valves.

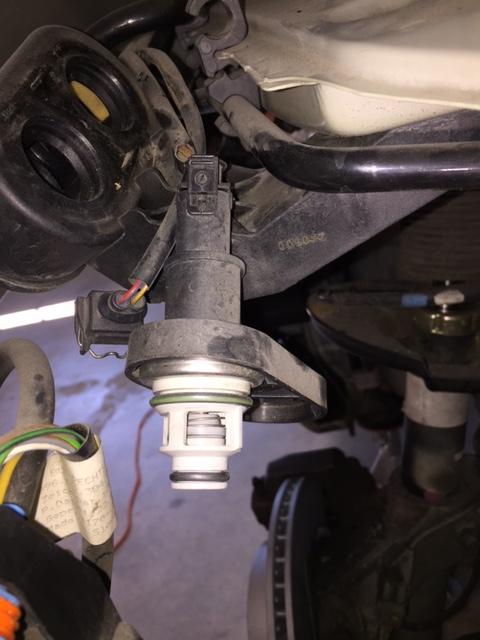
The valve is very snug in the housing, thanks to a hard rubber o-ring. I used a soft plastic trim removal tool to gently pry out the valve.
You can now get to the second valve, P/N 996-605-213-01. The electrical clip is different, and it will be much easier to disconnect it once you have the valve out of the housing. Again, I used my trim tool to separate the valve from the housing. To remove the connector, you’ll gently pry the plastic tabs and pull it off of the valve.
Now comes the fun part: installing the new valve. It’s a very, very tight fight, and you have virtually no room in the fender to gain any leverage. I found that if you push down as hard as you can, while wiggling the valve back and forth, it will eventually pop in. Swearing and loud grunting noises seemed to help. Make sure you reconnect the electrical to the back valve before installing the front valve.
Once the valves are back in, refasten the plastic retainer with the torx screw, then reconnect electrical to the front valve, and you’re done.
I confirmed the blowing-bottle noise was gone on my test drive, but I haven’t cracked open the champagne yet. The noise was intermittent before, so I won’t be confident I fixed the issue until I’ve driven some more. Thanks to our wonderful New England weather right now, that might be awhile.
Note: there is yet another 996-605-201-01 purge valve on the carbon canister itself. I'll have to take a look at that one if the problem isn't solved. Also, my understanding is that a clog in any of the associated lines can cause an issue as well. this is certainly a complex system with multiple modes of failure. I sure hope this fixed my problem...