Trans mounts seem ok. No oil leaks and no tears in the rubber, The engine mount on the other hand is SHOT. We have the new bushing to go in after trans gets back in.
On to the Infamous bearing!!
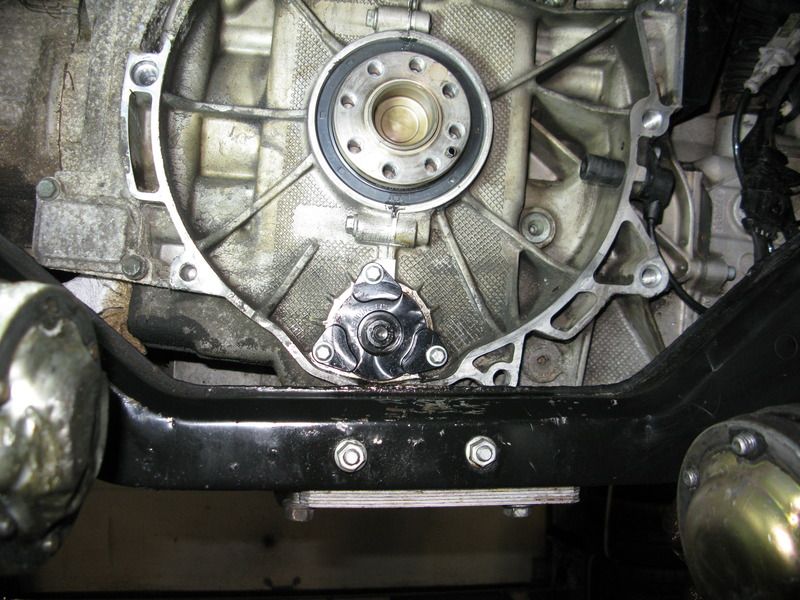
Impact gun to take off the Flywheel and this reveals a bone dry rear main seal. I like this and we do have a new one but I will leave well enough alone.
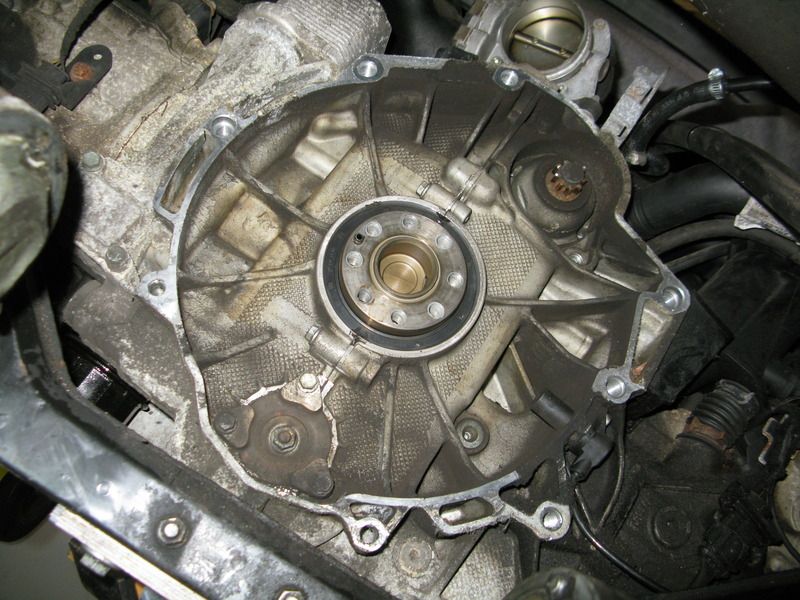
IMS cover is also dry, wonder what that means. Pull the cover and get assaulted buy very foul smelling oil. It's really BAD!! What a stink. Missus 7/8ths comes out and asks what died in the shop. I tell her it must be a rotting bearing hidden away in here...
This is where my really cheep Yankee nature hits head on with a bit of talent and cleverness. I'm just not buying a bearing puller for a couple of hundred bucks. I'm sorry but that is just how it is. I try to buy the BEST tools I can find for my hobby but I can't do it. So, I got my new bearing and did some measuring and found that a pipe of 2" ID will allow the bearing to be pulled and fit onto the shoulder of the shaft. I picked up some 8mm threaded rod and what are called "coupling" nuts. These nuts are for joining threaded rod and are about 8 times taller than a regular nut. So, armed with my $2.79 piece of 2" ID exhaust pipe, $3 worth of threaded rod, 80 cents worth of coupling nuts I have a IMS bearing puller. After seeing the cover I know that our 2000 has the double row bearing and I have my doubts that this will work with the wire ring they use as a keeper on the OD if the bearing. But, I have about 6 bucks invested and know I can make it heavier if I have a failure. I will admit that this was not 100% plug and play puller time. The bearing stud is an 8mm fine thread, while the nut is 8mm coarse. No biggie tho, I yank out my 8mm 1.0 tap and rethread the coupling nut on one side. This is what it looks like:
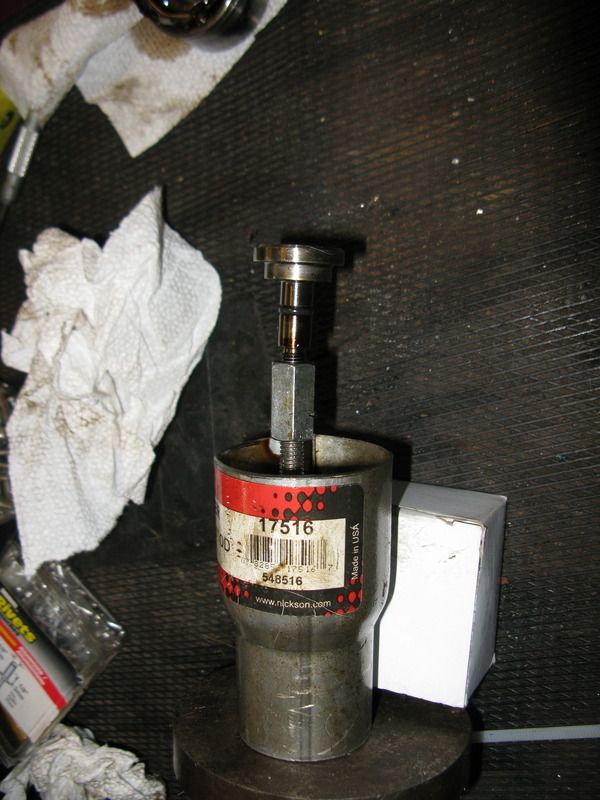
A simple tool with some discarded steel and some washers. Install the coupling nut onto the bearing stud first, then thread the rod on and build the puller onto it. Lube up the threaded rod coupling nut to keep the friction low. I used a moly paste that I have laying around. It's the same gunk used in the CV joints, very slippery stuff. Perfect for this application.
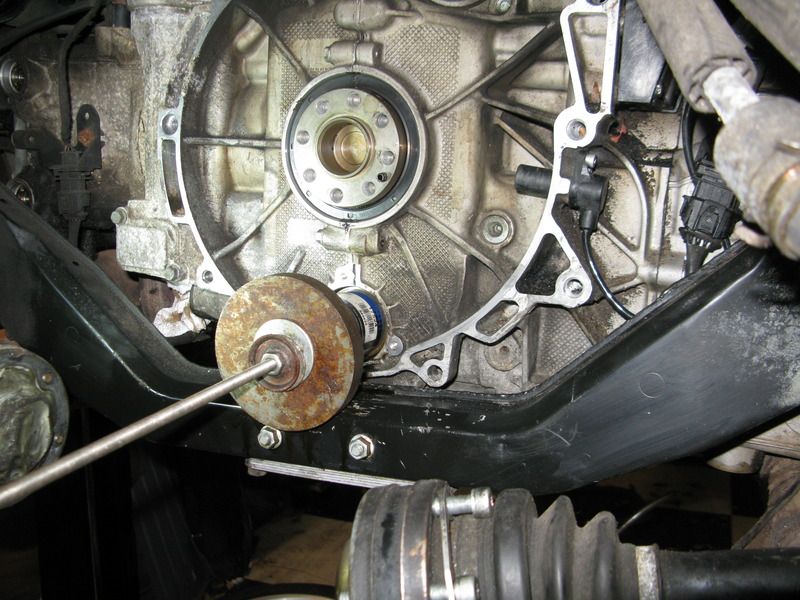
Center the puller in int hole on the shaft shoulder and begin the tightening process. It takes a bit to load everything up but eventually it will get quite hard to turn. This is when you go get a drink refill and let the load sit there. Come back after 3-5 minutes and tighten it up some more. Lets it sit with the load on there. My next step was to loosen the puller fully and then tighten again. I have learned this over the years that is takes time under load as well as the dropping of the load to break the corrosion and bond that the 2 metal parts have formed. On the second tightening sequence, I get up to about the same load and POP the bearing comes loose. I continue to crank away at a very low load until the bearing comes free of the shaft. Now I have really let the stink out!! Holy COW does this stuff smell bad!!! I put my finger into the shaft to get some of the oil and it/s stinky, sludgy, thick and a bit gritty. It's BAD stuff.
I clean all that mess out and get ready to do the install. I had placed my bearing in the freezer with the aluminum install driver mounted. I wrapped a rag around it so my hand wont begin to warm it when I pull it for the 8 second walk to the garage. I grab the trusty heat gun and begin heating the IMS at the 8, 4 and 12 o'clock positions for about 20 seconds each. When I started the shaft was 62 degrees as measure by a laser thermometer.
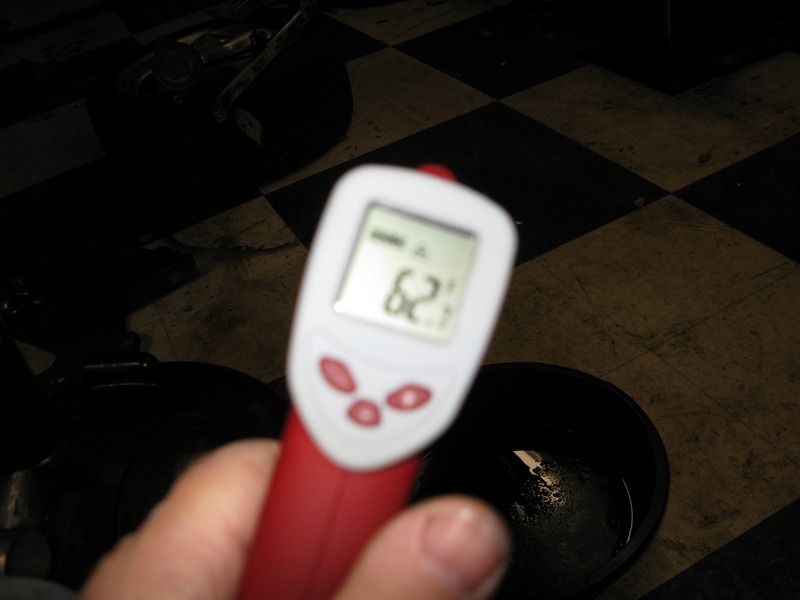
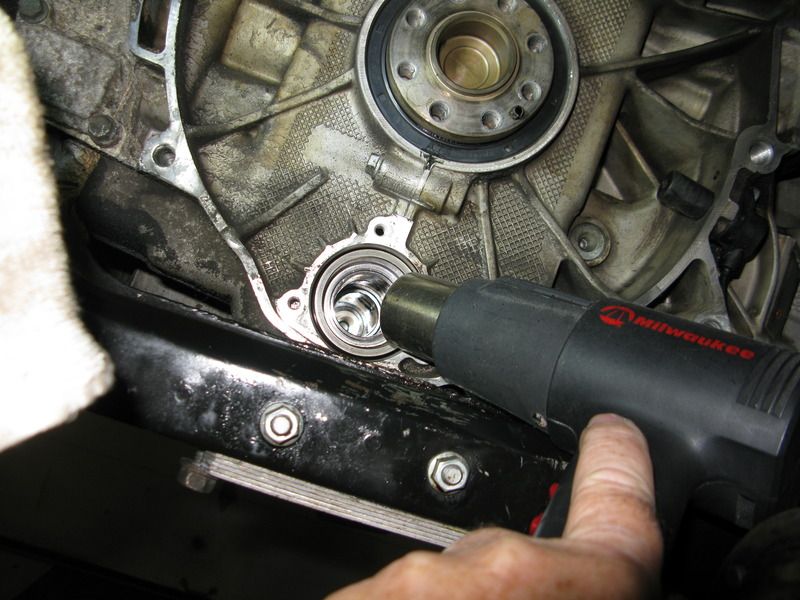
When the shaft reached a temp of 170 in all 3 places, about 4 minutes, I shut down the heat and quickly trotted to the freezer for my bearing, grabbed it and ran back out to the shop. I introduced Mr. Bearing to Mr Shaft and the bearing slid right in. NO hammering required. Like is was greased up with butter! My freezer had gotten it down to -3 degrees over the 24 hours it was in there. The temp difference allowed for a clear fit and then as soon as the temps equalized, the bearing was locked in place. I had followed instruction to quickly apply some Loctite to the OD of the bearing. Some grease on the the cover seal and that was mounted and I used the 3 bolts to bring it fully into position and then torque everything up properly.
I used an EPS roller bearing for this application. I like the roller design here where the radial loads are high and the ability to oil feed it. They make a nice complete kit with bearing, bolts, driver, oil pump shaft, sharpened punch to pop a 3mm hole in the oil cover and good instructions. I'm not interested in a bearing Jihad over what is better. This is what I choose for my own reasons, some revealed here. I don't care if you use a toilet paper roll to replace yours. It's your car, you do with it as you please.
Now I wait for the flywheel to arrive to begin the assembly process. Probably tomorrow night.
Thanks for reading....so far :-)