This was a really good day compared to yesterday. I have spent the better part 7 months getting ready to do the build on my 98'. Reading books, articles, forum postings, tech articles getting active in my PCA region again. All working at bettering my knowledge on this little 2.5L engine.
Yesterday was the culmination that you can over prepare and loose site of what you are trying to do. In essence to much data is not a good thing. Yesterday showed me that as I was befuddled by the fact of how the 3 chain cam lock tool would not work for the 5 chain engine.
Slept on it last night and that was when the clarity of the engine design and the engineering drawings ran through my head and how loads are being transferred around and why you won't find slots on all the cam ends.
With sanity restored and some kind PM's from folks, this morning was the day. Pulled the three remaining caps from the engine, rotated the engine to TDC, observed the slots in their respective positions, verified with Insite's thread on cam timing that my cams were indeed in the correct position.
Inserted the pin into the pully locking the front of the crank, installed a bar across the back of the crank locking it down there. Went and installed the to cam locks from LN's kit and then marked the cams with a marker to verify position.


Through out this I kept going back to each of my cams and verifying that no movement had occurred.
Since I am replacing all my cam tensioners I pulled all three out of the engine and on the IMS tensioner (that is the one behind the driver seat on the top) I did not have to remove the AC unit as there was enough room to remove it.
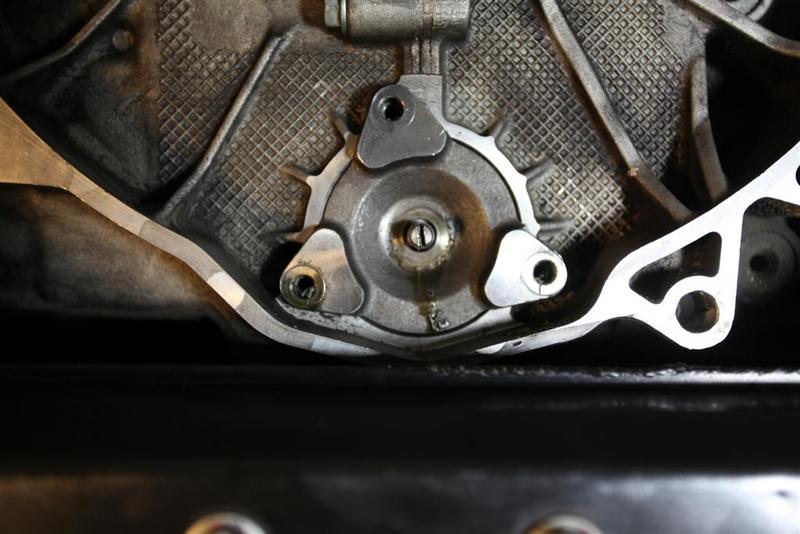
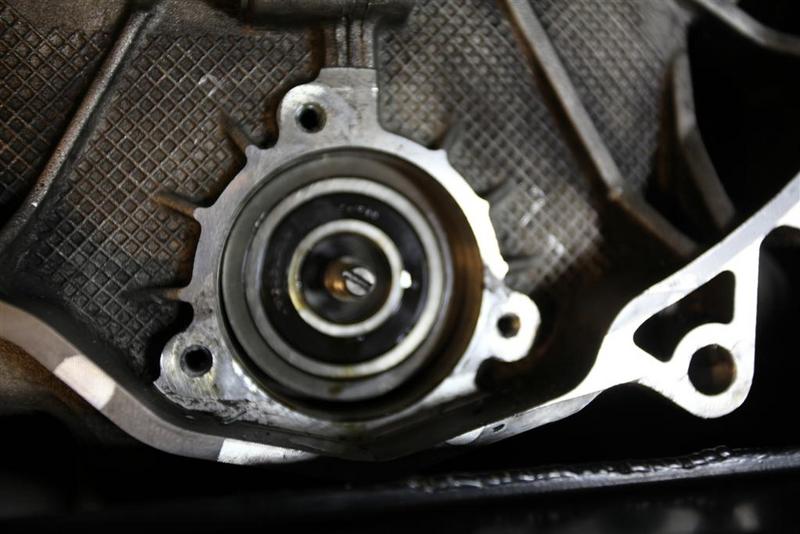
Well, everything seems great as no cams moved and we are ready to go. Using LN's directions which really are simple and easy (but I must stress need to be followed to the letter) to use. Just as Jake said, the bearing plate comes right out with no force at all. Just as a triple check, I downloaded a copy of Bentley's video using the LN tool and had that running in the back ground.
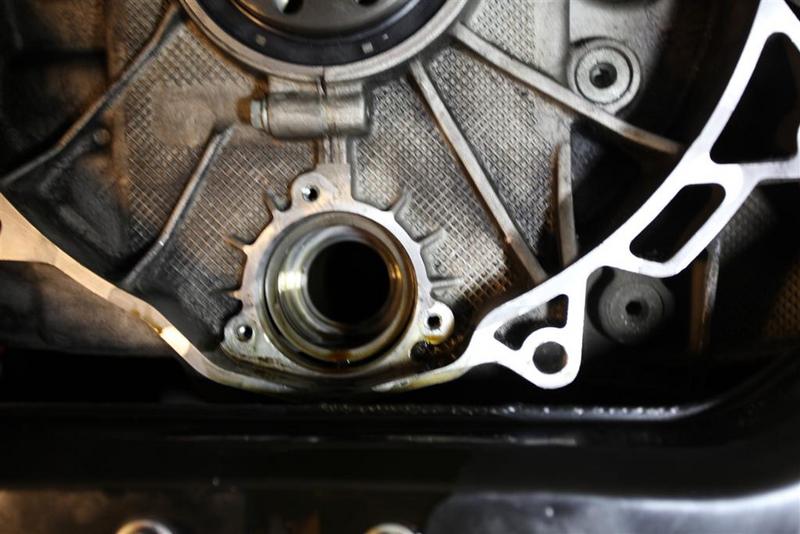
Note: When the bearing comes free it will make you think you broke something as the snap of the internal retaining ring sounds just like a bolt shearing off, but the bearing dropped out just like it's suppose to and the gush of oil did follow.
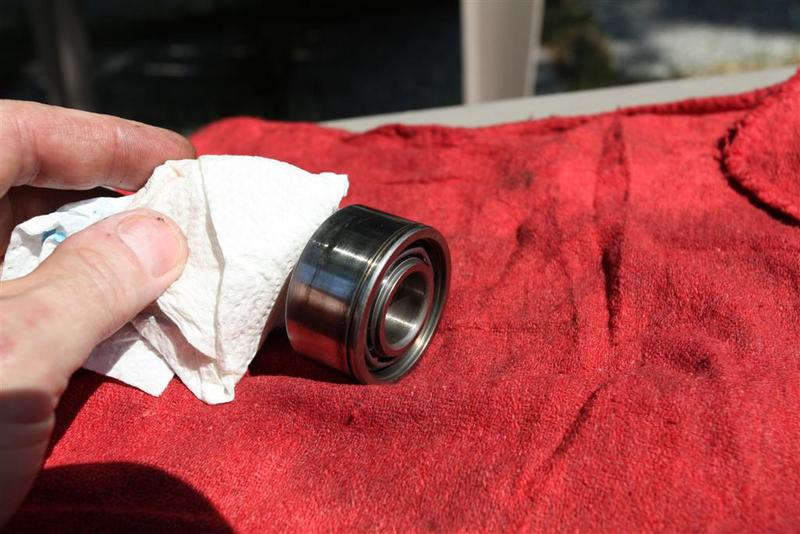
Once the bearing was out I had to see what condition it was in. Well, I think Jake calls this Stage 1 failure (someone can correct me if I am off) but there was no grease, it was filled with engine oil and while is spins freely, if you shake it side to side you can hear and feel bearings rattling. I believe that I caught this at the correct time.
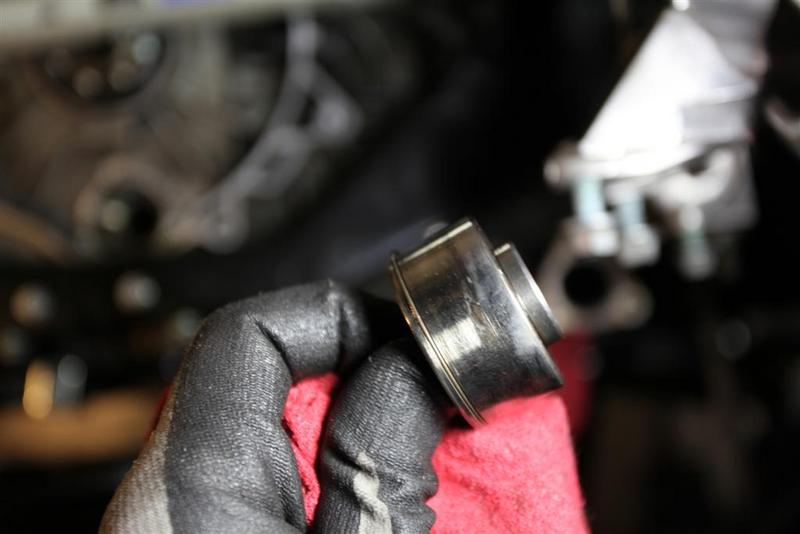
On the bearing there appears to be two spiral discolorations that go about one third around the bearing. Looks like bluing on metal...but not that dark. Either way the bearing is out and I know it was only a matter of time. I have several people that are interested in seeing the bearing, so I will send it to those that have asked as it will go in their database.
Jake, are you interested in receiving this for review? If so I can make you the last stop for this bearing. Just let me know.
Well, I pulled the new bearing out of the freezer, installed it in the jig, hand tapped it into place (easy breezy), installed the spiroloc as per the instructions and all of the other parts and pieces. For my sealing material a friend of mine who rebuilds aircraft engines (and 928's) gave me aviation sealer as it is impervious to oil, gas and other solvents, does not dry out but will not move from its placement as my thread sealer on the bolts. The bracket slide right back into place and everything buttoned up like the instructions said they should. I pulled all my bracing off, rotated the engine 720 degrees and the timing marks came right back to where they were suppose to be.
What a relief...I am taking the rest of the day off and going out on the river for some relaxing down time. Again, on this task...thank you to all who had input. It was appreciated.

In closing these are a couple shots of the bearing in the sun light as I try to capture the discoloration on the outer race.