 12-02-2018, 08:37 PM
|
#21
|
|
Registered User
Join Date: Oct 2018
Location: North Cali
Posts: 858
|
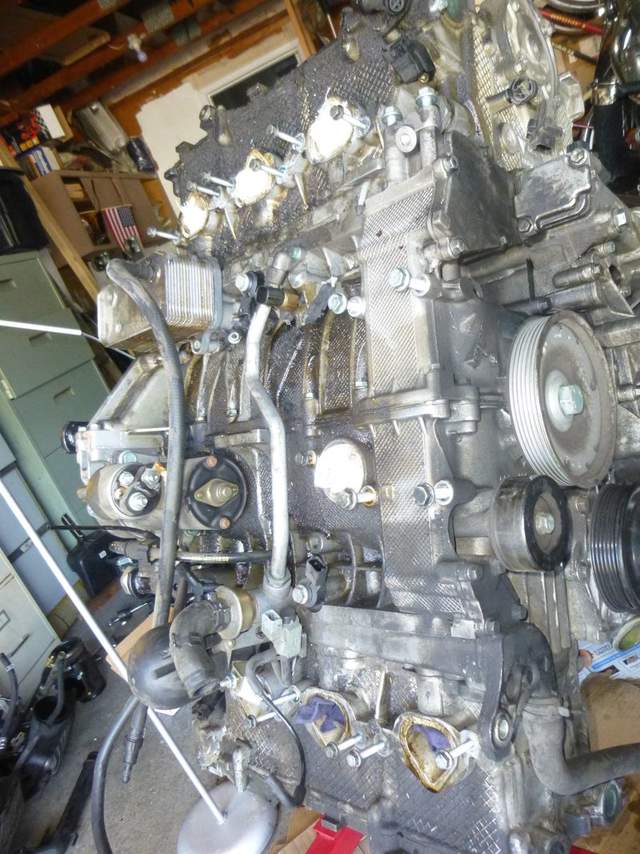
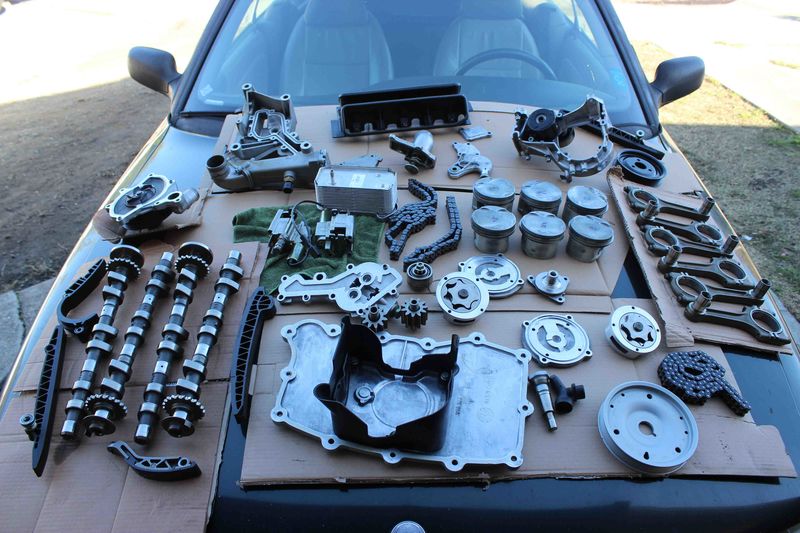
Here`s a little more progress today on stripping the engine.
Mating engine with stand:

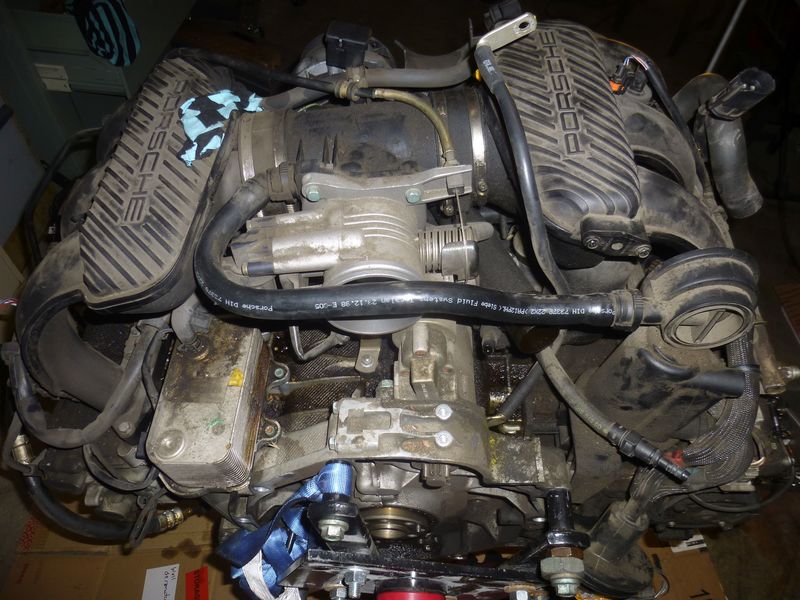
Opossum-damage, close-ups:
Thick oil-mud on the heads:
Sophisticated method to prevent steering pump shaft from spinning:
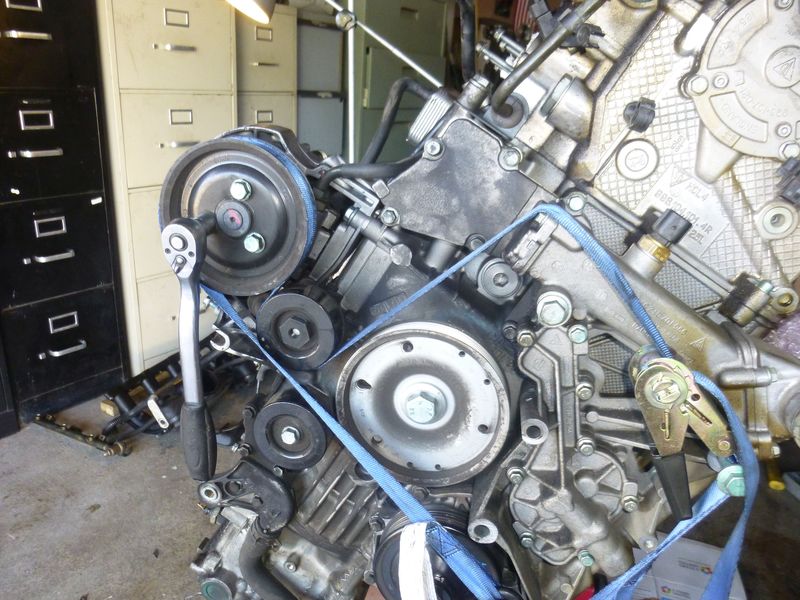
Stripped:
We`ll take a peek into the engine next time.
|

|

|
|
12-06-2018, 10:35 PM
|
#22
|
|
Registered User
Join Date: Oct 2018
Location: North Cali
Posts: 858
|
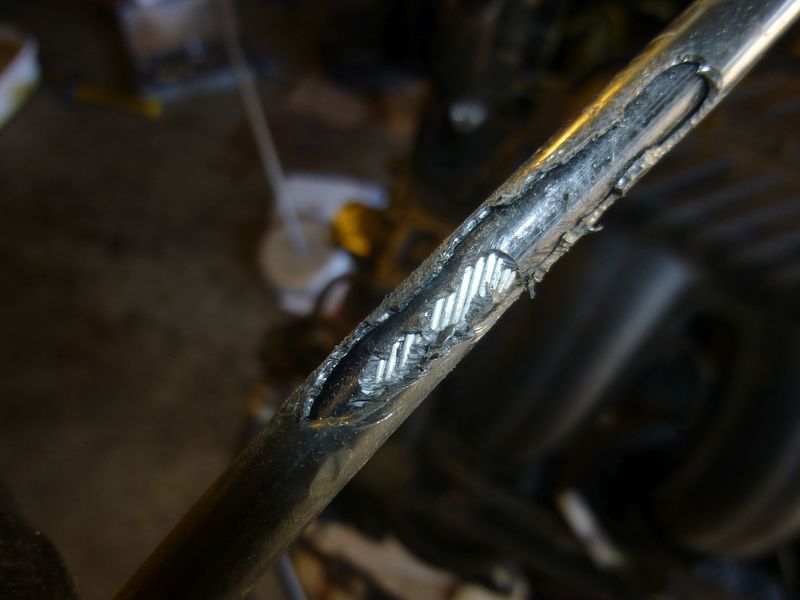
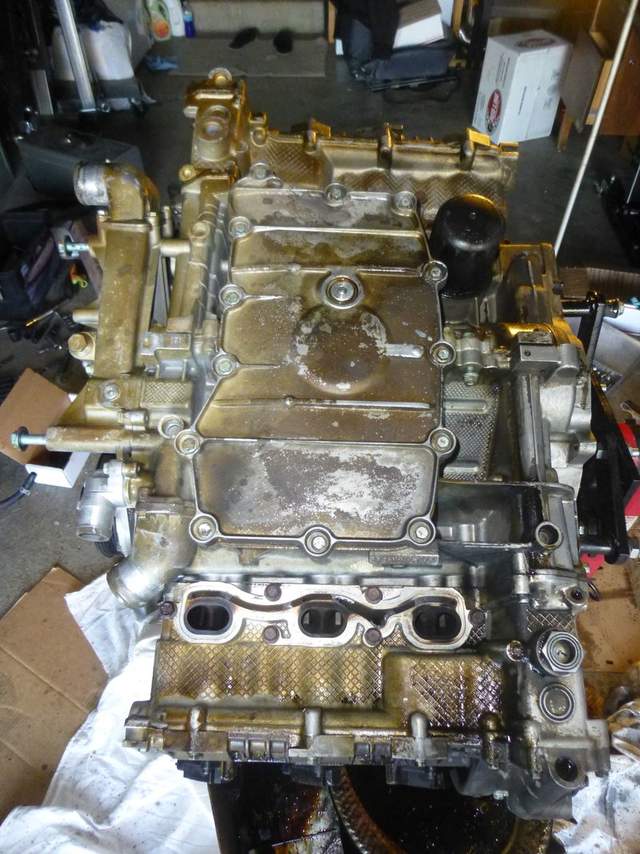
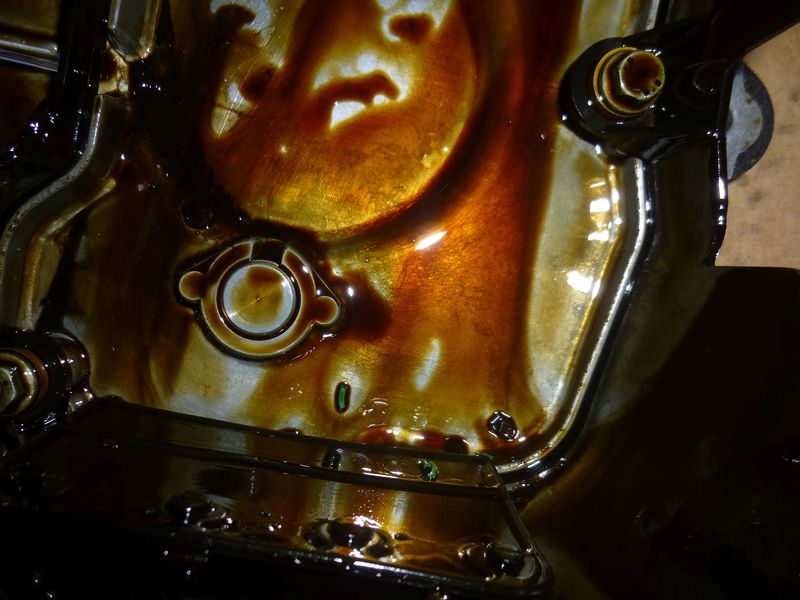
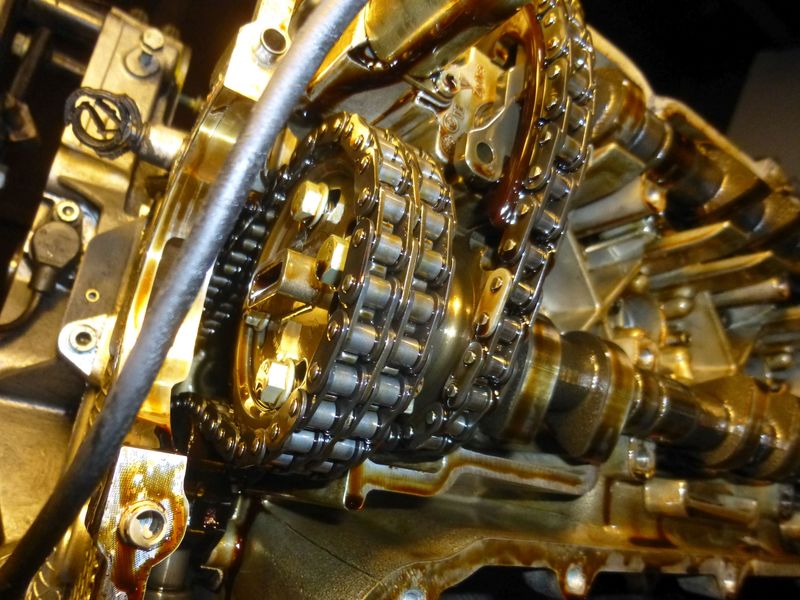
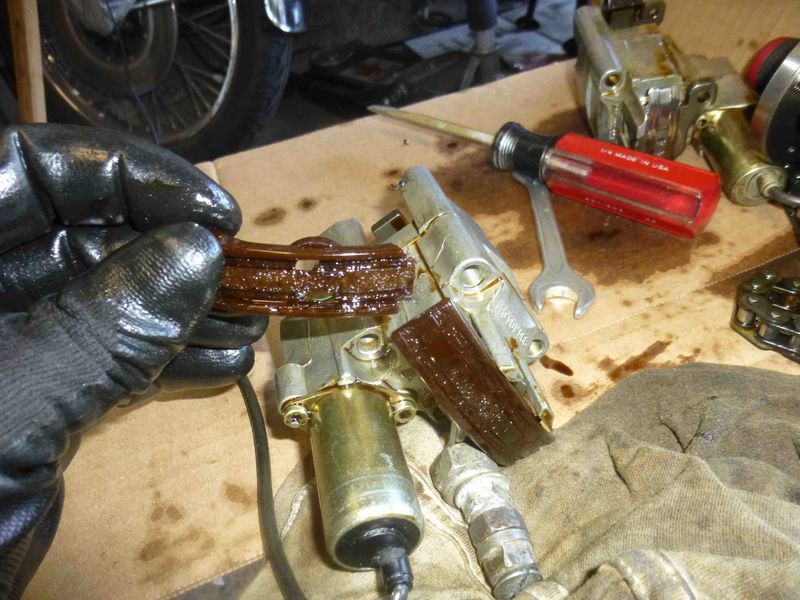
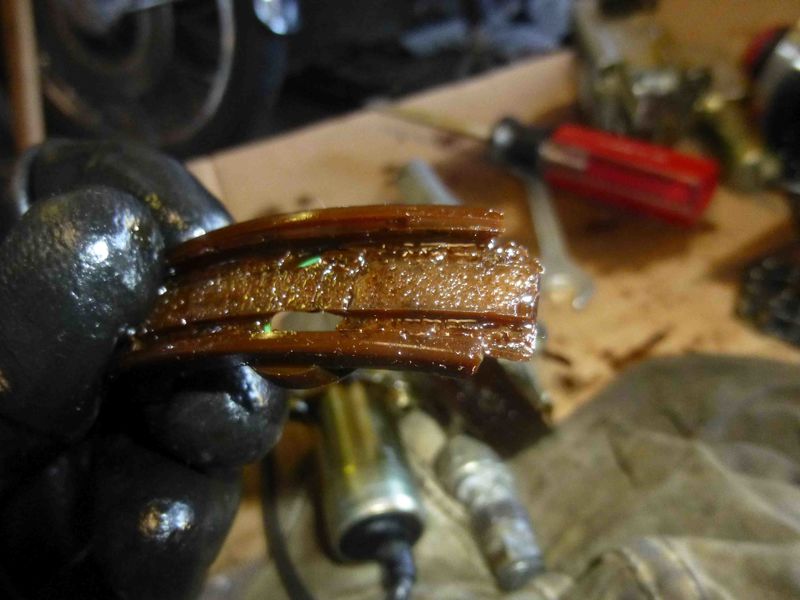
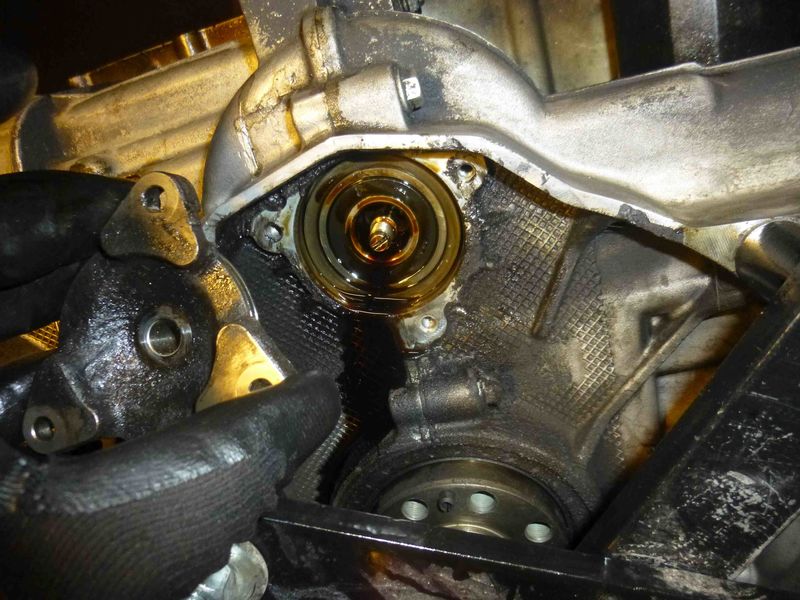
Sump off. Looks clean, no sludge or metal debris. Except for those green and brown plastic fragments..

Inside everything seems intact so far.


Let`s approach now from the heads. Cylinder 4-6 first.

Scavanging pump off:
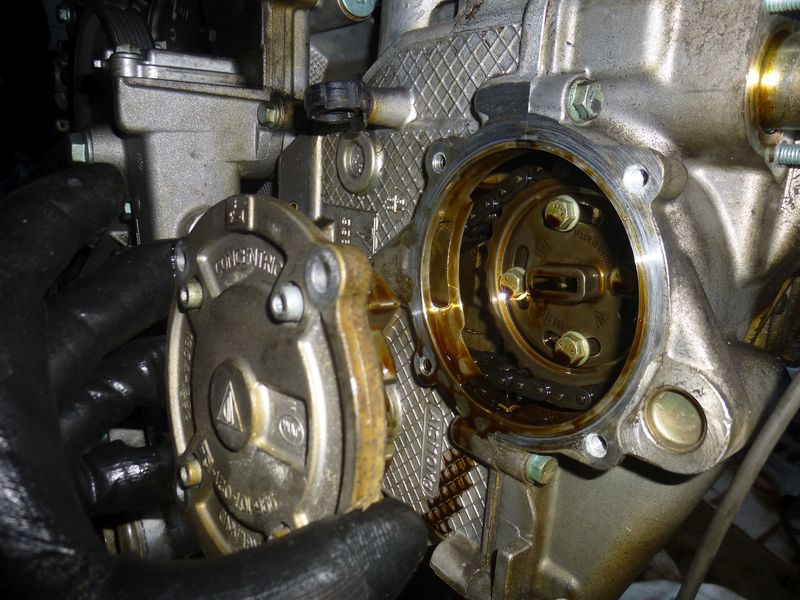
Head cover off. Something seems missing from there. Perhaps the origin of the plastic debris in the oil pan?
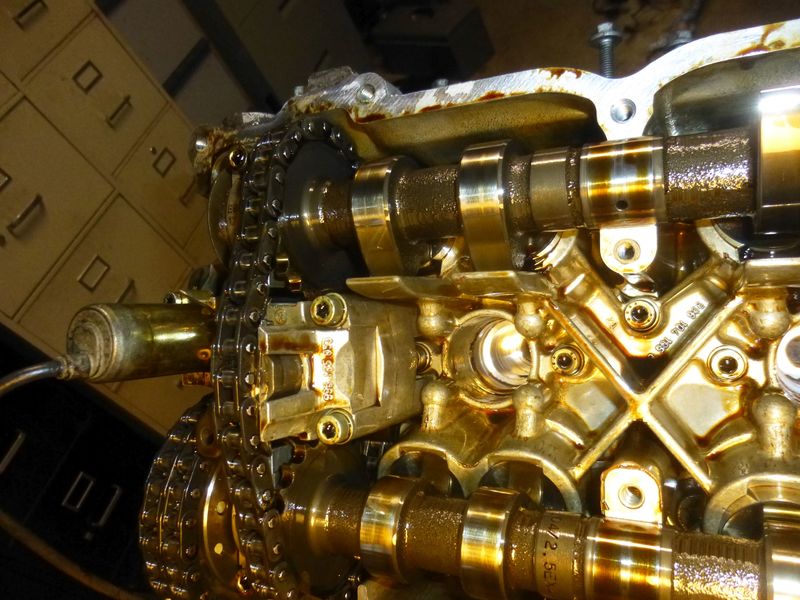
Not much left. The middle part, the actual rail is completely gone.

After the plastic chain guide completely had given up the chain was running on the steel bracket. May have been producing an awful sound though..

|
|
|
|
|
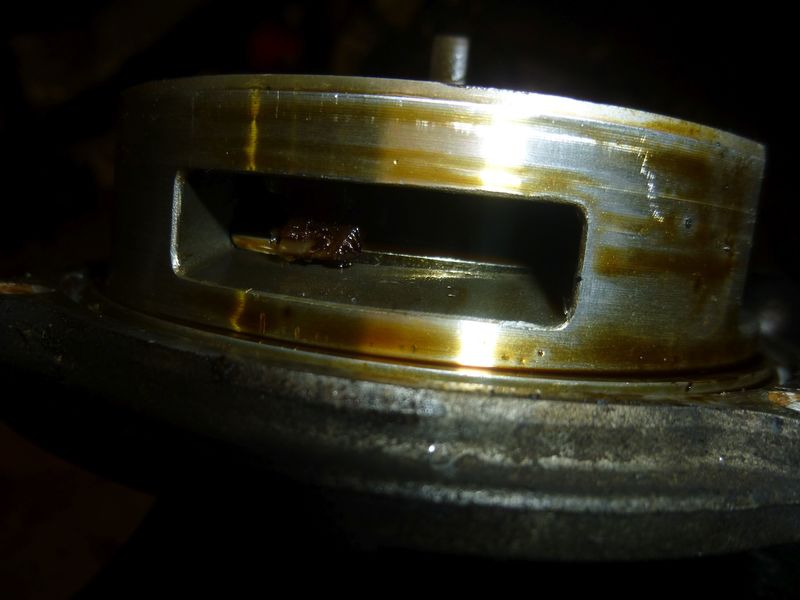
12-06-2018, 10:42 PM
|
#23
|
|
Registered User
Join Date: Oct 2018
Location: North Cali
Posts: 858
|
|
|
|
|
|
12-07-2018, 10:48 AM
|
#24
|
|
Registered User
Join Date: Sep 2018
Location: Ca
Posts: 119
|
Looks like we are tackling similar projects...I posted mine up on the General Discussion forum. Mine is a 3 chain 03 motor though.
Just got my drivers side head back on and after the cams are back in and i button that side up, I plan on tearing down the other side.
Where in N. Cal are you?
|
|
|
|
|
12-07-2018, 04:12 PM
|
#25
|
|
Registered User
Join Date: Oct 2018
Location: North Cali
Posts: 858
|
Hey, I`m located close to San Jose. Are you nearby?
Quote:
Originally Posted by Ottomotion

Looks like we are tackling similar projects...I posted mine up on the General Discussion forum. Mine is a 3 chain 03 motor though.
Just got my drivers side head back on and after the cams are back in and i button that side up, I plan on tearing down the other side.
Where in N. Cal are you?
|
|
|
|
|
|
12-07-2018, 09:56 PM
|
#26
|
|
Registered User
Join Date: Oct 2018
Location: North Cali
Posts: 858
|
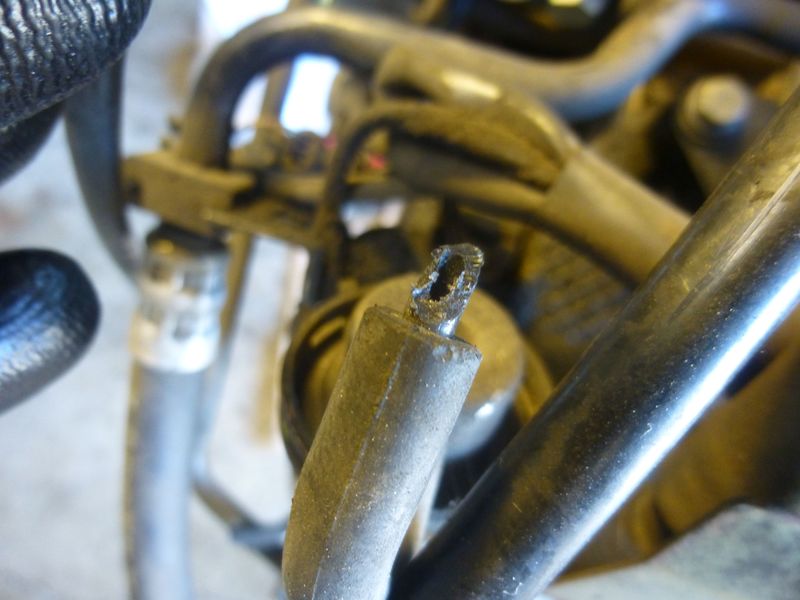
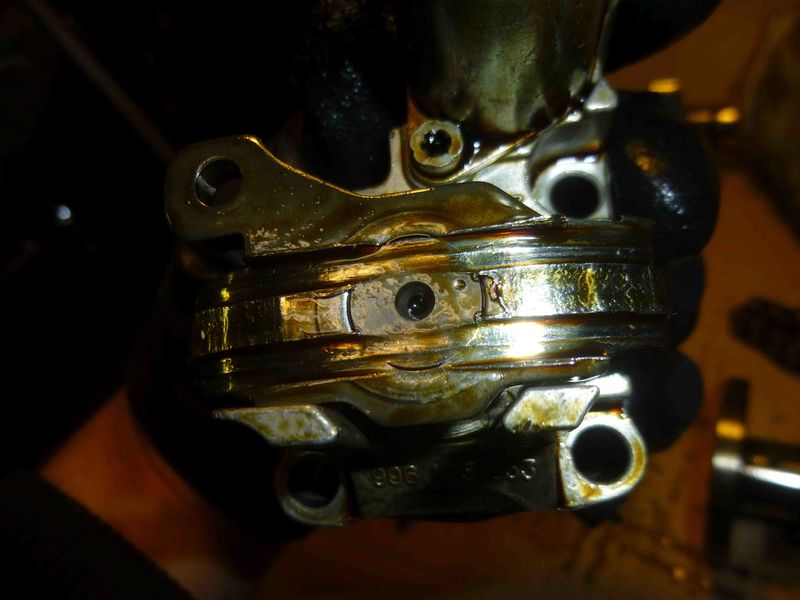
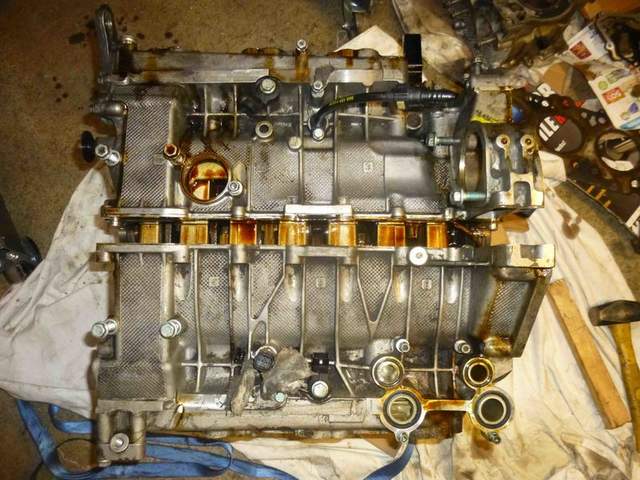
Few more pics for today. Taking off the oil pump cover:
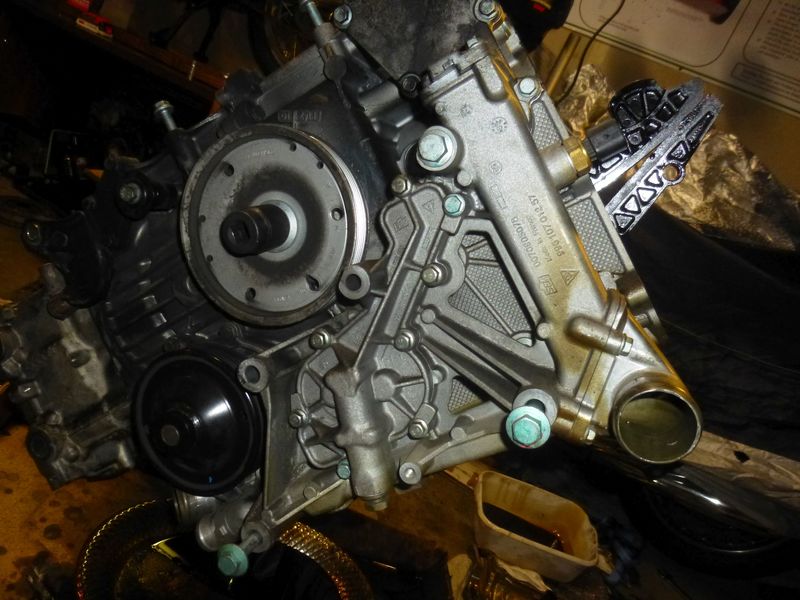
Pump is in decent condition.

So is this chain guide.
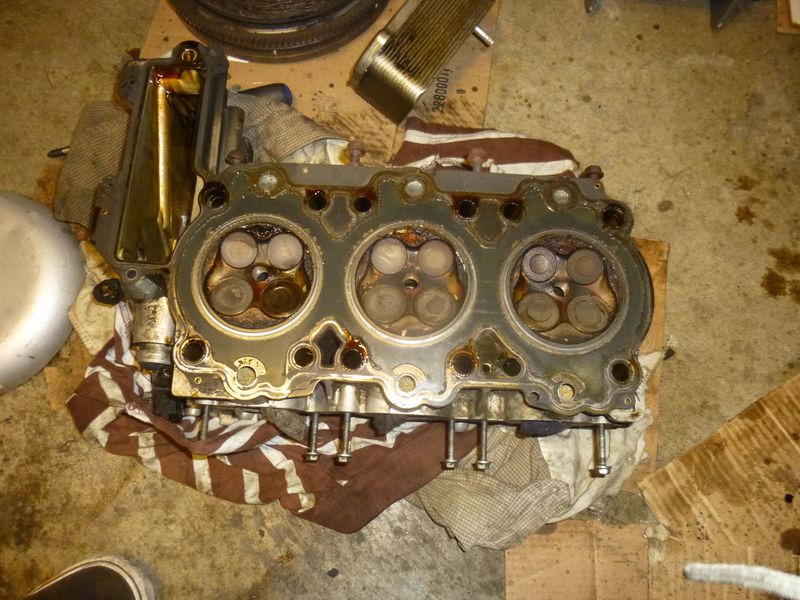
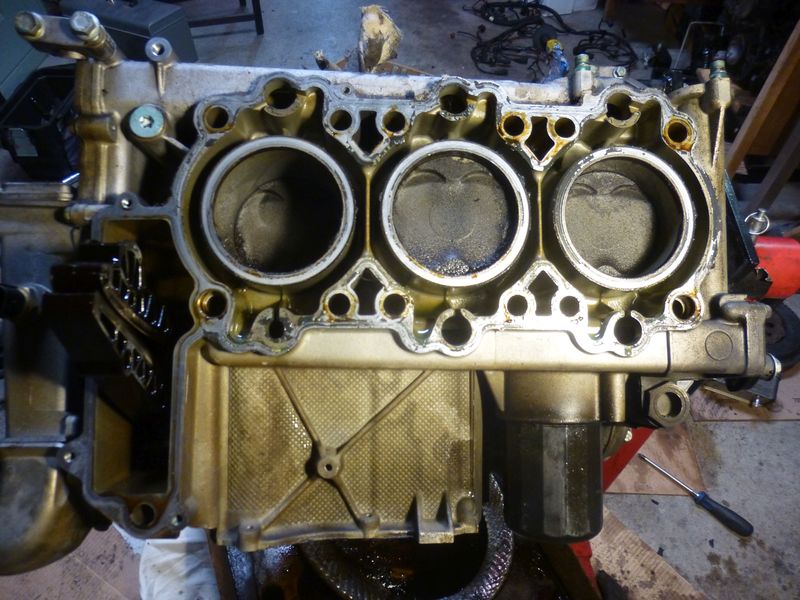
Let`s move to head 1-2-3.

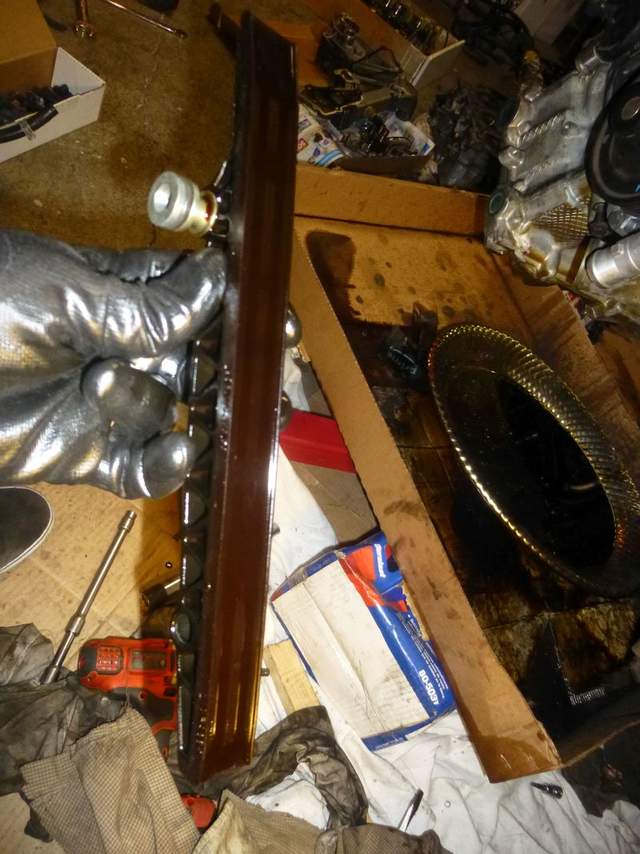
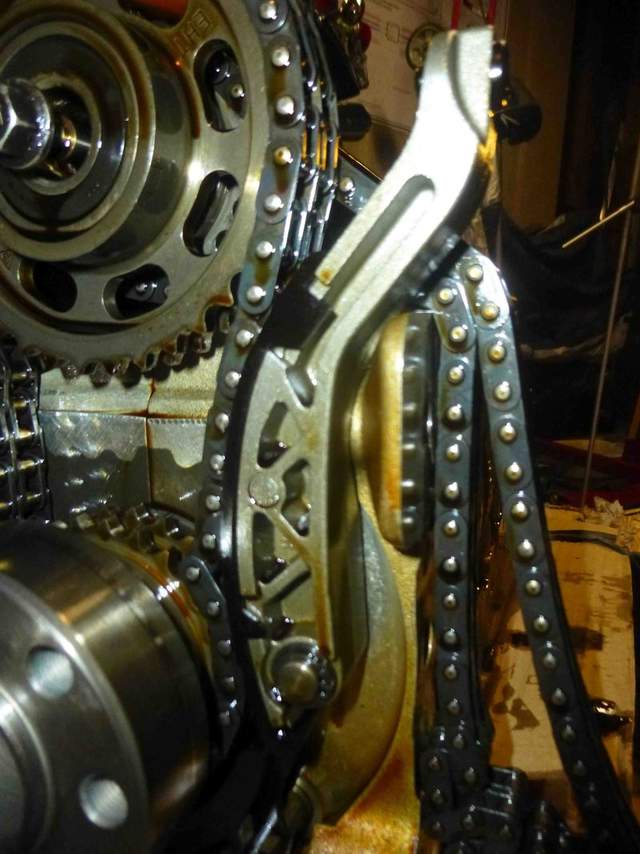
Oops, what`s left of this chain guide does not seem as good as the long rail. Actually, it came all the way from the other side.
Another piece landed here:

The chain guide for head 1-2-3 is intact.
Getting the head off.

Here we go.

|
|
|
|
|
12-07-2018, 10:01 PM
|
#27
|
|
Registered User
Join Date: Oct 2018
Location: North Cali
Posts: 858
|
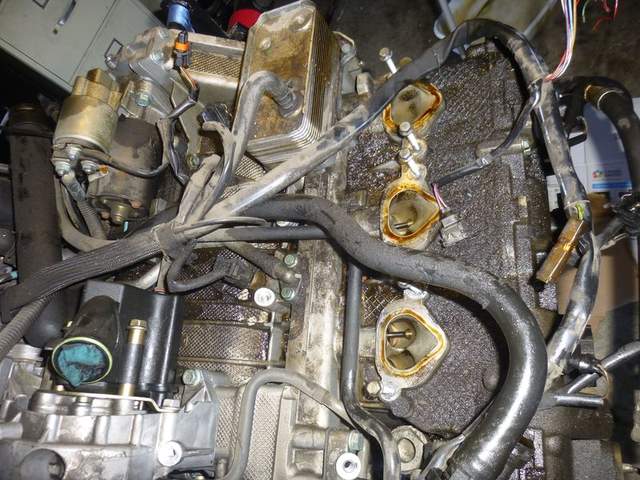
This is a bit kind of puzzling: the valves were hitting the pistons, but not on the side where the chain guide was totally missing so the timing was off but on the other side (1-2-3).
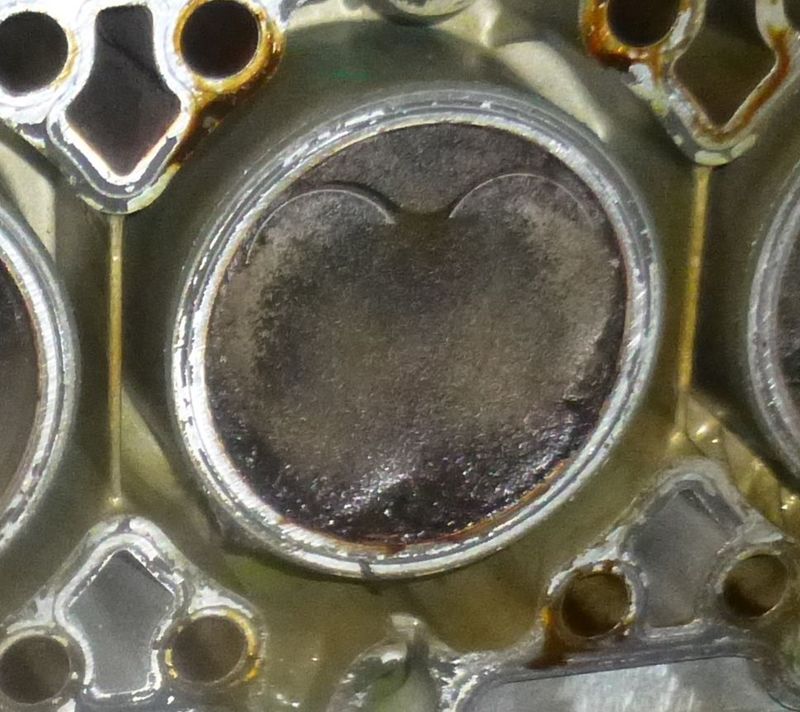
What I can think of is that the chain guard got chewed up by the timing chain resulting in jumping a tooth? What an unfortunate coincidence...
|
|
|
|
|
12-08-2018, 07:45 AM
|
#28
|
|
Registered User
Join Date: Sep 2018
Location: Ca
Posts: 119
|
Fresno.
Keep it up. Its nice to see someone else attempting this same task at the same time.
So if I am seeing and reading correctly, your chain guide/tensioner failed and your chain was riding on metal?
Interesting fail....My car has just over 100K on the clock and the pads look like new....
Now the valve spring and lifter for #5 intake...thats a different story.
|
|
|
|
|
12-08-2018, 08:43 AM
|
#29
|
|
Registered User
Join Date: Oct 2018
Location: North Cali
Posts: 858
|
Quote:
Originally Posted by Ottomotion
Fresno.
Keep it up. Its nice to see someone else attempting this same task at the same time.
So if I am seeing and reading correctly, your chain guide/tensioner failed and your chain was riding on metal?
Interesting fail....My car has just over 100K on the clock and the pads look like new....
Now the valve spring and lifter for #5 intake...thats a different story.
|
Hey, I`ll upload new pics soon. Fresno is not so far away from here, we should meet up once both cars run again 
As for the engine, indeed, the primary reason for the engine failure was the excessive wear and subsequent detachment of the chain guard. I think the chain picked up a piece of the guard on the opposite side and somehow made the timing to jump. Otherwise I can`t explain why the timing was messed up and the valves touched the pistons. Failing of these guards is frequent in these engines, yours may have been replaced earlier, or the 3-chain engines have a different design? BTW, my car has 100K miles in it and I don`t think it has been taken apart.
|
|
|
|
|
12-10-2018, 11:09 PM
|
#30
|
|
Registered User
Join Date: Oct 2018
Location: North Cali
Posts: 858
|
|
|
|
|
|
12-10-2018, 11:10 PM
|
#31
|
|
Registered User
Join Date: Oct 2018
Location: North Cali
Posts: 858
|
Bearings and bearing journals show no wear:

|
|
|
|
|
12-11-2018, 07:52 PM
|
#32
|
|
Registered User
Join Date: Sep 2018
Location: Ca
Posts: 119
|
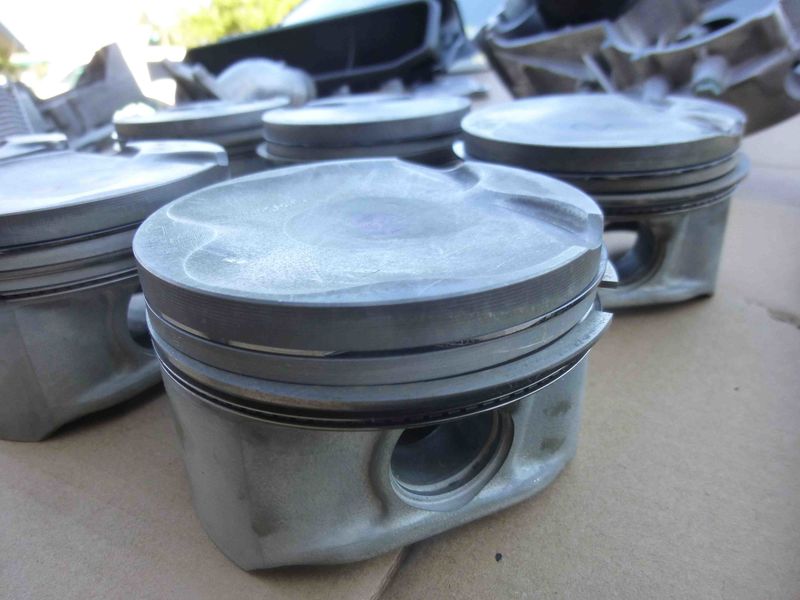
Damn possum did more damage than the chain pad letting go....
Does most look savable? Did it bend valves?
|
|
|
|
|
12-12-2018, 09:41 AM
|
#33
|
|
Registered User
Join Date: Oct 2018
Location: North Cali
Posts: 858
|
At least the car was used for something for 11 years All look salvagable, I`ll only need a few things, like the variocam actuator, pads, new IMSB, etc.. The valves don`t seem to be bent, that is a bit surprising. I think after some lapping they can be reused.
nes
Quote:
Originally Posted by Ottomotion
Damn possum did more damage than the chain pad letting go....
Does most look savable? Did it bend valves?
|
|
|
|
|
|
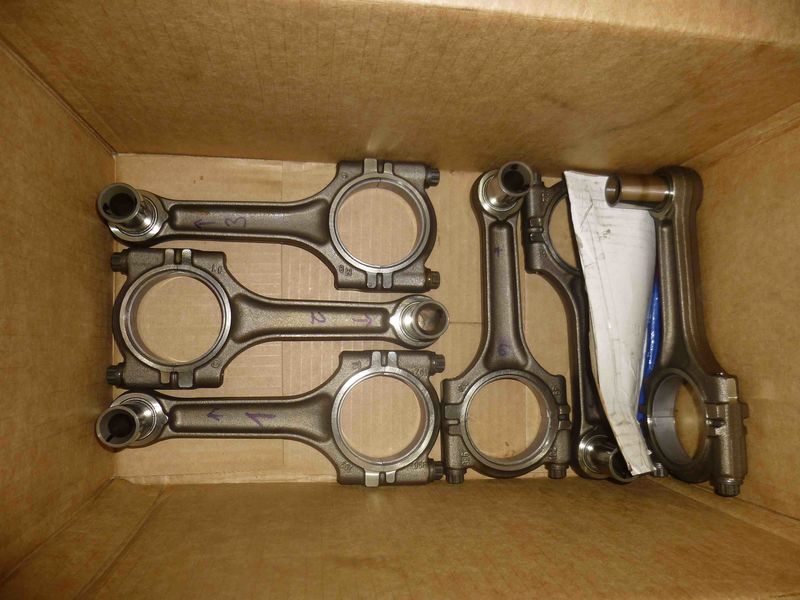
12-13-2018, 08:02 AM
|
#34
|
|
Registered User
Join Date: Oct 2018
Location: North Cali
Posts: 858
|
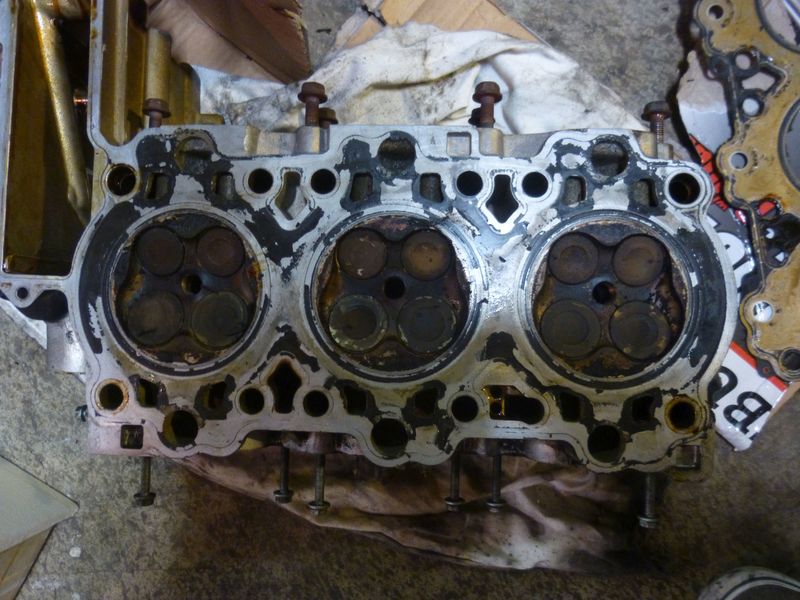
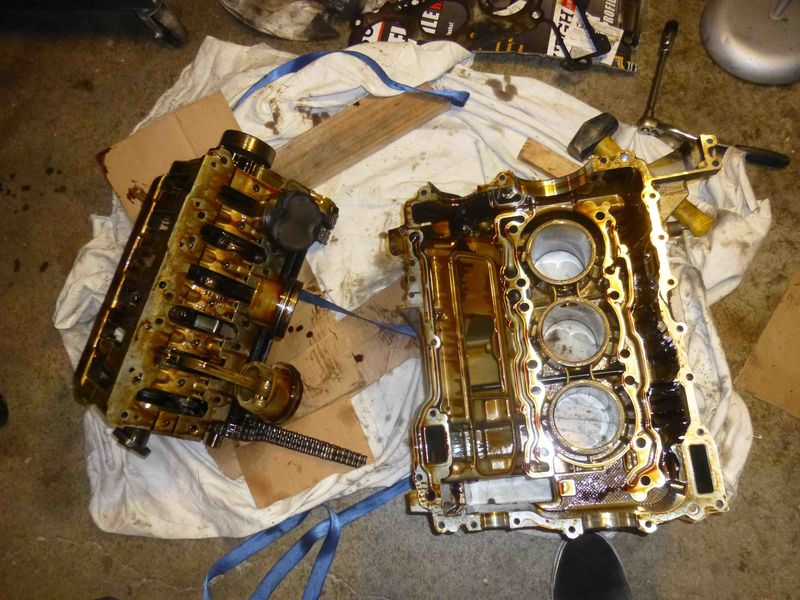
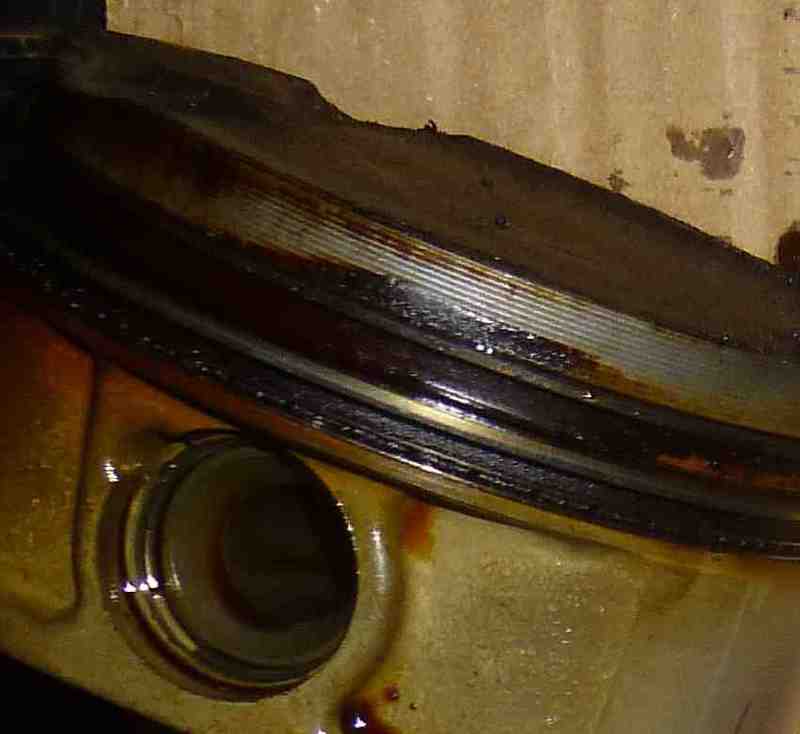
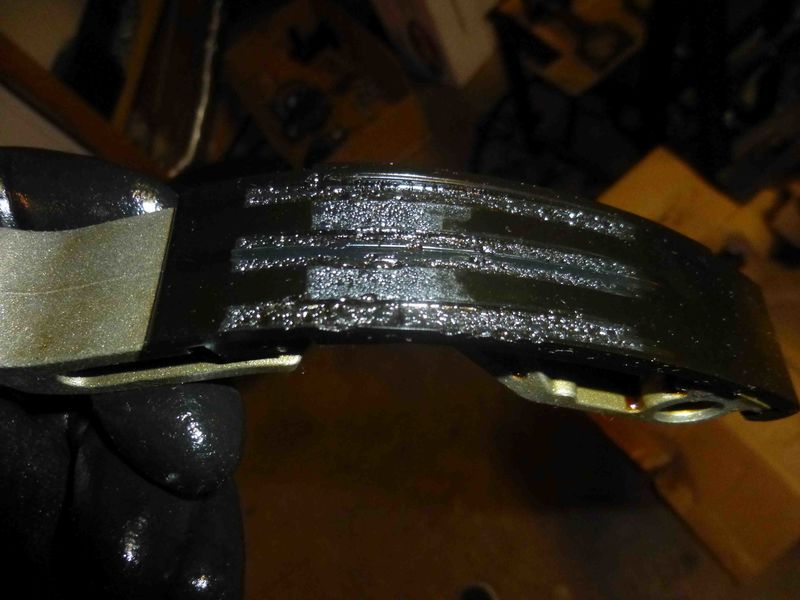
Cracked rod design:

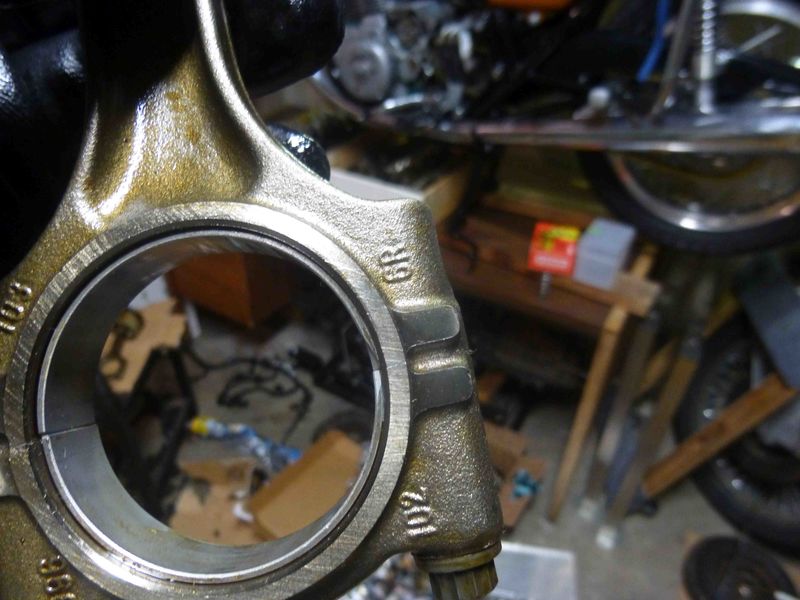
Camshaft actuator-damage:
Side-by-side:

This pad remained in one piece but was very close to its end:
|
|
|
|
|
12-13-2018, 09:12 AM
|
#35
|
|
Racer Boy
Join Date: Sep 2015
Location: Seattle, WA
Posts: 946
|
Thanks for posting the pictures, I'm enjoying following your progress!
What mid-70's bike is that in the background?
|
|
|
|
|
12-13-2018, 10:58 AM
|
#36
|
|
Registered User
Join Date: Oct 2018
Location: North Cali
Posts: 858
|
Hi, I`m glad you like the post! That`s a `73 TX750 Yamaha, my other project, been restoring it for about 3 years. It developed an oil leak somewhere that I`m trying to spot, that`s why it`s sitting now on the table. Here`s another pic:
Quote:
Originally Posted by Racer Boy
Thanks for posting the pictures, I'm enjoying following your progress!
What mid-70's bike is that in the background?
|

|
|
|
|
|
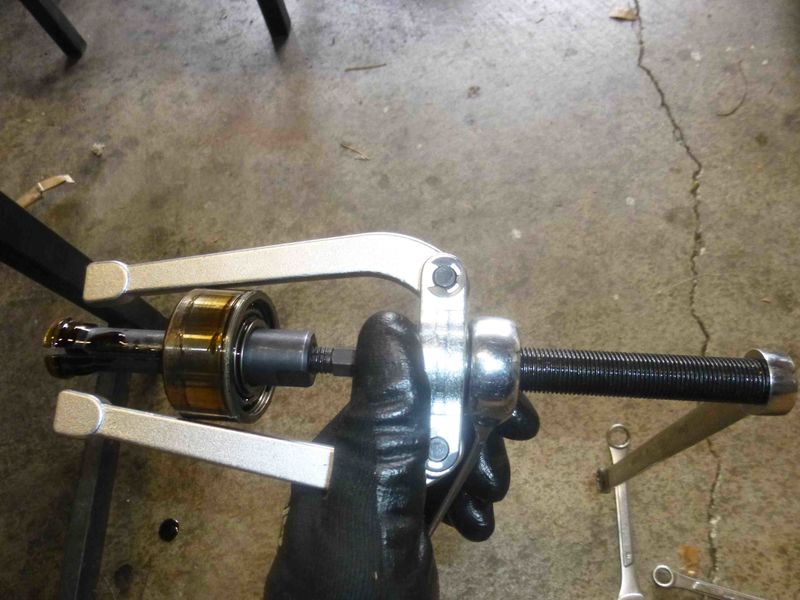
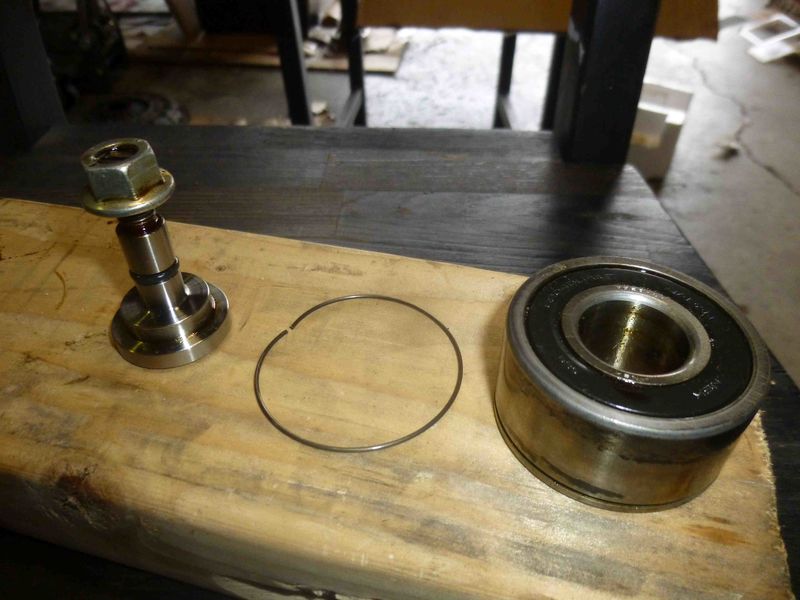
12-13-2018, 11:06 PM
|
#37
|
|
Registered User
Join Date: Oct 2018
Location: North Cali
Posts: 858
|
|
|
|
|
|
12-14-2018, 08:03 AM
|
#38
|
|
Registered User
Join Date: Sep 2018
Location: Ca
Posts: 119
|
Cool. I have not seen one of those before. Looks like a perfect alternative to the specialized tools. Very resourceful....
|
|
|
|
|
12-14-2018, 05:25 PM
|
#39
|
|
Registered User
Join Date: Oct 2018
Location: North Cali
Posts: 858
|
Quote:
Originally Posted by Ottomotion
Cool. I have not seen one of those before. Looks like a perfect alternative to the specialized tools. Very resourceful....
|
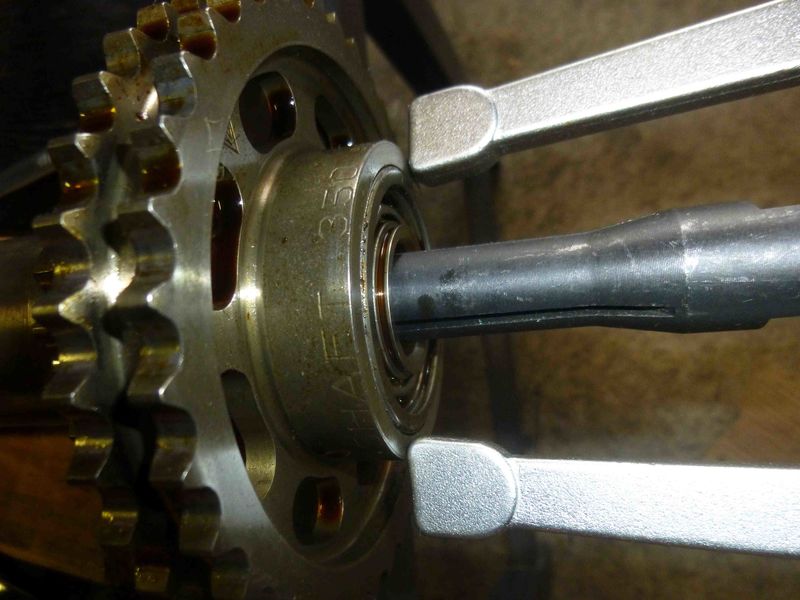
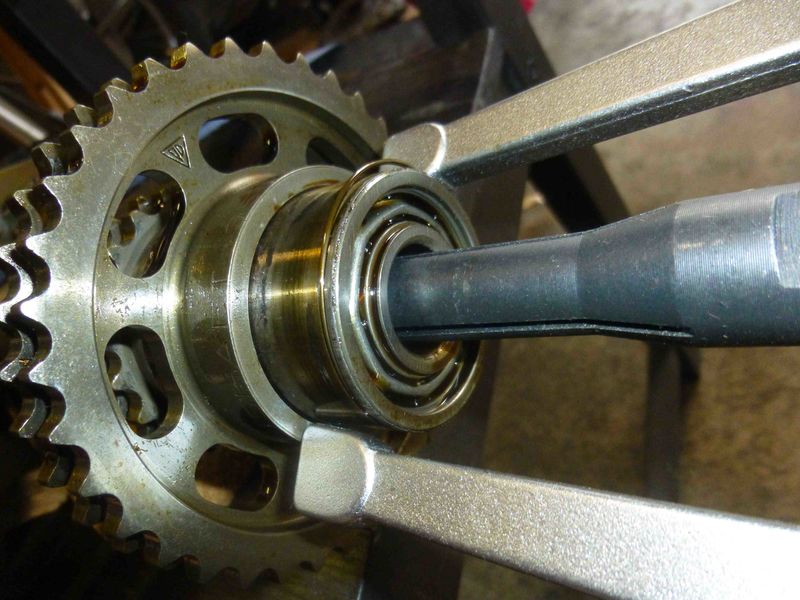
Yeah, it`s a complete set with 11 different sizes of pullers and a slide hammer, for $55 it`s a pretty good deal and you can use it for many other tasks. I had to modify one of the pullers to fit the IMS bearing though.
|
|
|
|
|
12-15-2018, 10:02 AM
|
#40
|
|
Registered User
Join Date: Oct 2018
Location: North Cali
Posts: 858
|
|
|
|
|
 Posting Rules
|
You may not post new threads
You may not post replies
You may not post attachments
You may not edit your posts
HTML code is Off
|
|
|
All times are GMT -8. The time now is 05:30 AM.
| |


 Boxster


 Linear Mode


