Go Back   986 Forum - The Community for Porsche Boxster & Cayman Owners > Porsche Boxster & Cayman Forums > Performance and Technical Chat

Post Reply
 
LinkBack Thread Tools Display Modes
Old 02-08-2008, 03:04 PM   #1
Registered User
 
Join Date: May 2007
Location: SoCal
Posts: 188
DIY garage/gate opener

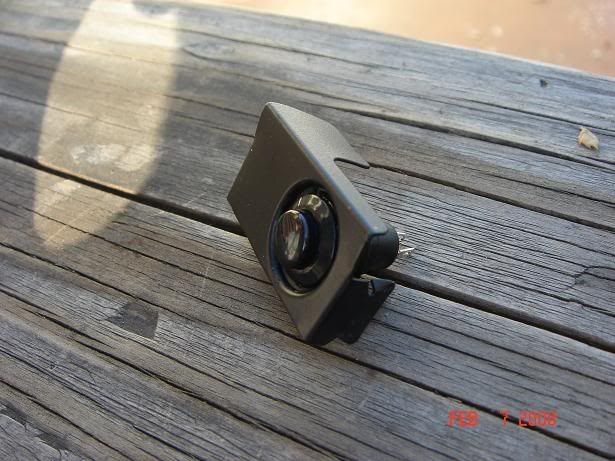
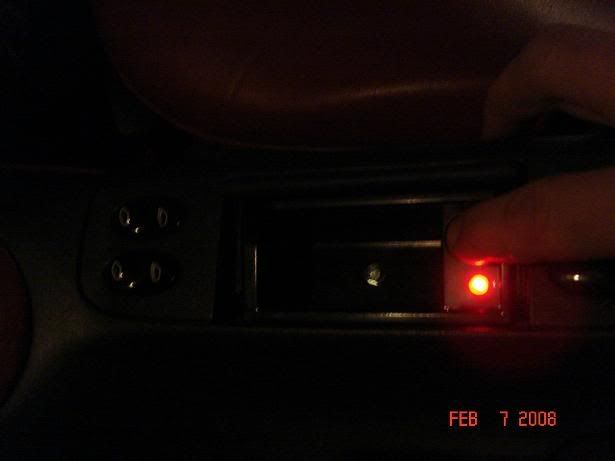
To make this garage/gate door opener cost me under $7 in parts at radio shack and around 3 hours to complete. Parts i bought are 1 push button momentary switch and 1 LED, other parts you will need are some small gage wire, wire connectors, electric tape.

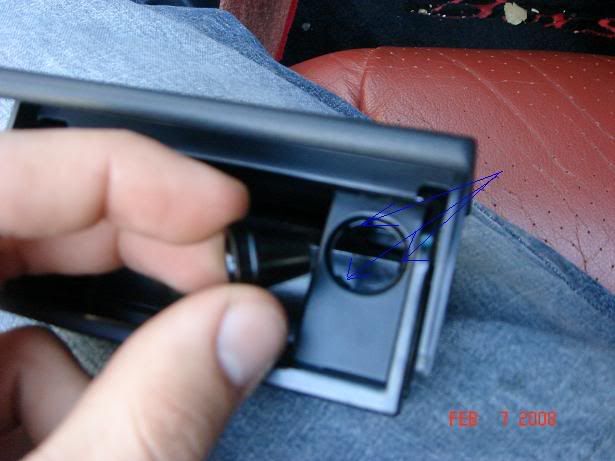
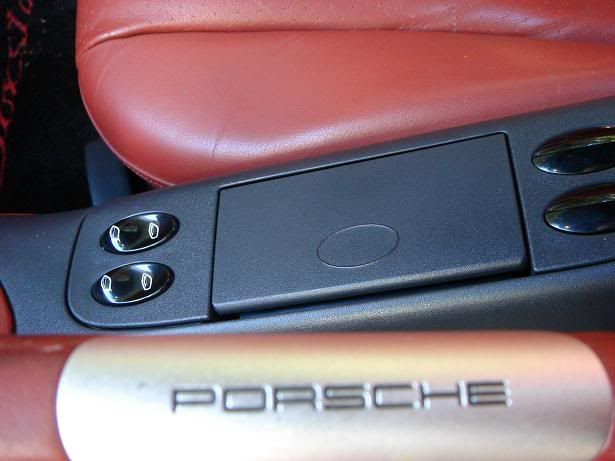
I wanted to make my remote control button hidden, and ash tray seemed a perfect place for it.


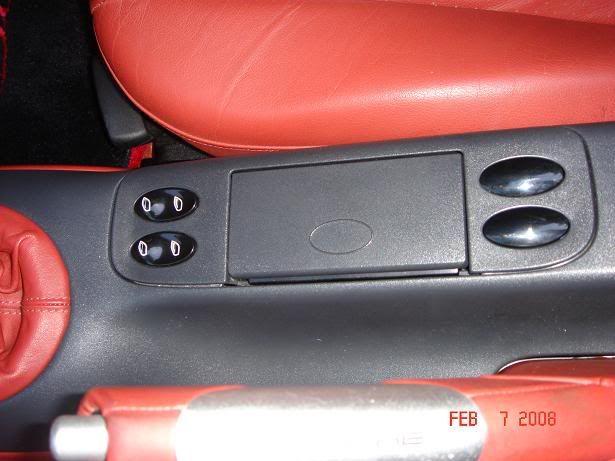
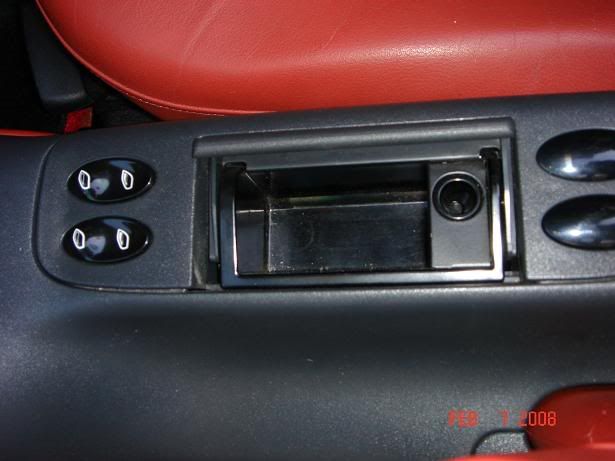
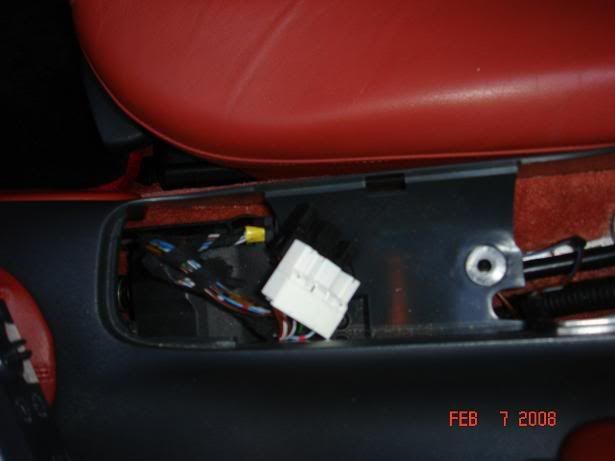
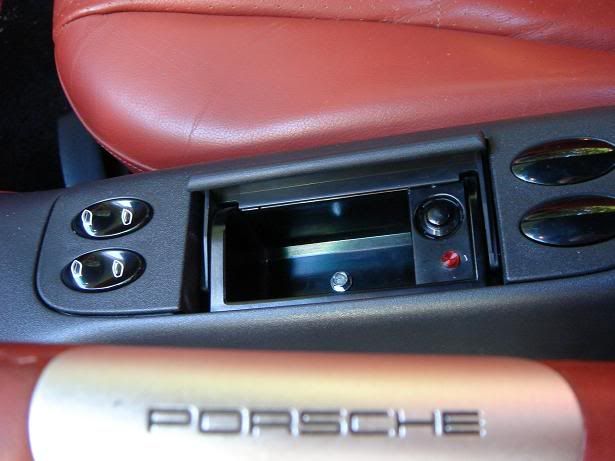
First I removed the ash tray


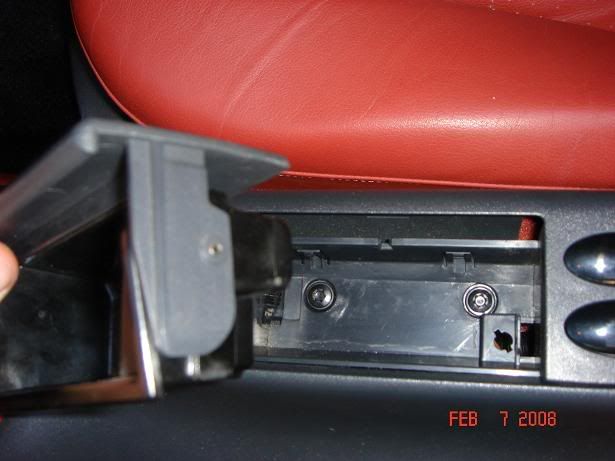
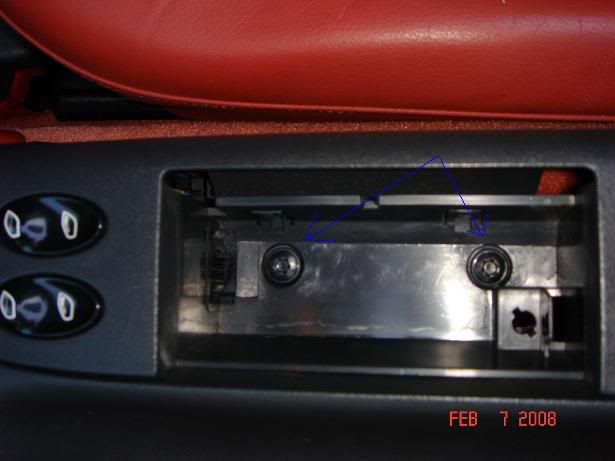
Then unscrewed these 2 screws and removed the piece of console


After disconnected 3 wire harnesses 2 for windows and 1 for little light for ash tray


blueillusion97 is offline   Reply With Quote
Old 02-08-2008, 03:06 PM   #2
Registered User
 
Join Date: May 2007
Location: SoCal
Posts: 188
Then I removed the cone shaped plastic piece which i will not use for this project also i marked with blue arrows 3 small metal pieces that need to be straightened to make the hole slightly smaller so that the switch would hold securely. This step is done much easier if the whole metal piece is removed all i did was just wiggle it around and pulled it out.


Here is a picture of the button installed in that metal piece that i removed.


Me working


Here i soldered 2 wires to a switch, drilled small hole for LED and installed it


Made 3 holes marked with arrows for wires to pass
blueillusion97 is offline   Reply With Quote
Old 02-08-2008, 03:08 PM   #3
Registered User
 
Join Date: May 2007
Location: SoCal
Posts: 188
Put the metal piece back on and push all the wires through holes


Here I soldered the black wire from LED to the returning wire of the switch (so it will only be a negative wire while the switch is on), and the Red to a separate wire that will be soldered directly to the positive on remote
blueillusion97 is offline   Reply With Quote
Old 02-08-2008, 03:09 PM   #4
Registered User
 
Join Date: May 2007
Location: SoCal
Posts: 188
Soldered 2 wires to a switch on a remote control from the back and one to the positive point that comes directly from the battery and will go the LED's red wire.


Put some connectors for easier installation, and taped wires to avoid shorts


Last edited by blueillusion97; 02-08-2008 at 03:14 PM.
blueillusion97 is offline   Reply With Quote
Old 02-08-2008, 03:10 PM   #5
Registered User
 
Join Date: May 2007
Location: SoCal
Posts: 188
I put the remote under central console toward storage compartment and installed everything else like it was before.


when the button is pushed LED lights up


I'm very happy with this setup and remote still has good range.
blueillusion97 is offline   Reply With Quote
Old 02-08-2008, 04:44 PM   #6
Registered User
 
Lil bastard's Avatar
 
Join Date: Feb 2008
Location: Du Monde
Posts: 2,199
Good job!

I also did a DIY exactly as you have done, with some minor exceptions. I carefully drilled a countersunk hole in the Seat Heater blanking plug for the push button switch and drilled a small hole in the same blanking plug for the LED which I epoxied to the backside so only the lens (flush with the top of the blanking plug) is visible. I also got a spare blanking plug if I ever want to switch it back, I think I paid $2 for the spare plug. Because I have the non-smoking option w/ Oddments Tray, I couldn't use the Ashtray as you did.

Instead of removing the circuit board from the standard garage door opener, I drilled a hole through that case for the wiring and made my solders to the board in-situ. Then I mounted the entire door opener w/ double-stick velcro to the inside of the console. I kept the 9-volt battery power rather than try and build a converter and tap into the car's electrical harness as a power source.

When I need the change the battery, all I need do is remove the Oddments Tray, pull the opener, swap the battery and replace it. In 4 yrs., the original battery is still good.

Last edited by Lil bastard; 02-09-2008 at 09:54 AM.
Lil bastard is offline   Reply With Quote
Old 02-08-2008, 06:22 PM   #7
Registered User
 
Join Date: Feb 2007
Location: mandeville, la
Posts: 474
Man, wow. Great write-up.

We all appreciate it, and it looks perfect
nola911 is offline   Reply With Quote
Old 02-09-2008, 05:54 PM   #8
Registered User
 
Join Date: May 2007
Location: SoCal
Posts: 188
Quote:
Originally Posted by Lil bastard
Good job!

I also did a DIY exactly as you have done, with some minor exceptions. I carefully drilled a countersunk hole in the Seat Heater blanking plug for the push button switch and drilled a small hole in the same blanking plug for the LED which I epoxied to the backside so only the lens (flush with the top of the blanking plug) is visible. I also got a spare blanking plug if I ever want to switch it back, I think I paid $2 for the spare plug. Because I have the non-smoking option w/ Oddments Tray, I couldn't use the Ashtray as you did.

Instead of removing the circuit board from the standard garage door opener, I drilled a hole through that case for the wiring and made my solders to the board in-situ. Then I mounted the entire door opener w/ double-stick velcro to the inside of the console. I kept the 9-volt battery power rather than try and build a converter and tap into the car's electrical harness as a power source.

When I need the change the battery, all I need do is remove the Oddments Tray, pull the opener, swap the battery and replace it. In 4 yrs., the original battery is still good.
I was considering somethig similar just with OEM Targa roof switch insded of making a switch but after finding out that rey run for around $40 i just didnt think it was worth the money. But if i wouldnt have smokers option i would have most likely went your way as well
blueillusion97 is offline   Reply With Quote
Old 02-09-2008, 05:56 PM   #9
Registered User
 
Join Date: May 2007
Location: SoCal
Posts: 188
Quote:
Originally Posted by maxferran
Man, wow. Great write-up.

We all appreciate it, and it looks perfect
Thank you
blueillusion97 is offline   Reply With Quote
Old 02-10-2008, 12:18 AM   #10
Registered User
 
Lil bastard's Avatar
 
Join Date: Feb 2008
Location: Du Monde
Posts: 2,199
Quote:
Originally Posted by blueillusion97
I was considering somethig similar just with OEM Targa roof switch insded of making a switch but after finding out that rey run for around $40 i just didnt think it was worth the money. But if i wouldnt have smokers option i would have most likely went your way as well
Yea, I understand. FYI, I didn't use a Targa Roof switch either. I used a stock Radio Shack push buttion switch - PN #275-644 and an LED PN#276-011. Wired them the same as you've done. The look is unobtrusive and about as inexpensive as you can get. I got a duplicate Garage Door controller here; http://florida-operators-controls.com/412001_linear_multi_code_transmitter.html
Lil bastard is offline   Reply With Quote
Old 02-10-2008, 06:24 AM   #11
Registered User
 
Join Date: Nov 2006
Location: New York
Posts: 644
Nice job on that DIY blueillusion97!

dcporsche99 is offline   Reply With Quote
Post Reply


Thread Tools
Display Modes

Posting Rules
You may not post new threads
You may not post replies
You may not post attachments
You may not edit your posts

BB code is On
Smilies are On
[IMG] code is On
HTML code is On
Trackbacks are On
Pingbacks are On
Refbacks are On


All times are GMT -8. The time now is 01:10 PM.


Powered by vBulletin® Version 3.8.7
Copyright ©2000 - 2024, vBulletin Solutions, Inc.
Content Relevant URLs by vBSEO 3.6.0
Copyright 2024 Pelican Parts, LLC - Posts may be archived for display on the Pelican Parts Website -    DMCA Registered Agent Contact Page