Go Back   986 Forum - The Community for Porsche Boxster & Cayman Owners > Porsche Boxster & Cayman Forums > DIY Project Guides

Post Reply
 
LinkBack Thread Tools Display Modes
Old 07-18-2014, 10:25 AM   #1
Custom User Title Here
 
particlewave's Avatar
 
Join Date: Mar 2012
Location: Ft. Leonard Wood
Posts: 6,164
Garage
Cool How To: Retrofit Headlights With HID Bi-Xenon Projectors

This is a work in progress. I will update it when I can.

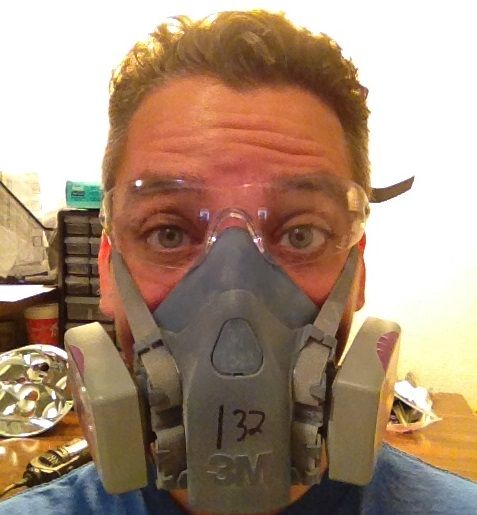
Always wear the proper safety gear!


Removal of the Main Outer Lens

1) Remove headlights from car.

2) Clean any debris from the main lens with a soft sponge and warm, soapy water.

3) Pre-heat oven to 225f degrees.

4) Remove main rear cover, fog lamp cover, all 5 bulbs (low, high, fog, turn and park), corner trim and headlight gasket (held in by 2 screws and 3 flares).


5) Place wooden planks in the oven to rest the headlight on, then bake each headlight for 15 minutes at 225f degrees and open them. Don't let the headlight touch anything metal inside the oven as the hot metal will deform the plastic.

VIDEO: How to open a sealed headlight.

6) Using a short razor blade, carefully remove any large pieces of excess silicone from the tongue of the main lens.
Use caution. If you scratch the silver perimeter paint from the back side, it will show through.
Never touch the inside of the lens! This will cause scratches that will be visible in the completed headlight.
If the inside of the lens is dirty and compressed air won't remove the dirt or debris, wash it gently with very soft finger tips, warm water and Dawn dish soap, then blow it dry with compressed air.

7) Wrap the main lens carefully in plastic wrap and store in a safe place until it is needed for re-installation.

__________________
https://youtube.com/@UnwindTimeVintageWatchMuseum

Last edited by particlewave; 08-26-2014 at 06:36 PM.
particlewave is offline   Reply With Quote
Old 07-18-2014, 10:26 AM   #2
Custom User Title Here
 
particlewave's Avatar
 
Join Date: Mar 2012
Location: Ft. Leonard Wood
Posts: 6,164
Garage
Disassembly of the Headlight

1) Remove the 2 screws retaining the plastic inner main housing shroud and slide it forward and out of the housing.

2) If you plan to paint the inner shroud, remove the 2 screws from the lower fog lamp shield and remove it from the main shroud.

3) If painting, remove the visor from the fog lamp.

4) Remove the inner main diffuser lens.


Removal of the Reflector
Removing the reflector for prep, sanding and painting is not absolutely necessary, but it makes the job much easier.

The reflector is held in place with 3 ball and socket mounts.

5) Disengage the lower adjustable mount first by twisting the white knob and pulling it back toward the rear of the headlight, exposing the ball and socket joint. The ball is retained in the socket with a small clip on the bottom of the socket. Use a small tool to depress the clip while pulling on the knob to free it (twisting the knob while pulling helps).

6) The upper adjustable mount can be disengaged from the reflector by simply removing its screw.


7) The picture below shows the 3rd upper fixed mounts socket side after removal to better show the retaining clip on it.


__________________
https://youtube.com/@UnwindTimeVintageWatchMuseum

Last edited by particlewave; 09-21-2014 at 03:01 PM.
particlewave is offline   Reply With Quote
Old 07-18-2014, 10:28 AM   #3
Custom User Title Here
 
particlewave's Avatar
 
Join Date: Mar 2012
Location: Ft. Leonard Wood
Posts: 6,164
Garage
Prepping the Main Reflector

1) Using a Dremel and drum sander, bore the upper bulb socket (low beam) to the correct diameter (Nine8Six's projector stand off post is pictured, but the procedure is the same for most kits. "H1" style kits still require some boring).


2) Remove the small square post from the inside of the reflector as it will keep the HID reflector from sitting flush (if using Nine8Six's kit, at least the top needs to be trimmed so that the stand off posts retaining ring will clear and allow the post to sit flush).


3) It's not a bad idea to drill a hole into the top of the reflector and use a self tapping screw for added projector support. HID projectors are a bit heavy and if using Nine8Six's kit, they are also on a stand off post, further levering that weight out and adding stress to the OEM reflector.


Make that hole a slot so that the projector can be rotated a few degrees for leveling of the cutoff later on.

__________________
https://youtube.com/@UnwindTimeVintageWatchMuseum

Last edited by particlewave; 09-21-2014 at 03:15 PM.
particlewave is offline   Reply With Quote
Old 07-18-2014, 10:29 AM   #4
Custom User Title Here
 
particlewave's Avatar
 
Join Date: Mar 2012
Location: Ft. Leonard Wood
Posts: 6,164
Garage
Electrical


High Beam Relay


Last edited by particlewave; 08-03-2014 at 12:42 PM.
particlewave is offline   Reply With Quote
Old 07-18-2014, 10:30 AM   #5
Custom User Title Here
 
particlewave's Avatar
 
Join Date: Mar 2012
Location: Ft. Leonard Wood
Posts: 6,164
Garage
Wrapping up

__________________
https://youtube.com/@UnwindTimeVintageWatchMuseum

Last edited by particlewave; 08-03-2014 at 12:51 PM.
particlewave is offline   Reply With Quote
Old 07-18-2014, 11:10 AM   #6
Custom User Title Here
 
particlewave's Avatar
 
Join Date: Mar 2012
Location: Ft. Leonard Wood
Posts: 6,164
Garage
Lens Restoration

To be continued...

__________________
https://youtube.com/@UnwindTimeVintageWatchMuseum

Last edited by particlewave; 08-03-2014 at 01:08 PM.
particlewave is offline   Reply With Quote
Post Reply


Posting Rules
You may not post new threads
You may not post replies
You may not post attachments
You may not edit your posts

BB code is On
Smilies are On
[IMG] code is On
HTML code is On
Trackbacks are On
Pingbacks are On
Refbacks are On


All times are GMT -8. The time now is 03:17 PM.


Powered by vBulletin® Version 3.8.7
Copyright ©2000 - 2025, vBulletin Solutions, Inc.
Content Relevant URLs by vBSEO 3.6.0
Copyright 2024 Pelican Parts, LLC - Posts may be archived for display on the Pelican Parts Website -    DMCA Registered Agent Contact Page