 10-23-2012, 08:22 PM
|
#161
|
|
Registered User
Join Date: May 2012
Location: Concord, CA
Posts: 271
|
I am with Kyle on this one... I have litronic and washers as well. But these led lights really upgrade the look of the car to more modern. Not sure what to do about removal of washers tho I imagine it would be possible. The other question tho is if this is made for non HID setups would the actual connectors or wiring be different?
Otoh I might keep my lamps for a while but I am curious ....
__________________
Michael Comet - www.comet-cartoons.com
2014 Guards Red Cayman S - PSE - PASM - 20"CC - INFTMT - CONV - etc..etc...
SOLD - 2003 Speed Yellow Porsche Boxster S - LNE IMS - Klisstle Rollbar Cover
|

|

|
|
10-23-2012, 08:28 PM
|
#162
|
|
Registered User
Join Date: Mar 2010
Location: dallas
Posts: 182
|
I was just wondering about the connectors as well....
__________________
2000 Boxster S
2007 H3
|
|
|
|
|
10-24-2012, 08:53 PM
|
#163
|
|
Registered User
Join Date: May 2012
Location: Concord, CA
Posts: 271
|
I contacted them. The reply I got is that the connectors will be the same. However of course doing HID on these means a separate ballast kit as opposed to our current litronics. Also if you have washers like me that will cp,rout with the light, I am or sure what will need to happen to close up the connector feeding the fluid for that. Maybe crimp somehow?
This might be enough to dissuade me for while. The OEM stock litronics are actually valued more than these.. Something to keep in mind. I am curious to know if I anyone who actually had stock HIDs had done this mod and what their thoughts are...
__________________
Michael Comet - www.comet-cartoons.com
2014 Guards Red Cayman S - PSE - PASM - 20"CC - INFTMT - CONV - etc..etc...
SOLD - 2003 Speed Yellow Porsche Boxster S - LNE IMS - Klisstle Rollbar Cover
|
|
|
|
|
10-25-2012, 12:41 PM
|
#164
|
|
Registered User
Join Date: Mar 2010
Location: dallas
Posts: 182
|
interesting, thanks. My headlights become hazed every few months so I was looking into this. I wonder how hard it is to just remove the whole washer system?
Quote:
Originally Posted by mcomet

I contacted them. The reply I got is that the connectors will be the same. However of course doing HID on these means a separate ballast kit as opposed to our current litronics. Also if you have washers like me that will cp,rout with the light, I am or sure what will need to happen to close up the connector feeding the fluid for that. Maybe crimp somehow?
This might be enough to dissuade me for while. The OEM stock litronics are actually valued more than these.. Something to keep in mind. I am curious to know if I anyone who actually had stock HIDs had done this mod and what their thoughts are...
|
__________________
2000 Boxster S
2007 H3
|
|
|
|
|
12-14-2012, 01:18 AM
|
#165
|
|
Registered User
Join Date: Mar 2011
Location: Orange County, CA
Posts: 316
|
Quote:
Originally Posted by mcomet
I am with Kyle on this one... I have litronic and washers as well. But these led lights really upgrade the look of the car to more modern. Not sure what to do about removal of washers tho I imagine it would be possible. The other question tho is if this is made for non HID setups would the actual connectors or wiring be different?
Otoh I might keep my lamps for a while but I am curious ....
|
If you buy a set of the LED HL you can sell me yours.
|
|
|
|
|
12-14-2012, 01:07 PM
|
#166
|
|
Registered User
Join Date: Dec 2012
Location: Reading UK
Posts: 45
|
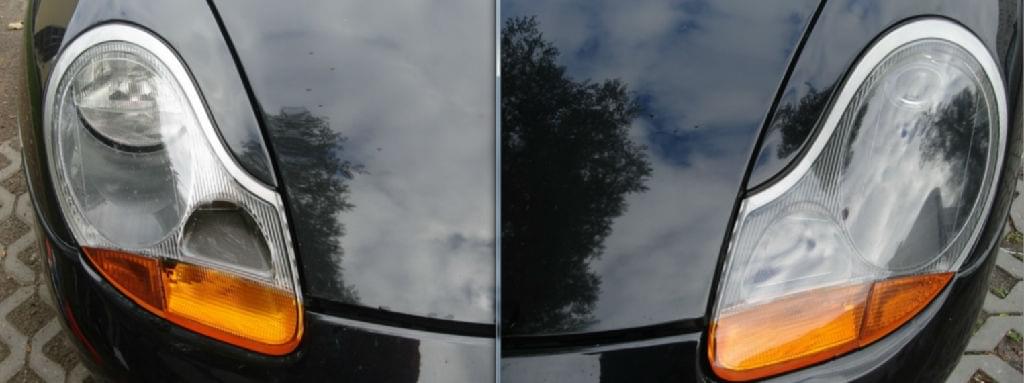
There really is no other way than tint spray or replacing the headlights for clear units. The only amber removal you may have read about is taking the inner amber lens out of the clear head lights.
|
|
|
|
|
12-14-2012, 07:08 PM
|
#167
|
|
Custom User Title Here
Join Date: Mar 2012
Location: Ft. Leonard Wood
Posts: 6,169
|
Huh?
Ok, then. Thanks for the tip?
__________________
https://youtube.com/@UnwindTimeVintageWatchMuseum
|
|
|
|
|
01-01-2013, 06:19 PM
|
#168
|
|
Registered User
Join Date: Nov 2009
Location: PA
Posts: 170
|
For the low beams, I've had HID's hooked up and have been running them all along.
A week ago, the right HID headlights would not turn on. I've swapped sides/bulbs, hooked up another ballast and tried everything. The right HID headlights will not turn on. If I install halogen H1 bulbs, they both light up without a problem....anyone have a clue?
I have both sides grounded the same way. The right will not light up and will blow the fuse every other time I take the headlights out and try to reinstall them. Weak battery?
|
|
|
|
|
01-22-2013, 10:57 PM
|
#169
|
|
Registered User
Join Date: Dec 2012
Location: Reading UK
Posts: 45
|
Quote:
Originally Posted by boxster7614
|
I really like those. Where are they from?
|
|
|
|
|
01-23-2013, 02:52 AM
|
#170
|
|
Registered User
Join Date: Mar 2011
Location: Orange County, CA
Posts: 316
|
^ he made them himself.
|
|
|
|
|
09-18-2013, 07:30 PM
|
#171
|
|
Registered User
Join Date: May 2012
Location: Brisbane, Australia
Posts: 6
|
Old thread, but I'll give an update on the led headlights.
I was one of the first who bought a black set and I ended up with major dramas.
Fog light burn out, crazed lens and fogging.
Just received the gen 2 set after some 6 months! Look the same as the old set, but quality appears much improved. Jeffrey at xtreme has been very helpfully considering his hands have been tied waiting for the new version to been released.
This set have 27w fogs and I'll install a low beam hid kit to keep the units cool.
Will post a progress update in a few weeks.
Thanks Jeff for your persistence
|
|
|
|
|
09-18-2013, 09:21 PM
|
#172
|
|
Registered User
Join Date: Jun 2012
Location: Bedford, TX
Posts: 2,755
|
Thanks for the update. Curious how the next generation will hold up.
__________________
______________________________________________
2001 Boxster S Lapis Blue
TS Cat Bypass Pipes and exhaust
iPad Mini Dash Install
DEPO Tail Lights
|

|
|
|
10-03-2013, 01:53 AM
|
#173
|
|
Registered User
Join Date: Sep 2013
Location: Polska
Posts: 1
|
Hello All.
Now I'm after installation bi-xenon
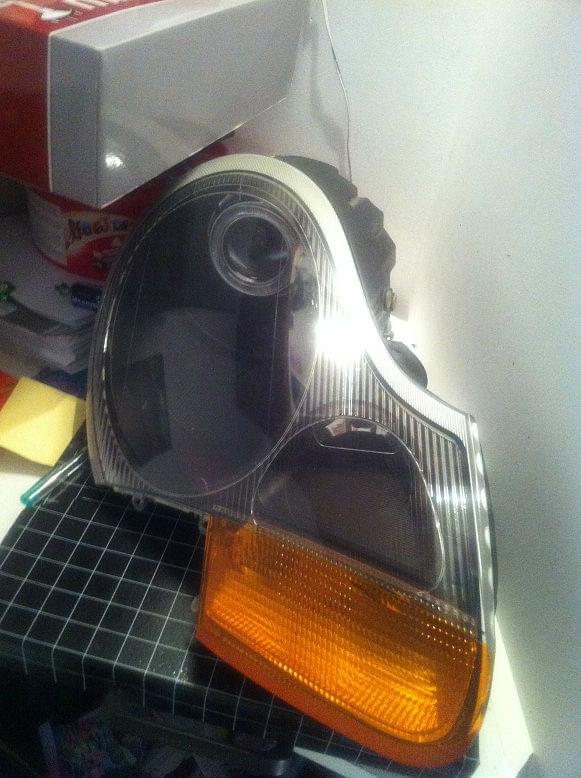
I have a lot of pictures of the installation. If anyone needs.
regards m.
|
|
|
|
|
10-03-2013, 07:55 AM
|
#174
|
|
Registered User
Join Date: Jun 2012
Location: Bedford, TX
Posts: 2,755
|
Quote:
Originally Posted by gtsvectra
Hello All.
Now I'm after installation bi-xenon
I have a lot of pictures of the installation. If anyone needs.
regards m. |
That looks great! Nice job 
__________________
______________________________________________
2001 Boxster S Lapis Blue
TS Cat Bypass Pipes and exhaust
iPad Mini Dash Install
DEPO Tail Lights
|
|
|
|
|
10-27-2013, 03:15 AM
|
#175
|
|
Registered User
Join Date: May 2012
Location: Brisbane, Australia
Posts: 23
|
Well its been a while, but I can provide some feedback on my black LED headlights supplied by Jeffrey at Xtreme.
Some may not know but I had some major dramas with the original model (One of the first to get the black coated model). Issues included:
- Cracked lens due probably caused by the heat of the halogen globe;
- Lens fogging;
- Fog light coating melted; and
- LED's orange indicator playing up.
I had to wait some seven months for the updated version and at this point thank Jeff for providing re-assurance that the lights would be replaced.
When the new one's came I'll be honest they looked the same although I understand the projector has been lowered slightly and 27w glove fitted to the fog lights.
I then waited another 6 weeks for some projector HID's, which managed to arrive in bits!
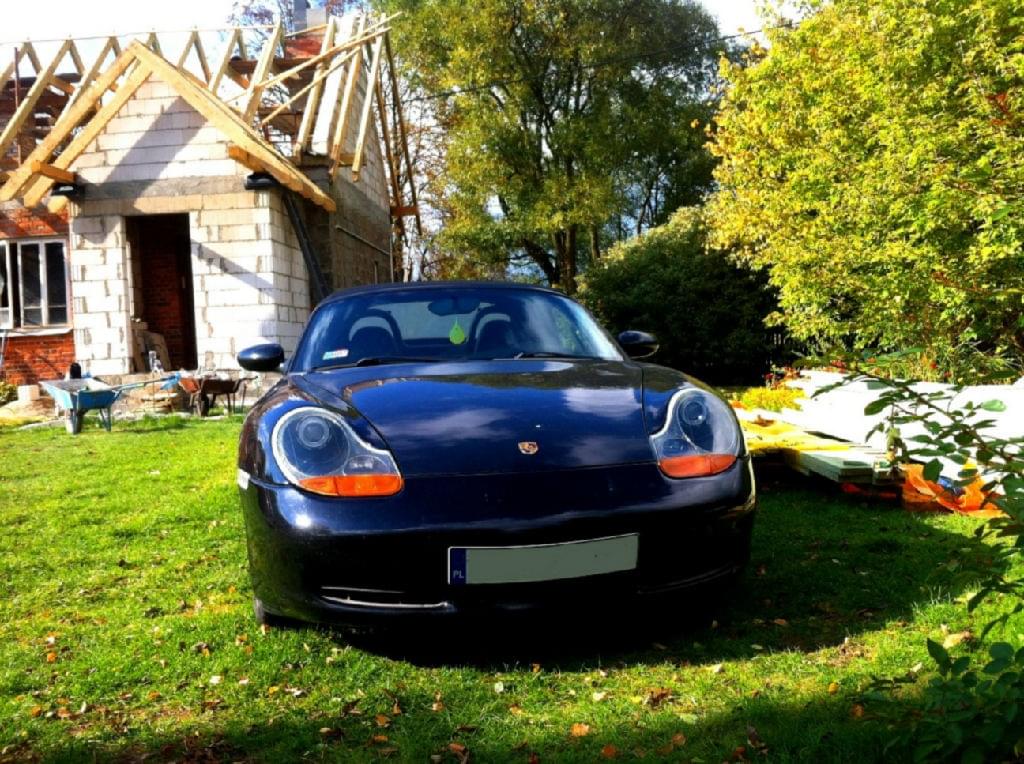
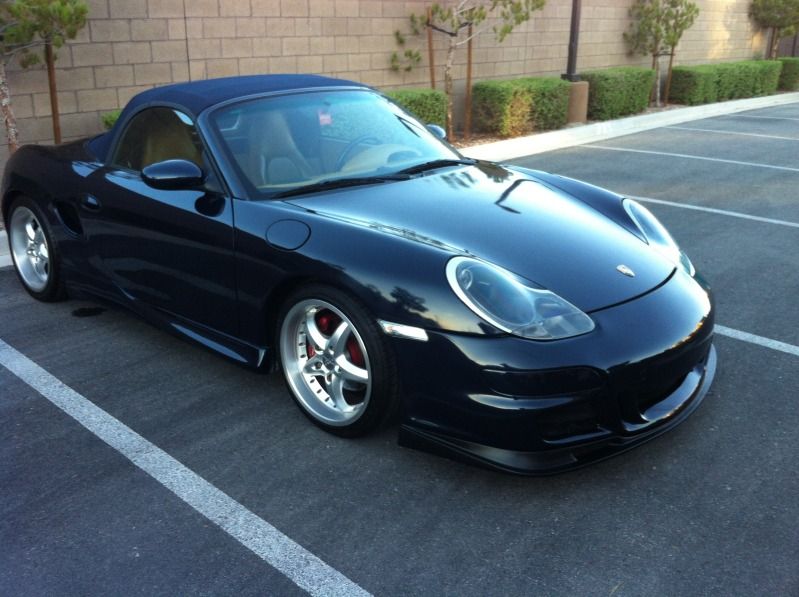
Anyway, finally found some time to install the HID's (see pics) and I can now confirm the lights are looking and working perfectly (except for some minor adjustment issues, which I'll sort out some dark night).
They get plenty of favourable comments and certainly update the whole look of the car.
Its almost a totally LED car now with rear lights, brake lights, interior lights etc all LED.
Oh - and HID's are a must for the Projectors.
Apologise for some of the pics as the sun was pretty bright
|
|
|
|
|
10-27-2013, 03:17 AM
|
#176
|
|
Registered User
Join Date: May 2012
Location: Brisbane, Australia
Posts: 23
|
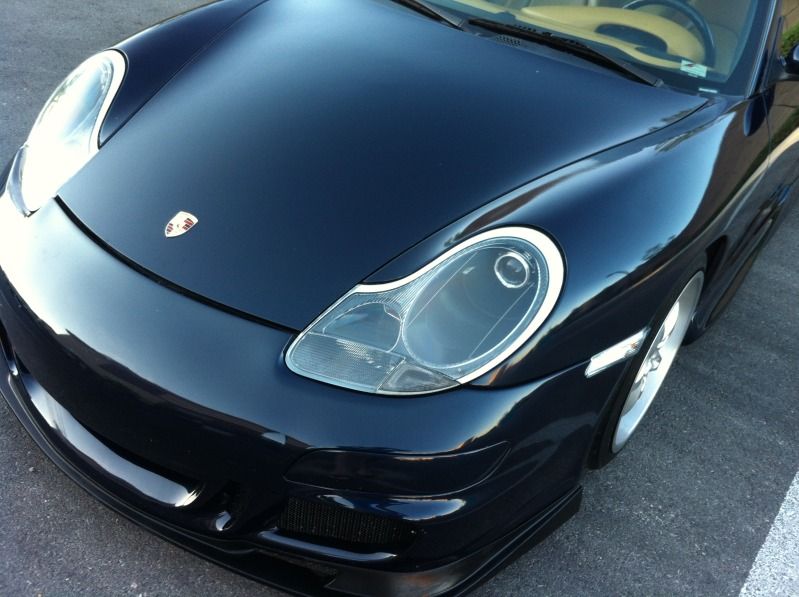
And one more pic 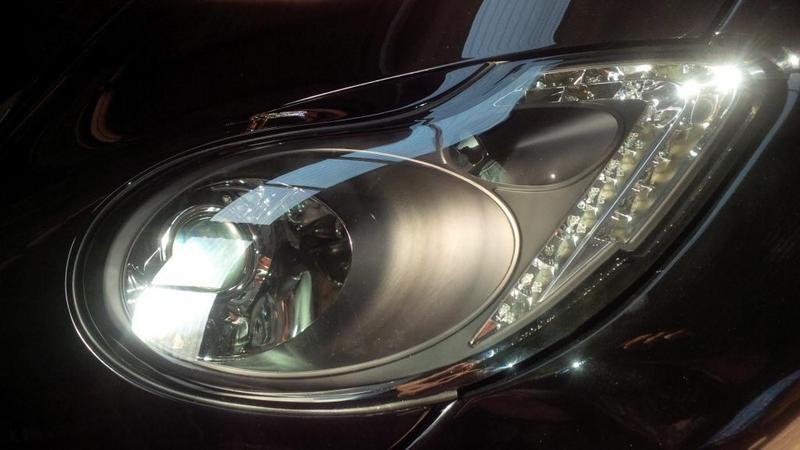
|
|
|
|
|
02-21-2015, 02:35 PM
|
#177
|
|
Registered User
Join Date: Feb 2015
Location: Seattle
Posts: 25
|
Curious how these lights held up over the years? Are the 2nd Gen any better?
|
|
|
|
|
02-23-2015, 10:43 AM
|
#178
|
|
Custom User Title Here
Join Date: Mar 2012
Location: Ft. Leonard Wood
Posts: 6,169
|
Quote:
Originally Posted by mack73
Curious how these lights held up over the years? Are the 2nd Gen any better?
|
That depends on what you mean by "better".
They seem to have addressed some of the issues with the lens melting and fogging, but that's about it.
If the price were ~$300, they might be worth it. Otherwise, purchase at your own risk 
__________________
https://youtube.com/@UnwindTimeVintageWatchMuseum
|
|
|
|
|
02-23-2015, 07:43 PM
|
#179
|
|
Registered User
Join Date: Feb 2015
Location: Seattle
Posts: 25
|
Quote:
Originally Posted by particlewave
That depends on what you mean by "better".
They seem to have addressed some of the issues with the lens melting and fogging, but that's about it.
If the price were ~$300, they might be worth it. Otherwise, purchase at your own risk |
Well that is a start I guess  what are the issues that remain?
|
|
|
|
|
02-24-2015, 10:04 AM
|
#180
|
|
Custom User Title Here
Join Date: Mar 2012
Location: Ft. Leonard Wood
Posts: 6,169
|
Halogen bulbs, plastic projector (fire is hot), LEDs are low quality (burn out), they don't actually fit in/on the car, the alignment pegs break off due to low quality brittle plastic, foam rubber surround gasket holds water and rots sealant between outer lens and headlight body allowing water and dirt infiltration, "chrome" flakes off, paint flakes off, full of "cooling holes" which also let dust, dirt and water in.
__________________
https://youtube.com/@UnwindTimeVintageWatchMuseum
Last edited by particlewave; 02-24-2015 at 04:14 PM.
|
|
|
|
 Posting Rules
|
You may not post new threads
You may not post replies
You may not post attachments
You may not edit your posts
HTML code is On
|
|
|
All times are GMT -8. The time now is 08:54 PM.
| |


 986S
986S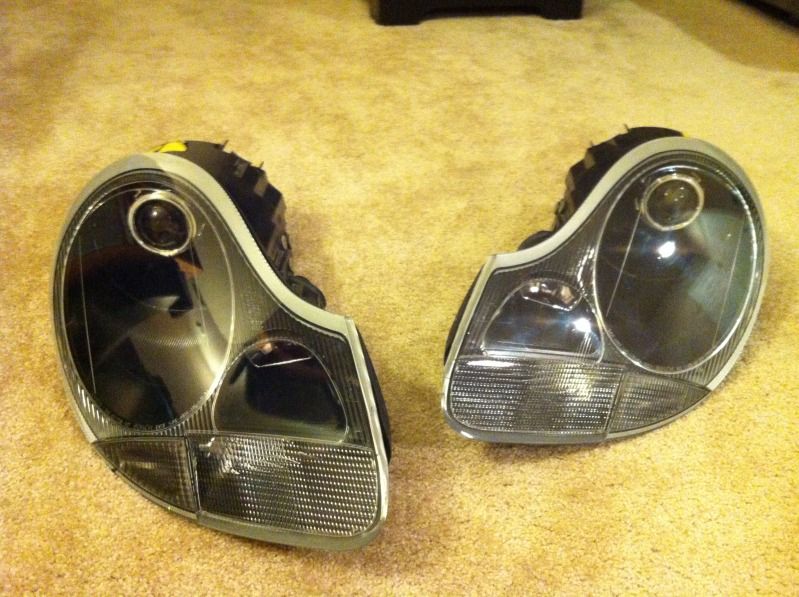

 2001 Boxster S
 Linear Mode


