 07-07-2024, 06:17 AM
|
#1
|
|
Registered User
Join Date: Jul 2014
Location: Valparaiso, IN
Posts: 186
|
I'm so impressed with the fine job you did and the clear, concise description of the creative ways you overcame the many challenges you encountered. I hope you enjoy sitting in your newly recovered seat for many, many enjoyable miles in your Boxster!
Lary (The Bald Eagle)
|

|

|
|
07-07-2024, 12:10 PM
|
#2
|
|
Registered User
Join Date: Apr 2023
Location: Oregon
Posts: 539
|
Many thanks, Grant and Lary. It's been a long slog chock full of gotchas. But it was worth it, although I never, ever want to do it again.
__________________
2000 986 base
Arctic Silver/black
2.7 liter
5-speed manual
|

|
|
|
07-07-2024, 12:17 PM
|
#3
|
|
Registered User
Join Date: Apr 2023
Location: Oregon
Posts: 539
|
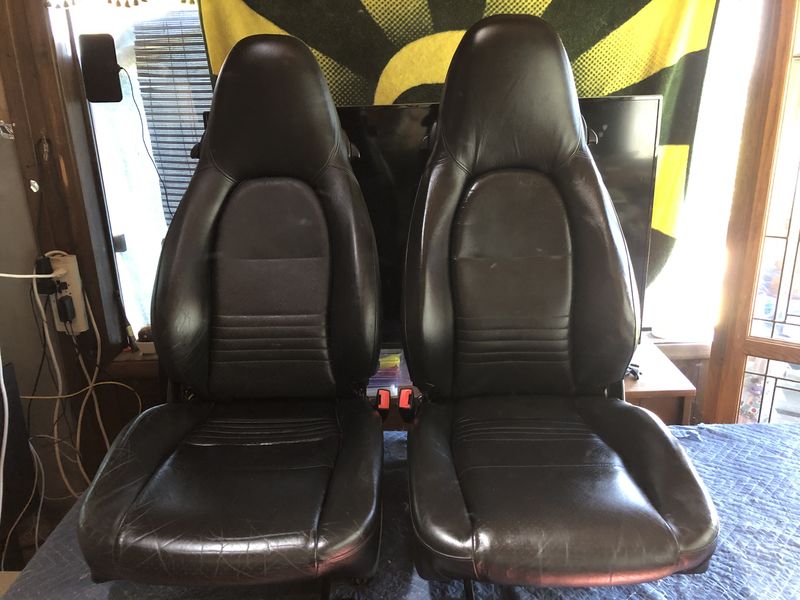
The finished seats, now both heated, ready for mounting in the car — after I psych myself up for the wrestling match. The passenger seat's leather has more "character" than the new one, but its condition is more than acceptable. Please ignore the weird lighting that resulted in strange reflections and shadows on the drivers seat.
__________________
2000 986 base
Arctic Silver/black
2.7 liter
5-speed manual
Last edited by LoneWolfGal; 07-08-2024 at 06:48 PM.
|
|
|
|
|
07-08-2024, 03:29 AM
|
#4
|
|
Registered User
Join Date: Mar 2018
Location: Winter Park, FL
Posts: 66
|
Gave it another shot!!
Went by another upholsterer, and quoted me "at least one day's work" (~$1,000), to "get them looking half way decent'.
So, with long weekend, I gave the passenger side a go.
Decided I was NOT going to do it in my Garage, as it is in mid-90's here in Central FL.
Step by step, just to see how far I could get.
Started by removing the seat bottom, doing that, then centerpiece, then back.
i added some padding to seat bottom as well.
Staple gun is my new friend!!
I'll post pics in natural light, as they don't look very well in flash!
Definitely kept me focused.
now I have to remove the seat bottom of the driver's side and do that again!
Thx for the clamp suggestion! Worked GREAT!!
|
|
|
|
|
07-08-2024, 07:06 AM
|
#5
|
|
Registered User
Join Date: Feb 2006
Location: Virginia
Posts: 1,739
|
Quote:
Originally Posted by LoneWolfGal

The finished seats, now both heated, ready for mounting in the car after I psych myself up for the wrestling match. The passenger seat's leather has more "character" than the new one, but its condition is more than acceptable.
|
Congratulations on seeing this project through to completion. I expect that it is a great feeling to look back and see how you overcame each challenge.
There is a song by the Indigo Girls called "Hammer and Nail." https://www.youtube.com/watch?v=yTI2GGNFR_U
If someone ever questions why you take on a project like this rather than pay someone to do it for you, these lyrics may apply:
I gotta get out of bed and get a hammer and a nail
Learn how to use my hands, not just my head
I think myself into jail
Now I know a refuge never grows
From a chin in a hand in a thoughtful pose
Gotta tend the earth if you want a rose
Good luck with your next project.
__________________
2000 Arctic Silver/Black, Hard Top, On Board Computer
PNP Rear Speakers, HAES 6-Channel Amp, Avic Z140BH,
Painted Bumperettes, 2004 (OEM) Top, Homelink integrated in dash with Targa switch, 997 Shifter, Carrera Gauge Cluster with silver gauge faces, heated 997 adaptive sports seats, Litronics, silver console
|
|
|
|
|
07-08-2024, 09:18 AM
|
#6
|
|
Registered User
Join Date: Apr 2023
Location: Oregon
Posts: 539
|
FUN FACT: The passenger seat's sides and back are, like all stock 986 seats, vinyl. However, the sides and back of the new drivers seat are leather. It's my understanding it came out of a 996, so I guess they went more upscale on the 911 model to justify the elevated price tag.
Today's project: Mount the passenger seat in the car. It's supposed to be 95 degrees today, so I'll break out the box fan and probably another fan as well.
Stiglitz, I'm glad the clamp method worked for you. As tight as the leather was on the bottom cushion after adding the heat pad, it was my salvation. Looking forward to seeing photos of your project.
KevinH, your advice has been indispensable and I thank you for the kind words. I might not have attempted this project without the wise counsel and encouragement from you and several others. And I enjoyed the Indigo Girls' song. The lyrics definitely apply.
__________________
2000 986 base
Arctic Silver/black
2.7 liter
5-speed manual
Last edited by LoneWolfGal; 07-08-2024 at 04:38 PM.
|
|
|
|
|
07-08-2024, 06:38 PM
|
#7
|
|
Registered User
Join Date: Apr 2023
Location: Oregon
Posts: 539
|
I mounted (and balanced) the passenger seat with a minimum of swearing. Installing the drivers seat will have to wait until Wednesday, due to previous commitments. (I hate it when something interferes with working on my 986.) The car must be drivable by the 13th, as I'm taking it out of town for a week. I wish I could have gotten the center console, etc. refinished before I take off. There's enough time for a normal individual, but not for the pickiest, most punctilious person on the planet. I make no apology, I'm sorry. Ta-ta till Wednesday.
__________________
2000 986 base
Arctic Silver/black
2.7 liter
5-speed manual
Last edited by LoneWolfGal; 07-10-2024 at 03:35 PM.
|
|
|
|
|
07-08-2024, 06:50 PM
|
#8
|
|
Registered User
Join Date: Feb 2006
Location: Virginia
Posts: 1,739
|
Quote:
Originally Posted by LoneWolfGal
FUN FACT: The passenger seat's sides and back are, like all stock 986 seats, vinyl. However, the sides and back of the new drivers seat are leather. It's my understanding it came out of a 996, so I guess they went more upscale on the 911 model to justify the elevated price tag.
|
The seats were probably from a car with the full leather interior. I believe that both the 986 and 996 could be ordered with full leather or partial leather interiors. As you point out, the 911 (or Carrera) is the more upscale model and I expect a greater percentage of 996 buyers checked the block for full leather. The full leather adds a dimension to the car that I would like to experience. However, I've heard complaints that the leather on the dash is sensitive to sun exposure and will dry out and shrink. Ironically, the less expensive vinyl is more durable.
My current seats are from a 996 Turbo. I think they are partial leather. Interestingly, the seats don't have map pockets on the back like the original seats in my Boxster.
I'm pleased that you found the Indigo Girls relevant.
__________________
2000 Arctic Silver/Black, Hard Top, On Board Computer
PNP Rear Speakers, HAES 6-Channel Amp, Avic Z140BH,
Painted Bumperettes, 2004 (OEM) Top, Homelink integrated in dash with Targa switch, 997 Shifter, Carrera Gauge Cluster with silver gauge faces, heated 997 adaptive sports seats, Litronics, silver console
|
|
|
|
|
07-12-2024, 03:48 AM
|
#9
|
|
Registered User
Join Date: Mar 2018
Location: Winter Park, FL
Posts: 66
|
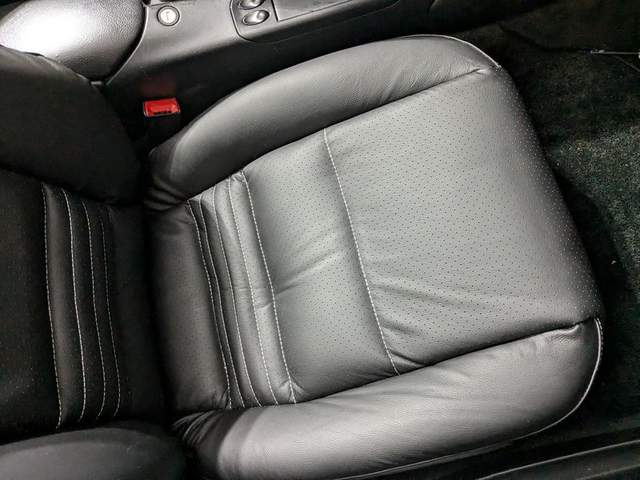
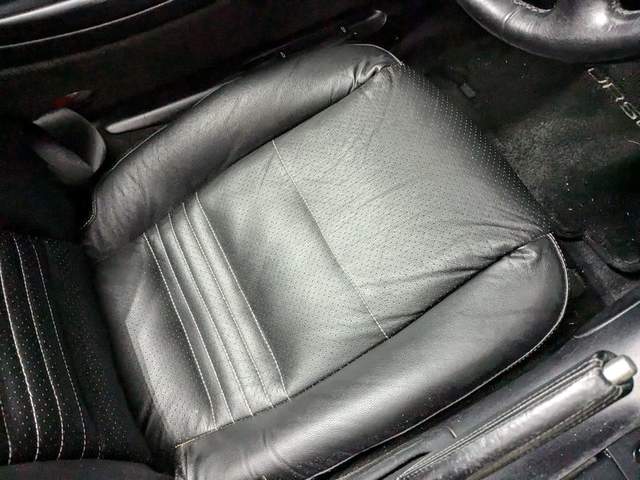
Lseat pic
Here's at least pic of bottoms of the seats. The driver's side i have to remove again and tighten it up.
The passenger I added some extra foam on the bottom, so that should flatten out a bit.
BTW, the seat backs trim is definitely easier if the seats have been in sun for a bit (not a problem in Central Fl!!).
I used hands, plastic trim piece removers/plastic spatula to press-bend into place, and left them "tucked in" with the tools holding it in place to stretch/gain memory. Kind of like using the clamps.
I also used my staple gun (with HD staples), CAREFULLY aimed into the edge. Test aim on a piece of wood or something so you can line it up properly. HOLD DOWN the stapler so it does not bounce back, and it will to through the rubber and into the seat. Sometimes they won't go all the way thru, so I "coaxed' it with a flathead and a few taps of a very small/light hammer to 'seat" the staple. Normally, you won't be able to see the staple at all, but if it shows, a black sharpie will cover it up completely (I'll post pics). After that, seat backs will start to tighten up in the sun!
|
|
|
|
 Posting Rules
|
You may not post new threads
You may not post replies
You may not post attachments
You may not edit your posts
HTML code is On
|
|
|
All times are GMT -8. The time now is 04:10 PM.
| |


 Hybrid Mode


