 01-31-2022, 05:33 PM
|
#1
|
|
Registered User
Join Date: Oct 2016
Location: Tennessee
Posts: 111
|
3D Printing: Another Cup Holder Coming
Hi all. New project just started. Another cup holder solution for the 986. Yeah, I know.
Anyway, I'm at the first prototype 3D file stage, ready to print when another project that has the printer occupied until sometime tomorrow morning finishes.
Here are a couple of screenshot pics of the idea.
This one is of the three parts I'll be 3D printing.

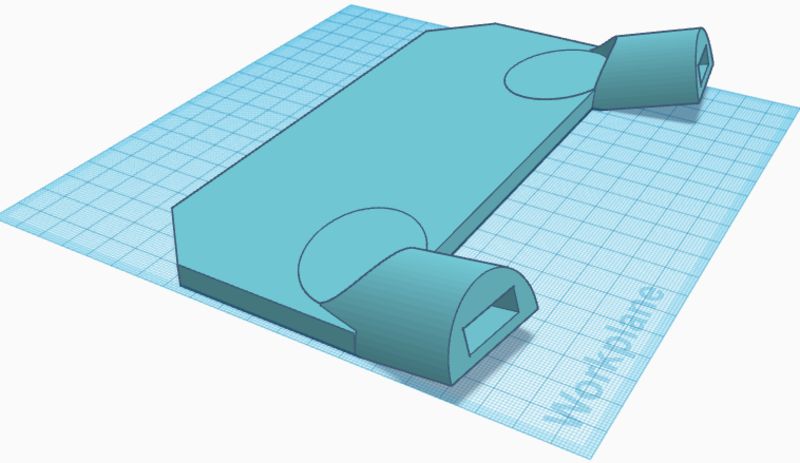
This one shows them assembled. (upside down)
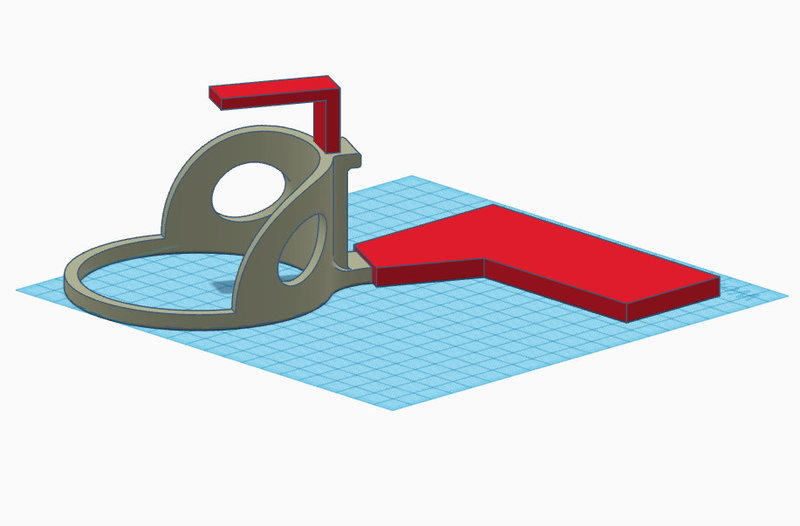
I don't know if it's the case in all 986s, but in my car, there is a space between the top of the lower center console (where the cubby and HVAC controls are) and the upper center console (where the double din stereo is), that measures approximately 7mm high. The larger piece shown in red (the bracket) will be inserted in that space, with the angled part just sticking out at the corner on the passenger side. Hopefully it will be a tight enough fit that it will hold its position without needing any kind of glue or fasteners.
The smaller red piece (on which the bottom of a cup/can will rest) is permanently inserted and glued in place, as shown in the assembled picture. Then the cup holder portion is inserted into the slot in the bracket, but will be removable.
(The colors shown do not represent the color of the printed objects. They will all be black.)
If this works like I hope, I will print a mirror image of the bracket, and see if a second cup holder is feasible on the driver's side of the console.
And, if all goes well, all the necessary files will be freely available on thingiverse.
Stay tuned for more.....
|

|

|
|
01-31-2022, 06:51 PM
|
#2
|
|
Registered User
Join Date: May 2017
Posts: 1,180
|
glued in place? Not seeing how this will stay secured with just glue. where the red pieces attaches to the brownish piece is going to be a week point also. All for new ideas.
Will stick to my rule of no drinks in the car though...no chance of any spilling on anything that way.
__________________
2000 Boxster Tiptronic
2003 Boxster
2003 996 C2 Cab
2002 996 (SOLD)
1986 944 (gone but missed)
|
|
|
|
|
02-01-2022, 05:05 AM
|
#3
|
|
Registered User
Join Date: Oct 2016
Location: Tennessee
Posts: 111
|
Quote:
Originally Posted by Stl-986

glued in place? Not seeing how this will stay secured with just glue. where the red pieces attaches to the brownish piece is going to be a week point also. All for new ideas.
|
Well, first off the surfaces of the 3D printed parts won't come out slick, and the tolerances I'm using are very tight. The smaller red piece that the bottom of the cup/can will rest on is exactly the same size as the slot it will be pushed into. It's possible that I won't be able to push it in without loosening those tolerances, but also possible that once I push it in, there'll be no getting it back out even if I don't use any glue on it.
As for the part that will be inserted into the bracket, I've made the tolerance only 1mm. I'm looking for it to be tight enough that it will be secure, but not so tight that it can't be removed.
The bracket itself will be the same thickness as the opening I'm putting it into. It should be a very tight fit, and if I need to, I will give it more thickness in subsequent printings until it is secure. If I have to use some double-sided tape to help hold it in place, that's always an option too.
These are all just what I'm hoping for. The first print is always a test. Usually it takes several tries to get everything exactly right.
I've already thought of one thing I'm going to have to change before I even print the first test piece. The space where the bracket will be isn't level. It's higher at the face of the console than it is as you go back into the console. I'm going to have to angle the arm of the cupholder that goes into the bracket downward to get the cupholder to sit level. If I print it as is, the cupholder would be angled forward (toward the console), and any cup or can in it wouldn't be level.
See? Even before I've made the first test print, I'm on to version 1.1.
|
|
|
|
|
02-01-2022, 05:55 AM
|
#4
|
|
Registered User
Join Date: May 2017
Posts: 1,180
|
Like I said, I am all for new ideas. I go through about 200 rolls a year of material designing/printing various things. even printing at 100% infill I dont see this supporting a full can of soda without it breaking. The way you have it designed and being assembled the cup part will have too much downward pressure for the part you have going in the spaces. I would suggest at a minimum printing it as 1 piece instead of 2 at a minimum.
For my speaker brackets I designed for the dash I went through at least 80 different revisions before getting it to a point where it would work well. My rear speaker brackets were about the same and that was before printing them out in abs and nylon and testing those versions out.
__________________
2000 Boxster Tiptronic
2003 Boxster
2003 996 C2 Cab
2002 996 (SOLD)
1986 944 (gone but missed)
|
|
|
|
|
02-01-2022, 07:37 AM
|
#5
|
|
Registered User
Join Date: May 2018
Location: Michigan
Posts: 108
|
Quote:
Originally Posted by Stl-986
Like I said, I am all for new ideas. I go through about 200 rolls a year of material designing/printing various things. even printing at 100% infill I dont see this supporting a full can of soda without it breaking. The way you have it designed and being assembled the cup part will have too much downward pressure for the part you have going in the spaces. I would suggest at a minimum printing it as 1 piece instead of 2 at a minimum.
For my speaker brackets I designed for the dash I went through at least 80 different revisions before getting it to a point where it would work well. My rear speaker brackets were about the same and that was before printing them out in abs and nylon and testing those versions out.
|
STL-
I'm just getting into 3D printing. What's a good starter CAD for someone new?
|
|
|
|
|
02-01-2022, 07:43 AM
|
#6
|
|
Registered User
Join Date: Oct 2016
Location: Tennessee
Posts: 111
|
Quote:
Originally Posted by 2ata
STL-
I'm just getting into 3D printing. What's a good starter CAD for someone new?
|
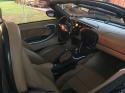
I'm pretty new to it too. I've done a few projects, with some decent success (a suction cup rearview camera mount for my Lotus; a mounting bracket to adapt a BMW removable cupholder for said Lotus; a replacement double din trim bezel for the Pioneer head unit in my Boxster; boxes for speakers and cupholders for our hot tub), but I'm far from anything but a novice at this point.
So far, I've been using Tinkercad online for design, and Cura for slicing. I'm sure I'll have to move on from Tinkercad before long as it doesn't seem nearly as capable as more complex pieces enter my wheelhouse. For starting out, though, it seems a good introduction, and it's free.
|
|
|
|
|
02-01-2022, 07:38 AM
|
#7
|
|
Registered User
Join Date: Oct 2016
Location: Tennessee
Posts: 111
|
I'm printing the first prototype right now. I'll see how it goes, and if the problems you predict arise. It's a cupholder from thingiverse that I've modified slightly for the application. My starting assumption is that, in its original form, it was working and strong enough for its designer. We'll see if my assumption was warranted. I added the part that goes under the cup/can, and changed the mounting bracket. The original was made to hang onto an existing cupholder. My mounting method should be stronger than the original, but I can beef it up if I need to.
I happy to have any advice from a more experienced 3D printer!

|
|
|
|
|
02-01-2022, 08:21 AM
|
#8
|
|
Registered User
Join Date: May 2017
Posts: 1,180
|
Tinkercad is good to use, pretty powerful, free and many youtube videos on how to do things. I mainly use what's part of Windows. 3D Builder. It is very, very basic....but it works for most things. I do use Tinkercad as well.
Take a look on thingiverse. There is one design for a cup holder that goes into the arm rest. It's simple and easy. Plus it keeps sticky liquid away from the shifter...and electronics. Someone on here made one out of foam and uses that.
I'm just not a fan of putting any liquids where it is close to electronics like the hvac/radio.
Keep in mind a few things also.
1) superglue does not work well to keep 2 pieces of PLA together, even worse in a car.
2) use plan for prototyping things, but use abs or nylon for final versions that will go in a car.
PLA will warp in a car, and break (it's brittle in the cold)
__________________
2000 Boxster Tiptronic
2003 Boxster
2003 996 C2 Cab
2002 996 (SOLD)
1986 944 (gone but missed)
|
|
|
|
|
02-01-2022, 08:35 AM
|
#9
|
|
Registered User
Join Date: Oct 2016
Location: Tennessee
Posts: 111
|
Quote:
Originally Posted by Stl-986
Tinkercad is good to use, pretty powerful, free and many youtube videos on how to do things. I mainly use what's part of Windows. 3D Builder. It is very, very basic....but it works for most things. I do use Tinkercad as well.
Take a look on thingiverse. There is one design for a cup holder that goes into the arm rest. It's simple and easy. Plus it keeps sticky liquid away from the shifter...and electronics. Someone on here made one out of foam and uses that.
I'm just not a fan of putting any liquids where it is close to electronics like the hvac/radio.
Keep in mind a few things also.
1) superglue does not work well to keep 2 pieces of PLA together, even worse in a car.
2) use plan for prototyping things, but use abs or nylon for final versions that will go in a car.
PLA will warp in a car, and break (it's brittle in the cold)
|
Thanks for the advice on PLA vs ABS/nylon. So far I've only worked with PLA and it's been fine, but I haven't done anything that has to be really really strong either.
I assume you're talking about the cup holder that goes inside the armrest. I actually have one of those I got right after I got the car in 2016. I almost never use it because 1, it's behind me, and 2, the armrest lid doesn't stay open on its own when you drive, so it falls down and crushes paper cups or things with straws in them. It's a good idea, but not a friendly one.
I've also seen the ones that mount in the ashtray, but I can't imagine that being a workable location with a manual car.
I don't like the ones that sit on the floor or clamp on the seat adjustment bar.
Right now I rely on one of those seat gap fillers with a cup holder in it, but it is in the way of the passenger. My wife doesn't like it there.
This project is just to explore another potential option.
|
|
|
|
|
02-01-2022, 11:13 AM
|
#10
|
|
Registered User
Join Date: May 2017
Posts: 1,180
|
Just keep in mind that in a car PLA will melt & warp. It will be even worse if it is something that is holding anything. OK for small parts, but not something like this. Remember, PLA is just corn starch and it has a very low melting point. If you get a design that works for you and you dont want to invest in the setup for ABS or Nylon let me know.
Just giving a word of caution is all. You dont want something that will start to melt & get soft that is holding a liquid right next to your electronics or console.
__________________
2000 Boxster Tiptronic
2003 Boxster
2003 996 C2 Cab
2002 996 (SOLD)
1986 944 (gone but missed)
|
|
|
|
|
02-01-2022, 01:43 PM
|
#11
|
|
Registered User
Join Date: Oct 2016
Location: Tennessee
Posts: 111
|
I have an Ender 3 Pro with a glass bed and enclosure. I've ordered a spool of ABS to start working with. If I'm not mistaken, I'm pretty well set for using it. Just need to make sure all my settings are correct for ABS.
As for the cup holder, the first prototype is printed, and there are definitely changes to make.
There's no way another one would fit on the driver's side, so the bracket part needs to be much bigger. It has to be long enough that it covers the entire gap between the console and dash with a nice finished surface. The part of it where the cupholder inserts needs to be thicker, since it will be sticking out from the dash, not back in the gap, and it needs to angle down about 15 degrees (just a guess. I'll measure the angle before the next attempt.) to make the cupholder level. I will probably make that part of the bracket into a cylinder, with the slot in the middle for the cupholder arm to be inserted.
The bottom arm of the cupholder fits so tightly that it needed to be hammered in, so it ain't gonna be coming out without some serious force.
I'll be on the road for the next week, so stay tuned.
Last edited by Tweetdriver63; 02-01-2022 at 02:23 PM.
|
|
|
|
|
02-01-2022, 05:10 PM
|
#12
|
|
Registered User
Join Date: May 2017
Posts: 1,180
|
Better get an all metal hot end. Stock wont cut it for doing abs.
__________________
2000 Boxster Tiptronic
2003 Boxster
2003 996 C2 Cab
2002 996 (SOLD)
1986 944 (gone but missed)
|
|
|
|
|
02-03-2022, 09:16 PM
|
#13
|
|
Registered User
Join Date: Oct 2016
Location: Tennessee
Posts: 111
|
Quote:
Originally Posted by Stl-986
Better get an all metal hot end. Stock wont cut it for doing abs.
|
Ordered. :dance: 
|
|
|
|
|
02-04-2022, 03:55 AM
|
#14
|
|
Registered User
Join Date: Oct 2019
Location: Central Florida
Posts: 253
|
Has anyone looked into a carbon fiber 3d printer?
|
|
|
|
|
02-04-2022, 06:23 AM
|
#15
|
|
Registered User
Join Date: May 2017
Posts: 1,180
|
any 3dprinter can do carbon fiber. Need an all metal hot end and a harden tip. material is pricy though
__________________
2000 Boxster Tiptronic
2003 Boxster
2003 996 C2 Cab
2002 996 (SOLD)
1986 944 (gone but missed)
|
|
|
|
|
02-15-2022, 09:57 AM
|
#16
|
|
Registered User
Join Date: Oct 2016
Location: Tennessee
Posts: 111
|
Here's the final prototype. The bottom cup support isn't attached to this one because this was just the last in the line of prototypes used to make all the adjustments to get the angles and sizes right. I'm also going to make a black trim piece to cover the gap to the left of the bracket, and I somehow managed to get the mounting slot off-center, which I have already fixed for the final printing. The final product will be printed in black ABS. I'll also be doing a strength test once the final ABS example has been printed. I think it will be plenty strong enough.
EDIT: After putting this in the car to check its fit, I took it back out and put it in as if it was going to hold the cupholder on the driver's side, and it is clear that with the change in the size of the cupholder itself (smaller than the original) and the change in the angle it sticks out from the console, there is plenty of room for one on the driver's side without interfering with anything. I am now printing up another prototype that will cover the entire width of the console and mount a cupholder at both sides. I'll be out of pocket until early next week, so checking it will probably have to wait. It will be printing until about midnight tonight. I may have enough time in the morning just to see how it fits though.

Last edited by Tweetdriver63; 02-15-2022 at 01:16 PM.
|
|
|
|
|
02-15-2022, 01:38 PM
|
#17
|
|
Registered User
Join Date: May 2017
Posts: 1,180
|
Looks like you changed the design some. Having the cup holder go into a slotted hole will be better then original design.
You going to have something for the cup/bottle to sit on at the bottom?
Still think the part at the L is going to be your weakest point. Instead of it being a square on that inside corner, make it an inside filet (sp?) Will give it more strength.
__________________
2000 Boxster Tiptronic
2003 Boxster
2003 996 C2 Cab
2002 996 (SOLD)
1986 944 (gone but missed)
|
|
|
|
|
02-15-2022, 05:03 PM
|
#18
|
|
Registered User
Join Date: Oct 2016
Location: Tennessee
Posts: 111
|
Yes, I changed the design somewhat. Your advice had a lot to do with that. For now I'm going to stick with the L shaped bottom support, but I'll be testing everything for strength once I print it all out with the ABS. I may decide to add some to the inside of the corner on that L shaped piece though. It can't be much or it might get in the way of whatever can/cup is placed in the holder.
As far as the L shaped piece staying in place, it's such a tight fit that I had to tap it into the slot with a hammer. I didn't use any kind of glue, but there's no way I can get it back out.
Here is what the latest iteration of the bracket looks like (upside down, of course). It will be nice if this all works like I hope, and we have two very usable and accessible cupholders:
|
|
|
|
|
02-23-2022, 06:59 AM
|
#19
|
|
Registered User
Join Date: Oct 2016
Location: Tennessee
Posts: 111
|
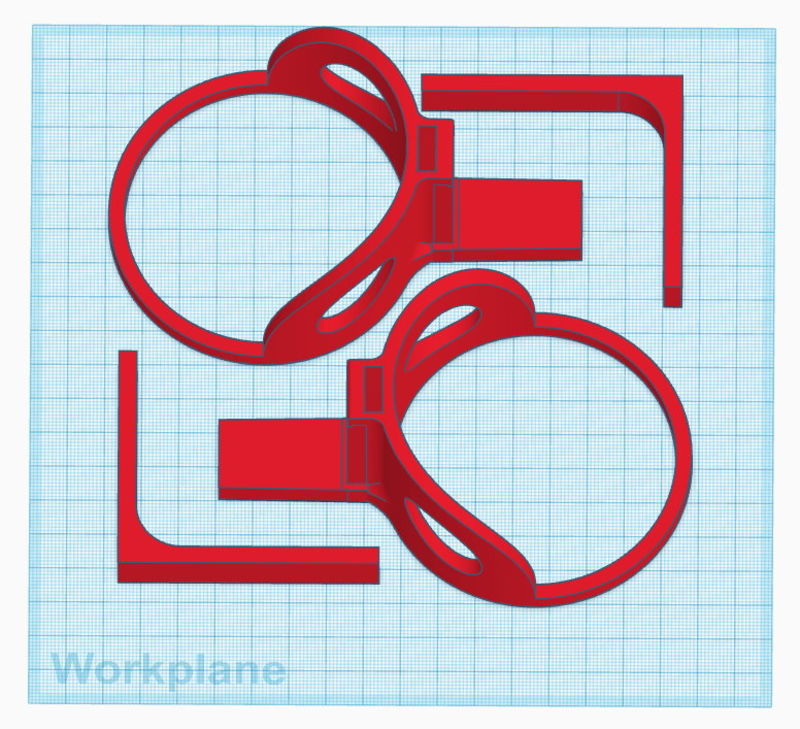
The previous post showed the last prototype I had made. It was made the largest size I can fit a single piece on the bed of my printer, and as a result wasn't big enough to fit in the car where it goes. To make it the right size, I have to print it in three pieces, as shown in the first picture.

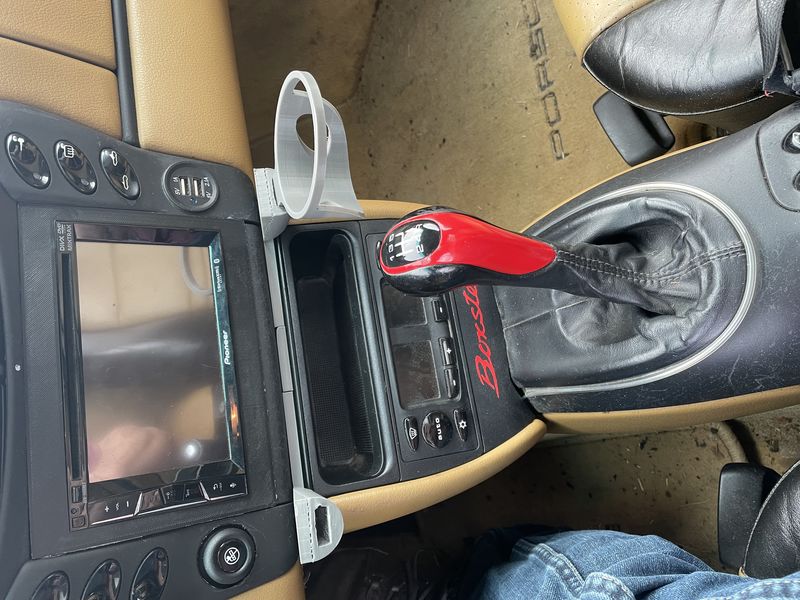
I nailed it this time. :dance: This is the final prototype. Next up will be the final product, printed in black ABS for strength and longevity.
Here's how it will look installed (except for the color). I only made one prototype of the cup holder itself, and it doesn't have the bottom support installed for the pictures. Also, I forgot to remove the support structure on the ends before I checked the fit and took the pictures. That bit on the arm sockets, just above the cupholder slots, will be removed on the finished product. That's just there to provide support during printing.
Oh, and I may make a small trim piece to go across the front and hide the fact that it's three pieces, and I'll take more care removing the support structure from inside the slots, so as not to mess up the edges.

|
|
|
|
|
02-24-2022, 07:12 PM
|
#20
|
|
Registered User
Join Date: Oct 2016
Location: Tennessee
Posts: 111
|
Quote:
Originally Posted by Stl-986
Looks like you changed the design some. Having the cup holder go into a slotted hole will be better then original design.
You going to have something for the cup/bottle to sit on at the bottom?
Still think the part at the L is going to be your weakest point. Instead of it being a square on that inside corner, make it an inside filet (sp?) Will give it more strength.
|
I also did a slight redesign of the bottom supports.
What do you think?
|
|
|
|
 Posting Rules
|
You may not post new threads
You may not post replies
You may not post attachments
You may not edit your posts
HTML code is On
|
|
|
All times are GMT -8. The time now is 12:35 PM.
| |


 2001 Porsche Boxster
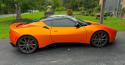 2012 Lotus Evora S
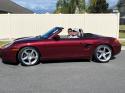 Boxster
 Hybrid Mode


