 09-12-2016, 06:11 PM
|
#1
|
|
Registered User
Join Date: Apr 2016
Location: Rangiora NZ
Posts: 64
|
Can you do the same process to the triangular corner reflector too ?
__________________
2000 Triple Black Boxster S
2017 Subaru Outback Grey
|

|

|
|
09-12-2016, 06:38 PM
|
#2
|
|
Custom User Title Here
Join Date: Mar 2012
Location: Ft. Leonard Wood
Posts: 6,169
|
Quote:
Originally Posted by Froggo

Can you do the same process to the triangular corner reflector too ?
|
No. It is orange all the way through.
|
|
|
|
|
09-21-2016, 09:30 AM
|
#3
|
|
Registered User
Join Date: Sep 2016
Location: Saskatchewan
Posts: 8
|
Does it need to be wet sanded with water, just a lubricant like WD, or just dry?
|
|
|
|
|
09-21-2016, 09:44 AM
|
#4
|
|
Registered User
Join Date: Apr 2014
Location: Leeds UK
Posts: 105
|
Quote:
Originally Posted by jbryshun
Does it need to be wet sanded with water, just a lubricant like WD, or just dry?
|
I use WD40 with the sanding disks and then water after 180 grit
|
|
|
|
|
09-21-2016, 01:10 PM
|
#5
|
|
Registered User
Join Date: May 2016
Location: Northern Indiana
Posts: 410
|
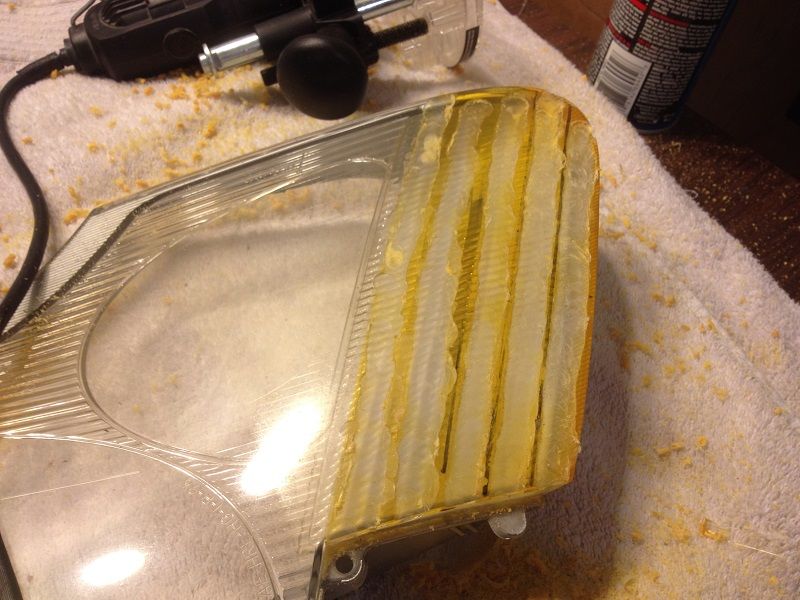
Best tip I have for hand sanding headlights (I used when sanding "foggy" plastic)...
Start with the most corse grit and sand HORIZONTAL, then step down a grit and sand VERTICAL until the previous horizontal scratches are gone, step down and go vertical, step down go horizontal, etc. The reason I found this so handy is by changing directions you can easily see how much to sand with the finer grit to remove the scratches from the previous.
The other tip I just thought to mention is to avoid the temptation of skipping a grit....200 grit will eventually remove 80 grit scratches, but it will take longer and risk an "uneven" surface. Bottom line, use every grit and change directions after each and progress to the finest grit you can find. The results will be better than "professional" as hand sanding gives better control than any power tool.
|
|
|
|
|
10-18-2018, 04:58 AM
|
#6
|
|
Registered User
Join Date: Mar 2011
Location: Delaware
Posts: 69
|
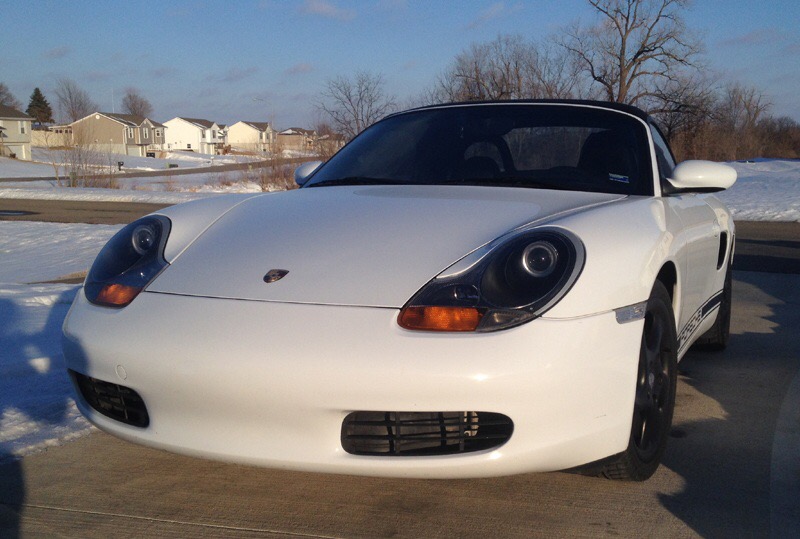
I agree with Pedro. Love my amber lens!
|
|
|
|
|
10-18-2018, 05:22 AM
|
#7
|
|
1997 Tip, 2018 Macan
Join Date: Aug 2015
Location: Upland, CA
Posts: 1,338
|
Long live the amber.
|
|
|
|
|
10-18-2018, 10:56 AM
|
#8
|
|
Custom User Title Here
Join Date: Mar 2012
Location: Ft. Leonard Wood
Posts: 6,169
|
Quote:
Originally Posted by rexcramer
Long live the amber.
|
Quote:
Originally Posted by springer123
I agree with Pedro. Love my amber lens!
|
Awwwww...now there are 3 of you.
Maybe you can start a support group. 
You should start your very own "Amber Nutz" thread instead of crapping in this one. 
Last edited by particlewave; 10-18-2018 at 11:11 AM.
|
|
|
|
|
10-18-2018, 12:15 PM
|
#9
|
|
Registered User
Join Date: Feb 2017
Location: CO
Posts: 989
|
I kinda like the amber turn signal with smoked corner look. Contacted Woody to see if he has any. So, sort of 4ish in the amber camp, kind of??
|
|
|
|
|
10-18-2018, 08:00 PM
|
#10
|
|
1997 Tip, 2018 Macan
Join Date: Aug 2015
Location: Upland, CA
Posts: 1,338
|
With four members, we may be a recognized protected class and granted special compensation under Federal law? :dance:
|
|
|
|
|
10-19-2018, 06:41 AM
|
#11
|
|
Registered User
Join Date: Mar 2014
Location: Eastern NC
Posts: 701
|
Quote:
Originally Posted by rexcramer
With four members, we may be a recognized protected class and granted special compensation under Federal law? :dance:
|
I will make five. Where do we apply? And I can keep my day job, right?
__________________
"YouTube Certified in Various Specialties"
|
|
|
|
|
10-19-2018, 08:31 AM
|
#12
|
|
Registered User
Join Date: Nov 2005
Location: San Diego
Posts: 200
|
Well....make it six. Amber rules!
|
|
|
|
|
10-19-2018, 11:17 AM
|
#13
|
|
Custom User Title Here
Join Date: Mar 2012
Location: Ft. Leonard Wood
Posts: 6,169
|
This is what happens to amber headlights in this thread:
Thanks to you guys keeping this thread at the top with your posts, I'm getting lots of requests to de-amber members headlights...thanks a lot. ")
Last edited by particlewave; 10-19-2018 at 11:20 AM.
|
|
|
|
|
10-19-2018, 11:29 AM
|
#14
|
|
1997 Tip, 2018 Macan
Join Date: Aug 2015
Location: Upland, CA
Posts: 1,338
|
My eyes, my eyes you blasphemer and you're welcome.
|
|
|
|
|
10-19-2018, 11:56 AM
|
#15
|
|
Custom User Title Here
Join Date: Mar 2012
Location: Ft. Leonard Wood
Posts: 6,169
|
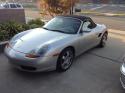
In all seriousness, this thread was originally just a proof of concept experiment. I've never done a completed set.
Amber looks great on certain color cars and even modified. Here's a set I built for a member years ago:
|
|
|
|
|
10-20-2018, 02:33 AM
|
#16
|
|
Registered User
Join Date: Dec 2013
Location: Dahlonega , Georgia
Posts: 1,364
|
Quote:
Originally Posted by particlewave
In all seriousness, this thread was originally just a proof of concept experiment. I've never done a completed set.
Amber looks great on certain color cars and even modified. Here's a set I built for a member years ago:
|
That's the same setup you built for me years ago , I kept the amber but added the clear corner lense . I think it looks good on my Arctic Silver . By the way the " Fred's lights " are still going strong as is your installation . 
__________________
2002 Boxster S Arctic Silver with black top with glass window and black leather interior. Jake Raby 3.6 SS ( the beast ) with IMS Solution. 996 GT3 front bumper , GT3 rocker covers and GT3TEK rear diffuser and Joe Toth composites rear ducktail spoiler .
|

|
|
|
10-23-2019, 12:11 AM
|
#17
|
|
Registered User
Join Date: Sep 2019
Location: Los Angeles
Posts: 17
|
I agree. I think people are just drinking the clear kool aid. I have clear lenses I'd like to make Amber. Any recommendations?
Quote:
Originally Posted by particlewave
In all seriousness, this thread was originally just a proof of concept experiment. I've never done a completed set.
Amber looks great on certain color cars and even modified. Here's a set I built for a member years ago:
|
|
|
|
|
 Posting Rules
|
You may not post new threads
You may not post replies
You may not post attachments
You may not edit your posts
HTML code is On
|
|
|
All times are GMT -8. The time now is 01:59 AM.
| |


 1997 Porsche Boxster
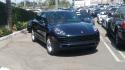 2018 Porsche Macan
 Hybrid Mode


