 12-20-2020, 07:17 PM
|
#1
|
|
Registered User
Join Date: Apr 2017
Location: Indiana
Posts: 1,510
|
Quote:
Originally Posted by MrBen

What about the mirror s
|
I've got 97" X 60" left on the original roll to do mirrors and probably my whole hardtop. The problem is I'm 3" short to do the front bumper. I'd have to seam it vertically and that would look tacky. If I wouldnt have ruin a big sheet on one of the quarters I'd have enough. Not counting the hardtop.
|

|

|
|
12-21-2020, 04:37 AM
|
#2
|
|
Multi-Boxer Driver
Join Date: Nov 2010
Location: Orange Park, FL
Posts: 1,429
|
Oil change completed, clean filter. 
__________________
-Chris
2004 Porsche Boxster 2.7 (gone  )
2004 Porsche 911 C4S Cab
1991 Porsche 911 C2 Targa 3.6
2017 Subaru Outback 3.6R
|

|
|
|
12-21-2020, 06:42 AM
|
#3
|
|
Registered User
Join Date: Feb 2019
Location: Kernersville, NC
Posts: 294
|
I finally got my heated seats working!
I had installed some 987 seats in my 986 Boxster and the new seats were heated, but my car never came with the heated seats option. I just put made a series of videos showing you every part needed and every step to take if you want to add the heated seat option to your car using stock switches and even the stock fuse location.
Here is a link to the playlist that has the entire video series. I hope this helps a lot of people that have been trying to do the same!
https://youtube.com/playlist?list=PL8ogZBhXvNybZNzcxzpT72z6e-uZqA-SI
__________________
1998 Boxster
2015 BMW M4 Dinan Stage 3
2016 BMW S1000XR
2015 Ninja 300
|
|
|
|
|
12-23-2020, 06:23 AM
|
#4
|
|
Registered User
Join Date: Jul 2005
Location: MA
Posts: 885
|
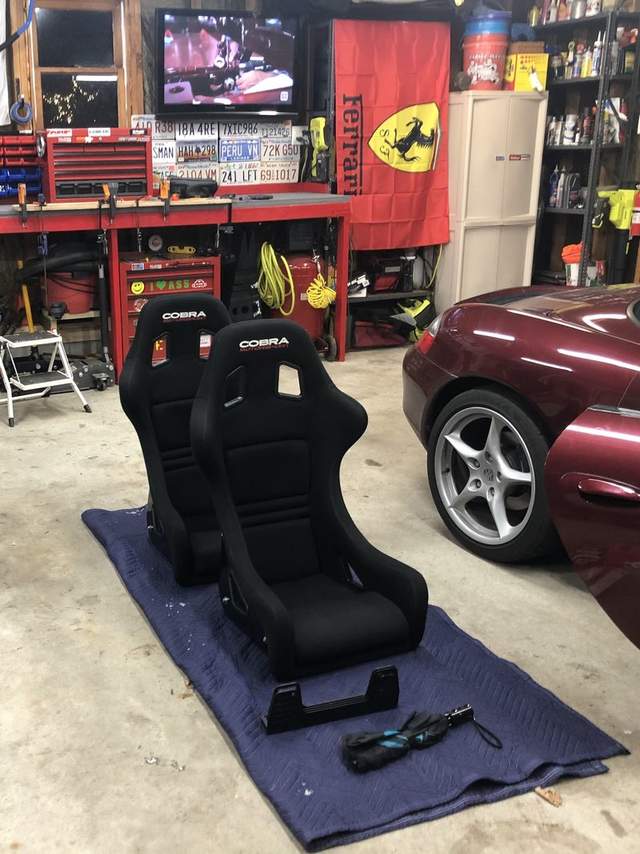
Picked up some lightly used Cobra Suzuka seats on Rennlist...and realized that I don't have the right brackets to mount them 
__________________
98 Arena Red 986
|
|
|
|
|
12-23-2020, 04:15 PM
|
#5
|
|
Registered User
Join Date: May 2020
Location: SoCal
Posts: 66
|
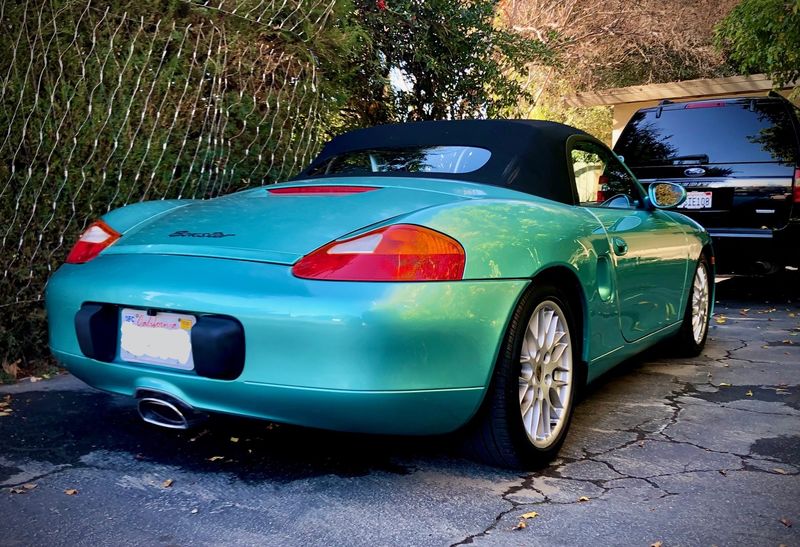
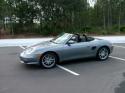
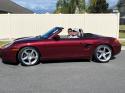
I applied a one-step porcelain coating to Mrs. Peel. It's Aero Flight Shield, it's only $29.99 for a small bottle, and a typical consumer can use it if the prep work is properly done.
The paint surface is like a mirror, now. Look at the right rear fender in the photo and focus on the reflection of the trees. It works very well. And Mrs. Peel is impressively shiny now.
|
|
|
|
|
12-24-2020, 01:48 AM
|
#6
|
|
1998 Boxster Silver/Red
Join Date: Sep 2017
Location: 92262
Posts: 3,086
|
Quote:
Originally Posted by 986Chick
I applied a one-step porcelain coating to Mrs. Peel. It's Aero Flight Shield, it's only $29.99 for a small bottle, and a typical consumer can use it if the prep work is properly done.
The paint surface is like a mirror, now. Look at the right rear fender in the photo and focus on the reflection of the trees. It works very well. And Mrs. Peel is impressively shiny now.
|
Don't forget to cover the license plate of the Ford.
__________________
1998 Porsche Boxster
|
|
|
|
|
12-30-2020, 03:52 PM
|
#7
|
|
Registered User
Join Date: Oct 2017
Location: Seattle area
Posts: 174
|
I was feeling the need for more horsepower, so I installed stripes and replaced a window regulator. Took her our for a short drive in the rain after I installed the stripes, couldn't really feel any increase in horsepower. BUT, that new window regulator seems to have really improved the handling!!! 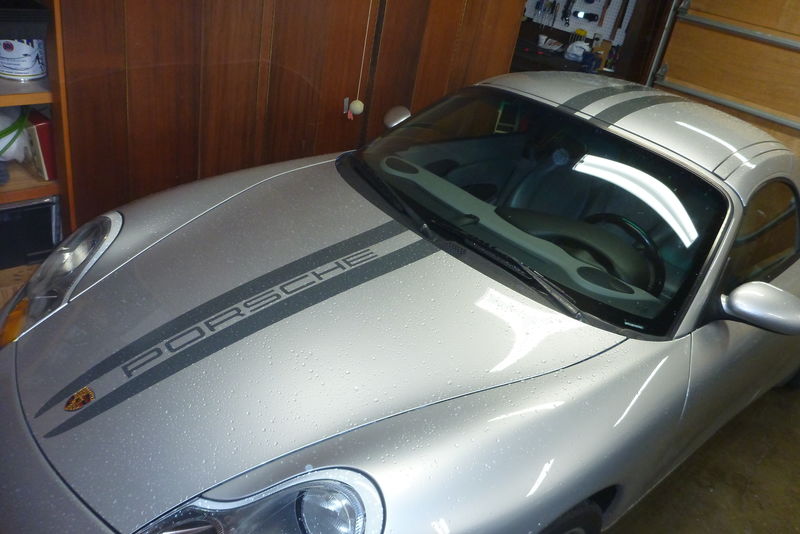
__________________
1998 Boxster
1991 Carrera
|
|
|
|
|
12-30-2020, 06:11 PM
|
#8
|
|
Registered User
Join Date: Jan 2019
Location: PA
Posts: 1,724
|
Quote:
Originally Posted by A8ked
I was feeling the need for more horsepower, so I installed stripes and replaced a window regulator. Took her our for a short drive in the rain after I installed the stripes, couldn't really feel any increase in horsepower. BUT, that new window regulator seems to have really improved the handling!!! |
If I were you I'd get a refund on those stripes! Stripes ALWAYS give you more noticeable horsepower! Those are obviously defective! 
__________________
2002 Boxster Base - Arctic Silver - Tiptronic
2010 Subaru Forester
1980 Ford C-8000 Custom Cab Emergency-One Fire Truck
__________________
"I never lose. I either win or I learn." -Nelson Mandela
|
|
|
|
|
12-30-2020, 06:20 PM
|
#9
|
|
Registered User
Join Date: May 2020
Location: SoCal
Posts: 66
|
Quote:
Originally Posted by piper6909
If I were you I'd get a refund on those stripes! Stripes ALWAYS give you more noticeable horsepower! Those are obviously defective! |
I'm just happy to see that he apparently keeps it in the family room.
|
|
|
|
|
12-31-2020, 02:51 AM
|
#10
|
|
Registered User
Join Date: Oct 2019
Location: Central Florida
Posts: 253
|
Well, not today, but Monday. I bought mine .
|
|
|
|
|
01-01-2021, 11:44 AM
|
#11
|
|
Registered User
Join Date: May 2020
Location: SoCal
Posts: 66
|
Man, replacing that expansion tank and line is much more difficult than I thought it would.
|
|
|
|
|
01-02-2021, 02:10 AM
|
#12
|
|
Registered User
Join Date: Jul 2019
Location: Finland
Posts: 345
|
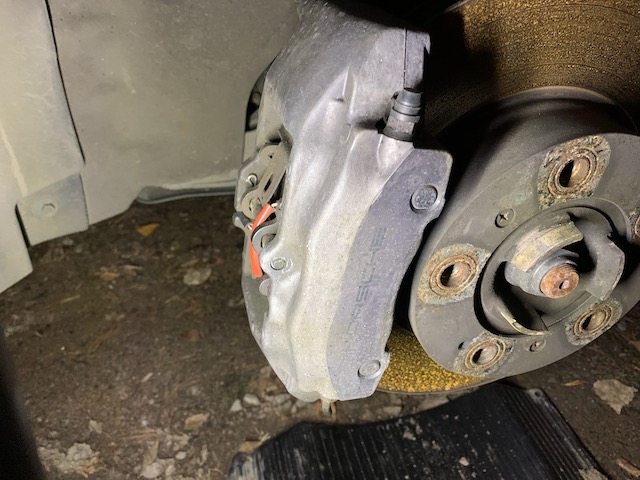
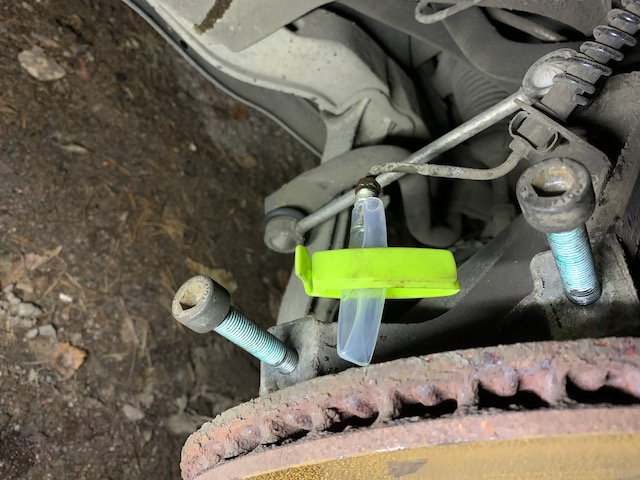
Removed the front brake calipers in effort to paint them (red, of course ) and to apply new stickers. In same time, I'll refurbish the calipers with new dustbooths, pads and also install new brake discs.
I was VERY concerned of how the caliper bolts would come loose (or not) after reading plenty of horror stories of that. On my car those came out very nicely, no fight at all, just a normal braker bar and even pressure. Also the bolts and threads do look to be in a very nice condition.
What was the recommended trick to put on caliper bolt treads at the time of re-assembly to make sure those bolts do not get seized there in the future either - was it copper paste or something else?
When these are done, it's time to do the same for rear calipers
__________________
Boxster 2.7 2001 Manual
|
|
|
|
|
01-02-2021, 05:27 AM
|
#13
|
|
Registered User
Join Date: Jan 2019
Location: PA
Posts: 1,724
|
Quote:
Originally Posted by pilot4fn
What was the recommended trick to put on caliper bolt treads at the time of re-assembly to make sure those bolts do not get seized there in the future either - was it copper paste or something else?
|
AFAIK, using ANY kind of anti-seize compound on caliper bolts is a big no-no. A mechanic told me that it's illegal in PA. That goes for lug nuts too.
__________________
2002 Boxster Base - Arctic Silver - Tiptronic
2010 Subaru Forester
1980 Ford C-8000 Custom Cab Emergency-One Fire Truck
__________________
"I never lose. I either win or I learn." -Nelson Mandela
|
|
|
|
|
01-13-2021, 09:15 AM
|
#14
|
|
Registered User
Join Date: Oct 2008
Location: O.C. CA
Posts: 3,709
|
Quote:
Originally Posted by piper6909
AFAIK, using ANY kind of anti-seize compound on caliper bolts is a big no-no. A mechanic told me that it's illegal in PA. That goes for lug nuts too.
|
I use a little on mine to prevent corroding in place.
__________________
OE engine rebuilt,3.6 litre LN Engineering billet sleeves,triple row IMSB,LN rods. Deep sump oil pan with DT40 oil.
|
|
|
|
|
01-02-2021, 05:48 AM
|
#15
|
|
Registered User
Join Date: Jul 2012
Location: New Hope, PA
Posts: 190
|
Quote:
Originally Posted by pilot4fn
Removed the front brake calipers in effort to paint them (red, of course ) and to apply new stickers. In same time, I'll refurbish the calipers with new dustbooths, pads and also install new brake discs.
I was VERY concerned of how the caliper bolts would come loose (or not) after reading plenty of horror stories of that. On my car those came out very nicely, no fight at all, just a normal braker bar and even pressure. Also the bolts and threads do look to be in a very nice condition.
What was the recommended trick to put on caliper bolt treads at the time of re-assembly to make sure those bolts do not get seized there in the future either - was it copper paste or something else?
When these are done, it's time to do the same for rear calipers
|
I use blue loctite - it prevents corrosion to some extent and of course locks the threads If you plan to track the car or drive in the mountains use red. Never had an issue with this approach. Disassembly is only marginally more difficult. Take a close look at the factory allen head cap screws - notice anything?
__________________
'01 986S
07 GT3
'80 911SC Weissach Edition (Sold)
11 958 S
https://dergarage.com
Last edited by CBRacerX; 01-02-2021 at 05:51 AM.
|
|
|
|
|
01-03-2021, 12:56 PM
|
#16
|
|
2001 Boxster S 6sp
Join Date: Nov 2015
Location: Green Valley, AZ
Posts: 62
|
Cleaned up my 01 Boxster S as she turns 20 this year!
Will be doing some tranny and motor mounts real soon.

__________________
2001 Porsche Boxster S
2022 Hyundai Santa Cruz
1983 Alfa Romeo Spider (PO)
1969 Morgan 4/4 1600 (PO)
|
|
|
|
|
01-03-2021, 07:45 PM
|
#17
|
|
Registered User
Join Date: Jul 2019
Location: Finland
Posts: 345
|
Quote:
Originally Posted by CBRacerX
I use blue loctite - it prevents corrosion to some extent and of course locks the threads If you plan to track the car or drive in the mountains use red. Never had an issue with this approach. Disassembly is only marginally more difficult. Take a close look at the factory allen head cap screws - notice anything? |
Thanks, blue locktite it is 
__________________
Boxster 2.7 2001 Manual
|
|
|
|
|
01-13-2021, 09:17 AM
|
#18
|
|
Registered User
Join Date: Oct 2008
Location: O.C. CA
Posts: 3,709
|
Quote:
Originally Posted by 986Chick
Man, replacing that expansion tank and line is much more difficult than I thought it would.
|
It's a great bonding experience don't you think ?
__________________
OE engine rebuilt,3.6 litre LN Engineering billet sleeves,triple row IMSB,LN rods. Deep sump oil pan with DT40 oil.
|
|
|
|
|
01-04-2021, 03:07 PM
|
#19
|
|
Registered User
Join Date: Jun 2014
Location: Oregon
Posts: 455
|
Today, I paid off my car loan. I own my car now!
__________________
'04 Midnight Blue Metallic 986
|
|
|
|
|
01-04-2021, 03:42 PM
|
#20
|
|
Damn Yankee
Join Date: Mar 2013
Location: Dallas
Posts: 1,117
|
Quote:
Originally Posted by Finnegan
Today, I paid off my car loan. I own my car now!
|
Congrats !!!
TO
|
|
|
|
 Posting Rules
|
You may not post new threads
You may not post replies
You may not post attachments
You may not edit your posts
HTML code is On
|
|
|
All times are GMT -8. The time now is 12:38 PM.
| |


 Boxster
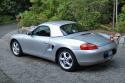 1998 Porsche Boxster
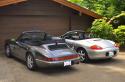 1991 Porsche Carrera 4
 Boxster
 Mean Motor Scooter
 Scarlett
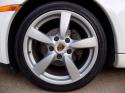 Cadi
Cadi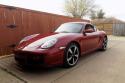 Tuesday
 Hybrid Mode


