Go Back   986 Forum - The Community for Porsche Boxster & Cayman Owners > Porsche Boxster & Cayman Forums > Boxster General Discussions

Post Reply
 
LinkBack Thread Tools Display Modes
Old 12-17-2007, 10:23 AM   #1
Registered User
 
Join Date: Jul 2006
Location: Where the Sewer Meets the Sea, CA. USA
Posts: 2,695
Send a message via MSN to CJ_Boxster
Smile Re-painted Interior

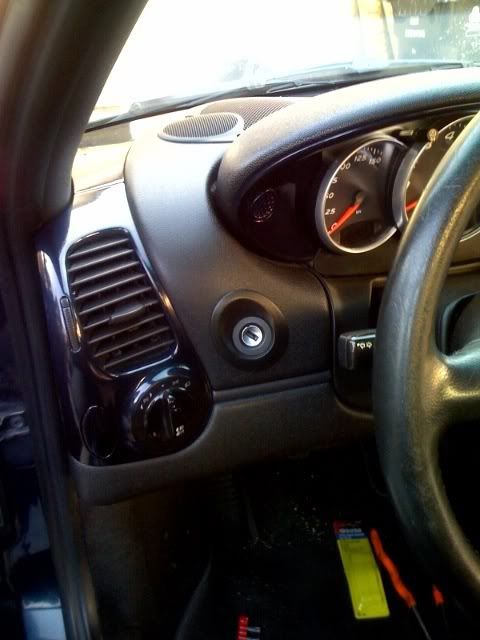
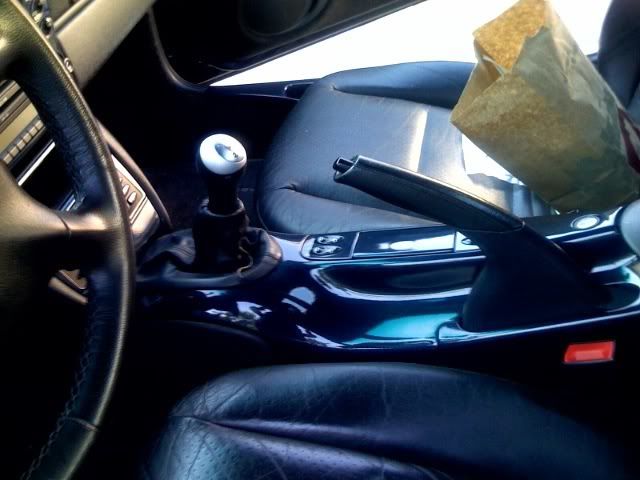
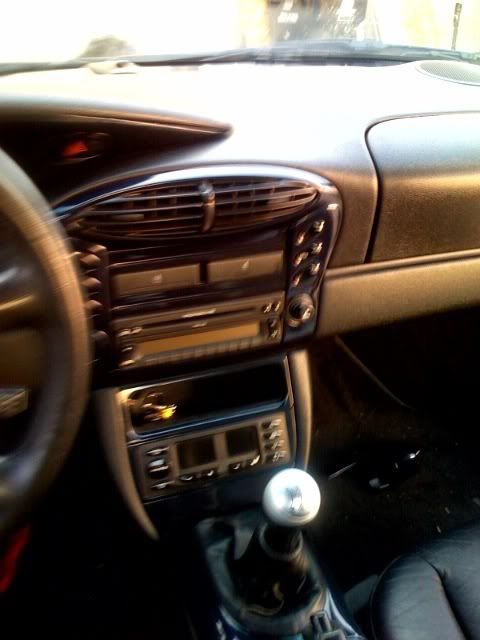
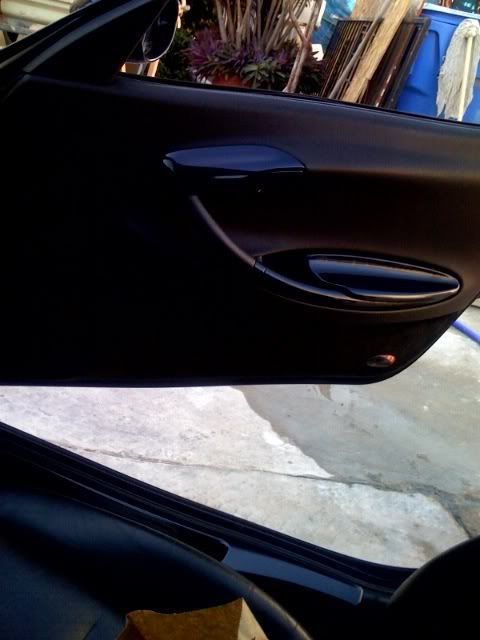
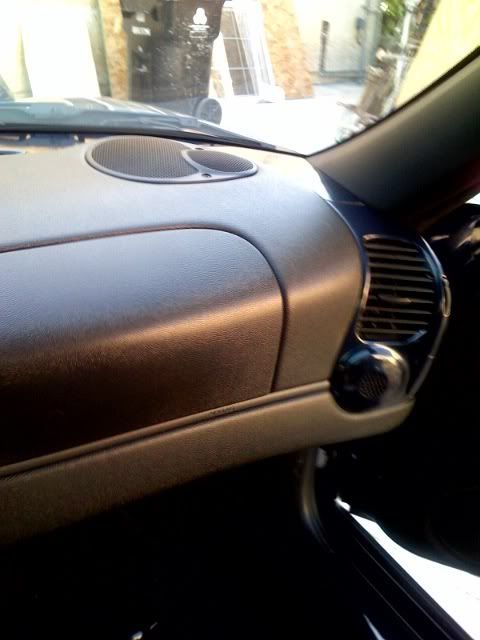
Some of you might not know this but when my boxster was repainted, i had the body shop repaint the interior body colored. That means Ocean Blue Interior which was sorta bland and not that flashy, So my weekend project this past weekend was to repaint it Chrome then apply a light Smoke over it but that didnt work out well so i had to RE-paint it again... Guess i can say my weekend project was to RE-RE-RE-paint my interior

Anyway, i settled with Aluminum Chrome and it worked well, I still need to re-do it cause this morning i noticed some areas in the paint where i needed to sand some more so afew areas are rough. Ill take care of that when the weather gets alittle warmer.

Here the pictures

BEFORE:


__________________
--Proud Boxster Owner/Tech,

Carlos J Cazares

FastForward Performance
http://i10.photobucket.com/albums/a1...er/newsig1.jpg
CJ_Boxster is offline   Reply With Quote
Old 12-17-2007, 10:29 AM   #2
Registered User
 
Join Date: Jul 2006
Location: Where the Sewer Meets the Sea, CA. USA
Posts: 2,695
Send a message via MSN to CJ_Boxster
PRIMER:


AFTER RE-RE-RE-PAINT AND INSTALL:


__________________
--Proud Boxster Owner/Tech,

Carlos J Cazares

FastForward Performance
http://i10.photobucket.com/albums/a1...er/newsig1.jpg
CJ_Boxster is offline   Reply With Quote
Old 12-17-2007, 10:46 AM   #3
Registered User
 
Join Date: Oct 2005
Location: New Jersey
Posts: 983
wow- that really looks great - nice job!

I spent my weekend removing ice from my driveway...
__________________
Happy Motoring!... Tim’05

http://i153.photobucket.com/albums/s..._kill/Siga.jpg
Dr. Kill is offline   Reply With Quote
Old 12-17-2007, 10:51 AM   #4
Registered User
 
Join Date: Jul 2006
Location: Where the Sewer Meets the Sea, CA. USA
Posts: 2,695
Send a message via MSN to CJ_Boxster
Ice, that sucks... I need to wash my boxsters exterior... sunday morning it was hit with at least 10 burd poops.
__________________
--Proud Boxster Owner/Tech,

Carlos J Cazares

FastForward Performance
http://i10.photobucket.com/albums/a1...er/newsig1.jpg
CJ_Boxster is offline   Reply With Quote
Old 12-17-2007, 10:58 AM   #5
Registered User
 
Join Date: Sep 2006
Location: chicago
Posts: 3,510
Send a message via AIM to djomlas
love the DIY effort man, but i liked the before better in your case.
still looks nice dont get me wrong.
you did a good job man.

what steps and paint did u use?
__________________
http://i34.tinypic.com/157yslk.jpg
"I couldn't find the sports car of my dreams, so I built it myself." ~F. Porsche
Gemballa springs::litronics::Eurotech 18s(275/225)::B&M::MOMO wheel::
exhaust cutouts::EVOcoldair intake::OEM smoked tails & sidemarkers::

colormatched bumperettes::Top Speed Pro-1 exhaust::
my cardomain/pictures page
djomlas is offline   Reply With Quote
Old 12-17-2007, 11:06 AM   #6
Registered User
 
Join Date: May 2006
Location: Annapolis Maryland
Posts: 1,528
So, when you fix the problem areas, will that be a re-re-re-re-re-do?
__________________
http://i84.photobucket.com/albums/k2...izzlysmall.jpg
'97 986
Cheating Death on 19" Wheels
...no catastrophic engine failure ...yet
Grizzly is offline   Reply With Quote
Old 12-17-2007, 11:14 AM   #7
Registered User
 
Join Date: Sep 2006
Location: California
Posts: 713
Wow, I like it! It looks somewhat close to the real alumalook, like on your door sill pulls. Well, from what I can see in the pictures. Can you post up some higher resolution close up pictures of it? How does the close up finish look, and which brand/paint-code did you use?

Thanks!
__________________
http://farm4.static.flickr.com/3420/...90927559_o.jpg

Some stuff for sale: M030 S 24mm front sway bar, M030 base 19.6mm rear sway bar, 996 GT3 OEM Porsche Motorsport front strut mounts monoball "camber plates"

WTB: looking for some 5-7mm spacers with extended bolts
chaudanova is offline   Reply With Quote
Old 12-17-2007, 11:16 AM   #8
Registered User
 
Join Date: Jul 2006
Location: Where the Sewer Meets the Sea, CA. USA
Posts: 2,695
Send a message via MSN to CJ_Boxster
Quote:
Originally Posted by djomlas
love the DIY effort man, but i liked the before better in your case.
still looks nice dont get me wrong.
you did a good job man.

what steps and paint did u use?
Yeah i know what you mean, when i seen the before and after pictures on my PC i thought to myself that some people might like the before pictures more than the after haha. But if you seen it in person its a bit of a different story.

The Steps were removal, then sand the clear-coat off all the parts atleast till i hit the old paint, then I sprayed it with primer, then 20 minutes later i sprayed the Metal-Cast Chrome paint and it looked great the first 2 minutes while it dried then it started to look like crap. Even after drying over nite the paint would still rub off onto my hands. I let it set over nite and on sunday i sanded that crap off and sprayed it with Dupli-color Aluminum Chrome which came out way better.

Let that set for 4 hours and then reinstalled it... I wish i took more time to sand it with the finer sand paper i had but i was being rushed by the dropping temps outside.
__________________
--Proud Boxster Owner/Tech,

Carlos J Cazares

FastForward Performance
http://i10.photobucket.com/albums/a1...er/newsig1.jpg
CJ_Boxster is offline   Reply With Quote
Old 12-17-2007, 11:17 AM   #9
Registered User
 
Join Date: Jul 2006
Location: Where the Sewer Meets the Sea, CA. USA
Posts: 2,695
Send a message via MSN to CJ_Boxster
Quote:
Originally Posted by Grizzly
So, when you fix the problem areas, will that be a re-re-re-re-re-do?
No, itll be only 4 Re's lol
__________________
--Proud Boxster Owner/Tech,

Carlos J Cazares

FastForward Performance
http://i10.photobucket.com/albums/a1...er/newsig1.jpg
CJ_Boxster is offline   Reply With Quote
Old 12-17-2007, 11:19 AM   #10
Registered User
 
Join Date: May 2006
Location: Annapolis Maryland
Posts: 1,528
Chrome paint has always sucked. Recently though, Eastwod Company came out with a new two stage chrome paint that looks pretty good and doesn't rub off.
__________________
http://i84.photobucket.com/albums/k2...izzlysmall.jpg
'97 986
Cheating Death on 19" Wheels
...no catastrophic engine failure ...yet
Grizzly is offline   Reply With Quote
Old 12-17-2007, 11:29 AM   #11
Registered User
 
Join Date: Jul 2006
Location: Where the Sewer Meets the Sea, CA. USA
Posts: 2,695
Send a message via MSN to CJ_Boxster
Quote:
Originally Posted by chaudanova
Wow, I like it! It looks somewhat close to the real alumalook, like on your door sill pulls. Well, from what I can see in the pictures. Can you post up some higher resolution close up pictures of it? How does the close up finish look, and which brand/paint-code did you use?

Thanks!

I used Dupli-Color Aluminum Chrome DA1684 and primer is Dupli-Color Sandable Primer DAP1692... The Tag on the back of the Aluminum Chrome just says Aluminum. The close up doesnt look so good cause i didnt take my time sanding it, i seen some problem areas this morning so when the weather gets warmer ill redo the entire thing.

FYI, NEVER use Krylon "Crystal Clear Coat" Its anything but Crystal Clear LOL, i used it on a test peice on saturday and sunday and it turned Chrome and Aluminum into a Primer Gray which is not what i wanted lol.
__________________
--Proud Boxster Owner/Tech,

Carlos J Cazares

FastForward Performance
http://i10.photobucket.com/albums/a1...er/newsig1.jpg
CJ_Boxster is offline   Reply With Quote
Old 12-17-2007, 11:31 AM   #12
Registered User
 
Join Date: Jul 2006
Location: Where the Sewer Meets the Sea, CA. USA
Posts: 2,695
Send a message via MSN to CJ_Boxster
Quote:
Originally Posted by Grizzly
Chrome paint has always sucked. Recently though, Eastwod Company came out with a new two stage chrome paint that looks pretty good and doesn't rub off.
Wish i knew that on friday lol
__________________
--Proud Boxster Owner/Tech,

Carlos J Cazares

FastForward Performance
http://i10.photobucket.com/albums/a1...er/newsig1.jpg
CJ_Boxster is offline   Reply With Quote
Old 12-17-2007, 04:58 PM   #13
Registered User
 
Join Date: Dec 2006
Location: chicago
Posts: 216
looks good to me dude, i like it
nice job
__________________
2001 White Boxster w/ Hardtop
18" wheels/painted console
de-ambered/6speed

A careful driver is one who honks his horn when he goes through a red light
-Henry Morgan
xxxalexxxx is offline   Reply With Quote
Old 12-17-2007, 05:05 PM   #14
Registered User
 
Join Date: Jul 2006
Location: Where the Sewer Meets the Sea, CA. USA
Posts: 2,695
Send a message via MSN to CJ_Boxster
Thanks! Itll be nicer and glossier when i redo it
__________________
--Proud Boxster Owner/Tech,

Carlos J Cazares

FastForward Performance
http://i10.photobucket.com/albums/a1...er/newsig1.jpg
CJ_Boxster is offline   Reply With Quote
Old 12-17-2007, 06:52 PM   #15
Registered User
 
Join Date: Nov 2006
Location: baton rouge
Posts: 840
The center console and up the dash looks great, I live that look.
__________________
99 TWIN TURBO Boxster 175k+ miles


Growing up the car magazines said how amazing Porsches are. Was I brainwashed? Somehow...I doubt it.

http://www.pcars.us/albums/10641_porsche_cars.jpg
Gary in BR is offline   Reply With Quote
Old 12-17-2007, 08:42 PM   #16
Registered User
 
Join Date: Oct 2007
Location: Dallas, TX
Posts: 295
Send a message via Yahoo to TimAustinW
Everything turned out looking great! What do you think about painting the faceplate to the climate control?

I'm in the process of painting my interior trim as well. I got factory match paint that matches my exterior from expresspaint.com (per suggestions from members of the forum). I decided to do the faceplate trim of the climate control unit as well and felt it helped unify the already painted pieces. It was pretty easy to remove the faceplate trim from the unit. Three screws hold the unit together and then there are some smaller screws that hold the faceplace to the led screens and buttons. Here's a pic with the climate control painted...

I've also partially painted the faceplate of the becker (ran out of paint, more comes on Wednesday). In retrospect it might be a little overkill to paint the stereo faceplate but I guess there's no turning back now. I gotta finish the job.

I also just finished installing the ipod adapter and ipod holder which I painted Seal Grey metallic as well. On wednesday I'll also be painting the upper frame of the console (trim above the vents)

Forgive the crappy flashy photo.
__________________
TimAustinW
http://i226.photobucket.com/albums/d...ignature-1.jpg
02 Seal Grey, NHP Headers w/ Highflow Cats/2ndary Bypass Pipes, smoked side markers/3rd brake light, exterior match interior trim, 986 Lloyds Mats, 986 deck lid emblem, arctic silver intake grills, ipod link, painted calipers, Glass Window Robbins Top with defroster kit, Bose Sound System, Leather lower door panels, Console Lid w embroidered crest; Stainless door sills; Painted Bumperettes; Custom Hood Crest

Last edited by TimAustinW; 12-17-2007 at 08:53 PM.
TimAustinW is offline   Reply With Quote
Old 12-17-2007, 09:00 PM   #17
Registered User
 
Join Date: Oct 2007
Location: Dallas, TX
Posts: 295
Send a message via Yahoo to TimAustinW
Here's a wider shot of the whole console.
__________________
TimAustinW
http://i226.photobucket.com/albums/d...ignature-1.jpg
02 Seal Grey, NHP Headers w/ Highflow Cats/2ndary Bypass Pipes, smoked side markers/3rd brake light, exterior match interior trim, 986 Lloyds Mats, 986 deck lid emblem, arctic silver intake grills, ipod link, painted calipers, Glass Window Robbins Top with defroster kit, Bose Sound System, Leather lower door panels, Console Lid w embroidered crest; Stainless door sills; Painted Bumperettes; Custom Hood Crest
TimAustinW is offline   Reply With Quote
Old 12-18-2007, 06:02 AM   #18
FTD
Registered User
 
Join Date: Nov 2007
Location: Atlanta, GA
Posts: 834
very sharp.
FTD is offline   Reply With Quote
Old 12-18-2007, 06:23 AM   #19
Registered User
 
Join Date: Sep 2006
Location: Naperville, IL
Posts: 793
Send a message via Yahoo to Chills
That looks great, CJ. I like it better than the blue you had before.
__________________
I bleed green

It's not about the summit, it's about the climb.


http://i133.photobucket.com/albums/q46/chills1138/2.jpg
Chills is offline   Reply With Quote
Old 12-18-2007, 06:34 AM   #20
Registered User
 
Join Date: Nov 2006
Location: New York
Posts: 644
Nice job CJ! Looks sweeeeet!!!!

dcporsche99 is offline   Reply With Quote
Post Reply


Posting Rules
You may not post new threads
You may not post replies
You may not post attachments
You may not edit your posts

BB code is On
Smilies are On
[IMG] code is On
HTML code is On
Trackbacks are On
Pingbacks are On
Refbacks are On


All times are GMT -8. The time now is 04:48 AM.


Powered by vBulletin® Version 3.8.7
Copyright ©2000 - 2024, vBulletin Solutions, Inc.
Content Relevant URLs by vBSEO 3.6.0
Copyright 2024 Pelican Parts, LLC - Posts may be archived for display on the Pelican Parts Website -    DMCA Registered Agent Contact Page