Finally had a nice weekend last week, so I bucked up and embarked on this project. I have never painted wheels before, so it was a learning experience.
Supplies needed:
Bucket
Water
Soap
Fine steel wool (for metal polishing)
Sponge
Sandpaper
2 rolls 3M Blue Painters Tape
4 trash bags
2 carpenters heavy duty trash bags
1 can Duplicolor Premium Filler Primer
2 cans grey paint (custom made)
1/4" auto detailing tape
1 can pink paint (custom made)
Patience & time
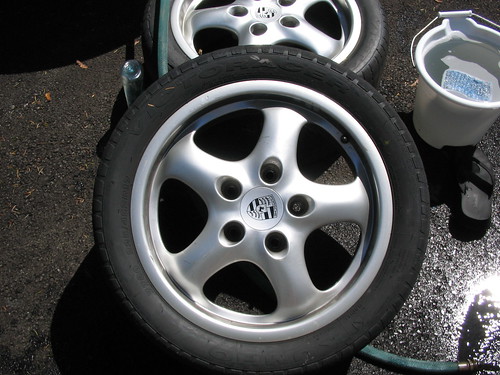
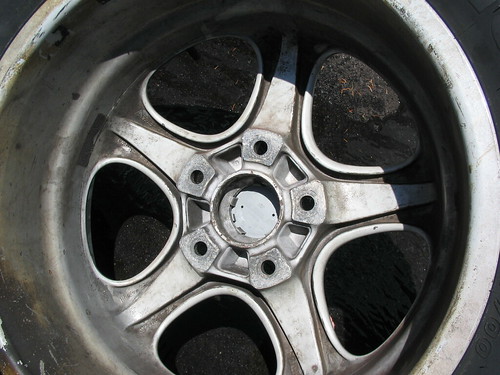
1. First, I cleaned my wheels inside and out extremely well. I'm talking every nook and cranny. I knew I wasn't going to paint the barrel of the wheel itself, but I figured since I was gonna be elbow deep in water anyway, I might as well clean the whole thing. It's -amazing- to see what steel wool can do cleaning wise. These are my race wheels, and I've never done THIS thurough of a cleaning job before.
Time taken: 4 hours
This is how they looked prior to cleaning.
2. Next was the sanding. I let the wheels dry for a good 30 minutes or so (was all the time needed because it was a good 75 degrees out, and I had direct sunshine on them). You made need longer. Sanding is fairly quick, but don't chince out on it. Take your time so that you give your paint something adequate to stick to! Make sure to get all the nooks and crannies. The hardest part was where the spokes met the barrel, and around the valve stem. Thankfully I have tiny fingers and could get em in there with a little work.
Time taken: 45 minutes
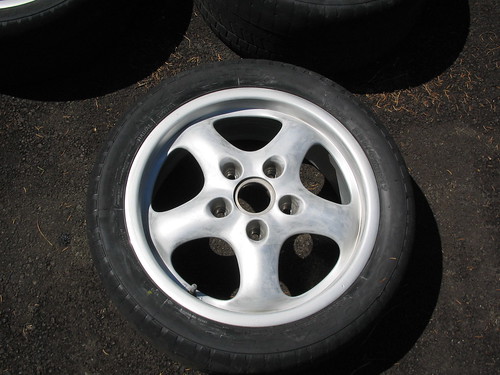
3. Now, back to washing. Another good scrub, but this time you shouldn't need the steel wool. Just make sure your wheels are as clean as humanly possible so that you aren't painting over dirt.
Time taken: 30 minutes
4. On to masking! This was the step that took the most patience. I didn't want to get my race tires unmounted to do this, so I had to adequately protect my tires from the paint. I took small pieces of 3M blue painters tape and stuck it in between the edge of the wheel and the tire, and kept doing it until I went all the way around. There was probably about 75 pieces of tape that it took to do that adequately. Then I added a whole extra line of blue tape around the tire to hold down the first set of smaller pieces. Then, I cut up four trash bags and taped them, overlapping by at least 5 inches on each side, around the top side of the tire. Then, I turned the tire over and taped the other edge of the trash bags to the inside of the barrel, making as nice a line around the inside as I could. I knew some paint would go through, and so I figured if I made a nice solid line just at the underside of the spokes it would look a lot cleaner than just overspray splotches. Next, I taped off all the places where the bags overlapped and taped off the valve stems.
I knew this was going to be time consuming because of how picky I am, so this entire stage I did inside on my coffee table. Thank goodness I don't have a wife

I watched 5 episodes of Battlestar Galactica in the meantime. Oh, btw, I went through a WHOLE roll of blue painters tape just in this stage alone.
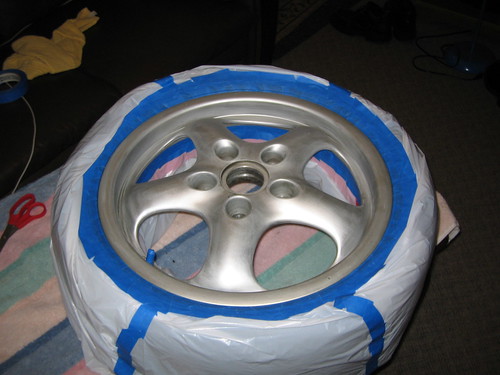
Once I had all four done, I took em outside and put them on two cut open carpenters trash bags.
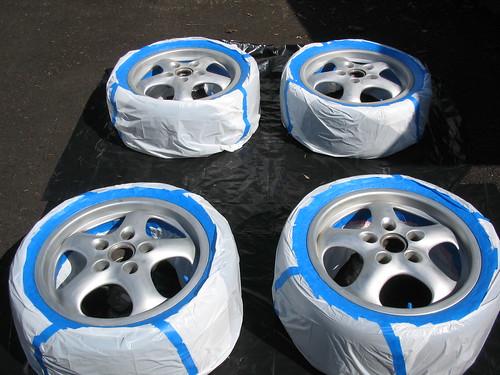
Time taken: 4 hours
5. Primer time! I bought Duplicolor Premium Filler Primer because my wheels had a few nicks and rashes. I figured the more I could fill them in the better....might as well, right? I started using EXTREMELY thin layers. Everyone I talked to who had done this before said to do lots of thin coats, else you'll get a run and you'll have to start all over again. After all the time I took to prep, I wasn't going to do this again. So, I did about 6 very very thin layers, with 10 minutes in between each layer. Looking back, I wish I had done more, but such is life. The 6 layers I did probably barely equated to one regular coat, but with how the grey of the primer matched so closely to the silver of the wheels to start with, I couldn't really tell how thuroughly I had covered everything. How this may affect me in the future... well, only time will tell.
Time taken: 1 hour & 15 minutes
6. Time to man up and put on the real paint. I waited 30 minutes for the primer to dry a little more, and then went to my color. It was a custom color I got done from a place here called Paint Masters. I got a whole book full of color swatches, and pointed to the color I wanted, which they then made up into two cans of spray paint for me. Each can cost 22.95. I again did very very thin layers to start, waiting 10 minutes in between coats. After about 15 coats I decided that I could definitely do a little more per layer and not be worried. So I started spraying on a little more (about 3 of my previous three layers) at a time. It took me about another 10-15 coats before I exhausted the last of my two cans. Ideally I would have liked to do maybe 2-3 more thin coats, but I was definitely happy at the end of the two cans.
Didn't get a picture of this stage...thought I did, but apparently it's not on my digital camera

Time taken: 5 hours
7. I left the wheels to dry outside overnight. The benefit of having done thin layers like I did was that they dried VERY fast. I probably didn't even have to wait 10 minutes between layers, but it gave me the benefit of any tree crap or grass that floated onto the top of the wheel was easily removable with tweezers and didn't leave any marks. This is why I wasn't worried about leaving them out... there was also no chance of rain, so I wasn't worried about that either.
8. The next day I was going to start masking off the lip of the wheel, and I was asking some people if they had any suggestions on how to do a very precise line easier than just time and patience. I knew I could do it, but knew it would just take a while. At this point, someone I knew offered to do the masking for me because he had painted wheels a lot. I wasn't going to pass that up, so I took them over to him and he taped em up for me. He said they were a pain and took him about an hour each.
Time taken (not mine): 4 hours
9. I picked the wheels back up and proceeded to do the lip in the same manner I had painted the center portion. Only difference was I didn't do such extremely thin layers, though they were definitely still thin. Proud to say I didn't receive a single drip or run on any section. Waited 10 minutes between coats, and applied about 10 coats each.
Time taken: 2 hours
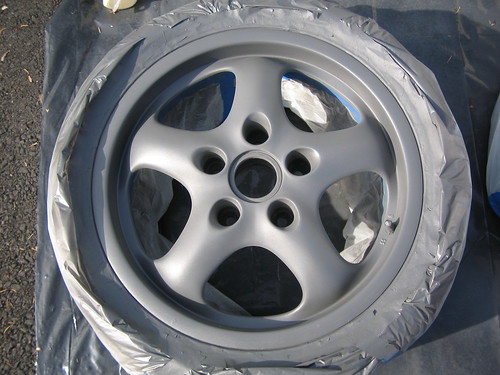
Final product:

Once I have my car back from the shop, I'll put them on and get a picture of the whole thing (you have to remember that when I race, I have pink numbers, a pink helmet, I typically wear a pink shirt, etc... I'm known as the Pink Porsche Princess, heheh).
Total time: 17 hours and 30 minutes, not counting overnight drying time. This time could probably be cut a lot if you were not as picky as I am about masking off, and if you didn't have to clean your wheels very much.