As part of the tear down, I am cleaning many components which I wont be replacing. Once of these are the Variocam adjusters. So I have searched the net looking for info on there magical devices and some does exist, but there is not much that shows some of the internals. Understandably so when we consider the cost of these. There also seems to be no way to refurbish them.
I had originally used paraffin on one of the adjusters and a ultrasonic bath to clean it and I thought it cam our well. When I went to do the bank 2 adjuster I actually saw some of the brown plastic from the guides in the same bag, which there should have not been any. On closer inspection and through some dismantling I found more fragments, some even blocking the holes on the piston visible. So I decided to take the risk and dismantle these and use a ultrasonic sensitive detergent at around 45 deg C and totally flush out the parts.
So here is a caveat, I do not recommend repeating this experiment as at this time I do not know if it will fix or damage the part. I am only sharing what I did and my observations and not recommending the following to anyone to repeat.
Each bank has differences, not only in the solenoid but also in the unit itself. Bank 2 has extra holes which oil is pushed through that bank 1 doesn't, also more importantly, there is a oilway at the top of bank 2 and this is on the bottom of bank 1
Below are some photos after the units were cleaned.


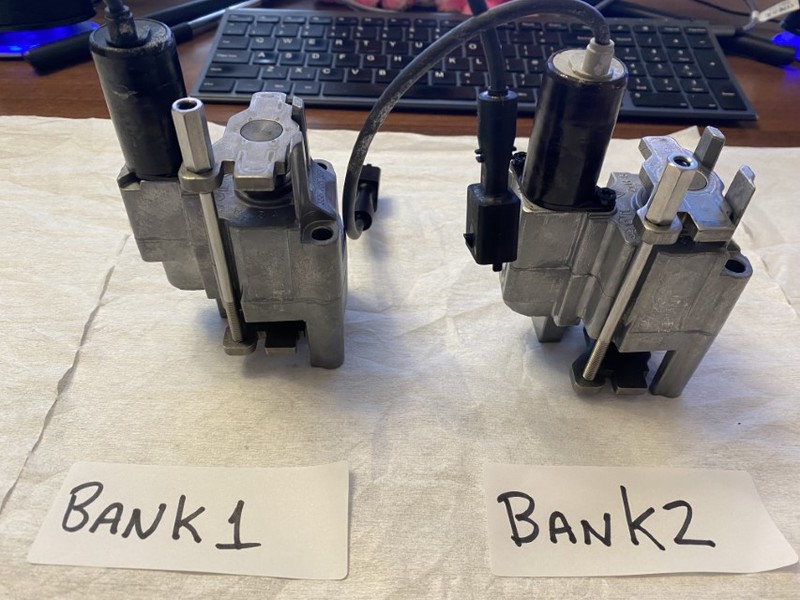
Apart from the difference in part number stamped on each unit, there is a stamp indicating which cylinder it is intended for visible on the top of each unit next to the solenoid
So how I cleaned the units was to dismantle each one, one by one as not not mix up the internals.
Below are the internals for Bank 1
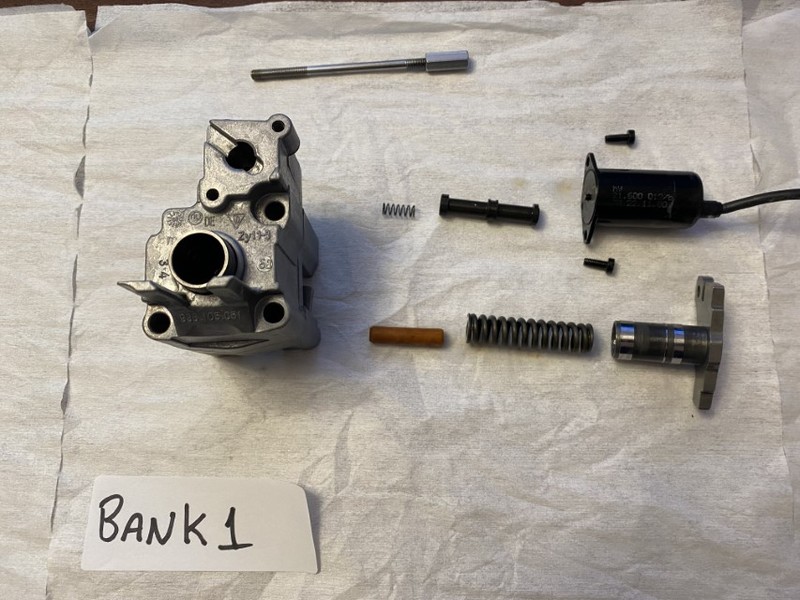

I next put the parts, not including the solenoid into an Ultrasonic bath with a sensitive detergent (metal and rubber) at 45 deg C for 10 minutes. I then gently moved the piston in an out (and I mean gently) and wow, the crud that came out and yes some more small pieces of plastic. On bank 1, there are only 3 or 4 places where fluid goes in and out so I just watched these as I GENTLY moved the piston. I then repeated the bath for another 10 mins and repeated GENTLY moving the piston and wow, even more crud and small pieces of plastic. Dont get me wrong, it was only 1-2 very small pieces but they were still there.
Between each 10 min clean I rinsed in warm water, submerged and gently moved the piston. I repeated one more 10 min clean in the batch.
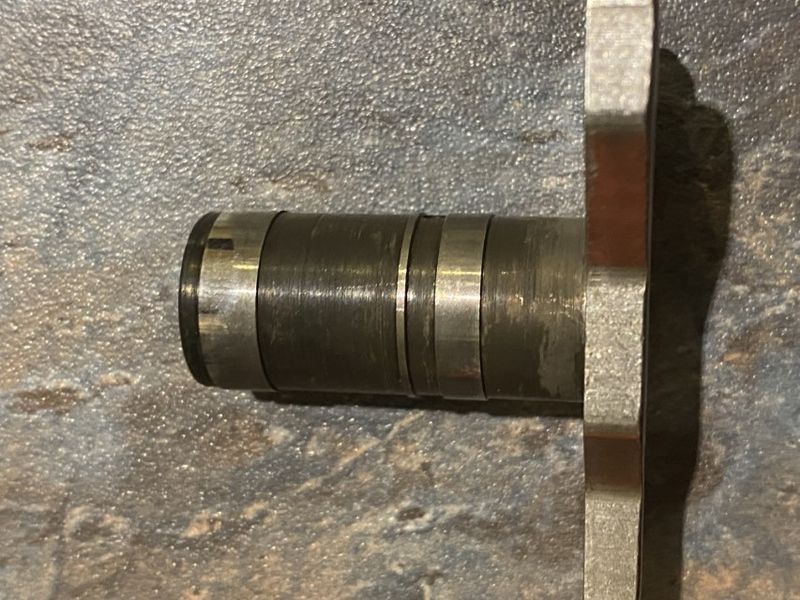
I then polished the piston in the middle (below) and using a shoelace and oil only I polished the main piston in the unit.

BTW, before cleaning the pistons did not move freely, either the one inside the main or the main. Following cleaning, I submerged the unit in fresh oil and gently moved the piston to prime it and removed as much water as possible. Yes there will be some water remaining but this will hopefully be removed when I break the engine in following the rebuild and the 2-3 oil changes I am planning post run in. The amount should be insignificant....hopefully
