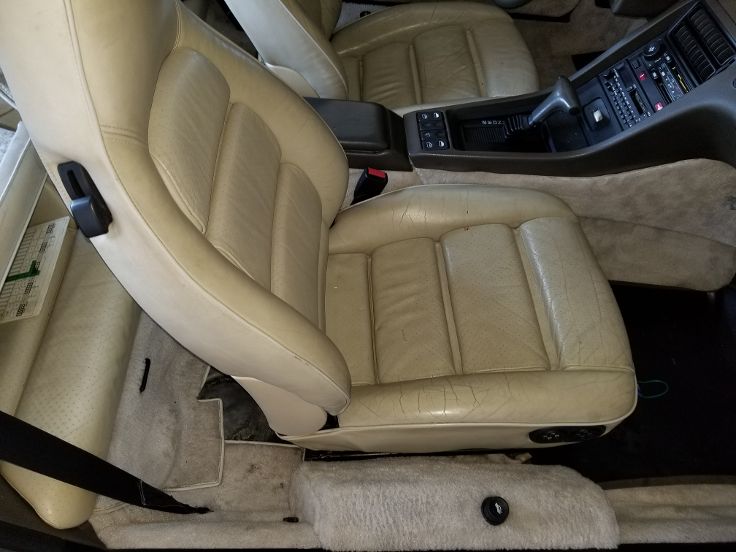
I was searching the interweb 2 weekends ago for a windshield molding clip and accidentally found the plastic seat gears I stripped back in April on the passenger seat when I attempted to move the seat forward with the manual crank. I had left that project off my To Do list since I figured those gears would be unobtainium. But there they were on our favorite sponsor’s website. Finding them inspired me to pick the baton back up on this job. Ordered them both (wasn’t sure if I needed one or both) and went to work Mon morning to see if I could get the seat out. To refresh your memory, Porsche in its infinite wisdom holds a 928 seat in place with 6 bolts – 2 in front and 4 (?!?) in the rear. I could move the seat back far enough to get the 2 fronts out. I could move the seat fwd enough to get the 2 rear bolts out but not the 2 fwd rear bolts. Cranking the seat with the manual tool got it fwd almost enough to get the bolts out but I needed a good ½” to get an allen wrench on them. That’s when the gears broke and I left it to marinate.
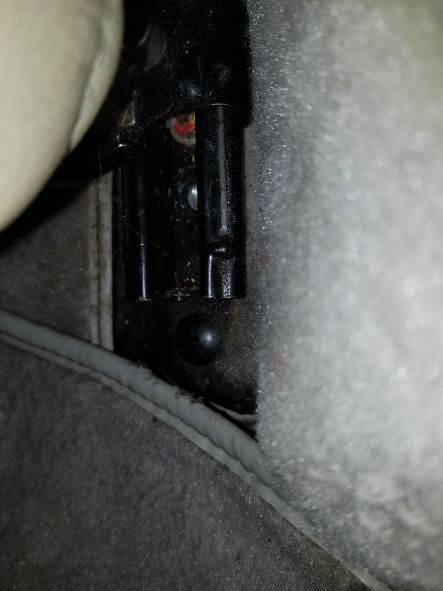
With the seat bottom lifted as high as it could go, from the front I removed the motor with 1 of the gears attached then the other gear which was held in place by a snap ring (which went flying off somewhere). This gave me access to the square cables that run the seats. I popped a drill on the left cable and was able to move the left side fwd enough to get to the bolt on the left track. I removed the fwd one and put the rearward one hand tight so the seat wouldn’t flop around. When I tried the drill on the right cable, it moved slightly fwd but not quite enough to get to the fwd bolt. Still needed ¼ to ½” to fully access it. The cable seemed stuck or jammed or as far as it would go, so I didn't want to go any farther and cause damage. So close but yet so far.
I posted a question on RL to see if anyone had any ideas. A couple were proffered, however, by now it was 100 deg so I waited until the next day to try them.
Tue morning I looked to see if either suggestion would work. Nope. I went back to the right side cable. It had a protective plastic cover on it, with the end being a fat nozzle. This prevented the drill from getting a decent grip on the cable. So I removed the plastic covering, which gave me more cable to insert into the drill. Made sure I had the drill tight on the cable and gave it a slow twist forward. It moved. I now had enough room to get to the final rear bolt. Success!

I lifted the seat off its base, unplugged the power cord, and then rested the seat on the center console and door sill. I cleaned the threaded slide bolts (had already gotten the majority of the crap off earlier this spring) and then shot some lithium grease on them. Ran them back and forth with the drill and they ran well. Then measured them up so each side was in the same place. As I removed the seat, the snap ring that went flying was on the trans tunnel carpet. Yay! I hauled the seat into the basement where I'll do more cleaning on the tracks later. I also wanted to do some work on the switch I installed earlier this yr, as it felt like 1 or 2 of the steel balls may have fallen out of place.
With the seat out, I could turn to cleaning the area under the seat. This is the last spot in the interior I had left to clean. There's still a bit of funkiness in the interior and I'm hoping getting this area cleaned will eliminate the remaining smell. It defn needs some cleaning.
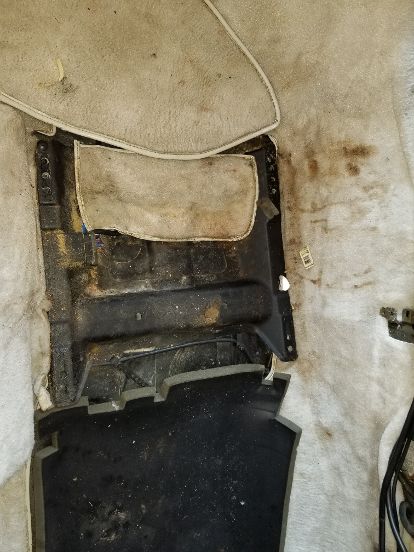
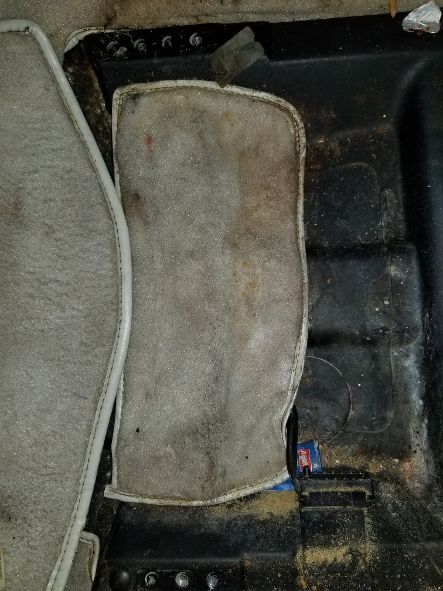
I also fished a lot of coins out from the track by the console. None of them were deformed but they don't need to be in the track area. Turns out it was $1.63 and with the remaining change from the driver’s side, I’ll parlay it into a PowerBall ticket. Might be inclined to keep the shark if I win the jackpot. Keep your fingers crossed…
The new gears arrived Fri afternoon so yesterday I began replacing the snaggle-toothed gears. Turns out both gears were missing teeth and ordering both gears was the proper call.
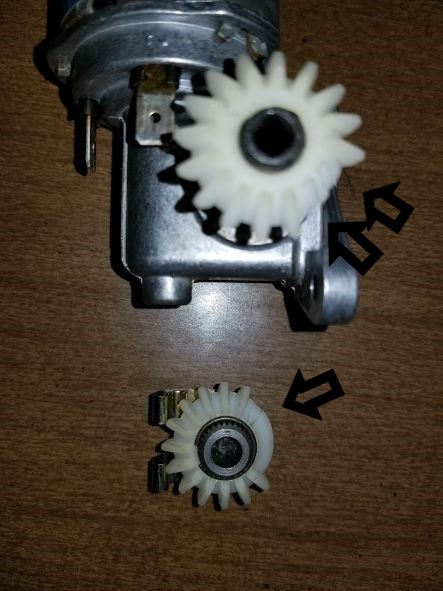
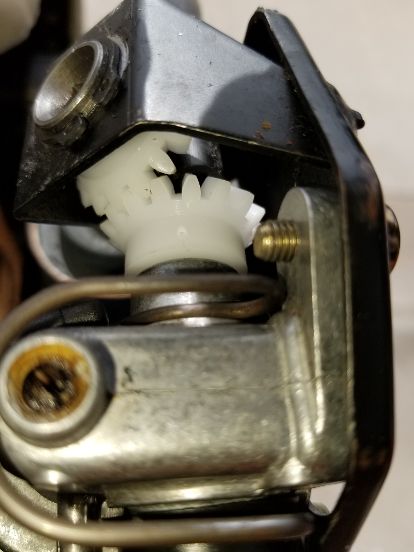
Both were held in place by small snap rings. I was trying to decide how to remove them without having them fly across the garage. Both came off with relative ease. Got the new gears on and the snap rings back in place. It took some effort to get the final snap ring on that held the gear in seat frame (the one that went flying). I needed more hands than I had available. I ended up wiring the gear to the frame and popped the snap ring on. Took quite a bit of effort but I got it.
I laid the seat on its side so I could use gravity as my friend when resetting the seat switch. Took a couple of attempts to get it where I liked the movement of the switch.
I’m ready to put it back in. Get it dropped into the car and plug the cable back in. Put the 4 rear bolts in. Hook up the battery to allow me to move the seat back to expose the front holes. It moves backwards just fine. I try moving it fwd. NOTHING. Crap. I need to take the seat back out to see what’s wrong, but since it won’t go fwd, THE REAR BOLTS ARE COVERED! Double crap – I’m right back where I started. I’m thinking I’m going to have to tear it all apart again and use the drill to get it to move fwd. Dadgummit. Then I realize I have the manual crank, so I give that a try. It moves fwd enough I can access all 4 rear bolts. Whew!
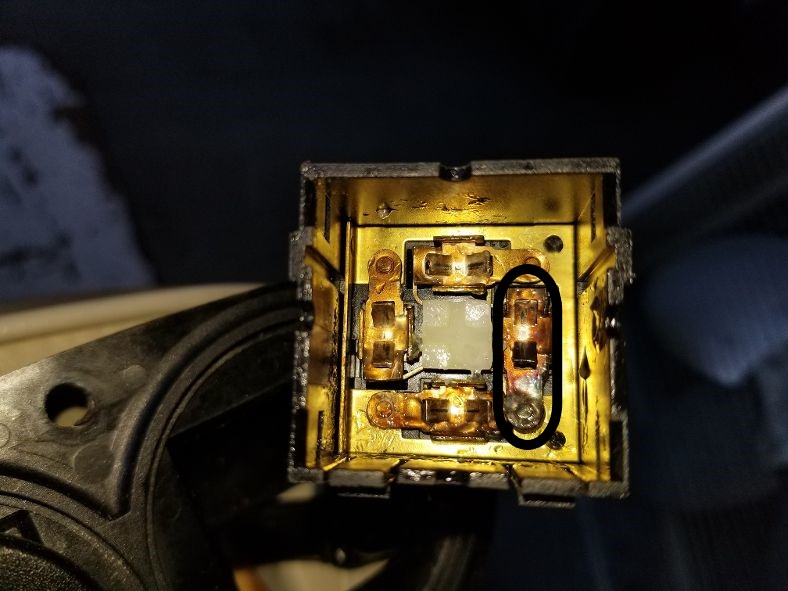
After removing the seat, I laid it on its side and popped the switch out of the case. It looked like the fwd motion copper blade had some solder or JB Weld or something on it. Must have had some issue before and was “fixed”.
Remember back in April I pulled the new switch out of the new case so I could pop it into the old case in the seat. It looks like I need to replace the old case with the new case. Now that the seat is out, that’s not a big deal, just have to document where the 6 wires go, cut several zip ties that hold it to the other switch wires and pull it out of the enclosure holding the case. It gives me a little struggle but succumbs.

I popped the new switch into the new case and decided to call it a day since I needed to mow the lawn. I used that time to plot how to fish the new switch wires through a very small area.
Today I began by tying a 12” twist tie to the wires and snuck the twist tie exactly where it needed to go. The wires came thru perfectly. Referenced my documentation pics to be sure the wires went where they belonged. Of course the new wires were different colors but thankfully were the proper length for the various locations they belonged. I guessed on 4 of the 6 wires as to polarity but thought I had them. Put the seat back in, connected the power cord, and put the 2 rear bolts in hand tight. Did a tiny rear motion, then fwd. It worked. Pressed the up portion of the switch. It went down. Pressed the down button. Nothing. Hmmm. Removed the rear bolts and swapped the wires on the up-down motor. Put it back with the 2 rear bolts hand tight. Pressed the up button. It went up. Pressed the down button. It went down. Perfect! Everything was working as it should. I removed the rear bolts 1 more time and stuck a couple of zip ties on the wires. Put all 4 rear bolts in, moved the seat back and put the 2 fronts in. Done and working as the good DR intended. And a job done that I wasn’t looking forward (pardon the pun) to tackling.