Now that everything is clean(see previous post), time to move on to a brake fluid flush. I gave all the nozzles a squirt of AeroKroil and crossed my fingers. All 8 easily broke loose and I got the flush completed. The fluid that came out looked a bit like Coke, but now has a nice amber glow. Maybe the normal maintenance items were going to be more routine.
Next up was changing the brake pads. It looked like a simple system, even simpler than a 987.
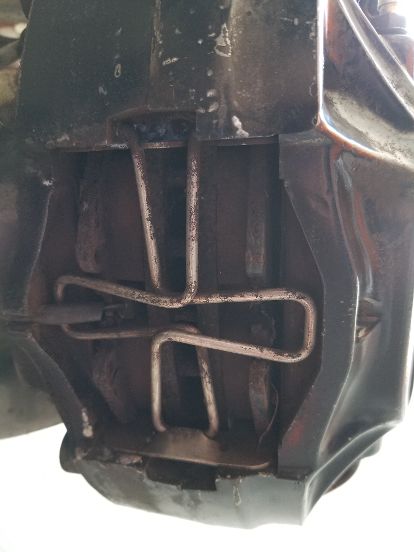

You pinch the retaining ‘spring’ with a vise grips and then swing one of the ends free from the caliper. Carefully disconnect the pad sensor and remove the pads. I started with the left rear caliper and it took me a bit to figure out the best way to do everything, but the old pads came out and the new ones slid right in. Easy peasy. This shouldn’t take long. On to the right rear.
The spring and sensor weren’t a problem. The inner pad wasn’t either. But the outer pad got part way out and became stuck.
It wouldn’t budge any farther. The caliper was held on by 2 19mm bolts. Based on previous history, I wasn’t looking forward to the upcoming fight. Got a breaker bar and ½” drive 19mm socket onto both bolts and thankfully both came loose. With the caliper free, I was able to hammer the offending pad out. The new pads slide right in w/o issue. On to the left front.
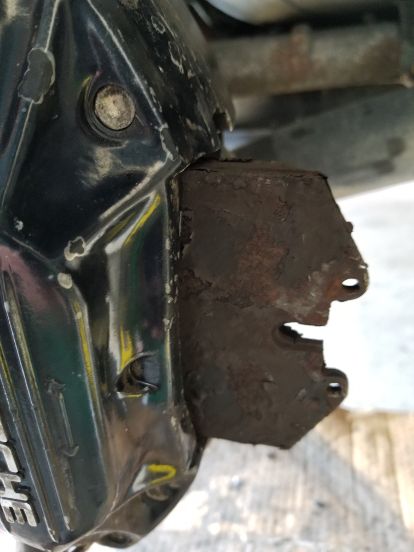
The outer pad gave a bit of a fight. They have a couple of holes drilled in them, so I looped a couple of wires into the holes and then stuck a long screwdriver into the loops. Gave a good pull and the pad came out. The inside pad wasn’t as cooperative. It didn’t want to come out at all. I decided to chip the material off the pad to give it more wiggle room. Surprisingly, the pads on all 4 wheels had quite a lot of material on them (they looked almost new), so removing the material on this one would give it a lot more room to maneuver. But it would only come about 25% out.
The front calipers are held on by 2 bolts with a 10mm hex indention in them. Once again, not looking forward to pursuing that fight but I got my 10mm hex socket out along with the breaker bar. Gave the 1st bolt a careful push and it turned! Except it was the socket turning inside the bolt, which was petrified and not budging. Didn’t bother trying again and fully stripping it and since the 1st bolt wasn’t coming out, no need trying the 2nd. I had to get the pad out with the caliper in place.
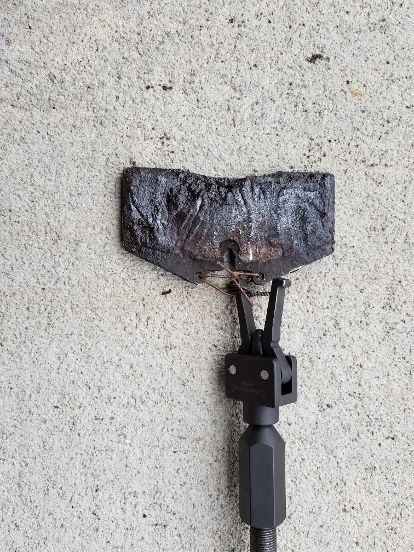
So I put my thinking cap on and decided to build a puller.
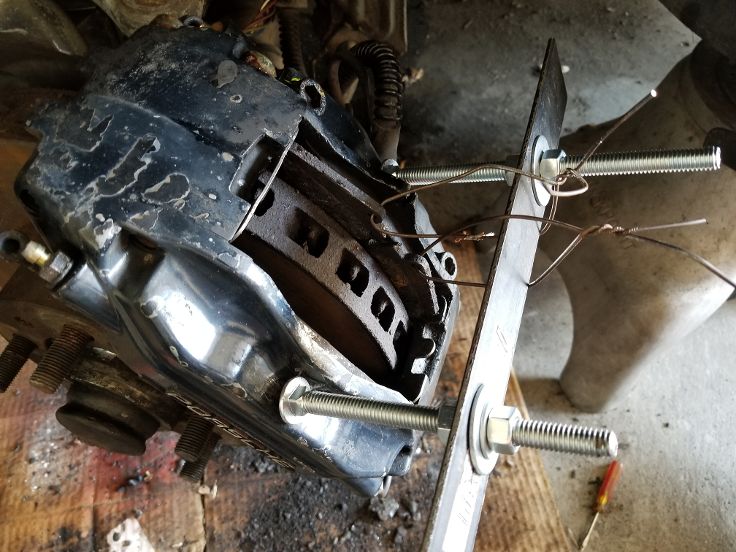
I looped a couple of wires over the plate and then screwed the nuts to move the plate up. It got the pad out a shade further but 1/3 out isn’t good enough. The plate started to bend, which caused the carriage bolt heads to slip off the caliper. Rats!
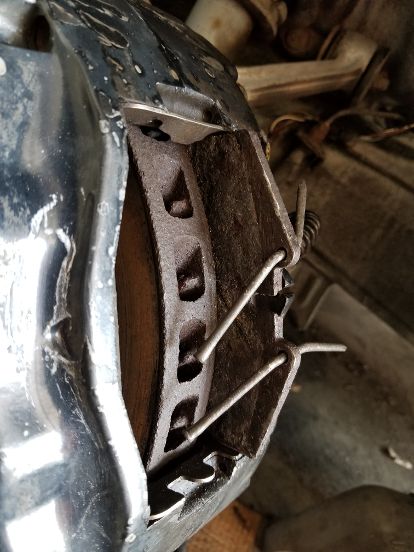
At this point I decided to try the right front. Maybe that side would cooperate. I don’t normally like to take both sides apart so you have no reference point to look at, but these were so simple it wasn’t going to be an issue. Got the outer pad out with a bit of a struggle, but the inner was just like the left side. I chipped the material off it too. Here’s a shot of how much room it had but still wouldn’t come out. Also note the caliper hex head bolts.
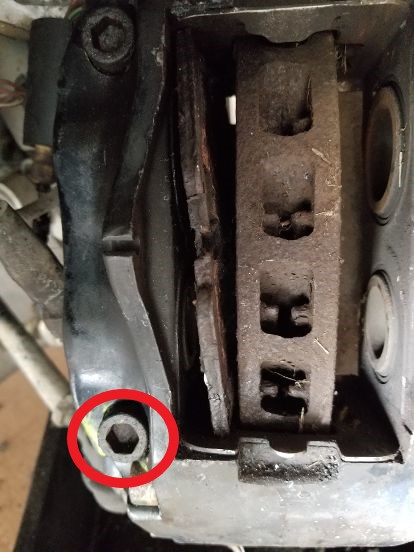
Having the pad at that much angle should have been enough to release it, but it was just as stuck as the left side. So I went to O’Reilly’s and got one of their loaner gear pullers. Got the smallest one they had. Tried sticking one of the arms down the opening, hoping to catch the pad on the hook of the arm. But the arm was too fat and it wouldn’t fit. Double rats!
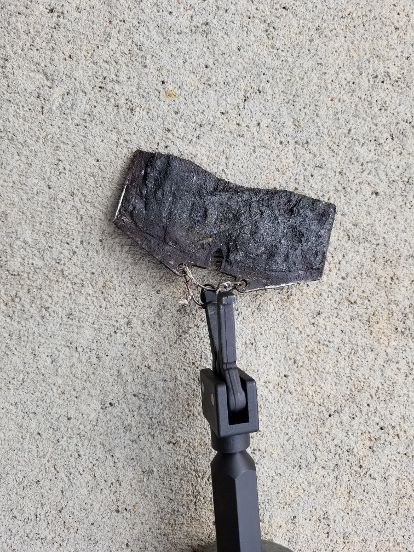
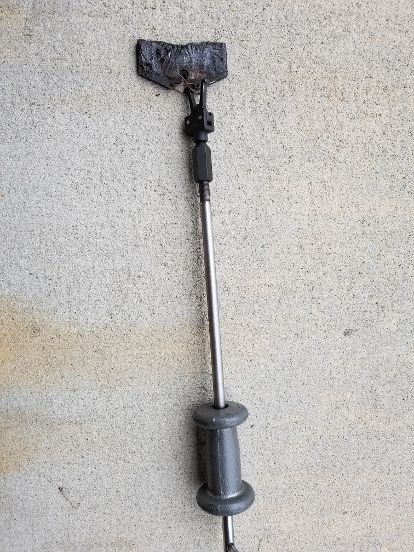
Got on the Internet to see how much slide hammers were. There was one at Home Depot that had an attachment that looked like it would work perfect. But it was $55. I didn’t really want to spend that much, I wasn’t sure if I needed another new tool (already up to 13 new tools on the project), and wasn’t sure when the next time I’d need a slide hammer. Took the gear puller back to O’Reilly’s and asked if they loaned slide hammers. They said yes! But the only attachment they had that would kind of work was shaped like a V with hooks on the ends.
The V was too short and fat to slide down the pad side and hook it, so I had to come up with some way of wiring it to the pad. I tried several variations of wires but each would break. However, I could see it was slightly moving the left side pad. I tried a thicker wire in the pad and then wired one of the V sides to it. It took a couple of wire reloads, but the pad finally submitted.
Moved to the right side with the correct formula. Took a couple of attempts but that pad finally came out too.
Now all I had to do was slide the new pads in and I’d be done. Except they wouldn’t slide in. Even if they did go in, they would never slide back and forth. So fired up the bench grinder and took some extra material off the edges. Once they easily fit, I added a dab of paint onto the exposed metal. Popped them in and buttoned them up. Finally done!

What should have taken me the better part of an hr took me 4 days. When I originally looked at the pads, I thought about not changing them since there was so much material on them. But there’s no way they would have worked properly being rusted in place. At first I thought maybe they were cheap Chinese pads that were a tad oversized and easily rusted from not being used, especially when the new rears slid in without problems. But since the new fronts had trouble going in, I’ll have to rethink that. At least the next owner shouldn’t have issues the next time they need changing.
When I got in and pumped the pedal a few times, the pedal became rock hard and I mean ROCK hard. Looking fwd to trying the brakes on the street. They should be really good.
Onward and upward.