The lack of starting is pointing to 2 possibilities the LH computer or the crank position sensor. Since the tach wasnt bouncing at ignition, the CPS was a likely candidate (plus it was only $50 for a replacement vs $500 for a computer rebuild), so thats where I started.
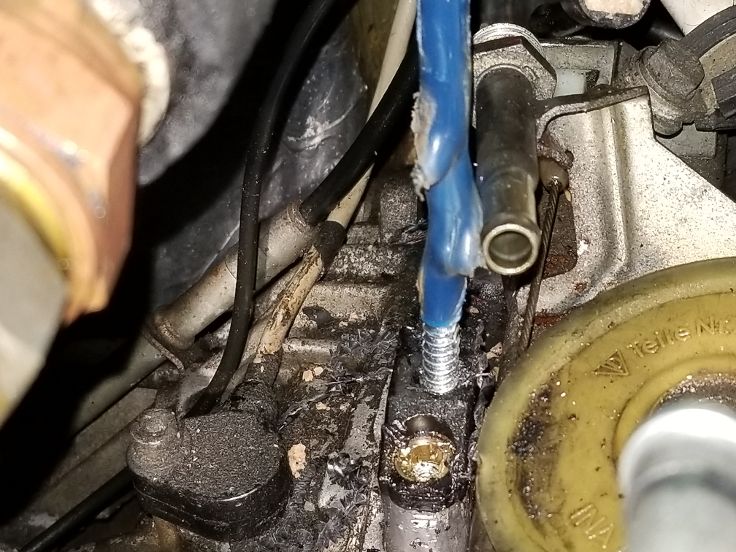
Like any CPS, its located on the flywheel and is in a crappy spot to get at. On the 928, its on top of the bell housing at the back of the engine. Wouldnt you know, I had to remove 2 of the fuel lines I just put in along with several other items to get to the CPS. At least this time the fuel lines didnt fight me. There were a couple of items that I couldnt remove unless I wanted to take the intake manifold off, which I didnt, so I worked around them but they made life a little more difficult (whats new?).
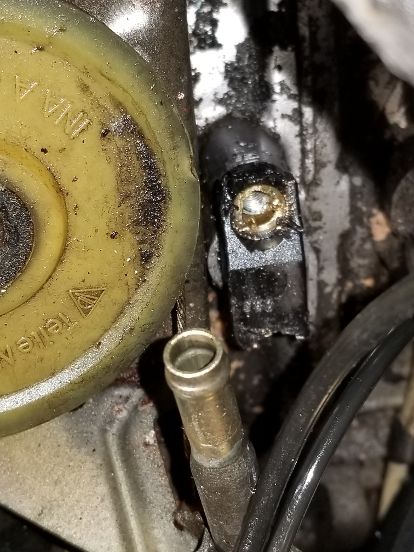
Of course the CPS was stuck in the hole. I was able to get a claw hammer onto the chord section of the CPS and I gave several yanks hoping it would release it. All that did was break a portion of the T off.
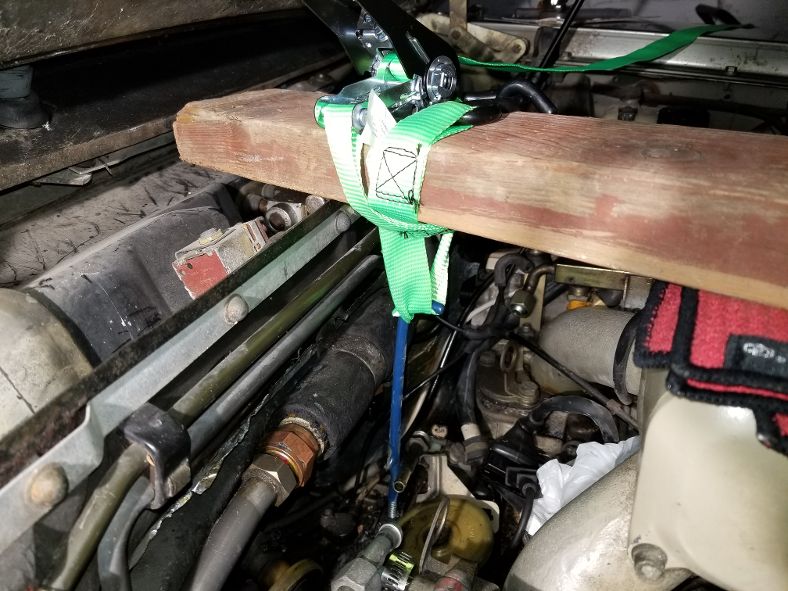
Next attempt was to drill a hole in the CPS, put a lag bolt into it, and try to tug it out. Due to remaining parts in the engine bay, I wasnt able to use a normal drill and drill bit, so I bought several 12 long bits and they worked fine. I set a cpl of 2x4s across the intake manifold and firewall and ran a rachet strap around the lag bolt.
Unfortunately, when I tightened the strap, the bolt just pulled out of the CPS. I was able to get the bolt back in a 2nd time, so I left some tension on it overnight along with generous squirts of aerokroil hoping in the morning it would pop out. Nope, the lag bolt came out without the CPS. Time for more drastic measures. I chipped the top part of the T off.

Next began a series of steps to remove 4 sections of the lower part of the T. The first layer is about ¼ of solid plastic. I drilled a bunch of holes and got the majority of the plastic out. However, there were plastic remnants in the hole and the edge wasnt smooth, which was going to be necessary for the next step. So I bought a Dremel extension with the hope of using it on the cheap Dremel knockoff Id bought at Harbor Freight to use on the gas tank removal. Naturally the cheapo Dremel wasnt made for attachments, so I tried hooking the extension on my drill. That didnt work either. So I broke down and bought Dremel 200, which took the attachment. I was able to get the 1st layer clean, nice, and level.

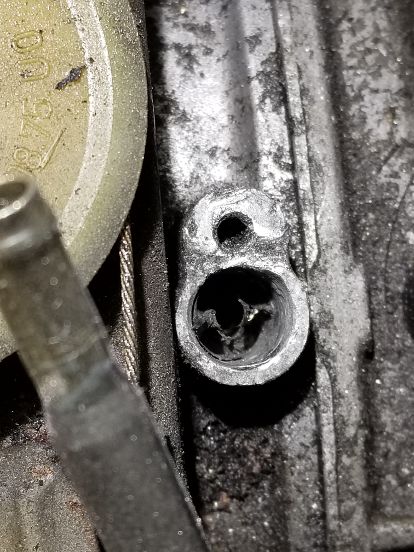
As you can see, theres a rare earth magnet in layer 2. Its not something you can drill out, so you have to drill around the edge of it and pull it out. Its about 1 long.
Once I got it out, there was some more clean-up work to get to the next level.
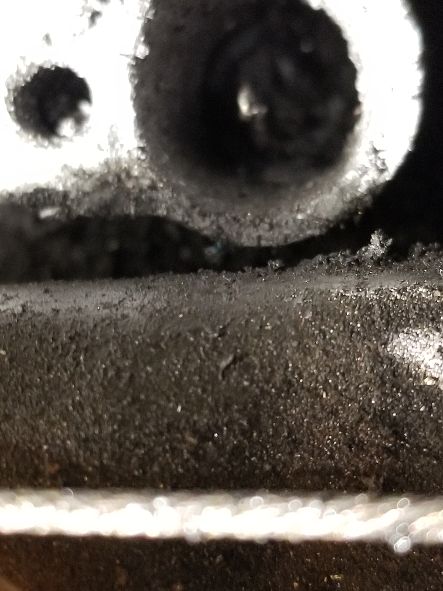
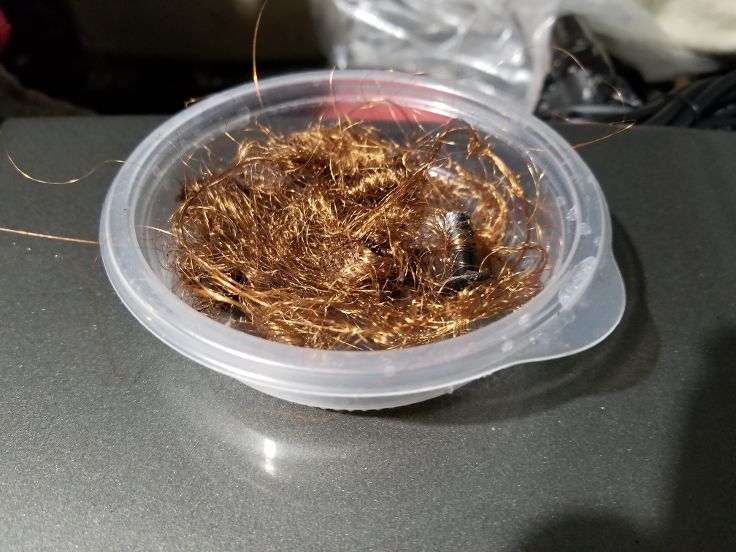
Next up was extracting the voluminous amounts of cooper wire strands. It took a lot of picking with a needle nosed pliers.
Now all that was left was the aluminum cap at the bottom. This was going to be the trickiest step, as you need to crimp the cap inward with a screw driver and pull it out with the needle nosed pliers. I got it crimped but could never get it pulled out. Worked on it for 2 days. Then my biggest fear occurred it became too loose from crimping and fell down the hole and on top of the flywheel. Crap. I can reach it with a pliers but it wont pull thru the hole. I have 2 options now. Im going to attempt to grab it with some mechanical fingers but I dont think thats going to work. Option 2 is to pull the plate off the bottom of the bell housing and rotate the engine and the cap
should work its way out the bottom. What could go wrong?
The only silver lining with this last option is I needed to pull the plate anyway to check the thrust bearing play. However, Ive been avoiding this procedure because the plate is held on by 6 bolts and 2 of the bolts are impossible to remove unless you drop the exhaust pipe. Im sure those 30 yr old exhaust bolts will jump off without issues. The articles on RL say to not put those 2 bolts back on the plate and I was hoping there would only be 4 bolts for me to take off. But no, all 6 are there, which probably means the thrust bearing play has never been measured (it seems the Achilles heel of 928 32V automatics is not releasing the tension on the flex plate once a yr). So Ill start that adventure in the hopes I can finish the CPS extraction at the same time.