First of all, I realize that my 2000 Boxster S no longer has the original engine... but the exhaust that I made can easily be adapted to almost any 986 setup from the axles back.
Having a non-conventional engine in my Boxster, there are no off-the-shelf solutions for exhaust systems. Even if I tried to use an existing Porsche muffler, it's not very conducive to higher HP / bigger engine displacements. I needed a true dual 2.5" system for my application.
My proof-of-concept exhaust was a simple pair of cheap glass packs that I welded to some old mandrel bends I had laying around the garage. It worked OK, but the placement of the mufflers had them rubbing against the trans-mount cross member. It was tight. Really tight. Additionally, it was loud. REALLY loud.

I wanted to incorporate some form of an X-pipe or crossover pipe, so I went looking for dual inlet / single outlet mufflers. Almost every style of 2-in / 1-out muffler was configured for a longitudinal (front to back) setup. There clearly wasn't enough room for this style.
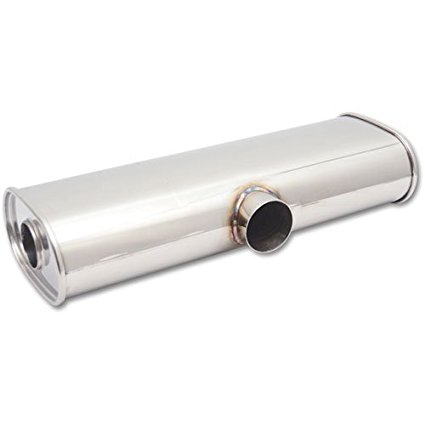
However, I found a muffler that I believe was originally designed for a Mitsubishi EVO that which might fit the bill. It's intended to be a 3" single inlet with dual 2.5" outlets... but is also a perforated tube design meaning I should be able to run it backwards with no compromise in flow.
https://smile.amazon.com/gp/product/B0031TQE84/ref=oh_aui_detailpage_o00_s00?ie=UTF8&psc=1
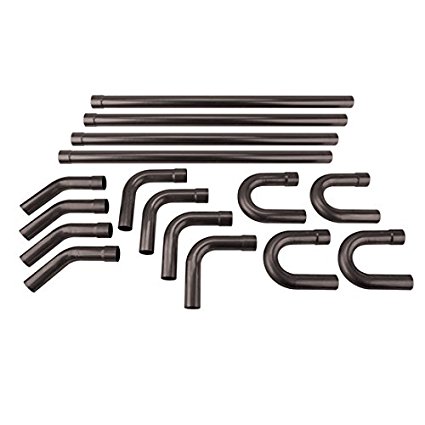
To get this to fit, I was going to need some mandrel pipe bends. I found this deal for a huge assortment of mild steel pipes. Sure, stainless would look better... but is also twice the price and I'll be painting the pipe with high temp ceramic paint when I'm done anyway.
https://smile.amazon.com/gp/product/B01I47IEY4/ref=oh_aui_detailpage_o01_s00?ie=UTF8&psc=1
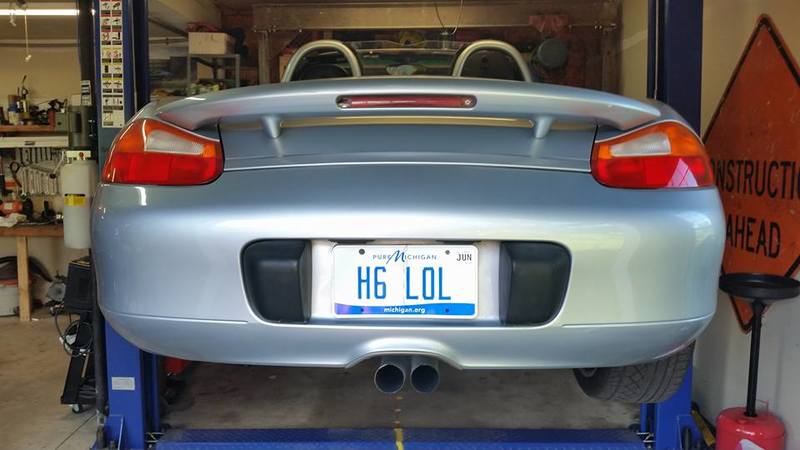
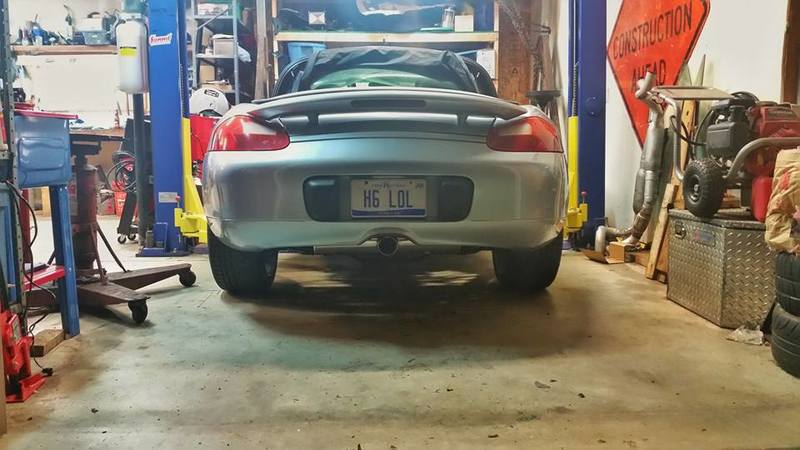
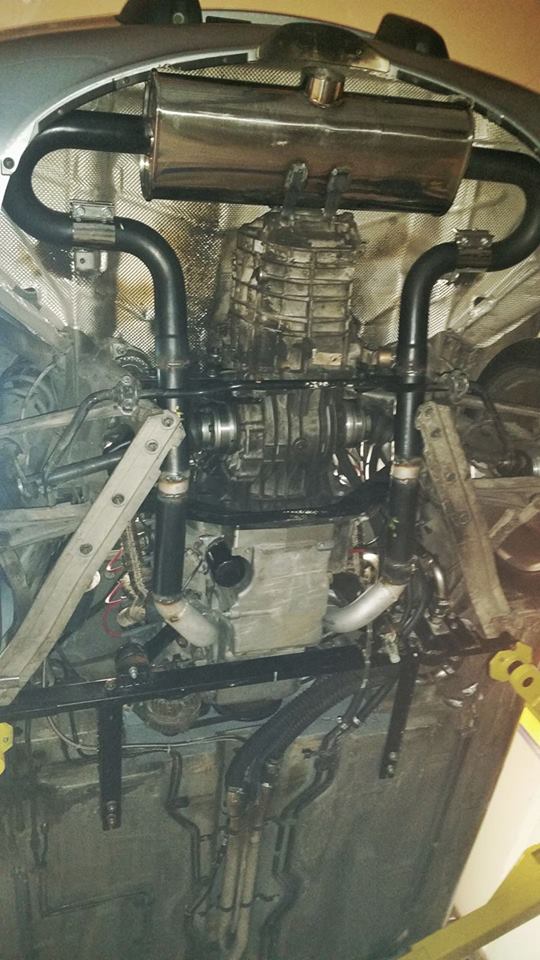
The fitment of the muffler in the Boxster is "good". I wish it tucked up underneath the bumper another inch, but I'm otherwise happy with it. I did have to trim a very small section of lip from the inside of the bumper skin (you'll never see if from outside the car) but that's mostly because my transmission is set back an additional 1.5". A stock located transmission shouldn't have this problem. I also decided to angle the tip downwards about 15-20° to help tuck it up higher under the bumper.
Running the pipes was pretty straight forward once I committed to a plan. I used two of the 180° bends and two of the 90° bends that came with my pipe kit. I did cut up two short sections of the old exhaust (those are the grey pieces) to get the smaller bends I needed.
For ease of installation and maintenance reasons, I use a band clamp between the 180° and 90° bends.
Additionally, you may notice that I do not have any flex pipes in my design. Since all of my exhaust points are mounted to either the engine or transmission, I technically don't need any flex joints. Would I like a flex joint for added piece of mind? Yes. Did I have the space or patience to add one in? No. It was a beautiful week and I just wanted to get this done so I could go driving.

Time will tell if I actually need to add a flex joint or not.
Finally, here is an A / B comparison between the two exhausts. The cell phone obviously doesn't capture the true loudness of the old system (thank you heavy compression algorithms) but the new system is quite a few less dB overall.
https://www.youtube.com/watch?v=V3jZ5SnlU-4
Hope you enjoyed it.