As some of you may know I am currently performing a kind of mega service on my 986. Today I buttoned up the water pump, new low temperature thermostat, and motor mount. I had to get a second water pump gasket after I bent mine trying to install it from the top. I highly recommend installing the pump from the bottom with the motor mount out, which is what I ended up doing, it provides a lot more room to work. All three of these replacements are easily doable in day.
Getting the mount out was a pain, because even with a 15mm box wrench, spanner, deep socket, and crowfoot, I could only reach the two upper bolts with the spanner, which wasn't long enough to provide a lot of leverage. I finally got them to break, and after that getting the mount out was pretty easy, and having the thermostat hose disconnected definitely made removing and installing the mount much easier.
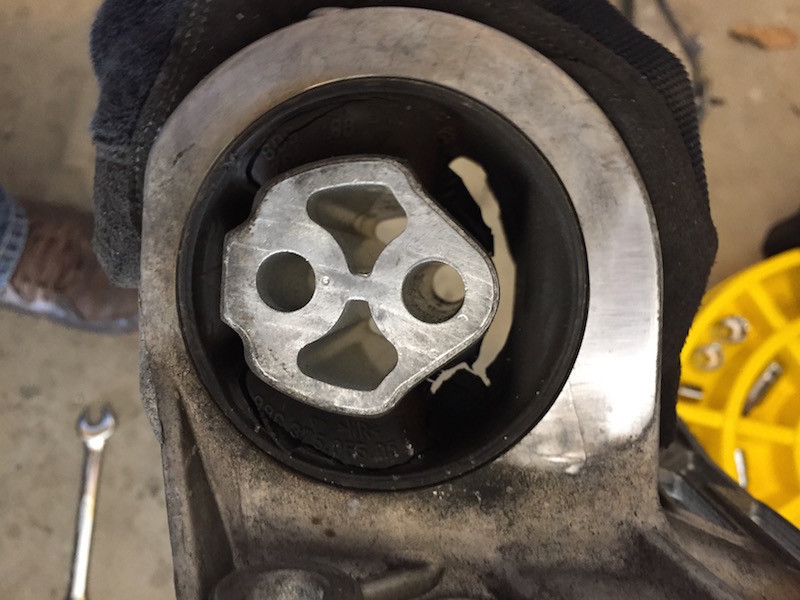
Here is what my 16 year old, 95k motor mount looked like:
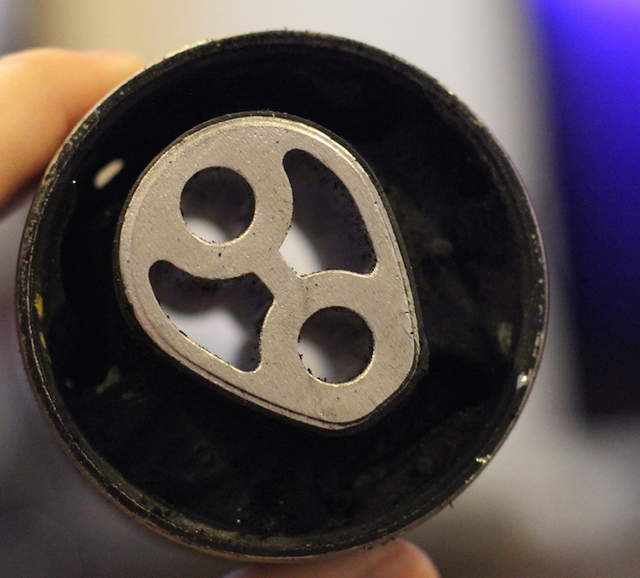
Here is the new 987 mount (the 987 one supersedes the old 986 style):
As you can seen the rubber on the top of the old mount was completely gone, and if you look closely you can see that there is a long crack all the way around the remaining rubber. It was better than I expected, but it needed to be replaced. I removed it from the holder with a combination hacksaw, and sledgehammer/awl. Not the best way but it worked. I had the new insert frozen, and I got it have way in before I declared defeat and called around to find a hydraulic press. A friend of my dad's pressed the new mount in within a few seconds. I definitely recommend using a press over the sledge hammer/DIY route.
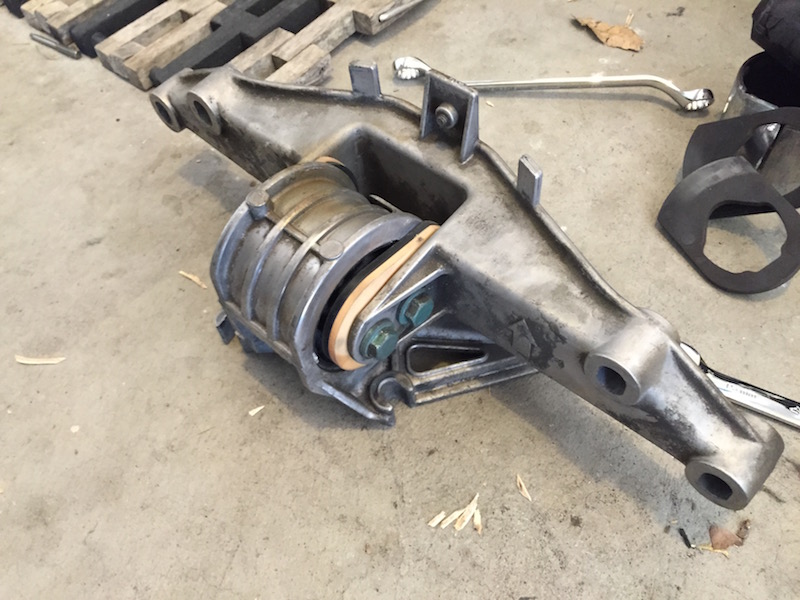
I then mounted the new mount into the yoke. I put a little blue locktite on the two bolts, and torqued to 48ft/lbs. I installed the rubber bumpers with the rubber facing in, because I could not find any instructions on the direction for the new rubber/foam stoppers, and because I figured the inner mount section would experience more friction, than the outer foam side.
The yoke and mount with new 987 insert, and rubber/foam stops:
I got the mount back in, and fastened all of the bolts, lifting and lowering the engine as needed with a large scissor jack I had placed under the oil sump with a 2x4 on top to distribute the weight more evenly. I torqued the lower two engine bolts to spec (34ft/lbs), but couldn't reach the two upper bolts with the torque wrench, so I torqued then as much as I could by hand. I then installed the four studs, and 4 nuts. None of the instructions I saw mentioned torquing the studs separately from the nuts. I attempted to torque the studs, but was afraid of stripping the 7mm stud hex heads, so I settled for getting them as tight as I could by hand, then torqued the nuts to spec (48ft/lbs). I raised and lowered the engine a bit and rechecked the torque, then called it a day.
The best tip I have for anyone replacing their motor mount is to not loosen the upper two engine bolts too much. Loosen them just enough to remove the mount. The two U-shaped bolt holes allow you to not remove the bolts all the way, and tightening them back in with the little space available is a pain.
I'm curious what people's thoughts are on using locktite, torquing the studs, and the direction of the rubber/foam stops?
Best,
-Rick
