Well I'm finally on my way back together. I had been waiting for my order from LN Engineering which included the tapered sleeve ring compressor. They had been on back order for a few weeks. When it arrived I was out of excuses.
Well, almost out. Knowing that one of the modes of failure for the M96 is when one of the sprockets on the IMS slips, causing an instant timing deviation and possible catastrophic failure (if you consider valves impacting pistons to be catastrophic anyway), I wanted to do something to mitigate the potential.
I had stumbled across this video while surfing the issue:
https://www.youtube.com/watch?v=XP6GwqLvD7Q
So I did it at home. I don't have a milling machine with DRO, but I do have a drill press and a half way decent set up for drilling holes in metal stuff:
Okay
now I'm out of excuses.
I decided to install the IMS bearing into the shaft before putting the shaft in. No reason not to, and it sure is easier to reach.
I'm going to be a guinea pig for the EPS roller bearing. The bearing went in the freezer for what turned out to be a couple of days and my intermediate shaft went in the oven for a while to gain as much elbow room as possible. (Warning: did cause a funny smell I had to explain to my woman). Coming out of the oven the shaft went vertical into my vise so the entire load of me 'encouraging' the bearing into place didn't transmit through anything but the gear I pressed it in to. I used their install tool and a plastic dead blow hammer to get the bearing to sit solid in the pocket.
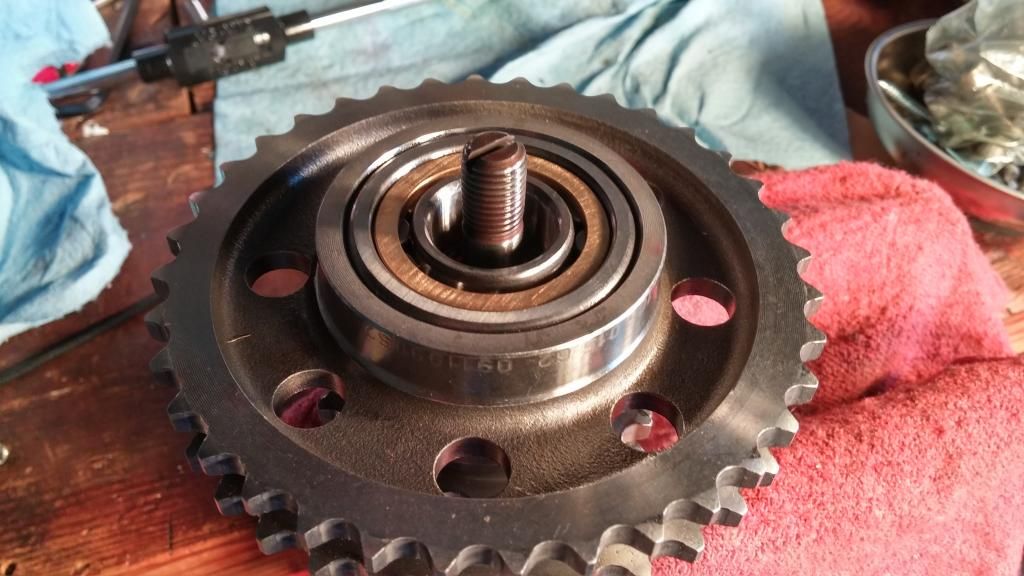
In.
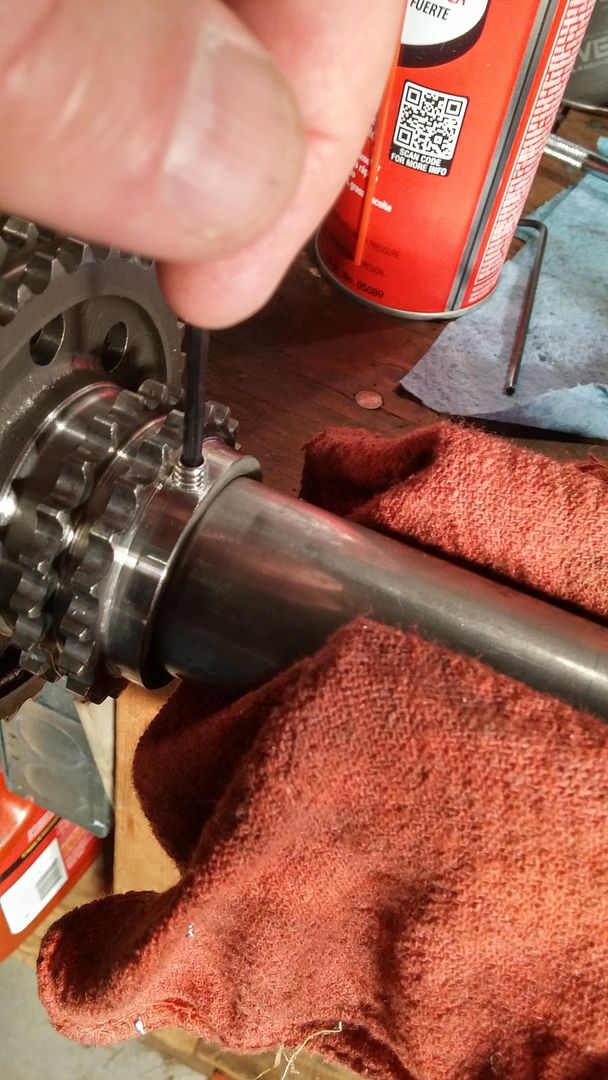
Other things about the EPS bearing. The current price on the vertex site is $439, and it turns out that includes the kit to do the oil feed. The kit consists of a tapered punch and the revised oil pump drive shaft. Having seen the images of the groove in the oil pump drive I was surprised to find out the groove is quite small (0.093" wide and 0.005" deep by my measure). The punch? Not a fan. The instructions tell you to punch a 1-3mm hole in the back of the drive shaft hole. That's a huge range. Being as my shaft was still on my bench, drilling a 0.078" hole and blowing the shaft out with compressed air seemed like a better option.
I fit the bearing carrier to the crankcase half for cylinders 1-3. There are two bolts which exist to hold the bearing carrier to this case half but they are both at the same end of the engine (the rear in our boxster case). Porsche special tool #blah, blah lets you use a cylinder head bolt to secure the other end.
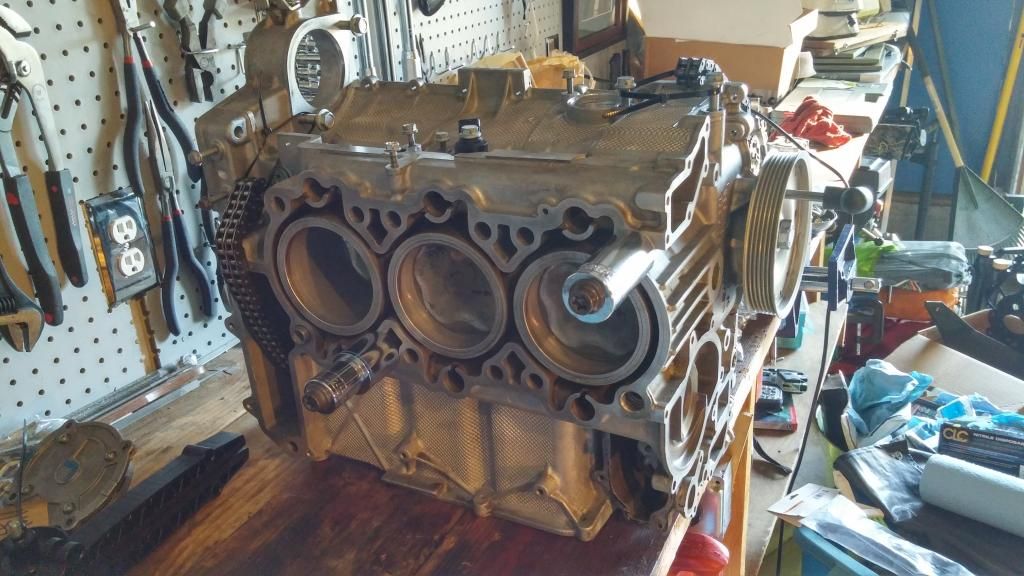
As you can see I have two such special tools which do double duty as 1/2" drive sockets. Those head bolts are just tight enough to keep the bearing carrier from having any slop and are not in any danger of marking up the mating surface common to the cylinder head.
The two bolts dedicated to holding the carrier to the case will eventually be joined by a really long one from the opposite case half. The manual I have tells me not to bring those bolts to final torque until the case halves are bolted together. So just like the head bolts being used to hold the carrier to the case, I have them just snug enough to do the job.
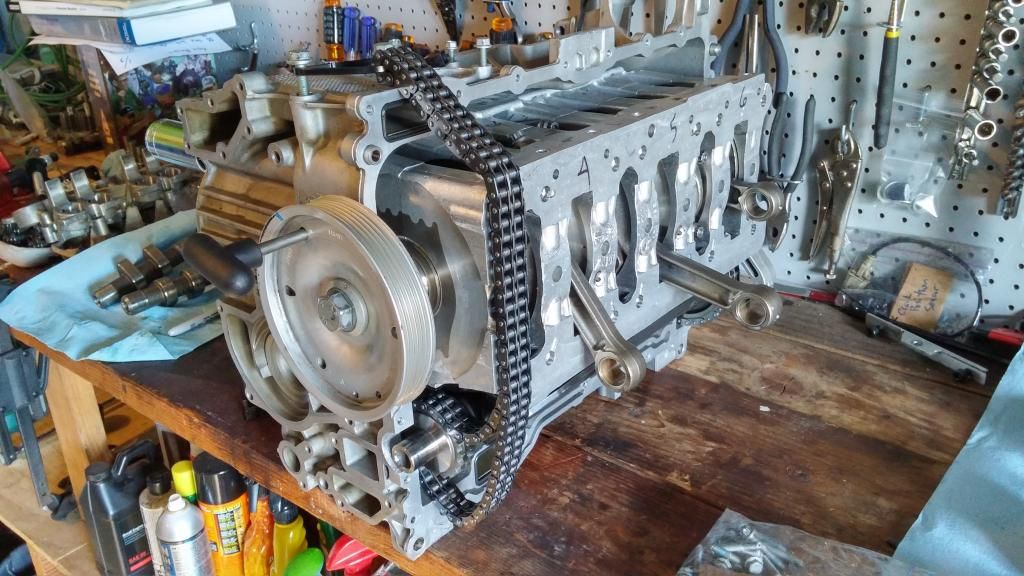
You can also see pistons 1-3 in place in these pictures. Thanks to the tapered sleeve ring compresser, getting them in was stupid easy and actually a little fun.
The crank pulley is on in order to facilitate rotating the crank shaft to the various positions required to install the pistons.
The basic process it rotate the engine so the rod journal is the furthest away from the cylinder head surface. You take a piston with connecting rod attached, remove the bearing cap and feed it into your ring compressor (lots of clean oil on everything). Then you feed the assembly into the engine from the cylinder head side. It found it quite easy to reach into the bearing carrier and gently guide the rough scratchy end of the connecting rod to meet the crankshaft.
You've already triple checked the piston orientation (cylinder number, "up", etc) and now it's time to get super careful with the connecting rod caps. First off, orientation which I made simple by running a random line with a fat sharpie across the joint of the rod and cap before taking it apart. The pen mark also makes it very easy to see side to side mismatch.
The super careful part is as follows. These (stock) rods are of the "fractured" variety. They literally forge the connecting rod and do all the machining, and the break it in a predetermined spot. The fractured spot has a granulated structure to it, and the idea is that it takes place of any dowel pins, etc. and maintains precise location.
You can't just sock your rod bolts down and assume that the alignment is dead perfect both top and bottom. You need lots of light and get your face in there and make sure. I gently installed the rod bolts while holding the cap in place, just finger tight. Then I pulled out the pin holding the crank pulley and rotated the engine back and forth to check to make sure the rod caps were going on absolutely perfectly and snugged the bolts back and forth. I had to back up a few times over all but it wasn't really difficult.
Once happy I finished torquing them down.
Next I spent an hour going over the case half for cylinders 4-6, getting rid of any remaining sealant and then blowing the hole thing out with my air compressor.
When I get home today my latest pelican order will be on the porch which contains Drei Bond and head gaskets.