I had a post all typed up earlier with pictures, etc of where I had managed to get to on Friday night, then had a failure to click "Submit Reply".
Well it basically contained this picture:
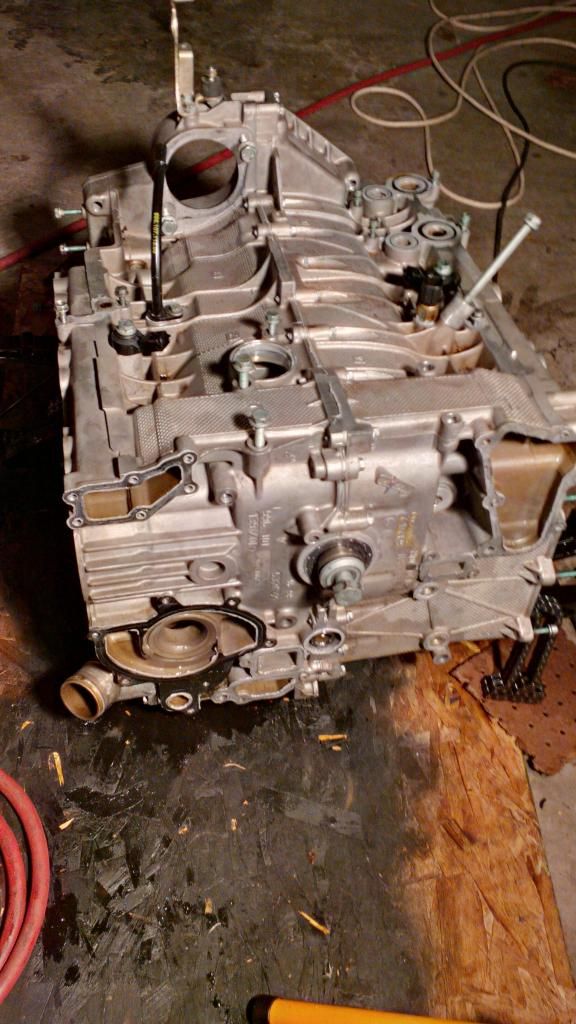
Since I was practiced up, removing the other cam cover, cams, lifter carrier and finally cylinder head was pretty straight forward. I had also made a comment in the post about how I've come to the conclusion that during dismantling a Porsche engine if it requires anything more than a nudge with the rubber hammer or gently prying at the pretty healthy spots the designers left you, you missed a fastener.
[sidetrip]
Back in the day I had a 75 Honda Civic 1200 and it blew a head gasket. The manual described how to get all the way down to removing the head bolts and then pointed out two (pathetic in comparison to what the M96 designers left us) locations you could pry ever so gently, but admonished that "what ever you do, don't pry at the gasket surface". (Duh). Let me tell you something, that gasket was STUCK on. I ended up devising a way to allow me to use my floor jack from under the car to push on the only spots allowed and it damn near lifted the car off the ground before the gasket came loose. Compared to that, the Porsche is a
dream.
[/sidetrip]
Today's project was to get the case split. So I did.
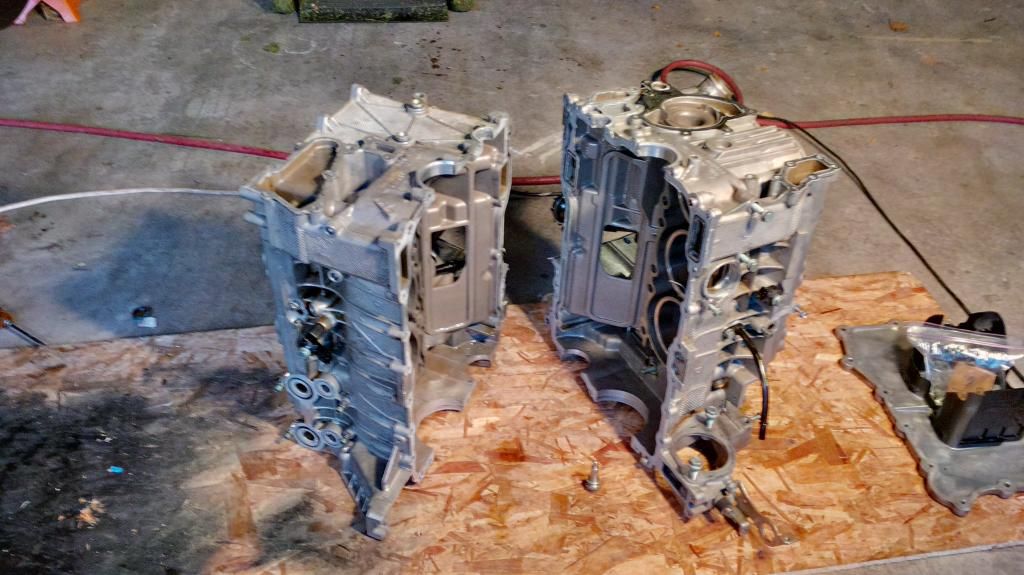
I swear to you, that's not a crescent wrench in the back ground. It's not. Really.
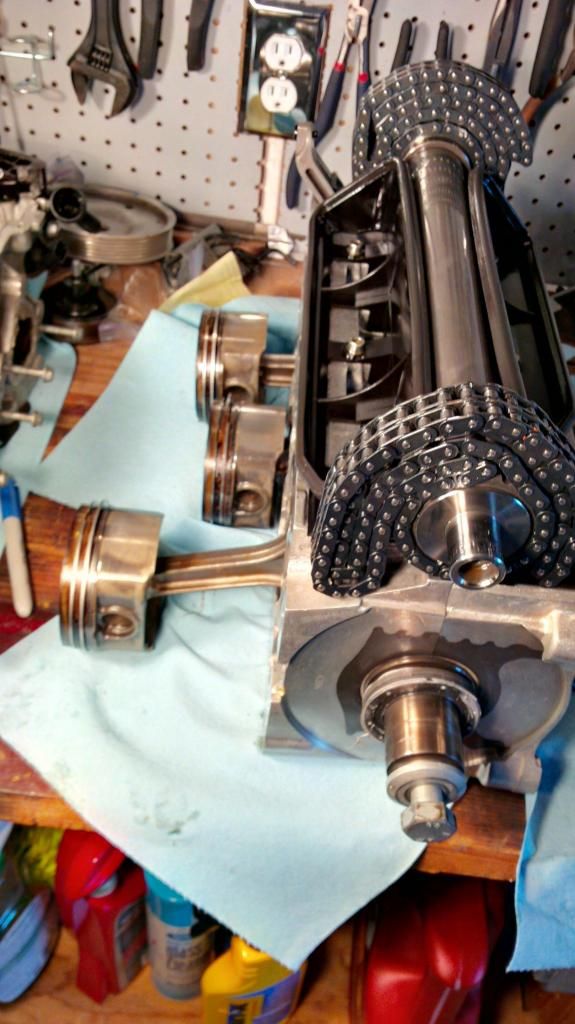
Chain ramp for the IMS/crank shaft chain. On to the shopping list. The ramps for the cam chains looked much newer.
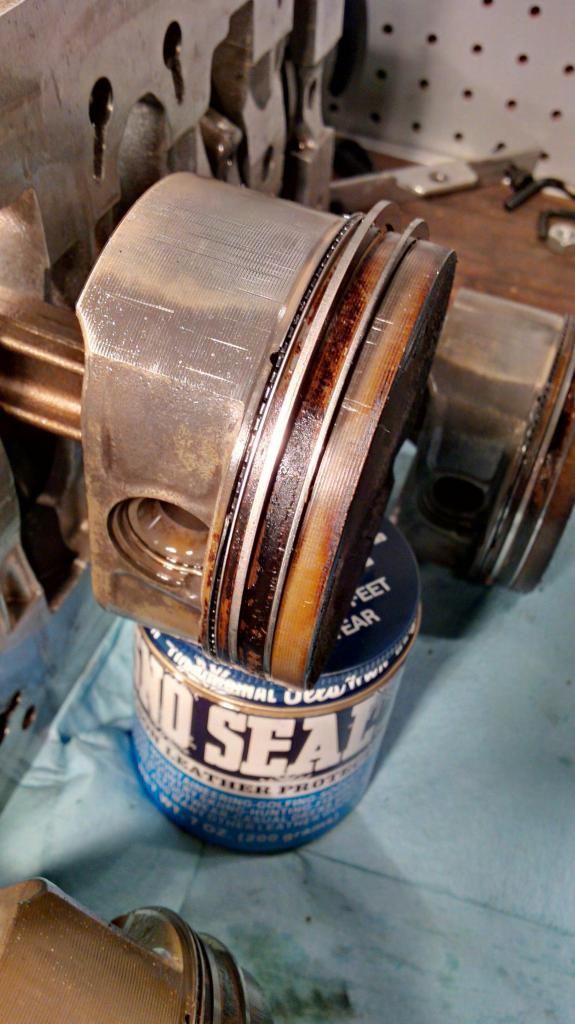
Looking over the pistons I could see some very light scoring on them, mostly between the crown of the piston and the first ring. #1 cylinder is the worst one. But the rings look damn smooth and the bores of the cylinders looked absolutely brand new in some cases, and one or two with a few very fine linear scratches. I made a point to head back after I had everything situated on my work bench to go back and wipe out those bores and really take a look
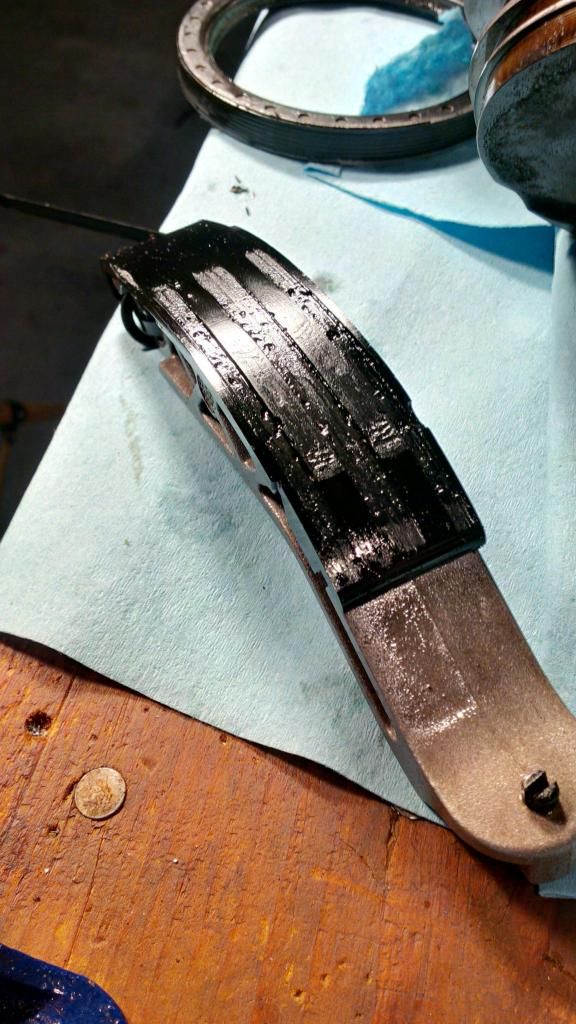
Houston, we have a problem.
I thought it was the strange way light shines on stuff that is dripping with oil but when I wiped the bore of my #5 cylinder I noticed a significant scratch. Shown under two different lighting scenarios so you can see the best. With bare fingers it is just possible to feel the scratches. I did my best to light them well for the pictures.

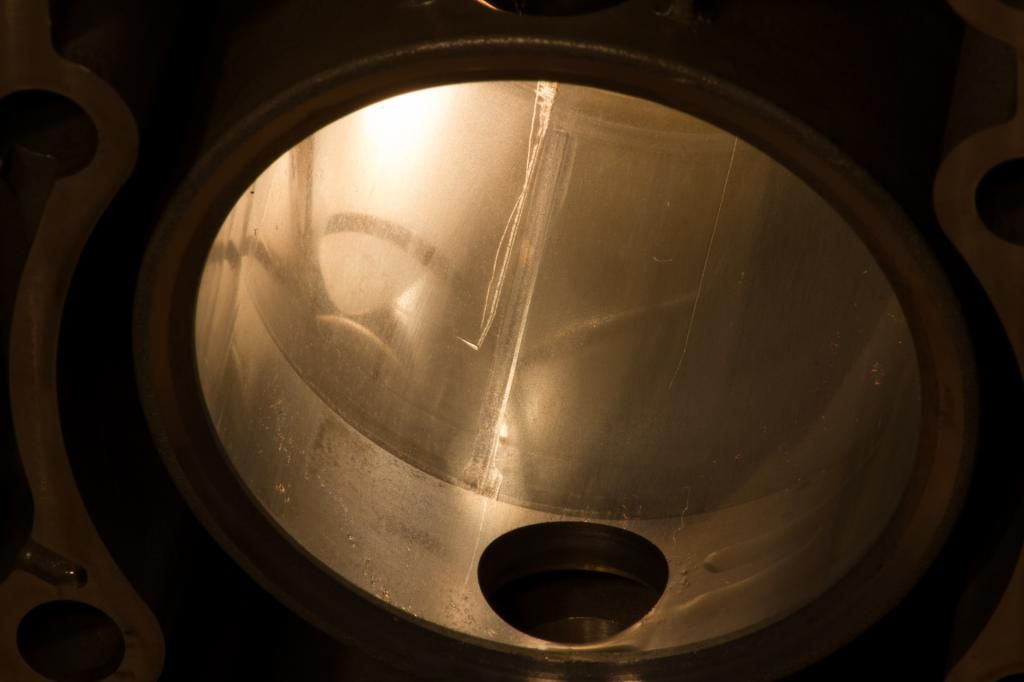
I had to orient myself with the way the crankcase was situated and then move to the bench to see if I could see any corresponding damage. I was worried that I would find where a wrist pin snap ring had popped out, but it seems to be secure. Looking on, it didn't take long to notice.
Here's what you see at first:
Then you zoom in:

There's supposed to be a break in the ring, but it's not supposed to be over an inch long. My guess is this is an assembly mistake, most likely the last time someone was in here. The ring material is really thin and it would not be that difficult to have snagged and got a piece crushed into the cylinder wall.
After taking the pictures here I cleaned up my tools and called it a night. Tomorrow I'll need to obtain the correct sockets for the bearing carrier and connecting rods.
Stay tuned as I dig deeper.