Last item I decided to tackle for today was the rear main seal (RMS). As I showed earlier in the thread, mine is leaking and needs to be replaced. I spent a great deal of time reading a lot about what people have done, not done, tried, failed, succeeded and otherwise tried to work their way through the installation of this little seal. It is amazing how setting a seal to 13mm can cause so much heart burn.
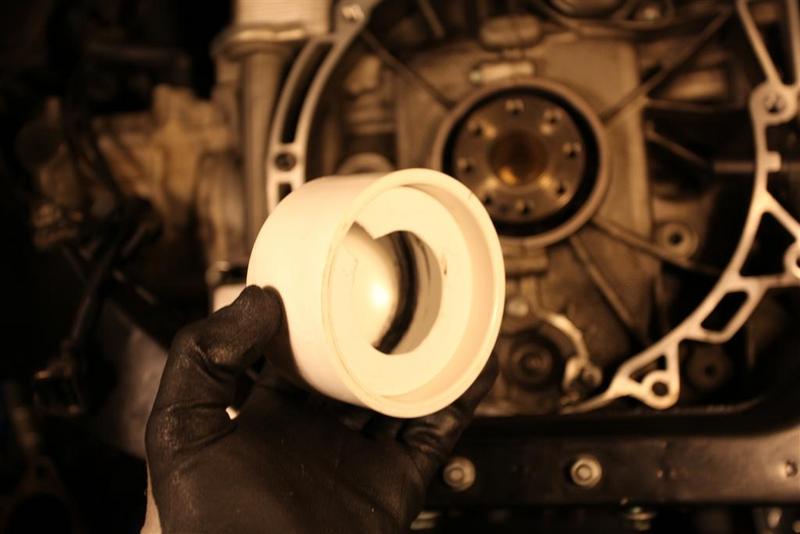
Well, in my research I found several wonderful threads. One was on manufacturing your own RMS seating tool and the other was on the reasons behind the depth setting for the RMS. First off, the tool. There was a thread where a user took plumbing connectors and fabricated a tool. I see why they did this when you are facing over a hundred bones for the Porsche tool. For my tool I took a slightly different approach and when with plumbing end connectors rather then cutting wood spacers and gluing parts together. I simply took a 4" end cap and mated a 3" flat end cap inside of it after cutting it down the the proper depth setting (13mm). I added a hole to accommodate the lip on the crank and the set pin thus giving me the proper depth to seat the seal.


Once this was done, I needed to remove the old RMS, and has been proven over and over again, I drilled my hole, inserted my screw, used a pry bar (placing my hand under it when pulling) and removed my old RMS.

Now with the old seal out I want to share a thread from cheetahonline which had beautiful shots of the new PTFE RMS seal installed and why you want to ensure the 13mm insertion.
The M96 Porsche engine found in the Boxster / Cayman has an Rear Main Seal "RMS" to seal the back end of the crankshaft (the end the connects to the transmission). The photo above shows the old seal already removed. The problem that many people have is how to properly install the new seal, so that it won’t leak again. Porsche has updated the seal itself and the recommended installation depth. To see which RMS update is available for your specific engine, check out
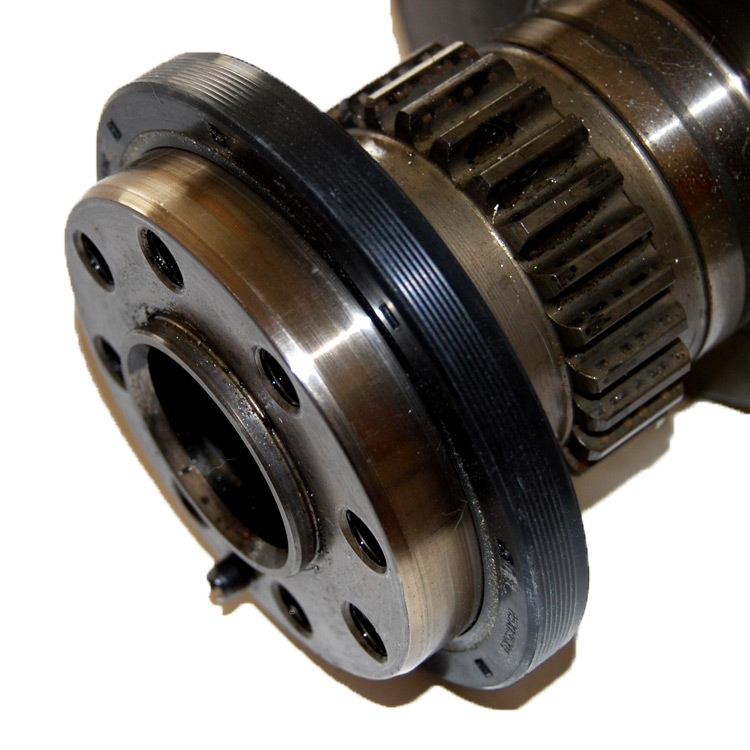
Pelican Parts - Porsche Boxster/Cayman Parts & Accessories Catalog. The new RMS will come with a plastic installation sleeve as shown above. For the rest of these photos, the crankshaft has been removed from the vehicle to show how the new seal is installed with the plastic sleeve and the new mounting tool. Normal procedures, such as completely cleaning the area should be done before replacing the seal. This article is strictly showing the proper procedure for aligning the seal.

Place the open end of the plastic insert onto the crankshaft end. This should fit on as shown. This surface is where the seal will slide onto to stop splashing oil from exiting the engine. This seal does not support the crankshaft in any way, it is only a seal to stop oil leaks.

Slide the RMS onto the shaft as shown. The depth does not matter yet, as the setting tool will be used to get the proper depth. (they used a delrin tool in their thread similar but slightly different from mine)
Place the tool onto the end of the crankshaft (rotating it until raised area on the crankshaft lines up with the hole on the tool). With a hammer, tap around the back of the tool evenly until the tool bottoms out against the crankshaft. This should be very obvious as to when it happens, as the sound of the taps should change once they are contacting.

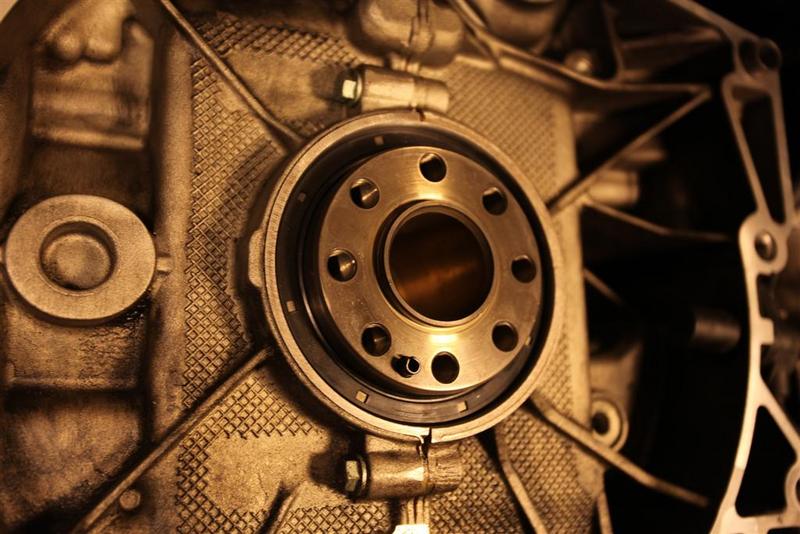
Remove the tool and the seal should be mounted squarely to the crankshaft as shown. This new mounting depth of around 13mm is shown above. The original depth of 11mm left the seal farther out on the crankshaft. The reason for the change is most likely two-fold: the seal is moved away from the edge of the case where is could leak easier and moving the depth to a slightly different spot to avoid an attempt to seal on an area that already had been shown to leak.This should be done during clutch changes, or during an IMS replacement / upgrade. The RMS itself is a $10 part, but labor to replace it is usually billed out at 8 hours (same labor to replace a clutch). Therefore, take the extra few minutes to replace the seal if there is any sign of leaking any time that the transmission is removed.

(end of Cheetahonline post)
On the directions that came with my new seal, it clearly states you want to insert and leave the seal alone for a minimum of 4 hours to allow the material to seat properly. Not a problem as my project is not going anywhere for the next few days.
So, how did my tool do for seating the seal???


Well, we are almost at the point where I am ready to do the deed on the IMS, I still have a couple of areas to work on but I decided this was enough for today.
If you have any questions, comments or suggestions...please post them up. I am only writing my own ditherings here to document what I am going through on this build hoping that some of it is useful to someone.