The wiring harness looked a bit overwhelming when I first looked at it, but after a few email exchanges with JB at blackflamecustoms , it was easy to figure out.
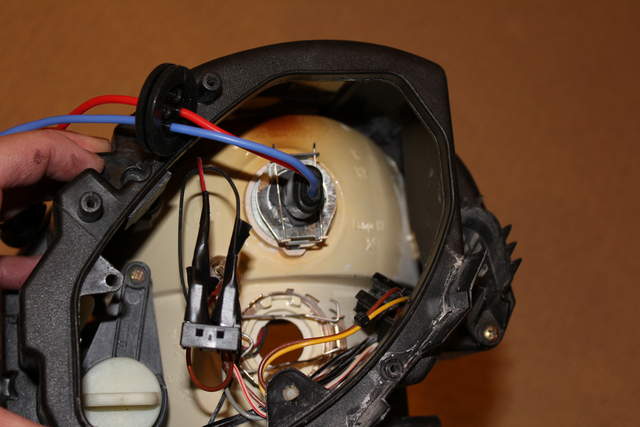
Connect the blades from the wires from the projector to the high beam connector. Brown is negative, so connect the black wire to brown, and the other to red. I ran the projector wires through the high beam hole which is the lower hole.
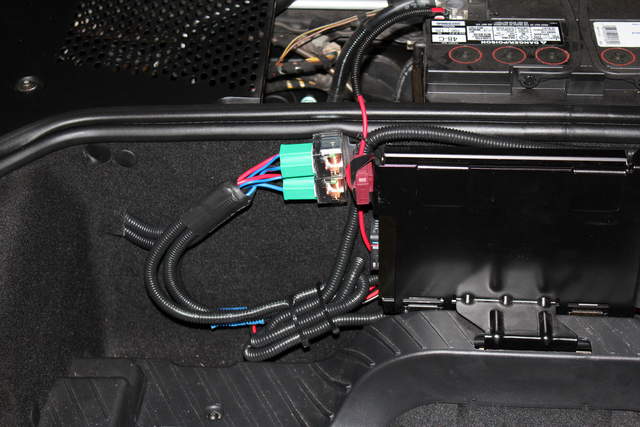
Plan the installation of the wiring harness. I had to extend some of the cables to because I wanted to install the main relay on the harness to the nut that secures the amp. The harness connections are simple.
Red wire with the brown fuse casing: to positive battery terminal
Black wire : to negative battery terminal
Two ballast cables will go to the ballasts.
Remaining cable with two blades (headlight connector) will go to the low beam connector on the headlight assembly. The brown wire on the low beam connector is negative, so I connected the negative blade to it. You only need to connect the headlight connector on one side of the car.
Before the final installation of the harness and before sealing the assembly, insert the headlight assemblies into car and test the lights, high beam, low beam, indicators, fog, parking lights, and side markers. Also test the beam of the projectors to make sure they arent aimed too high or low. At this point, you just want to get the aim in the right ball park. One mistake I made was that although the projector was secure, it was not flush with the back of the reflector bowl, so the aim was way too low.
Installing the Wiring Harness in my Boxster.
I didnt want to drill any holes in the car, but I needed to run wires from the front trunk compartment to the headlights.
- Mount the harness relay to the amp nut.
- Extend the short ballast wire and the light switch connector so they are long enough to reach the headlight assembly.
- There is a large grommet on the right side of the trunk. Using an Xacto blade, I slit an X opening in the rubber grommet to run the ballast and the headlight connector.

- On the opposite side, I used the vertical headlight adjustment opening to run the ballast wire. Since this was one ballast wires that I extended, I threaded it through the opening before I terminated the cables.
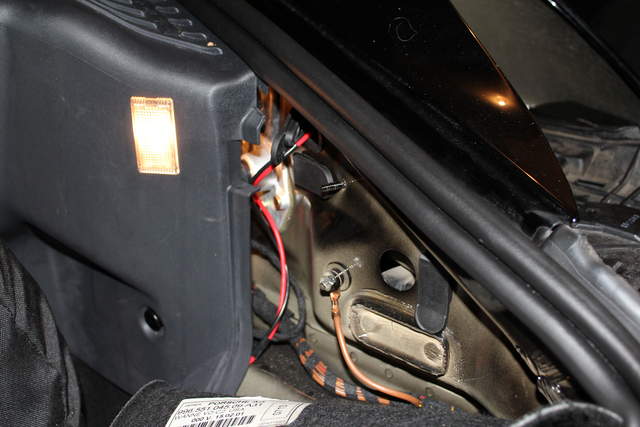
- Secure the cables behind the trunk liner and secure with zip ties as needed.
- Mount the ballasts on the side. There is plenty of space there. Secure with industrial strength Velcro.

- Use zip ties to make sure the cables dont interfere with the main connection from the car and the headlight assembly.
- Lock the headlight assemblies in place. I found that the tool that came with the Boxster was useless. A 5mm long neck socket I got from Sears is a lot more effective.