I saw others had installed HID projectors with bi-xenon lamps in their Boxsters, but they didn't provide many specific instructions, parts, etc. Well, I figured I had nothing to lose because my headlights were pretty bad anyways, so I invested $300 in HID projectors and embarked on my DIY HID journey. Hopefully, you can benefit from my mistakes and from what I learned.
First of all, simply putting HID bulbs in your H7 sockets is NOT the way to go. The light discharge is too intense and unfocused, which is dangerous to oncoming drivers.
Secondly, I'm not a professional, so if you see that I did something stupid, don't be too hard on me. Gentle correction is always constructive.
Thirdly, I'm told that altering headlights is not legal in most parts of the country, although the HID projectors will pass safety inspection.
Things you need.
I ordered from
BlackFlameCustoms : HID Projector Headlight Retrofits, Retrofit Service & Parts- Mini-Morimoto MH1 bi-xenon projector
- H1 HID Bulbs (4300/5000k/6000k- your choice)
- All Digital Morimoto Ballasts
- Shrouds (to cover the new projectors)
- Plug-and-play wiring harness
Also other than basic hand tools, you will need a Dremel tool, silicone adhesive sealant, an Xacto knife and an oven.
- Follow the instructions to remove the headlight assembly from the car.
- Clean the headlight assembly and prepare the oven for baking. After reading various posts and viewing a number of YouTube videos on this process, what seemed to work best is to preheat the oven to around 225 F.
- Remove the rubber gasket around the assembly, remove the back cover, and remove all bulbs. Also if you have a Headlight Corner Trim, remove that too, as that piece warped easily in the heat. I had to purchase a replacement.
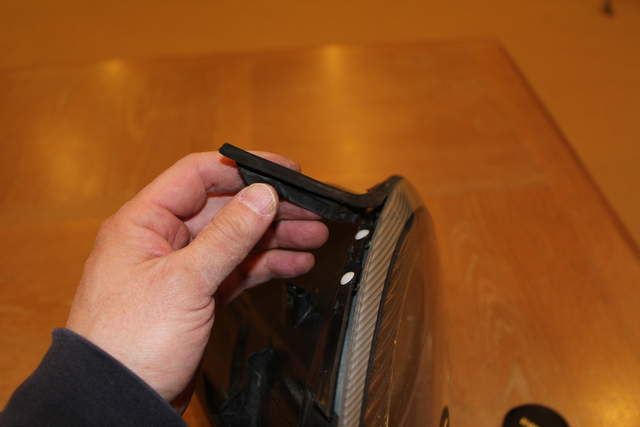
- Put the assembly in the oven, but not directly on the wire rack. Put some strips of wood on the rack, then put the assembly on top of the wood.

- Bake for 10 minutes.
- Remove from the oven and us a flat bladed screwdriver to loosen the silicone adhesive. If you don’t feel that its going to give, put it in the oven for another 10 minutes. I found that the side opposite of the flood light seemed to be the easiest place to start. You should hear the adhesive start to lift. Be patient and never force it. Repeated trips to the oven may be needed, but eventually the lens will come off. Wear gloves as the plastic gets pretty hot.
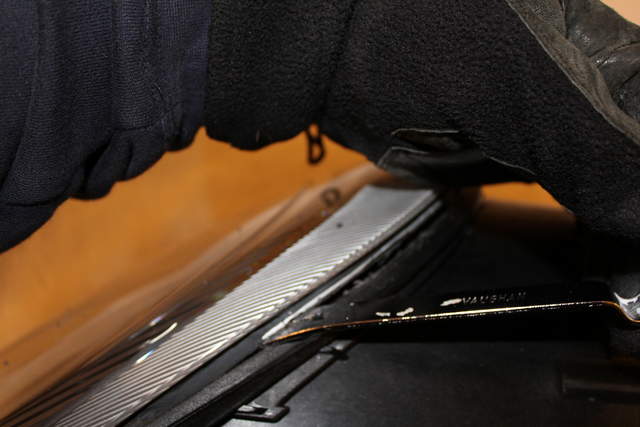
- Remove the outer lens and the plastic inner lining and set them aside carefully.
- As the adhesive is still soft, use the screwdriver blade to scrape off as much adhesive as possible from the main assembly.
- The inner lens was melted on my headlights, so I was eager to trash them. Using a pair of pliers, the lens comes free. There are plastic tabs at 9, 12, and 3 o’clock so those are the points you may need to pry a little. I used a mini pry bar with an angle to get behind the lens to pry it free.

- The upper hole on the chrome reflector is for the low beam bulb, and the lower for the high beam. In front of the low beam opening is a bulb deflector that needs to be removed. Looking at the back of the assembly, you see the tabs that hold it in place. I used a pair of wire snips and needle nose pliers to cut and bend the tabs so that it the bulb deflector came loose.
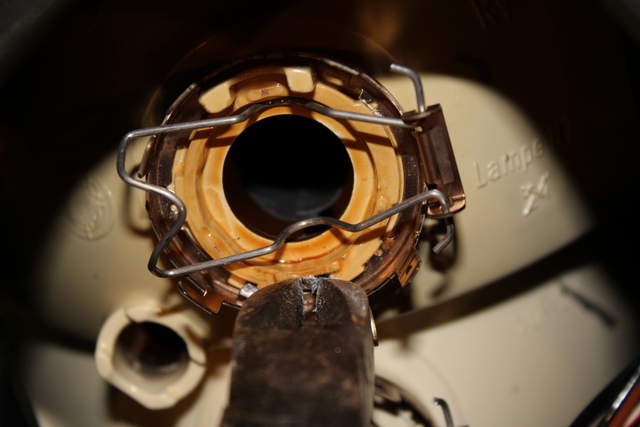
Remove it from the front side.
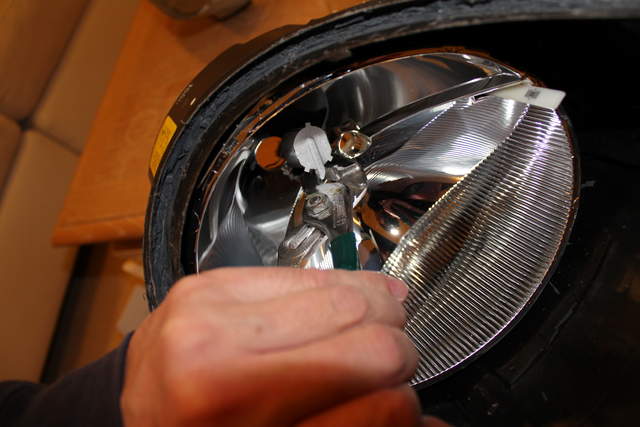
- Using the Dremel tool, the square base that held the bulb deflector needs to be cut away. The back of the HID projector needs that space to sit flush against the headlight reflector bowl. Run your fingers over that area to make sure you remove all remnants of the square base. This picture isn't very focused, but the red arrow points to the thing I'm talking about.
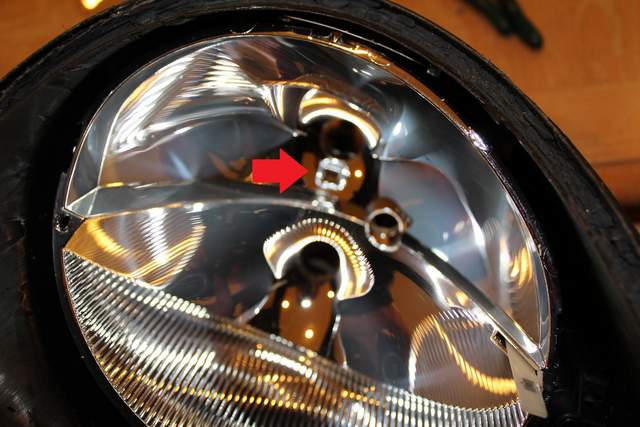
- You will discover that the back of the reflector bowl has a little shelf. You may also need to cut away part of it to get a good flush fit.
- Use the drum sanding bit on your Dremel tool to make the bulb opening a bit larger to the projector can fit in it. I took a Sharpie pen and drew a circle just around the opening, and then shaved away the markings. You don’t want to make the opening too large.
- Next, use the Dremel tool to cut away the rim of the low beam bulb opening. This is necessary for the nut to be able to grasp onto the projector threads. The wire clip assembly that holds the H7 bulb should come right off.
- Make a notch on the top of the bulb opening. This will be used to align the projector and will keep it in place.
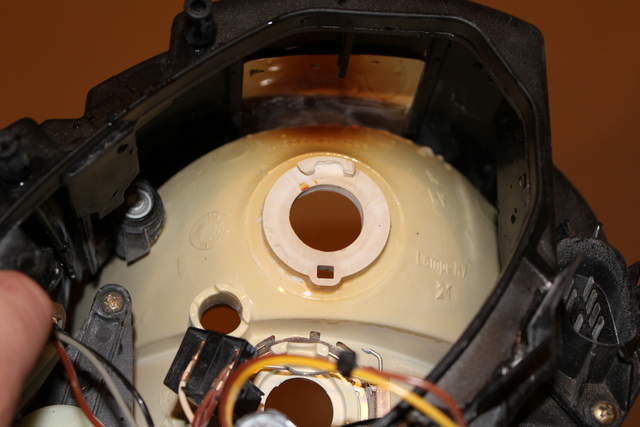
- Clean the whole headlight assembly well by using an air compressor or clean rag to remove all the dust particles. Shake the assembly upside down and sideways to make sure you get all the dust out. Remove any fingerprints
- Install the projector by placing the silicone washer on the projector first. Place the projector in the low beam opening. On the threaded side of the projector, put the H7 adapter place on, then secure the projector with the lock ring.
- At this point try to fit the shroud on the projector. It will require some cutting to fit it. There were two cuts I had to make, one at the top and another at the side to accommodate the “shelf” in the middle of the reflector. Use the Dremel tool on the shroud, cutting and measuring carefully in an iterative fashion to make sure you have a good fit. I cut the shroud too much on the top, leaving an gaping hole. Fortunately, this wont be noticeable once I cover it with aluminum tape. When the headlight lens covers the assembly, it will cover the top of the shroud anyways. No one will notice it unless they really really look for it.
- If the shroud is attached to the projector with screws, then you may need to remove the projector. Mine had a slip on collar so I was able to install it once I got it to fit.
- Attach the bulb holder and the bulb clip.
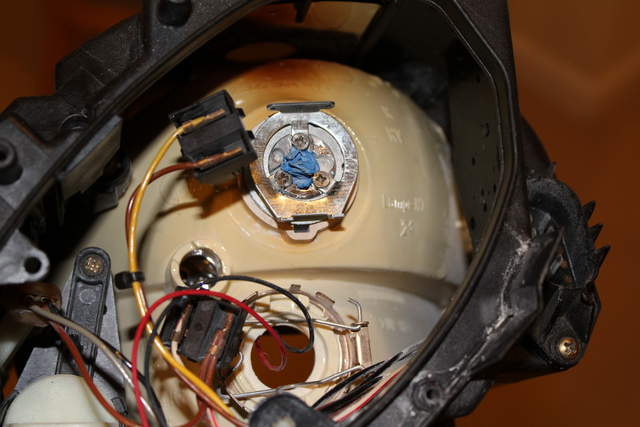
- This might be a good opportunity to replace all the bulbs. The H7 fog light bulb is easy to get out since the assembly is apart. Also, I removed the amber turn indicator reflector and replaced the clear bulb with an amber bulb (Sylvania 1156A) to give the headlight assembly a clear, clean look.
- Drill a 7/8 inch hole in the back cover and run the wires through it. The Morimoto HIDs came with a grommet that will fit in a 7/8 inch hole nicely.

- With that the headlight assembly is almost done. Before putting it all back together, it’s time to test that the wiring is all done correctly.