 07-18-2017, 06:05 AM
|
#1
|
|
Registered User
Join Date: Apr 2017
Location: Indiana
Posts: 1,512
|
uh that was a whole lot of nothing - trim removal
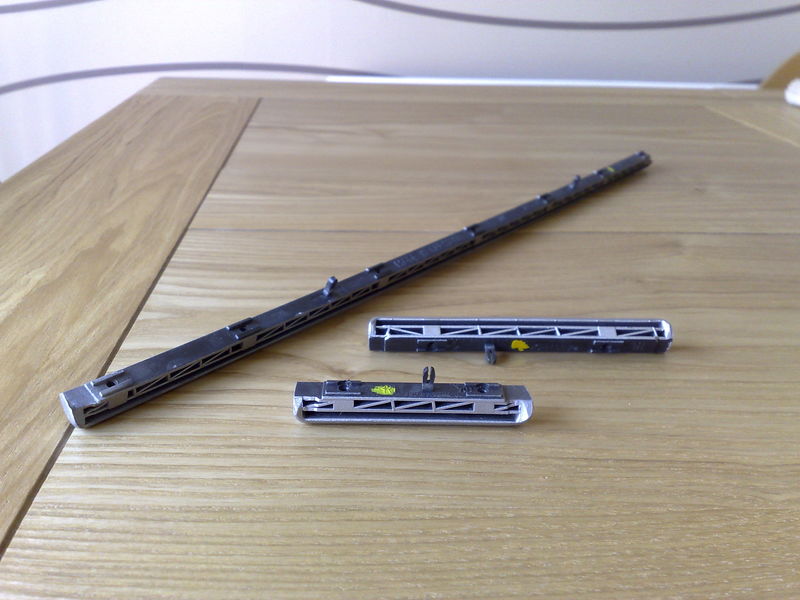
Didn't like the tape because it didn't quite match. Decided to see for myself what's involved in removing the dash trim. To my surprise it was sooo easy and only took about 1/2 hour.
Step 1: Remove glove box. 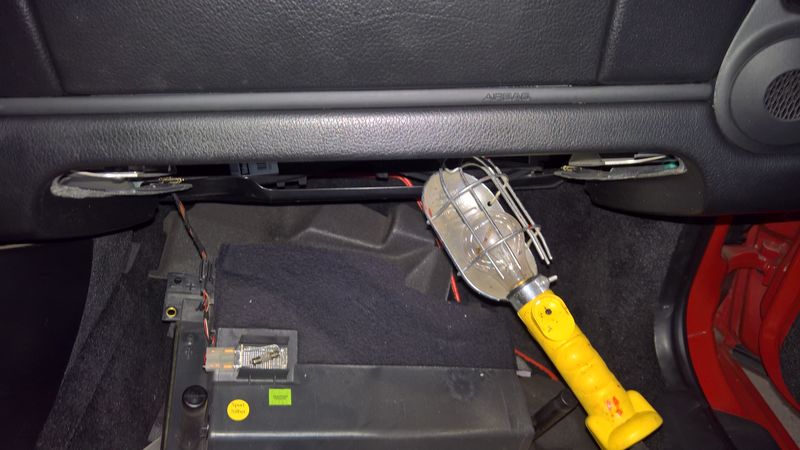
Step 2: look under there, see screws.

Step 3: remove screws and take out trim.
From what I've heard this long strip is the hardest but I'll let you know ��
|

|

|
|
07-18-2017, 09:45 AM
|
#2
|
|
Registered User
Join Date: Jun 2015
Location: Seattle
Posts: 147
|
Hmm, wonder how hard it is to get the trim out when you don't have a glovebox (pre-03 cars)...mine is scratched and I'd like to wrap it.
__________________
'02 Boxster S
'16 GTI PP
'17 Bolt (with a B)
|
|
|
|
|
07-18-2017, 09:56 AM
|
#3
|
|
98 Arctic silver 986
Join Date: Jul 2011
Location: Upstate, NY
Posts: 1,452
|
I think the long strip was the easiest by far.
|
|
|
|
|
07-18-2017, 10:54 AM
|
#4
|
|
Registered User
Join Date: Apr 2017
Location: Indiana
Posts: 1,512
|
Quote:
Originally Posted by Nmbrsix

Hmm, wonder how hard it is to get the trim out when you don't have a glovebox (pre-03 cars)...mine is scratched and I'd like to wrap it.
|
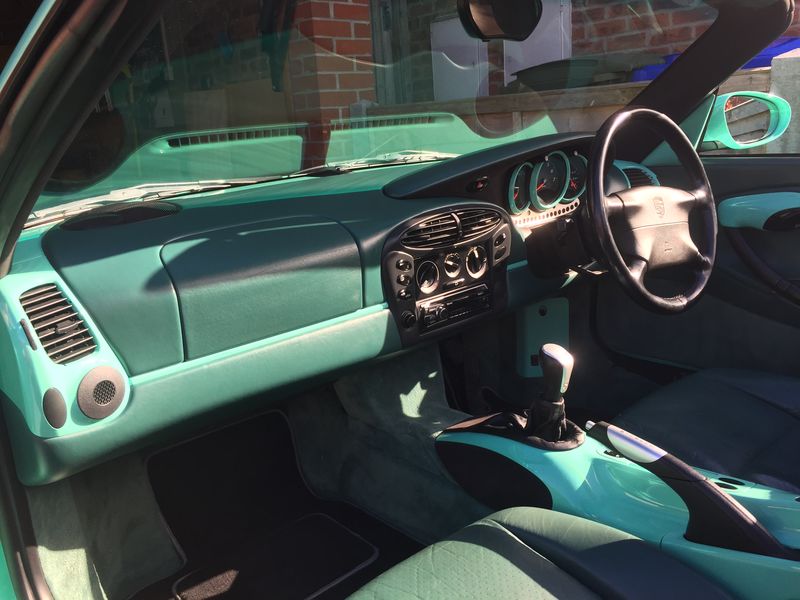
You can if you want without taking it off. I fid as a test to see if I liked the colored trim Wrapped:

|
|
|
|
|
07-18-2017, 11:38 AM
|
#5
|
|
Registered User
Join Date: Apr 2017
Location: Indiana
Posts: 1,512
|
Quote:
Originally Posted by JBauer
You can if you want without taking it off. I fid as a test to see if I liked the colored trim Wrapped:
|
That pic you quoted is wrapped just to see if I liked it. I looked fine but the only wrap I could find the color was a little off. If it would of matched I would of left it alone. Its not hard, vinyl wrap, hair dryer and some thin plastic tools.
|
|
|
|
|
07-18-2017, 01:49 PM
|
#6
|
|
Registered User
Join Date: Oct 2008
Location: Beverley East Yorkshire UK
Posts: 302
|
|
|
|
|
|
07-18-2017, 01:56 PM
|
#7
|
|
Registered User
Join Date: Apr 2017
Location: Indiana
Posts: 1,512
|
Quote:
Originally Posted by Christian H
|
If you don't mind. How'd you do the short ones? Haven't tried them yet 
|
|
|
|
|
07-18-2017, 02:07 PM
|
#8
|
|
Registered User
Join Date: Oct 2008
Location: Beverley East Yorkshire UK
Posts: 302
|
Quote:
Originally Posted by JBauer
If you don't mind. How'd you do the short ones? Haven't tried them yet |
Exactly the same, its a bit tight but not impossible
The short pieces have two screws in each I was upside down with my head in the footwell to start with to check out where the fixing screws are, using a flexy drive made it a lot easier
|
|
|
|
|
07-18-2017, 03:16 PM
|
#9
|
|
Custom User Title Here
Join Date: Mar 2012
Location: Ft. Leonard Wood
Posts: 6,169
|
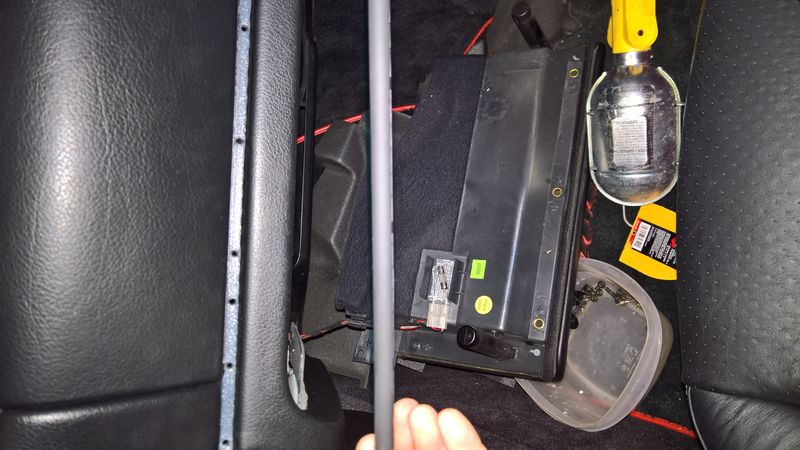
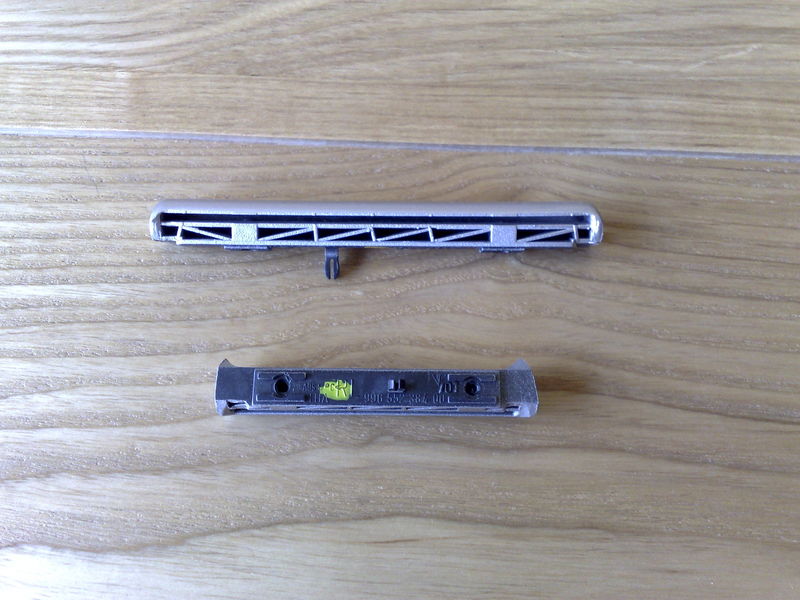
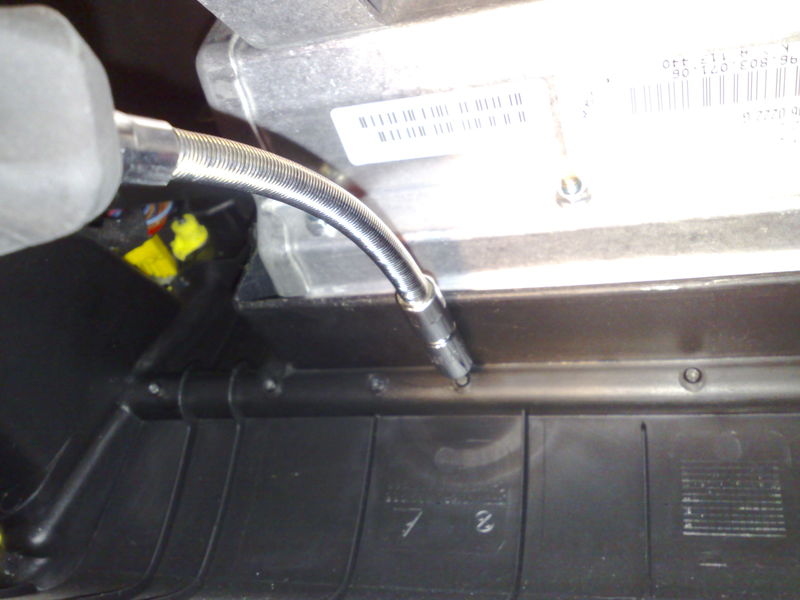
Christian - I think there is a difference between US and UK cars. For the long strip on my '99, there's aluminum framing under the dash. The gap between the frame and the passenger airbag surround is only about 1.5cm. There is no seeing the screws and was very difficult to get fingers in there to feel them.
|
|
|
|
|
07-18-2017, 04:27 PM
|
#10
|
|
Registered User
Join Date: Apr 2017
Location: Indiana
Posts: 1,512
|
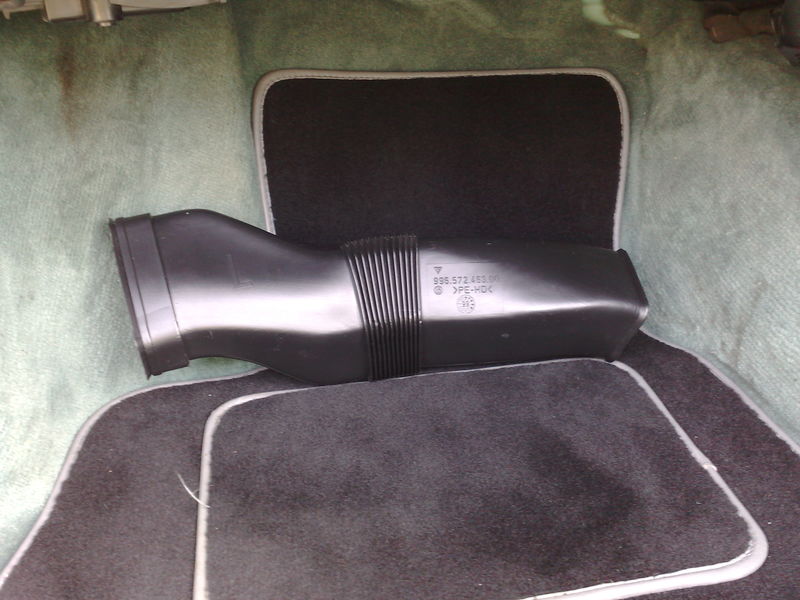
I'm thinking they are different I removed the air duct, got under there upside down and I couldn't get to them.
Last edited by JBauer; 07-18-2017 at 06:52 PM.
|
|
|
|
|
07-18-2017, 04:30 PM
|
#11
|
|
Registered User
Join Date: Apr 2017
Location: Indiana
Posts: 1,512
|
Quote:
Originally Posted by particlewave
Christian - I think there is a difference between US and UK cars. For the long strip on my '99, there's aluminum framing under the dash. The gap between the frame and the passenger airbag surround is only about 1.5cm. There is no seeing the screws and was very difficult to get fingers in there to feel them.
|
A glove box makes a big difference too.
|
|
|
|
|
07-18-2017, 06:32 PM
|
#12
|
|
98 Arctic silver 986
Join Date: Jul 2011
Location: Upstate, NY
Posts: 1,452
|
I think the easiest way to get the small strips off is to remove the steering wheel surround. I needed to take mine off when I was dying the dash from red to black. Once I took the surround off the screws were east to get too with a stubby screwdriver.
|
|
|
|
|
07-18-2017, 06:54 PM
|
#13
|
|
Registered User
Join Date: Apr 2017
Location: Indiana
Posts: 1,512
|
Quote:
Originally Posted by tommy583
I think the easiest way to get the small strips off is to remove the steering wheel surround. I needed to take mine off when I was dying the dash from red to black. Once I took the surround off the screws were east to get too with a stubby screwdriver.
|
If you dont mind, how did you get the surround off?
|
|
|
|
|
07-19-2017, 04:21 AM
|
#14
|
|
Registered User
Join Date: Oct 2008
Location: Beverley East Yorkshire UK
Posts: 302
|
Quote:
Originally Posted by particlewave
Christian - I think there is a difference between US and UK cars. For the long strip on my '99, there's aluminum framing under the dash. The gap between the frame and the passenger airbag surround is only about 1.5cm. There is no seeing the screws and was very difficult to get fingers in there to feel them.
|
That does sound a lot different to my '99 I'm sure there must be a few changes between countries spec's especially when the steering wheel gets moved to the other side!
|
|
|
|
|
07-19-2017, 07:57 AM
|
#15
|
|
98 Arctic silver 986
Join Date: Jul 2011
Location: Upstate, NY
Posts: 1,452
|
Quote:
Originally Posted by JBauer
If you dont mind, how did you get the surround off?
|
First you have to take off the instrument cluster (many DIY's for this), then you can see the screws to remove the surround. I remember it being very easy remove the surround.
|
|
|
|
|
07-19-2017, 08:57 AM
|
#16
|
|
Registered User
Join Date: Apr 2017
Location: Indiana
Posts: 1,512
|
Quote:
Originally Posted by tommy583
First you have to take off the instrument cluster (many DIY's for this), then you can see the screws to remove the surround. I remember it being very easy remove the surround.
|
Thanks! I got them out finally. A LOT harder than the glove box side I guess that's what I get for being cocky about the other side. Had to make my own flexible ratchet 😉
Thanks all for the help 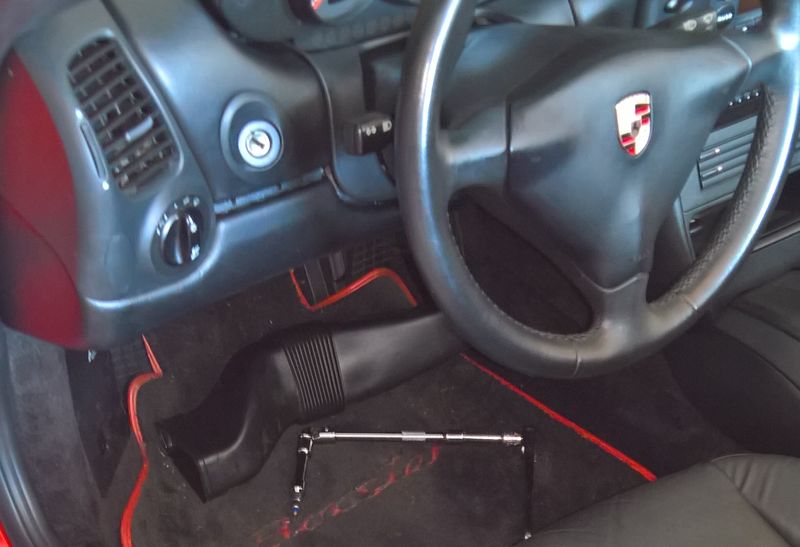
|
|
|
|
|
07-19-2017, 10:11 AM
|
#17
|
|
98 Arctic silver 986
Join Date: Jul 2011
Location: Upstate, NY
Posts: 1,452
|
Yeah I was trying to get to them from underneath, but once I removed the steering wheel surround they were really easy to get too. Glad you got them out though. I never put the screws back in. I just pushed them back into the dash and they have stayed in for over 2 years now.
|
|
|
|
|
07-19-2017, 10:19 AM
|
#18
|
|
Registered User
Join Date: Apr 2017
Location: Indiana
Posts: 1,512
|
Quote:
Originally Posted by tommy583
Yeah I was trying to get to them from underneath, but once I removed the steering wheel surround they were really easy to get too. Glad you got them out though. I never put the screws back in. I just pushed them back into the dash and they have stayed in for over 2 years now.
|
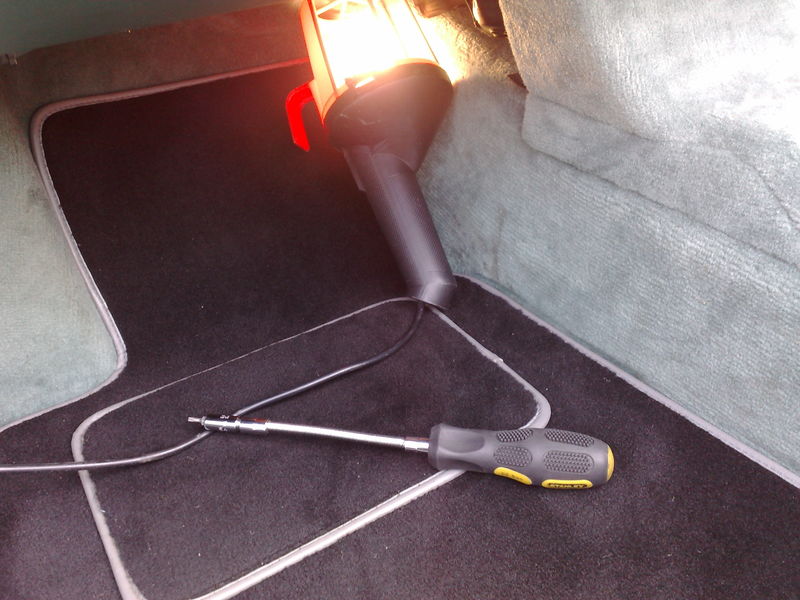
LOL there is noooo way I'm putting them back either. Odd thing tho I had to remove the air vent tube, go in from under dash because there was no way to get anything more than my fingers in there. Even with collar out. went in from bottom with a convoluted socket wrench set up and guided it to the screw heads with my fingers. Its in the floor in the pic. Took me 2hrs.
Thanks for the help
|
|
|
|
|
07-19-2017, 12:34 PM
|
#19
|
|
WALDMEISTER
Join Date: Sep 2013
Location: Germany
Posts: 1,381
|
The little pieces were actually the easier part for me:
Side vent out = "easy" access for the smaller trim piece
Center console out = "easy" access for the smallest trim piece
__________________
Original Owner | PORSCHE Boxster 2.7L (MY01) | Seal Gray
|
|
|
|
 Posting Rules
|
You may not post new threads
You may not post replies
You may not post attachments
You may not edit your posts
HTML code is On
|
|
|
All times are GMT -8. The time now is 09:45 AM.
| |


 1998 Porsche 986
 Peppermint piglet
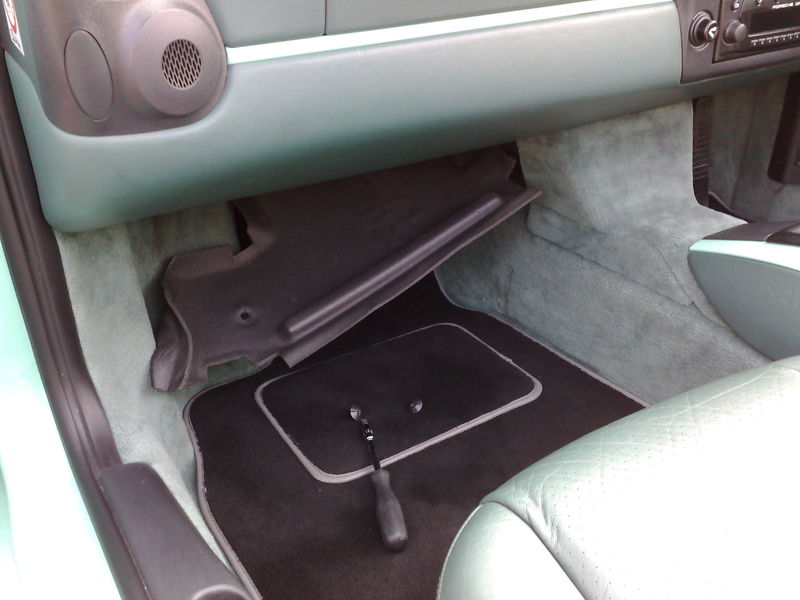


 "GRAY"
 Linear Mode


