Go Back   986 Forum - The Community for Porsche Boxster & Cayman Owners > Porsche Boxster & Cayman Forums > DIY Project Guides

Post Reply
 
LinkBack Thread Tools Display Modes
Old 03-21-2018, 03:36 PM   #1
Registered User
 
Join Date: Dec 2017
Location: Cambria, CA
Posts: 121
Garage
987 Airbox: a different approach

So I decided to install a 987 airbox in my 2000 S. It made sense to pull out the 986 airbox as I was doing a variocam wear pad job with the engine in the car and it seemed logical to pull it before the job so I would have extra work room. The 986 removal was awful. I loosened the intake manifold on the left side, bent up the motor cover attachment point on the drivers/front side and was having a really had time removing the airbox intact. I eventually cut it out in pieces. Given that the 987 airbox is much bigger I could not imagine the effort it would take to get it in. I was also worried about possible damage to the airbox or engine by forcing the larger box into the car.

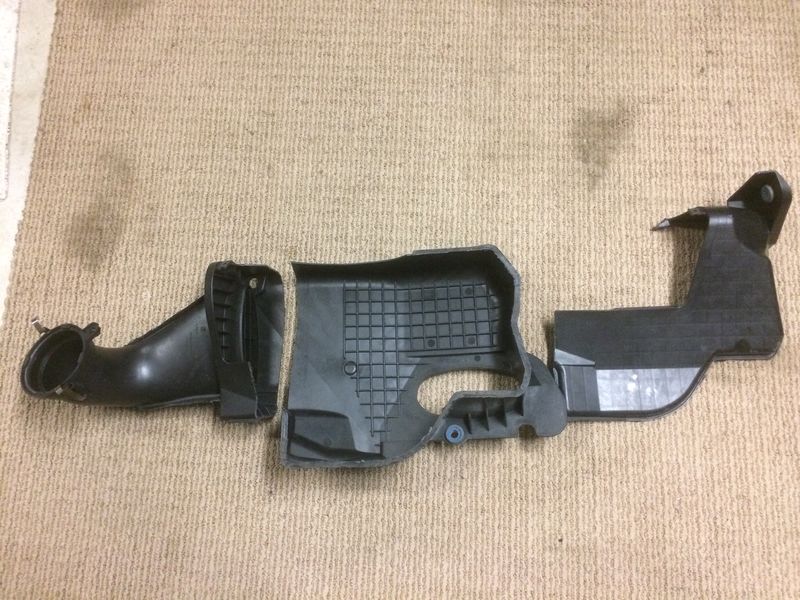
Without the airbox in the way the variocam wear bar job was quite straightforward with the engine in the car. Not having the airbox in the way made me think that doing other jobs on the engine such as injector work or replacement of the aos hose that attaches on the 4-6 bank would be a breeze. So....to make installation of the 987 airbox easier and to allow future removal of the airbox for engine access I decided that I would cut the airbox into 3 pieces, install them one at a time and screw the pieces one to the other so that I could disassemble the box if needed at a future date. The three pieces each have an attachment point to the car and they are: 1) the side that is closest to the wheelwell; 2) the side next to the engine that attaches to firewall between the engine and passenger compartments; and 3) the portion of the box that includes the outlet and maf attachment.


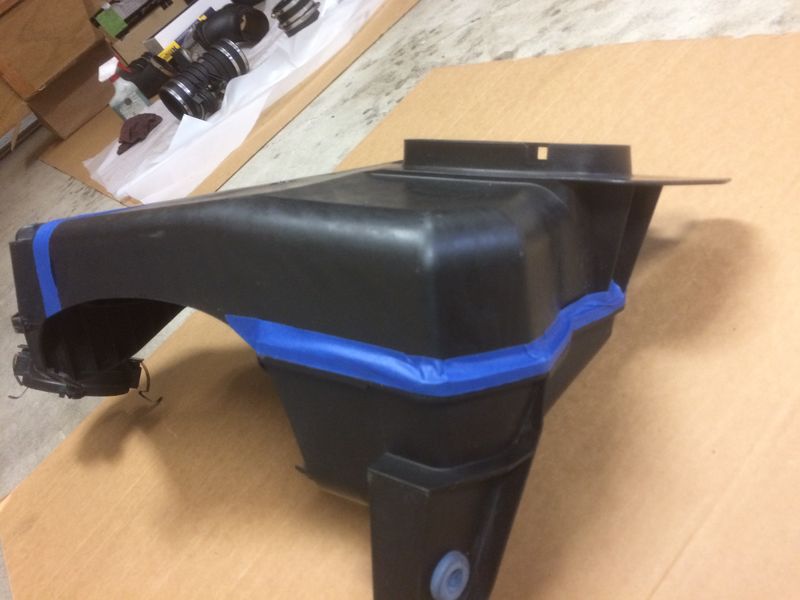
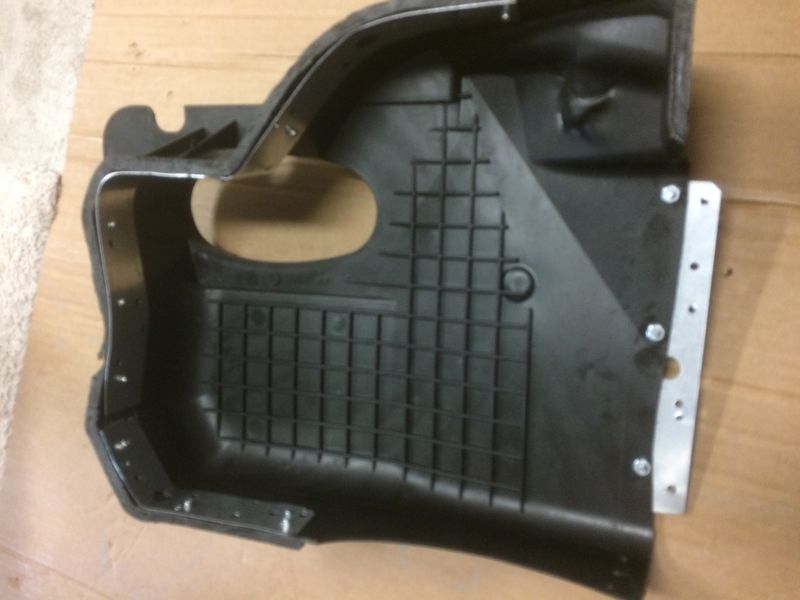
I used a Dremel to cut the box up and the two large pieces (that did not include the outlet) I cut mainly on the molding seam. With the pieces out on the shop floor I fashioned attachment points using pieces of sheet metal so that I would have strong places to screw the parts back together. Where I could I riveted the pieces to the airbox. Some places I used bolts so that I could put it back together in the car. In a few spots I used sheet metal screws where nuts and bolts didn't work.


After several test fits to make sure that I could fit the parts back in and that the places where the parts attached would be accessible to tools I first put the side that attached to wheel well in followed by the piece with the outlet/maf holder and finally the side that is closest to the engine. I then screwed the pieces together loosely, bolted the pieces to the car and then did a final tightening down of all attachment points.


Once the airbox was in and everything tightened down I then sealed the joints/rivits/bolts/screws with high strength tape.

One mistake I made: the air filter is a tight fit in the airbox in its unaltered form. When I cut the pieces apart along the molding seam I unwittingly made the box about 1-3mm narrower. When I went to fit the filter in the only way I could get it in was by shaving a bit of the plastic off of the filter (with the Dremel). If I do disassemble the box again I will add a little width the the box to make it easier to get the filter in. The small portion of plastic that I removed doesn't look like it will affect the filter in any way.

There is an place on the wheelwell where the box attaches that other have noted interference from a hose/wire. That was easy to deal with: I put the piece on the wheel well, marked the interference point from under the car, took it out and used a heat gun to carefully melt the plastic enough to create a small indentation in the box. Tested the piece out and it was a perfect fit.

Others going back some ways have also noted that the outlet where the maf holder connects is a tight fit to the car body. That is true and it was so tight that I was only able to connect the maf holder by loosening the airbox bolts to the car and pull the box out while making the connection. Were I do a 987 airbox again I would make a cut on the inside corner of the outlet, bend the outlet so that the maf connection is moved an inch out from the body and then repair the cut with carbon fiber or fiberglass.
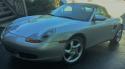

Last edited by dlud; 03-21-2018 at 03:39 PM.
dlud is offline   Reply With Quote
Old 03-21-2018, 06:52 PM   #2
Registered User
 
jaykay's Avatar
 
Join Date: Sep 2009
Location: toronto
Posts: 2,668
Novel approach my man.....well done. I hope it works well. Do you plan to use sealant on the joints....if you are not pulling it apart too often something like RTV might work....just slice it open a remove the bead when the time comes.

then again if intake air temperatures don't go up then maybe all is okay.

To get more room for this kind of stuff. I wonder if there is a good procedure for slightly lowering the engine and trans about 3 inches without disconnecting a myriad of items. You can rotate the front an engine down but by how much without damaging the trans mounts
__________________
986 00S
jaykay is offline   Reply With Quote
Old 03-21-2018, 08:22 PM   #3
Registered User
 
Join Date: Dec 2017
Location: Cambria, CA
Posts: 121
Garage
The high strength tape that I used to seal the joints is, according to the manufacturer, good to 200F so it should be ok. If that doesn't work out I'll look to other alternatives such has high temp flue tape or rtv sealant as you suggested.

I also considered dropping the engine but eventually decided that it was a lot more work and I wasn't sure it was going to be enough to get the airbox in without doing other things such as removing the oil cooler and intake plenum.
dlud is offline   Reply With Quote
Old 03-28-2018, 06:06 AM   #4
Registered User
 
Join Date: Oct 2017
Location: edmonton alberta
Posts: 68
I’m in the process of doing a bunch of work on my boxster and the air box just happens to be part of it. The way you did it looks pretty interesting. Did the intake manifold come off for this way of installation?
986bsdriver is offline   Reply With Quote
Old 03-28-2018, 07:05 AM   #5
Registered User
 
Join Date: Dec 2017
Location: Cambria, CA
Posts: 121
Garage
Quote:
Originally Posted by 986bsdriver View Post
I’m in the process of doing a bunch of work on my boxster and the air box just happens to be part of it. The way you did it looks pretty interesting. Did the intake manifold come off for this way of installation?
No. The 987 box goes in in three pieces and you then screw it together. But if you want to get the original box out intact you might have to loosen or remove the intake manifold. Even with loosening the manifold I wasn't able to get the 986 box out and eventually cut it into pieces to get it out. Getting the old box out was the hardest part of the process for me.
dlud is offline   Reply With Quote
Old 03-29-2018, 09:32 AM   #6
Registered User
 
Join Date: Oct 2017
Location: edmonton alberta
Posts: 68
Well my 987 box is in and it was quite interesting. I did manage to destroy my old box so I was committed at that point and even then the 986 box didn’t want to come out. Putting the 987 box in was rather straight forward though other then the hard to access bolts. I’m just waiting for the epoxy to dry as of so somewhat secure and stabilize the box.

I wasn’t able to get the bolt behind the filter that is well hidden inside the box but the epoxy I used is for structural purposes so it should hold fairly well with the screws I used.


As tight fitting as it is, I was fully prepared to take the manifold out and had the gaskets to do it until I saw this write up a few days ago. I’d definitely recommend doing it this way as you aren’t really removing and reassembling half a motor. Total time was roughly 3-4 hours. Most of it was spent removing the old box as it came out in tiny pieces with vise grips.
986bsdriver is offline   Reply With Quote
Old 03-29-2018, 01:16 PM   #7
Registered User
 
Join Date: Dec 2017
Location: Cambria, CA
Posts: 121
Garage
Quote:
Originally Posted by 986bsdriver View Post
Well my 987 box is in and it was quite interesting. I did manage to destroy my old box so I was committed at that point and even then the 986 box didn’t want to come out. Putting the 987 box in was rather straight forward though other then the hard to access bolts. I’m just waiting for the epoxy to dry as of so somewhat secure and stabilize the box.

I wasn’t able to get the bolt behind the filter that is well hidden inside the box but the epoxy I used is for structural purposes so it should hold fairly well with the screws I used.


As tight fitting as it is, I was fully prepared to take the manifold out and had the gaskets to do it until I saw this write up a few days ago. I’d definitely recommend doing it this way as you aren’t really removing and reassembling half a motor. Total time was roughly 3-4 hours. Most of it was spent removing the old box as it came out in tiny pieces with vise grips.
That was pretty much my experience as well: the removal process was the real difficult part. I didn't have a problem with the bolt that is high up on the wheel well. I did have to use the old grommet from the 986 box and a longer bolt. I originally was going to permanently join the parts back together (using carbon fiber fabric) but went with the bolt together route so I could take it apart again if I needed access to that side of the motor. It was pretty time consuming to come up with attachment points that didn't prevent you from getting the pieces in the car and gave enough structure to make for a strong structure.
dlud is offline   Reply With Quote
Old 03-29-2018, 02:45 PM   #8
Registered User
 
Join Date: Oct 2017
Location: edmonton alberta
Posts: 68
I couldn’t get the bold above the wheel well so I left it as it and had used a few key points to keep it together. With silicone couplers I think it’s plenty isolated that it won’t fall apart. I’ve also got a hole in the bottom where the vent lines are, but having been in the air movement industry for a decade, it shouldn’t be a huge issue. Short of there being a massive vacuum in the intake box, pin holes done make a huge difference and the hole in the bottom will be minimal.

Kinda wish I lined the seam with metal and rivers though. It’s held in 4 points and structural epoxy the rest which I’m hoping is fine
986bsdriver is offline   Reply With Quote
Old 03-30-2018, 09:40 AM   #9
Registered User
 
jaykay's Avatar
 
Join Date: Sep 2009
Location: toronto
Posts: 2,668
.......would lowering the engine a little help the process?
__________________
986 00S
jaykay is offline   Reply With Quote
Old 03-30-2018, 10:59 AM   #10
Artist, 986S tinkerer
 
NewArt's Avatar
 
Join Date: Aug 2013
Location: Montreal, Canada
Posts: 1,821
Quote:
Originally Posted by jaykay View Post
.......would lowering the engine a little help the process?
I think that if you were going to do that, you probably wouldn’t need to cut up the box in the first place.
__________________
James now has: 2008 987S 6 speed
Crashed: 2010 987.2 pdk in speed yellow!
Sold to a cool racer chick: 2004 986 S
YouTube channel: the PORSCHE as seen by NewArt
www.youtube.com/channel/UCohdrH2xHTklM1thxk0KKOQ?
NewArt is offline   Reply With Quote
Old 03-30-2018, 11:34 AM   #11
Registered User
 
Join Date: Dec 2017
Location: Cambria, CA
Posts: 121
Garage
Lowering the engine is unnecessary to install the airbox the way I did. It might help if you wanted to try to put the 987 airbox in without cutting it up. Probably lowering the engine, removing the left intake manifold and the oil cooler would make the installation of an intact 987 airbox much easier.

dlud is offline   Reply With Quote
Post Reply


Thread Tools
Display Modes

Posting Rules
You may not post new threads
You may not post replies
You may not post attachments
You may not edit your posts

BB code is On
Smilies are On
[IMG] code is On
HTML code is On
Trackbacks are On
Pingbacks are On
Refbacks are On


All times are GMT -8. The time now is 06:26 AM.


Powered by vBulletin® Version 3.8.7
Copyright ©2000 - 2024, vBulletin Solutions, Inc.
Content Relevant URLs by vBSEO 3.6.0
Copyright 2024 Pelican Parts, LLC - Posts may be archived for display on the Pelican Parts Website -    DMCA Registered Agent Contact Page