Go Back   986 Forum - The Community for Porsche Boxster & Cayman Owners > Porsche Boxster & Cayman Forums > DIY Project Guides

Post Reply
 
LinkBack Thread Tools Display Modes
Old 01-15-2017, 05:24 AM   #1
Registered User
 
Join Date: Apr 2016
Location: Norway
Posts: 29
Remove amber film on headlights, Guide

I've decided to make a post of my own on this. I know there is some posts allready but i wanted this to be easy to find and the method to show in the first post. Here is my contribute:

The most important part / tool to make this job easy, fast and safe is this rasp / grinding tool.


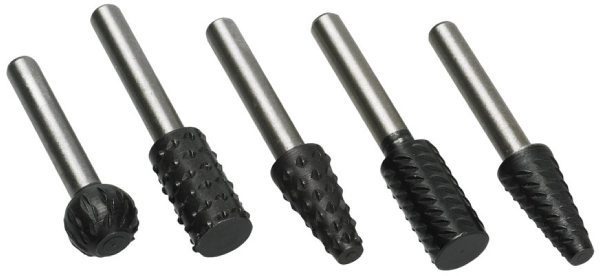
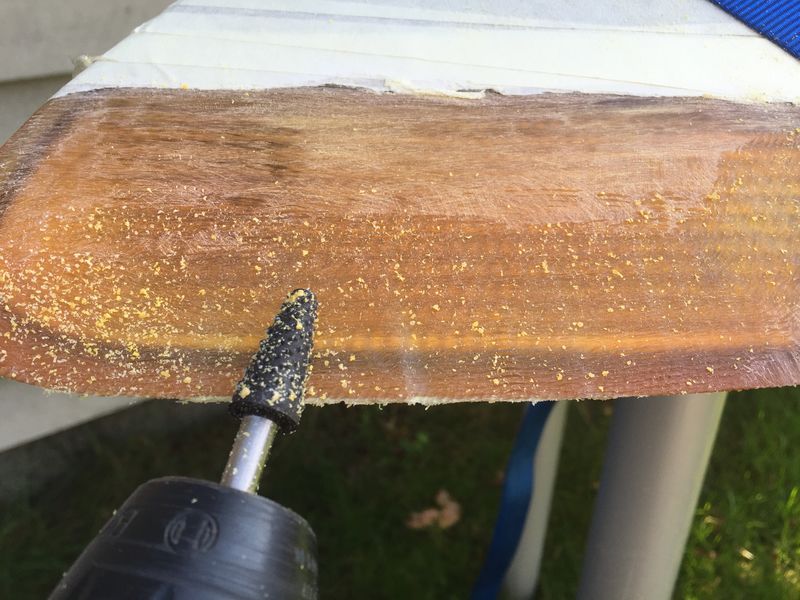
Use the one that is on my drill, and forget about the two others as they apply heat and wil just melt the plastic throughout the headlight. i also used a extension schaft betwen the drill and rasp to reach all the amber area.

The thickness of the amber is about 3mm. Push the drill in a back an forth motion and let the rasp digg away the amber untill it starts to get brighter.


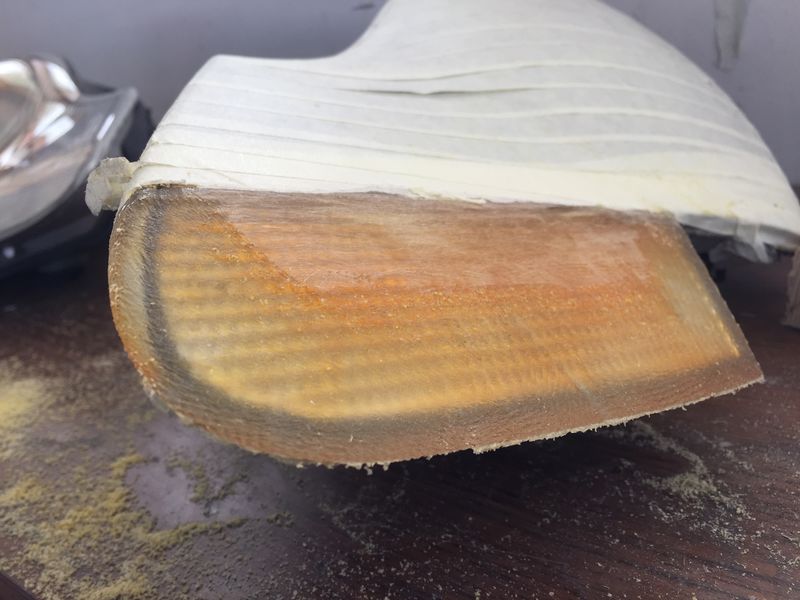
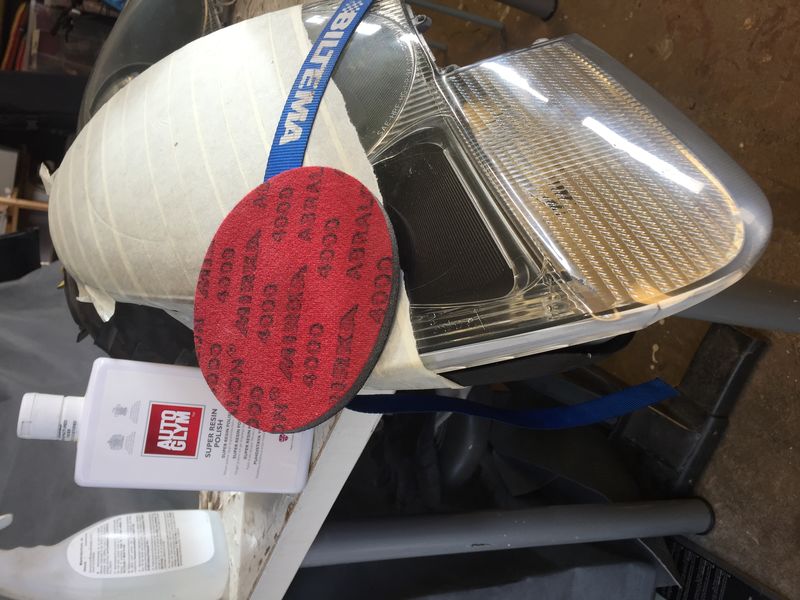
try to make the surface as smooth as possible when you start to see the Bright spot's like in this Picture. Unfortunatuley I dont have a Picture of when all the amber area looked like the bright spot's you see here, but from there on i started with 40 sanding grid, up to 240. Then wet sand from 400 to 2000 and then uset a 4000 pad + rubbing and polish. This prosess was realy fast and easy.

All in all i Guess roughly 30 - 45 min rasp, about 45 min sanding, 15 min polish.. total 2 - 3 houers.


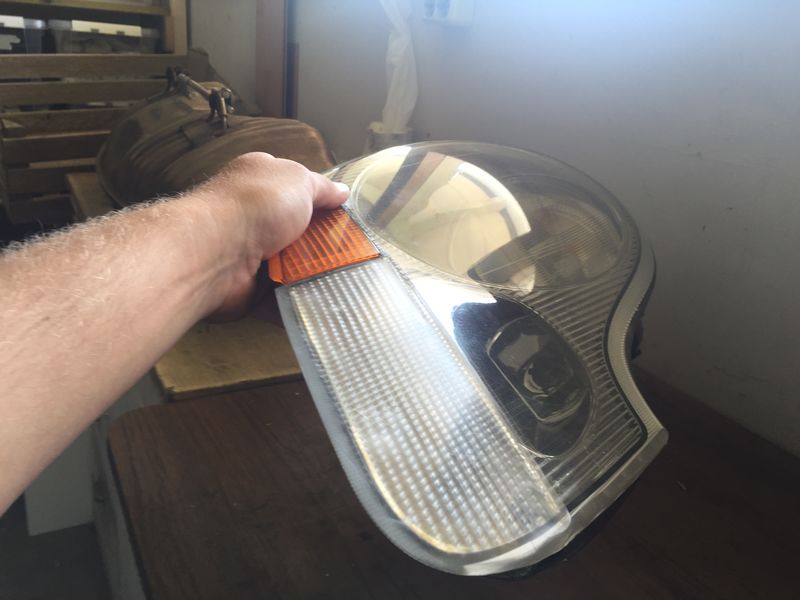
To get the headlight compleatly clear you need to open the headlight and remove / Paint the part shrouding the blinker.
I painted the whole inside black and installed #Nine8Six 's projectors


__________________
Porsche Boxster 2.5L 1999
RedBeauty is offline   Reply With Quote
Old 01-15-2017, 10:21 AM   #2
Custom User Title Here
 
particlewave's Avatar
 
Join Date: Mar 2012
Location: Ft. Leonard Wood
Posts: 6,163
Garage
Well, that's a great idea! I wish I had come up with it!

Nice work.
particlewave is offline   Reply With Quote
Old 02-12-2017, 09:34 AM   #3
Registered User
 
Join Date: Sep 2016
Location: Ireland
Posts: 2
Amber headlight film removal

Hi Redbeauty,
liked the write up on amber indicator film removal and was wondering which rasp is on the drill - is it the 3rd or 5th from left one as shown in photo?
nm24 is offline   Reply With Quote
Old 02-18-2017, 10:05 AM   #4
Registered User
 
Join Date: Jul 2015
Posts: 88
What year is your boxster? Mine is a 99 and I thought nothing would take away the orange on the lenses as it is not a film. Is yours a 99? Thanks
CDNIcecube is offline   Reply With Quote
Old 02-18-2017, 11:36 AM   #5
Registered User
 
geraintthomas's Avatar
 
Join Date: Nov 2015
Location: South Wales, UK
Posts: 852
Nice and clear guide. But I'd give ParticleWave some credit, as he was the one who discovered how to do this.
__________________
Porsche Boxster S Type 986

Bi-xenon Headlight Upgrade | 987 S 18" Anthracite Alloys | Android Head Unit | 5000k 55w HID's | 5000k Cree DRL's | 5000k Cree number plate lights | Cree LED Indicators | One-touch roof operation | Bypass exhaust pipes | Parking sensors | Ambient footwell lighting
geraintthomas is offline   Reply With Quote
Old 03-13-2017, 04:46 PM   #6
Registered User
 
Join Date: Apr 2016
Location: Norway
Posts: 29
Havent been on here for a while now, but better to answer late than never. "Nm24" it's the 3rd rasp from left. The rougher the rasp is, the less heat you apply and the faster you wil do the job. Just make shure to move the rasp all over the amber area while rasping so you dont get deep spots and uneven surface.
"CDNIcecube" mine is also a 99. Its hard plastic like the rest of the headligt but with amber / yelow as i would say. If i remember correct its about 1,5 mm thick, and it wil be more and more transperrent when you are close to cleen transperrent.
"Geraintthomas" and "particlewave" my credit goes to you and evrybody else that makes this forum so inspirational. For me the car is somthing that represent me, my interest and my dedication. I like to have cars that evrybody else dont have and give it an extra personal touch without ruin the originality. To do this with other enthusiasts that share the same passion, and to share our nice details and touches to the cars, make the cars of the forum enthusiast extra spesial and cool. With all the combination of colors and wariation of style i think evrybody can get ther own one of a kind. So thank you for sharing. That was what inspired me and gave me the confidense tho do this job! I just found a easy, fast, but not dangerus way of doing this and wanted to make a new easy to fint thred of one way to do this. Hope some find it usefull!

Cheers!
__________________
Porsche Boxster 2.5L 1999
RedBeauty is offline   Reply With Quote
Old 06-05-2017, 08:19 AM   #7
Registered User
 
redciv1's Avatar
 
Join Date: Jun 2014
Location: Dacula, Georgia
Posts: 264
So I am curious, then if you could also maybe use a hand sander and maybe 80 grit to remove the color from the lens then progress up from there with the grit? Also, does this mean that the corner trim piece, side marker lights and rear tail lights could be done this way?
redciv1 is offline   Reply With Quote
Old 06-05-2017, 08:58 AM   #8
Custom User Title Here
 
particlewave's Avatar
 
Join Date: Mar 2012
Location: Ft. Leonard Wood
Posts: 6,163
Garage
Quote:
Originally Posted by redciv1 View Post
So I am curious, then if you could also maybe use a hand sander and maybe 80 grit to remove the color from the lens then progress up from there with the grit? Also, does this mean that the corner trim piece, side marker lights and rear tail lights could be done this way?
This modification only works on the headlights. Everything else is amber all the way through.

See here: http://986forum.com/forums/general-discussions/51810-our-amber-headlights-can-de-ambered.html
particlewave is offline   Reply With Quote
Old 06-06-2017, 03:59 AM   #9
Registered User
 
redciv1's Avatar
 
Join Date: Jun 2014
Location: Dacula, Georgia
Posts: 264
Boo again, thanks Particle!!!
redciv1 is offline   Reply With Quote
Old 06-06-2017, 11:05 PM   #10
Registered User
 
Join Date: May 2015
Location: Greater Seattle, WA
Posts: 534
For anyone contemplating de-ambering, is there a good source for the clear corner pieces (triangular pieces?)

I think there are litronic-style "headlight squirter" corners, as well as smooth reflector corner options available, correct?
__________________
2001 Boxster
jakeru is offline   Reply With Quote
Old 06-06-2017, 11:15 PM   #11
Custom User Title Here
 
particlewave's Avatar
 
Join Date: Mar 2012
Location: Ft. Leonard Wood
Posts: 6,163
Garage
Quote:
Originally Posted by jakeru View Post
For anyone contemplating de-ambering, is there a good source for the clear corner pieces (triangular pieces?)

I think there are litronic-style "headlight squirter" corners, as well as smooth reflector corner options available, correct?
Correct.
There is no low cost source that I know of. I see them on eBay for $110-$175 regularly.
particlewave is offline   Reply With Quote
Old 10-07-2019, 01:46 PM   #12
Registered User
 
Join Date: Apr 2019
Location: Bulgaria
Posts: 34
where can I buy those gorgeous inner lenses?

palmhero is offline   Reply With Quote
Post Reply


Posting Rules
You may not post new threads
You may not post replies
You may not post attachments
You may not edit your posts

BB code is On
Smilies are On
[IMG] code is On
HTML code is On
Trackbacks are On
Pingbacks are On
Refbacks are On


All times are GMT -8. The time now is 05:39 AM.


Powered by vBulletin® Version 3.8.7
Copyright ©2000 - 2024, vBulletin Solutions, Inc.
Content Relevant URLs by vBSEO 3.6.0
Copyright 2024 Pelican Parts, LLC - Posts may be archived for display on the Pelican Parts Website -    DMCA Registered Agent Contact Page